Posting some useful lua scripts I've been using for a while into one convenient place. Credit goes to amaurea, FatRatKnight and DarkKobold for the scripts, and Rolanmen1 and Toothache42 for helping me a bit with memory addresses and ram searches.
Download rngdisplay.luaLanguage: lua
function nextrng(r1, r2, r3)
return AND(XOR(SHIFT(r3, 5), SHIFT(r2, -11), SHIFT(r1, -1), SHIFT(r2,15)),0xFFFF)
end
function rngsim(n)
local rngbase=0x03000000
local result = { memory.readword(rngbase+4), memory.readword(rngbase+2), memory.readword(rngbase+0) }
for i = 4, n do
result[i] = nextrng(result[i-3],result[i-2],result[i-1])
end
return result
end
local phit = 0x0203A550
local pdmg = 0x0203E1BE
local pcrt = 0x0203A556
local ehit = 0x0203A5D0
local edmg = 0x0203E1BC
local ecrt = 0x0203A5D6
while true do
local nsim = 20
rngs = rngsim(nsim)
for i = 1, nsim do
gui.text(228, 8*(i-1), string.format("%3d", rngs[i]/655))
end
gui.text(210,0,"RNG1:")
gui.text(210,8,"RNG2:")
gui.text(210,16,"RNG3:")
gui.text(194,24,"Next RNs:")
gui.text(0,0,"Player")
gui.text(0,8,"Hit: " .. memory.readbyte(phit))
gui.text(0,16,"Damage: " .. memory.readbyte(pdmg))
gui.text(0,24,"Crit: " .. memory.readbyte(pcrt))
gui.text(0,40,"Enemy")
gui.text(0,48,"Hit: " .. memory.readbyte(ehit))
gui.text(0,56,"Damage: " .. memory.readbyte(edmg))
gui.text(0,64,"Crit: " .. memory.readbyte(ecrt))
emu.frameadvance()
end
Download FE_RNGCounter.luaLanguage: lua
R2u= memory.readword
--*****************************************************************************
local function roll(A,B,C)
--*****************************************************************************
return bit.band(0xFFFF,
bit.bxor(
bit.rshift(A, 5),
bit.lshift(B,11),
bit.rshift(B,15),
bit.lshift(C, 1)
)
)
end
--*****************************************************************************
local function unroll(A,B,C)
--*****************************************************************************
--Returns what the previous RNG was.
local r= bit.band(0xFFFE,bit.bxor(A, bit.rshift(B, 5), bit.lshift(C, 11)))
r= bit.bor(r,bit.band(0x0001,bit.bxor(B,bit.rshift(C,5))))
return bit.bor(
bit.lshift(bit.band(0x0001,r),15),
bit.rshift(bit.band(0xFFFE,r), 1)
)
end
local Raddr= 0x03000000
local R= {R2u(Raddr), R2u(Raddr+2), R2u(Raddr+4)}
--*****************************************************************************
local function RNGmatch(a,b,c)
--*****************************************************************************
return (R2u(Raddr) == a) and (R2u(Raddr+2) == b) and (R2u(Raddr+4) == c)
end
--*****************************************************************************
local function AdvanceRNG()
--*****************************************************************************
local RR= {R[1], R[2], R[3]}
for i= 0, 2000 do
if RNGmatch(R[1],R[2],R[3]) then return i end
if RNGmatch(RR[1],RR[2],RR[3]) then R= RR; return -i end
table.insert(R,1,roll(R[1],R[2],R[3])); R[4]= nil
table.insert(RR,unroll(RR[1],RR[2],RR[3])); table.remove(RR,1)
end
R[1]= R2u(Raddr)
R[2]= R2u(Raddr+2)
R[3]= R2u(Raddr+4)
return false
end
local Count, Fail= 0, 0
--*****************************************************************************
local function CountRolls()
--*****************************************************************************
local c= AdvanceRNG()
if c then Count= Count+c
else Fail= Fail+1; Count= 0
end
end
--*****************************************************************************
local function ShowRolls()
--*****************************************************************************
gui.text(1,1,Count,"green")
gui.text(1,9,Fail,"red")
end
gui.register(ShowRolls)
while true do
CountRolls()
emu.frameadvance()
end
Download Ephase.luaLanguage: lua
BattleCheck =1000;
-- emu.speedmode('turbo');
CharacterStore = 0x0202AB78;
--CharacterStore = 0x0202BCE8;
EnemyStore = CharacterStore + 0x3E * 0x48;
Phase = 0x0202BCFF;
key1 ={};
key1['A']=true;
StartF = movie.framecount();
StatM = {'HpC','Lvl','EXP','Hp','Str','Skl','Spd','Def','Res','Lck','Con', 'X', 'Y'};
OffstC = {0x11, 0x8, 0x9,0x10, 0x12, 0x13, 0x14, 0x15, 0x16, 0x17, 0x18, 0x0E, 0x0F};
EnemyM = {'Alive','HpC','X','Y'};
OffstM = {0x00,0x11,0x0E, 0x0F};
Matcher = {};
newcount = 0;
for checks = 0,0x3D,1 do
Matcher[checks] = {};
for i = 1,13,1 do
Matcher[checks][i] = memory.readbyte(CharacterStore+OffstC[i]+checks*0x48);
end;
end;
Estats = {};
for checks = 0,49,1 do
Matcher[checks+0x3E] = {};
if memory.readbyte(EnemyStore +0x11+checks*0x48) > 0 then
Estats[checks] = {};
Estats[checks][1] = false;
Estats[checks][2] = false;
Matcher[checks+0x3E][1] = true;
for i = 2,4,1 do
Matcher[checks+0x3E][i] = memory.readbyte(EnemyStore+OffstM[i]+checks*0x48);
end;
else
Matcher[checks+0x3E][1] = false;
end;
end;
function nextrng(r1, r2, r3)
return AND(XOR(SHIFT(r3, 5), SHIFT(r2, -11), SHIFT(r1, -1), SHIFT(r2, 15)),0xFFFF)
end
rngbase=0x03000000;
RNGCheck = savestate.create();
savestate.save(RNGCheck);
Unique = 0;
FClist = {};
outsl = {};
RNGList = {};
TempC = {};
TempE = {};
Pstat = {};
outs2l = {};
OfX = 6;
OfY = 42;
SX = 5;
SY = 5;
for curord = 0,BattleCheck-1,1 do
savestate.load(RNGCheck);
--RNGLOOP
for n = 1,curord,1 do
Rtemp = nextrng(memory.readword(rngbase+4), memory.readword(rngbase+2), memory.readword(rngbase+0));
memory.writeword(rngbase+4, memory.readword(rngbase+2));
memory.writeword(rngbase+2, memory.readword(rngbase+0));
memory.writeword(rngbase+0, Rtemp);
end;
R = {};
for Rl = 0,4,2 do
R[Rl/2] = memory.readword(rngbase+Rl);
end;
--PhaseLoop
while memory.readbyte(Phase) == 128 do
joypad.set(1,key1);
key1.start = (not key1.start) or nil;
emu.frameadvance();
gui.text(10,10, string.format('%d of %d done.', curord+1, BattleCheck));
end;
outs = "";
for checks = 0,0x3D,1 do
Pstat[checks] = false;
for i = 1,11,1 do
TempC[i] = memory.readbyte(CharacterStore+OffstC[i]+checks*0x48);
end;
if Matcher[checks][1] ~= TempC[1] then
outs = outs .. string.format(' %d %dHP', checks, TempC[1] - Matcher[checks][1]);
if TempC[1] == 0 then
Pstat[checks] = true;
outs = outs .. '-Dead';
end;
end;
if Matcher[checks][3] ~= TempC[3] then
outs = outs .. string.format(' %d %dXP', checks, TempC[3] - Matcher[checks][3]);
end;
if Matcher[checks][2] ~= TempC[2] then
outs = outs .. string.format(' %d +%dLvl', checks, TempC[2] - Matcher[checks][2]);
for j = 4,11,1 do
outs = outs .. string.format(' %d %d%s', checks, TempC[j] - Matcher[checks][j],StatM[j]);
end;
end;
end;
outs2 = "";
for checks = 0,49,1 do
for i = 2,4,1 do
TempC[i] = memory.readbyte(CharacterStore+OffstM[i]+(checks+0x3E)*0x48);
end;
if Matcher[checks+0x3E][1] then
Estats[checks][1] = false;
Estats[checks][2] = false;
if Matcher[checks+0x3E][2] ~= TempC[2] then
outs2 = outs2 .. string.format(' E%d %dHP', checks, TempC[2] - Matcher[checks+0x3E][2]);
if TempC[2] == 0 then
Estats[checks][1] = true;
outs2 = outs2 .. '-Dead';
end;
end;
if (Matcher[checks+0x3E][3] ~= TempC[3]) or (Matcher[checks+0x3E][4] ~= TempC[4]) then
Estats[checks][2] = true;
Estats[checks][3] = Matcher[checks+0x3E][3];
Estats[checks][4] = Matcher[checks+0x3E][4];
Estats[checks][5] = TempC[3];
Estats[checks][6] = TempC[4];
end;
end;
end;
FC = movie.framecount() - StartF;
IsUnique = true;
for n = 1,Unique,1 do
if FClist[n] == FC and outsl[n] == outs and outs2l[n] == outs2 then
IsUnique = false;
end;
end;
if IsUnique then
-- emu.speedmode('normal');
Unique = Unique + 1;
FClist[Unique] = FC;
outsl[Unique] = outs;
outs2l[Unique] = outs2;
for i = 1,25,1 do
gui.drawbox(0,0,320,240,'black','black');
gui.text(1,1,"Frames:" .. FC .. " RNG Distance: " .. curord);
gui.text(1,10,string.format("RNGx00 = %d RNGx02 = %d RNGx04 = %d", R[0],R[1],R[2]));
gui.text(1,20,outs);
gui.text(1,30,outs2);
gui.drawbox(3,40,238,160, 'black','white');
for checks = 0,0x3D,1 do
if Matcher[checks][1] > 0 then
if Pstat[checks] then
X = Matcher[checks][12];
Y = Matcher[checks][13];
gui.drawbox(OfX+SX*X,SY*Y+OfY,OfX+SX*X+3,SY*Y+3+OfY,'Green','Blue');
else
X = Matcher[checks][12];
Y = Matcher[checks][13];
gui.drawbox(OfX+SX*X,SY*Y+OfY,OfX+SX*X+3,SY*Y+3+OfY,'Green','Green');
end;
end;
end;
for checks = 0,49,1 do
if Matcher[checks+0x3E][1] then
if Estats[checks][2] then
X1 = OfX+SX*Estats[checks][3]+2;
Y1 = OfY+SY*Estats[checks][4]+2;
X2 = OfX+SX*Estats[checks][5]+2;
Y2 = OfY+SY*Estats[checks][6]+2;
gui.drawline(X1,Y1,X2,Y1,'blue');
gui.drawline(X2,Y1,X2,Y2,'blue');
if Estats[checks][1] then
X = Estats[checks][5];
Y = Estats[checks][6];
gui.drawbox(OfX+SX*X,SY*Y+OfY,OfX+SX*X+3,SY*Y+3+OfY,'Red','Blue');
else
X = Estats[checks][5];
Y = Estats[checks][6];
gui.drawbox(OfX+SX*X,SY*Y+OfY,OfX+SX*X+3,SY*Y+3+OfY,'Red','Red');
end;
else
if Estats[checks][1] then
X = Matcher[checks+0x3E][3];
Y = Matcher[checks+0x3E][4];
gui.drawbox(OfX+SX*X,SY*Y+OfY,OfX+SX*X+3,SY*Y+3+OfY,'Red','Blue');
else
X = Matcher[checks+0x3E][3];
Y = Matcher[checks+0x3E][4];
gui.drawbox(OfX+SX*X,SY*Y+OfY,OfX+SX*X+3,SY*Y+3+OfY,'Red','Red');
end;
end;
end;
end;
emu.frameadvance();
end;
-- emu.speedmode('maximum');
end;
end;


 Vanessa is occupied, so only Tana could do it. Oh wait, the archers have 4 luck. She can’t crit or double unless she uses the slim lance, which Vanessa desperately needs, and she has to dodge the other archer’s attack on enemy phase. Then, presumably her arriving on the south island will lure some of the enemies over, so she’s screwed after she kills the second archer (her combat truly sucks).
Conclusion? There’s no going around having to ferry Seth to the south. And without further ado, here we go.
Prep
Vanessa is occupied, so only Tana could do it. Oh wait, the archers have 4 luck. She can’t crit or double unless she uses the slim lance, which Vanessa desperately needs, and she has to dodge the other archer’s attack on enemy phase. Then, presumably her arriving on the south island will lure some of the enemies over, so she’s screwed after she kills the second archer (her combat truly sucks).
Conclusion? There’s no going around having to ferry Seth to the south. And without further ado, here we go.
Prep
 Turn 1
 The combination of Seth and Eirika remove all the pirates south of them, and Vanessa critkills the pirate she’s about to attack in the picture. The level-up she requires is a bit wild: hp/str/skl/spd/def, thank goodness it’s on player phase. Tana moves down in preparation of ferrying Seth, and Kyle sits still. The only reason he’s here is to take out those 2 soldiers who don’t move unless someone’s in their attack range.
The only enemy phase manipulations are making Seth land all his javelin attacks, and have Vanessa critkill the archer that attacks her. Not too bad.
Turn 2
The combination of Seth and Eirika remove all the pirates south of them, and Vanessa critkills the pirate she’s about to attack in the picture. The level-up she requires is a bit wild: hp/str/skl/spd/def, thank goodness it’s on player phase. Tana moves down in preparation of ferrying Seth, and Kyle sits still. The only reason he’s here is to take out those 2 soldiers who don’t move unless someone’s in their attack range.
The only enemy phase manipulations are making Seth land all his javelin attacks, and have Vanessa critkill the archer that attacks her. Not too bad.
Turn 2

 The first pic shows Tana carrying Seth, the second the ideal position for Vanessa. I want Vanessa to get attacked by the 3 mercs (she can survive all 3 hits) and the archer (required dodge obviously), while being out of range of the 2 soldiers and the myrmidon.
Now, I have 2 options here. Either Vanessa critkills one of the mercs with a javelin, or she equips a slim lance. The benefit of the slim lance is that she doubles and 3HKOes, and her crit chance goes up by 5. Thus, a slim lance + javelin combination leads to a 2RKO, and any slim lance crit is an instakill. She has 9 crit with the slim lance, giving her a 17.19% chance to crit at least once in 2 hits. Her odds of critkilling 2/3 mercs on enemy phase with a slim lance are about 7%, but critting all 3 makes it fall down to 0.5%. She also has to dodge the sniper’s attack, he has about 67 true hit on her.
This is getting a bit messy, probability breakdown again.
Sniper dodge: 33% chance
Vanessa critkills 0/3 mercs: 56.79%
Vanessa critkills 1/3 mercs: 35.36%
Vanessa critkills 2/3 mercs: 7.34%
Vanessa critkills 3/3 mercs: 0.51%
Vanessa 2 kills + sniper dodge: 2.42%
Vanessa 3 kills + sniper dodge: 0.17%
Before turn 2 enemy phase, Vanessa is level 7.24. She gains 11 exp from an attack, and 37 exp from a kill.
2 kills: 24 (base) + 11 (attack) + 37*2 (2 kills) + 1 (dodging sniper) = 110 exp. She levels up.
3 kills: 110 + (37-11) = 136 exp
Either way, she’s levelling up, and she wants def again because it reduces 4 damage hits by mercs to 3.
Str/skl/spd level-up: 11.55%
Str/skl/spd/def level-up: 2.31%
This sucks. Check out the modified probabilities now.
Vanessa 2 kills + sniper dodge + str/skl/spd level-up: 0.28%
Vanessa 2 kills + sniper dodge + str/skl/spd/def level-up: 0.056%
Vanessa 3 kills + sniper dodge + str/skl/spd level-up: 0.020%
Vanessa 3 kills + sniper dodge + str/skl/spd/def level-up: 0.0040%
To put this into perspective, let’s look at the estimated RN burns required, and the frames lost assuming a rate of 5 RNs burned per frame.
1) ~357 RNs (~71 frames)
2) ~1786 RNs (~357 frames)
3) ~5000 RNs (~1000 frames)
4) ~25000 RNs (~5000 frames)
*Bolded the outcome I consider the most reasonable for my purposes.
Only the first 2 are even feasible, so that rules out Vanessa getting 3 kills. Either that, or I let her eat a bad level-up, but the consequences of that will show right away.
One more consideration, Vanessa’s durability is seriously an issue. She can take 4 merc hits before she’s going to need to dodge every single hit she faces. Problem is, these mercs have a very high hitrate, 73 true hit to be precise.
0/3 mercs hit (19 hp left): 1.97%
1/3 mercs hit (15 hp left): 15.97%
2/3 mercs hit (11 hp left): 43.17%
3/3 mercs hit (7 hp left): 38.90%
Yikes. At least she can survive the turn taking all the merc hits.
Turn 3
The first pic shows Tana carrying Seth, the second the ideal position for Vanessa. I want Vanessa to get attacked by the 3 mercs (she can survive all 3 hits) and the archer (required dodge obviously), while being out of range of the 2 soldiers and the myrmidon.
Now, I have 2 options here. Either Vanessa critkills one of the mercs with a javelin, or she equips a slim lance. The benefit of the slim lance is that she doubles and 3HKOes, and her crit chance goes up by 5. Thus, a slim lance + javelin combination leads to a 2RKO, and any slim lance crit is an instakill. She has 9 crit with the slim lance, giving her a 17.19% chance to crit at least once in 2 hits. Her odds of critkilling 2/3 mercs on enemy phase with a slim lance are about 7%, but critting all 3 makes it fall down to 0.5%. She also has to dodge the sniper’s attack, he has about 67 true hit on her.
This is getting a bit messy, probability breakdown again.
Sniper dodge: 33% chance
Vanessa critkills 0/3 mercs: 56.79%
Vanessa critkills 1/3 mercs: 35.36%
Vanessa critkills 2/3 mercs: 7.34%
Vanessa critkills 3/3 mercs: 0.51%
Vanessa 2 kills + sniper dodge: 2.42%
Vanessa 3 kills + sniper dodge: 0.17%
Before turn 2 enemy phase, Vanessa is level 7.24. She gains 11 exp from an attack, and 37 exp from a kill.
2 kills: 24 (base) + 11 (attack) + 37*2 (2 kills) + 1 (dodging sniper) = 110 exp. She levels up.
3 kills: 110 + (37-11) = 136 exp
Either way, she’s levelling up, and she wants def again because it reduces 4 damage hits by mercs to 3.
Str/skl/spd level-up: 11.55%
Str/skl/spd/def level-up: 2.31%
This sucks. Check out the modified probabilities now.
Vanessa 2 kills + sniper dodge + str/skl/spd level-up: 0.28%
Vanessa 2 kills + sniper dodge + str/skl/spd/def level-up: 0.056%
Vanessa 3 kills + sniper dodge + str/skl/spd level-up: 0.020%
Vanessa 3 kills + sniper dodge + str/skl/spd/def level-up: 0.0040%
To put this into perspective, let’s look at the estimated RN burns required, and the frames lost assuming a rate of 5 RNs burned per frame.
1) ~357 RNs (~71 frames)
2) ~1786 RNs (~357 frames)
3) ~5000 RNs (~1000 frames)
4) ~25000 RNs (~5000 frames)
*Bolded the outcome I consider the most reasonable for my purposes.
Only the first 2 are even feasible, so that rules out Vanessa getting 3 kills. Either that, or I let her eat a bad level-up, but the consequences of that will show right away.
One more consideration, Vanessa’s durability is seriously an issue. She can take 4 merc hits before she’s going to need to dodge every single hit she faces. Problem is, these mercs have a very high hitrate, 73 true hit to be precise.
0/3 mercs hit (19 hp left): 1.97%
1/3 mercs hit (15 hp left): 15.97%
2/3 mercs hit (11 hp left): 43.17%
3/3 mercs hit (7 hp left): 38.90%
Yikes. At least she can survive the turn taking all the merc hits.
Turn 3
 Tana drops Seth and moves back to safety, nothing special.
 Vanessa has to kill the pirate (remember they don’t attack her, they just charge for the village). This introduces 2 options: a javelin kill and a slim lance kill. She doesn’t level up on the kill even if she killed all 3 mercs on the last enemy phase.
There are serious advantages and disadvantages to both weapon choices. If she uses the javelin, that puts her out of range of 2 of the 3 mercs, and she will only face 3 attacks: a myrm, a merc, and the sniper. The drawback? Her avoid goes to hell.
With javelin
Sniper 81 hit
Mercs 3 damage/86 hit
Myrm 7 damage/73 hit
With slim lance
Sniper 63 hit
Mercs 3 damage/70 hit
Myrm 7 damage/52 hit
Based on the turn 2 data, the most feasible outcomes are Vanessa killing 1-2 mercs. In particular, if she kills 2, she’s only facing one merc on turn 3 enemy phase regardless of what weapon is equipped. For this reason, I can confidently say that sticking with the slim lance is the way to go.
Even with the minimum hp amount of 7 left, Vanessa can take 2 merc hits (assuming the other one is even alive). The probability of her dodging both the myrm and the sniper are a decent 14.4%. Vanessa’s exp gain now is unpredictable due to all these contingencies, but assuming she levels up again by the end of turn 3 enemy phase, she’ll have an 11.55% chance of getting str/skl/spd. Def is pointless now because she’s almost guaranteed to be 1HKOed by everything from now on. Getting hp doesn’t help either as it only increases her max hp, not her current hp.
So, that gives us a ~1.66% cumulative odds of success so far, very manageable. Vanessa doesn’t have to crit the myrm because she 2HKOes with a slim lance, but killing him would make it easier to survive next turn’s enemy phase. Her crit chance is 8%. Adding in the crit makes a ~0.13% cumulative chance, still in the realm of sanity (~753 RNs or ~150 frames).
The merc will die (he was already weakened), and so will the myrm (critted), leaving the sniper alive.
Whoo!
Turn 4
Vanessa has to kill the pirate (remember they don’t attack her, they just charge for the village). This introduces 2 options: a javelin kill and a slim lance kill. She doesn’t level up on the kill even if she killed all 3 mercs on the last enemy phase.
There are serious advantages and disadvantages to both weapon choices. If she uses the javelin, that puts her out of range of 2 of the 3 mercs, and she will only face 3 attacks: a myrm, a merc, and the sniper. The drawback? Her avoid goes to hell.
With javelin
Sniper 81 hit
Mercs 3 damage/86 hit
Myrm 7 damage/73 hit
With slim lance
Sniper 63 hit
Mercs 3 damage/70 hit
Myrm 7 damage/52 hit
Based on the turn 2 data, the most feasible outcomes are Vanessa killing 1-2 mercs. In particular, if she kills 2, she’s only facing one merc on turn 3 enemy phase regardless of what weapon is equipped. For this reason, I can confidently say that sticking with the slim lance is the way to go.
Even with the minimum hp amount of 7 left, Vanessa can take 2 merc hits (assuming the other one is even alive). The probability of her dodging both the myrm and the sniper are a decent 14.4%. Vanessa’s exp gain now is unpredictable due to all these contingencies, but assuming she levels up again by the end of turn 3 enemy phase, she’ll have an 11.55% chance of getting str/skl/spd. Def is pointless now because she’s almost guaranteed to be 1HKOed by everything from now on. Getting hp doesn’t help either as it only increases her max hp, not her current hp.
So, that gives us a ~1.66% cumulative odds of success so far, very manageable. Vanessa doesn’t have to crit the myrm because she 2HKOes with a slim lance, but killing him would make it easier to survive next turn’s enemy phase. Her crit chance is 8%. Adding in the crit makes a ~0.13% cumulative chance, still in the realm of sanity (~753 RNs or ~150 frames).
The merc will die (he was already weakened), and so will the myrm (critted), leaving the sniper alive.
Whoo!
Turn 4
 Seth critkills the boss with a javelin.
 Since the sniper has 8 luck, the only way I can crit him is with a slim lance (4% crit chance). To ORKO I need a slim lance double crit, a lovely 0.16% chance (~625 RNs, ~125 frames). At least it’s on player phase, and let’s pray there’s no level-up.
You’ll notice that killing the sniper means the pirate goes free. That’s fine, Vanessa can take him out the next turn easily.
There's supposed to be 3 soldiers in the picture, but they are no problem, Kyle can take them out on enemy phase without interfering with the other enemies that Vanessa’s taking care of.
For once the enemy phase isn’t outrageous. Only the mage and merc can attack her, and there’s a very good chance Vanessa 1RKOing mercs with a slim lance now. If not, her crit chance is still high, around 19% in 2 hits.
Turn 5
Since the sniper has 8 luck, the only way I can crit him is with a slim lance (4% crit chance). To ORKO I need a slim lance double crit, a lovely 0.16% chance (~625 RNs, ~125 frames). At least it’s on player phase, and let’s pray there’s no level-up.
You’ll notice that killing the sniper means the pirate goes free. That’s fine, Vanessa can take him out the next turn easily.
There's supposed to be 3 soldiers in the picture, but they are no problem, Kyle can take them out on enemy phase without interfering with the other enemies that Vanessa’s taking care of.
For once the enemy phase isn’t outrageous. Only the mage and merc can attack her, and there’s a very good chance Vanessa 1RKOing mercs with a slim lance now. If not, her crit chance is still high, around 19% in 2 hits.
Turn 5
 This archer limits how far Seth can go. If I don’t kill him, he gets left behind.
 This is where I’ll be moving Seth.
 Goodbye pirate. There’s only 1 contingency of interest here. If I kill the pirate at range with a jav, Vanessa can 1RKO the mage on a counter, but loses the 1RKO on the merc. If she attacks the pirate at 1 range, the mage isn’t even in range.
Enemy phase is super easy, I might have to worry about Seth breaking javelins, Vanessa needs to dodge 1 merc, and possibly levelling up.
Turn 6
Goodbye pirate. There’s only 1 contingency of interest here. If I kill the pirate at range with a jav, Vanessa can 1RKO the mage on a counter, but loses the 1RKO on the merc. If she attacks the pirate at 1 range, the mage isn’t even in range.
Enemy phase is super easy, I might have to worry about Seth breaking javelins, Vanessa needs to dodge 1 merc, and possibly levelling up.
Turn 6
 Oh Amelia, how I hate you.
 Soldiers are cannon fodder for Vanessa, but she has to dodge all of their hits. Again, level-up possibility is always there, but that doesn’t create much of a problem.
 This is a little more facepalm worthy. By having him crit the mage and simultaneously going on the forest (+1 def/20 avo), Kyle's crappy combat is actually salvageable. With 2 turns he can take out the 4 enemies.
There’s also the option of sending a different unit than Kyle to mop up these enemies and the 3 earlier soldiers. Movement’s not an issue at all. I’ll look at Garcia and Artur.
Turn 7
No need for pics, Kyle (or whoever replaces him) finish cleaning up, and Seth kills Amelia in the most overkill fashion possible. Vanessa could kill her too, as she’s in range. She’ll gain like 6 exp to Seth’s 1, and advance her weapon level a bit, for what that’s worth.
This is a little more facepalm worthy. By having him crit the mage and simultaneously going on the forest (+1 def/20 avo), Kyle's crappy combat is actually salvageable. With 2 turns he can take out the 4 enemies.
There’s also the option of sending a different unit than Kyle to mop up these enemies and the 3 earlier soldiers. Movement’s not an issue at all. I’ll look at Garcia and Artur.
Turn 7
No need for pics, Kyle (or whoever replaces him) finish cleaning up, and Seth kills Amelia in the most overkill fashion possible. Vanessa could kill her too, as she’s in range. She’ll gain like 6 exp to Seth’s 1, and advance her weapon level a bit, for what that’s worth.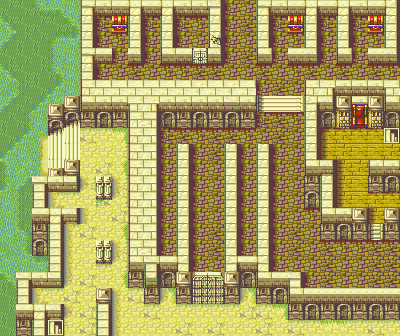 This map is pretty long, looks to be an 8 turn just by counting squares. 37 enemies and 8 reinforcements, 45 total. The map’s linear nature lends itself to training Vanessa though, which is a huge plus.
Chapter 10
This map is pretty long, looks to be an 8 turn just by counting squares. 37 enemies and 8 reinforcements, 45 total. The map’s linear nature lends itself to training Vanessa though, which is a huge plus.
Chapter 10
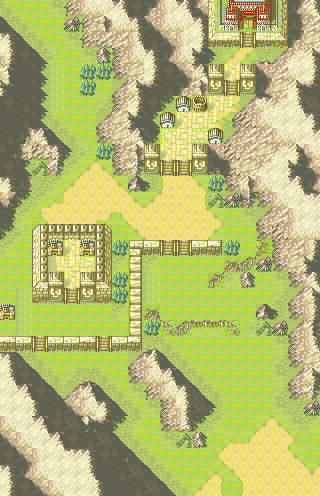
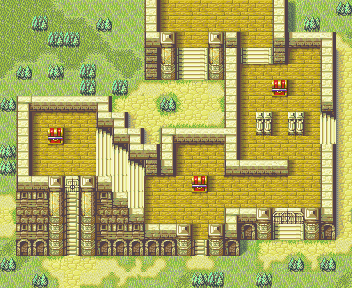
 Looks like an easy 3 turn. Just need to make sure Ephraim can kill the boss.
 Whoa. Note that with just 1 extra point of strength, Ephraim can 1HKO with a crit. This is base level Ephraim, so it shouldn’t be too difficult. The other enemies don’t cause him a problem, and Vanessa could kill 1 anyway if they get in the way.
Also, it may be possible to recruit Cormag with Tana (might cost a turn though). More importantly, if he can’t be recruited, he can be killed for a droppable elysian whip, which equals a promoted Vanessa.
Chapter 11
Whoa. Note that with just 1 extra point of strength, Ephraim can 1HKO with a crit. This is base level Ephraim, so it shouldn’t be too difficult. The other enemies don’t cause him a problem, and Vanessa could kill 1 anyway if they get in the way.
Also, it may be possible to recruit Cormag with Tana (might cost a turn though). More importantly, if he can’t be recruited, he can be killed for a droppable elysian whip, which equals a promoted Vanessa.
Chapter 11
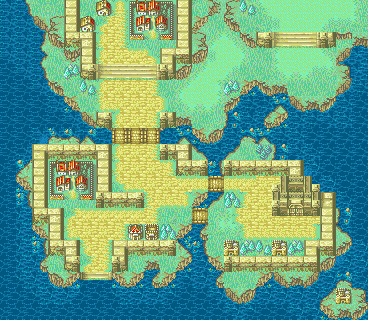
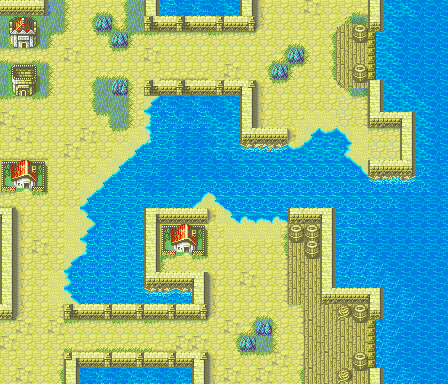
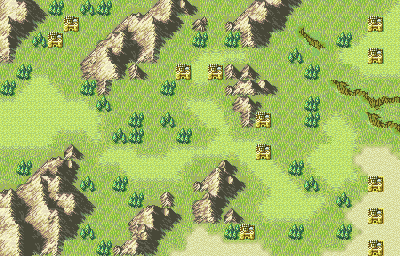
 I kid you not, a 1 turn might be possible here, though it requires Cormag. Look at how few enemies are on the map to start with.


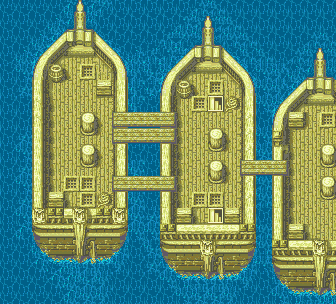
 That’s a whopping 10 enemies. Though, add just 1 turn and this happens:
 0_o 21 additional enemies, and if my memory serves me well, some of those monsters don’t attack you unless you’re right besides them. There’s about 4-6 reinforcements per turn until turn 6.
Chapter 12
0_o 21 additional enemies, and if my memory serves me well, some of those monsters don’t attack you unless you’re right besides them. There’s about 4-6 reinforcements per turn until turn 6.
Chapter 12
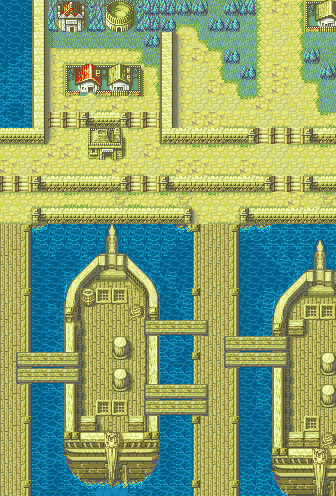 I’m glad this isn’t a rout map, otherwise this would be a serious headache. Rather, you defeat a pathetic monster boss.
Taking a quick look at it, I can get Seth to the boss in 4 turns so long as nobody gets in his way. In my quick run through, 2 enemies blocked him on turn 3, but Vanessa could kill 1, while Duessel takes out the other.
Scary amount of enemies, 48 on turn 2. Good thing I won’t have to face most of them
I’m glad this isn’t a rout map, otherwise this would be a serious headache. Rather, you defeat a pathetic monster boss.
Taking a quick look at it, I can get Seth to the boss in 4 turns so long as nobody gets in his way. In my quick run through, 2 enemies blocked him on turn 3, but Vanessa could kill 1, while Duessel takes out the other.
Scary amount of enemies, 48 on turn 2. Good thing I won’t have to face most of them 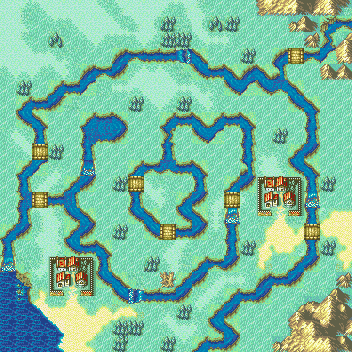 Nasty rout map, 44 enemies on turn 1, and 11 reinforcements by turn 5. That’s up to 55 enemies I’ll have to KO. Thankfully, Seth, Vanessa, Ephraim, Duessel, Gerik and Tethys can cover a lot of ground fast. This map is easily superior to C12 Eirika with those stupid spiders and mountains.
Chapter 14
Nasty rout map, 44 enemies on turn 1, and 11 reinforcements by turn 5. That’s up to 55 enemies I’ll have to KO. Thankfully, Seth, Vanessa, Ephraim, Duessel, Gerik and Tethys can cover a lot of ground fast. This map is easily superior to C12 Eirika with those stupid spiders and mountains.
Chapter 14
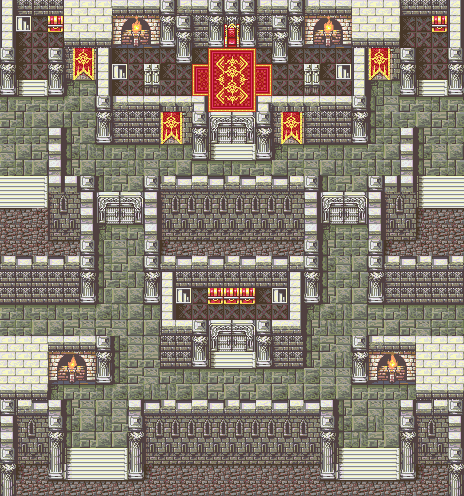 Seems like a 5 turn by counting squares, maybe even 4 considering Tethys, though the doors are a bit of an obstacle.
Another consideration, Vigarde is freaking tough.
Seems like a 5 turn by counting squares, maybe even 4 considering Tethys, though the doors are a bit of an obstacle.
Another consideration, Vigarde is freaking tough.
 55 hp/24 def/62 avo is insane (remember throne tiles give 3 def/30 avo). 10 luck also makes him hard to crit, you need 22 skill just to get 1 crit on him unless the weapon used has a crit boost. Seth has 19 at the moment.
For a crit 1HKO, you need 43 atk. Seth currently has 20 str, with a heavy spear he has 47 atk. If he can’t crit, a 2RKO is easy.
What a beast.
Now let’s compare to Eirika route.
55 hp/24 def/62 avo is insane (remember throne tiles give 3 def/30 avo). 10 luck also makes him hard to crit, you need 22 skill just to get 1 crit on him unless the weapon used has a crit boost. Seth has 19 at the moment.
For a crit 1HKO, you need 43 atk. Seth currently has 20 str, with a heavy spear he has 47 atk. If he can’t crit, a 2RKO is easy.
What a beast.
Now let’s compare to Eirika route.
 Annoying 7 turn rout map. I’ve already covered the details. C9 Eph route might be faster due to not needing to rout.
Chapter 10
Annoying 7 turn rout map. I’ve already covered the details. C9 Eph route might be faster due to not needing to rout.
Chapter 10
 A seize map that can be 3 turned pretty easily thanks to bypassing the mountain. I’d say this map ties C10 Eph route.
Chapter 11
A seize map that can be 3 turned pretty easily thanks to bypassing the mountain. I’d say this map ties C10 Eph route.
Chapter 11
 Another rout map, 41 initial enemies but only 1 reinforcement on turn 9 according to serenes forest. This took Cheetah 8 turns, though I’ll admit the last 2 were pretty uneventful. I’m almost certain C11 Eph route is faster.
Chapter 12
Another rout map, 41 initial enemies but only 1 reinforcement on turn 9 according to serenes forest. This took Cheetah 8 turns, though I’ll admit the last 2 were pretty uneventful. I’m almost certain C11 Eph route is faster.
Chapter 12
 This map should be compared to C13 Eph, since that is also a rout map. Regardless, Eph route wins easily, as this map is just absurd. Gigantic map with low move enemies in hard to reach places? No thanks.
Chapter 13
This map should be compared to C13 Eph, since that is also a rout map. Regardless, Eph route wins easily, as this map is just absurd. Gigantic map with low move enemies in hard to reach places? No thanks.
Chapter 13
 This map compares well to C12 Eph, in fact it’s considerably faster since Aias can be killed on turn 1. Pretty big victory for Eir route.
Chapter 14
This map compares well to C12 Eph, in fact it’s considerably faster since Aias can be killed on turn 1. Pretty big victory for Eir route.
Chapter 14
 C14 Eph wins, no contest. This map takes Cheetah 8 turns to complete, whereas I estimate Ephraim’s takes 4-5.
 Ephraim
 The number of enemies seems to be exactly the same, but the placement and type of enemies varies a little. In particular, Eph route has a lot more dark mages, which makes 1-2 range more important.
I read through the earlier posts in this thread, and apparently Eph route saves a turn due to better unit positioning.
Chapter 16
Eirika
The number of enemies seems to be exactly the same, but the placement and type of enemies varies a little. In particular, Eph route has a lot more dark mages, which makes 1-2 range more important.
I read through the earlier posts in this thread, and apparently Eph route saves a turn due to better unit positioning.
Chapter 16
Eirika
 Ephraim
 Counting squares on Eph gives 6 turns when you factor in Tethys and swiftsoles, which is 1 turn slower than Cheetah. Reinforcements are triggered by location, not turn count, so that shouldn’t create a significant difference. I’m more concerned about all the time lost watching status staves miss, having enemies move that won’t suicide into anyone, additional killed enemies, etc. None of that is an issue in losing a turn on a rout map like the previous chapter.
I think C16 Eir outweighs C15 Eph, albeit insignificantly.
Now what’s my final conclusion?
Counting squares on Eph gives 6 turns when you factor in Tethys and swiftsoles, which is 1 turn slower than Cheetah. Reinforcements are triggered by location, not turn count, so that shouldn’t create a significant difference. I’m more concerned about all the time lost watching status staves miss, having enemies move that won’t suicide into anyone, additional killed enemies, etc. None of that is an issue in losing a turn on a rout map like the previous chapter.
I think C16 Eir outweighs C15 Eph, albeit insignificantly.
Now what’s my final conclusion?
 Gah! My gut feeling tells me Eir route is superior even with the added difficulty of C9, but the only way to properly know would be to TAS both routes, which is insanely time consuming just to test. I kind of want to do Ephraim route because I find it more interesting, and it would add variety to me and Cheetah’s submissions, as viewers would be able to watch both routes TASed.
 None of these enemies want to attack you. I’m dead serious.
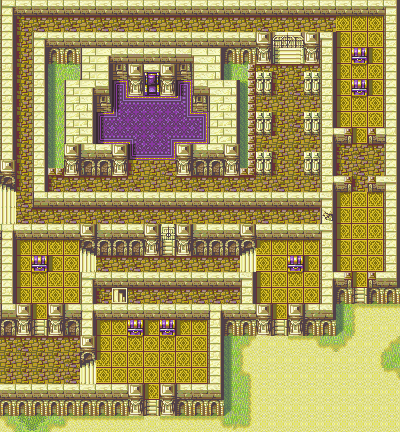
 Putting a unit on each of the red tiles would kill all the required enemies on enemy phase. The ones I crossed out are killed with javelins on player phase.
Even 4 turning means you have to face 41 enemies, that’s 2 more than C11 Eir route. But realistically only a 5 turn can be achieved because Tana and Vanessa don’t have the combat to take on gargoyles, or even mogalls. This adds another 5 enemies, and the losses start to become apparent.
A quick test shows me that killing an enemy that has an opportunity to counter takes roughly 298 frames. Multiply that by 7 enemies and you have 2086 frames lost from killing those extra enemies. The fact that C11 Eir route is bigger cannot compensate for this difference. It doesn’t take that long to move characters (2 frames/square + lag between menus), and besides, you have to move fliers all over the place in C11 Eph route to kill some mogalls/gargoyles.
So, I can conclusively say that C11 Eir > C11 Eph.
Chapter 12 Eir vs Chapter 13 Eph
I TASed C13 Eph and achieved a
Putting a unit on each of the red tiles would kill all the required enemies on enemy phase. The ones I crossed out are killed with javelins on player phase.
Even 4 turning means you have to face 41 enemies, that’s 2 more than C11 Eir route. But realistically only a 5 turn can be achieved because Tana and Vanessa don’t have the combat to take on gargoyles, or even mogalls. This adds another 5 enemies, and the losses start to become apparent.
A quick test shows me that killing an enemy that has an opportunity to counter takes roughly 298 frames. Multiply that by 7 enemies and you have 2086 frames lost from killing those extra enemies. The fact that C11 Eir route is bigger cannot compensate for this difference. It doesn’t take that long to move characters (2 frames/square + lag between menus), and besides, you have to move fliers all over the place in C11 Eph route to kill some mogalls/gargoyles.
So, I can conclusively say that C11 Eir > C11 Eph.
Chapter 12 Eir vs Chapter 13 Eph
I TASed C13 Eph and achieved a  Only took me 5 gigantic posts 0_o


