The Kaizo Mario Bros. 3 ROM Hack was created by Obitus1 "to test the most skilled SMB3 players." After the original
Kaizo Mario World series, Kaizo, a Japanese word that translates as "reorganize" or "restructure" has become shorthand for game versions that are exceedingly difficult and/or cruelly designed.
As the KMB3 release notes say: "Kaizo doesn't want you to win. Kaizo wants you to lose, and it will troll you."
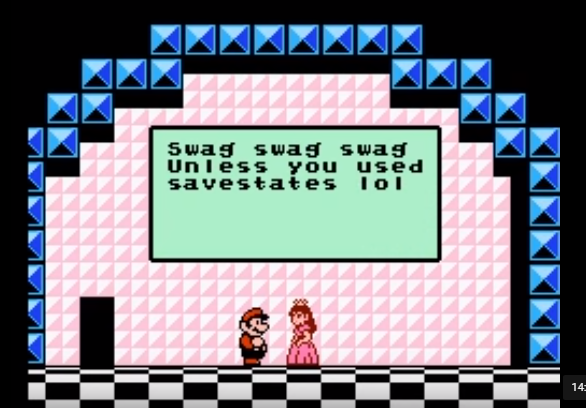
This TAS completes KMB3 as fast as possible, with a couple of speed-entertainment tradeoffs pointed out along the way. Due to the game's difficulty and relative newness, the split between the TAS (14:42) and
unassisted world record (24:11) is much wider than for other SMB3 categories - this TAS is nearly 10 minutes faster.
On a sad note, the author, Obitus1, has apparently recently passed away. I didn't know him, but I have massive appreciation for the ingenuity and quality of this hack, so this TAS is dedicated to him.
Enable closed-captioning to see my subtitles in the encode; the .fm2 is also subtitled.
Many people, including me, first became aware of Kaizo at AGDQ 2016; MitchFlowerPower's run is included here as it includes commentary with good explanation and demonstration of how many of the levels were intended to be solved: [dead link removed]
Patches
To play Kaizo, you'll need to apply a
patch to the SMB3 ROM with filename: Super Mario Bros 3 (PRG 1) (U).nes. I used Lunar IPS to do this and it was quite easy.
In case it's of interest, I created a
patch that fixes the big ? glitch; this patch should also be applied to the SMB3 ROM. The resulting ROM only differs from the "official" KMB3 by 2 bytes; I changed the level entry code to clear the big ? block byte ($7e2) instead of another address not used in KMB3.
Notable Glitches/Strats
This TAS takes advantage of many well-known SMB3 glitches, notably wall jumps and wall clipping. A few strats, however, haven't to my knowledge been used in a published TAS:
Big ? Glitch
SMB3's game designers apparently wanted to ensure that the giant ? blocks found in some levels, containing special suits, would only be used once per level; i.e. you can't keep getting a Hammer suit by entering the same pipe over and over again. They chose a kind of odd way to enforce this - tracking big ?'s in 8 slots, indexed by the block's X-High (x / 256 pixels) value. Moreover, the byte that tracks this ($7e2) is cleared when Mario dies or enters a new world, but NOT on routine level entry.
This works fine for SMB3, which used these blocks sparingly. But KMB3 uses them extensively, so certain strings of deathless play can result in some or all of the big ? blocks being hit before the level is entered! If the level design requires use of that suit, you're forced to take a death to reset $7e2.
My patch above fixes this problem without any other significant effect on gameplay (though this movie won't synch due to different resulting lag in F3). And just to be clear, this movie was done with the original ROM, working around the glitch by choosing which ?'s to hit and using a TAS-only strat to complete the otherwise-impassable final castle without taking any deaths. Unless someone is able to scale vertical walls in Bowser's castle unassisted, it is impossible to complete the unmodified KMB3 unassisted without dying.
Throw-Stomp
Throwing a shell at a bonus block just right causes it to hit the bonus block while simultaneously stomping the shell. This is used in Levels 1 and 13 to allow a thrown shell to be recaptured. This glitch is significantly limited because the shell x velocity (which increases the faster Mario is traveling) can't be too high, and the y velocity has to be within a narrow range. Translation: Mario has to be moving slowly, and must throw the shell from a certain distance away.
I found this glitch while working on the game-end-glitch run, where it was more an annoyance rather than anything useful.
Shell Ninja
If Mario is moving quickly holding a shell, he can turn back while in the air and then throw the shell across his body such that he can stomp the shell without its bouncing off anything first. This is used twice in Level 9 -- once to prevent a beetle from waking up, and then to make an otherwise impossible jump.
Andymac demonstrated this and coined the term when we were doing the SMB3 warpless back in 2010. This is the first TAS where I've found a use for it.
Re-usable P-switch
If you run onto a P-switch but turn around back off it after a single frame, the P-switch action takes effect, but the switch remains usable. Not particularly useful, but interesting.
Small Mario Wall Scaling
Unlike the big Mario suits, which require a speed of 33+ to do a wall jump, due to different clipping rules, small Mario only needs a speed of 17 (for reference, walking speed=24, running=40, P-speed running=56). This makes it just possible to continuously wall-jump, Super Metroid style (well, 3 blocks at a time), up a vertical wall or pipe. This enables a major skip in L8, and is required to complete Bowser's castle without having died at least once.
L1
The first half of the level is similar to a WIP by Trioct though I shaved off about 4 frames.
Kaizo's level design attempts to make you finish most levels as small Mario. The mid-level setup is intended to have you get the mushroom, then lose it again to walk on the mini-pirahnas to get into or past the pipe as small Mario. Taking this as a challenge, I found a way to clear the level as big Mario by getting over the pipe. The top of the pipe is 22 blocks above the highest available jump-off point, though, so getting over requires:
- Using the throw-stomp glitch activate the block (mushroom) while also stomping the shell. This glitch requires a specific trajectory and throwing distance, so an extra mini-jump is used to set it up.
- Grab the koopa shell and mushroom while accelerating to speed 47 for a maximum height jump (7 blocks) into a wall-jump (4 blocks) followed by a shell jump (7 blocks) and another wall jump (4 blocks). Note that as big Mario it's not possible to perform 2 wall jumps in a row as there's not enough time to regain the necessary horizontal speed.
This strat is ~2 seconds slower than Trioct's for L1; it defers losing the mushroom to L2 and I also took about 9f extra lag to stomp an enemy rather than stay above the screen after the big pipe, so call it ~3s. I included it as a speed-entertainment tradeoff as it shows unusual glitches and strats and just generally beats up on the game engine.
L2
My hat is off to Obitus1 for this level's design -- it seems so harmless yet is pitilessly evil.
Ironically, the fastest strat for L2 can't be done with big Mario, so I lose the mushroom at the opening (fun fact: P-block counter continues during the power-down animation, so taking damage to extend the slide won't work).
The key difference to both trioct's WIP and the WR strat is to hold the shell while stomping the goombas in the tunnel. Mario turns around while jumping to keep the koopa shell from hitting the goombas -- if it does, both shell and goomba get killed.
Having the shell permits much faster clearance of the breakable blocks around the giant ? block. There are a huge variety of ways to combine jumping into the field of coins with throwing the shell; many have bizarre or useless results. This combo is the best I found, allowing for rapid construction of an exit tunnel 2 blocks high, with running room to accelerate.
While using the shell to clear blocks, I do a lot of extra jumping to maintain P-speed. Grabbing the leaf in the air shortens how long P-speed is active -- this actually saves time because Mario decelerates while flying, and max flight time is not required. Once P-speed expires Mario maintains near running speed while gliding by allowing a few frames of free-fall before each tail wag.
Tompa first demonstrated keeping the leaf by shell-jumping over the pipe at the end, though he used the flying koopa at the end as a boost rather than the shell from the beginning.
L3
This level is designed around use of Kuribo's shoe, which lets Mario do a single air-jump and walk on or stomp things that would normally cause damage. Because of Kuribo's bouncing movements, big Mario can't make it through the narrow spike tunnels like small Mario can. Fortunately, it's faster to ditch the Kuribo's shoe at the tunnel entrance and use the invincibility period to get P-speed and fly up to the top of the level. More time is saved by doing a duck-jump/flight through the short tunnel into a wall jump to shorten the flight time upward.
At the top of the level is that rare case in SMB3 where P-speed is easily available but it's faster not to use it -- if P-speed is obtained Mario decelerates as he flies down to a speed of 23 -- just under walking speed. Without P-speed, Mario can still glide pretty far but by spacing out the tail flapping slightly can maintain a much faster x speed of 38-40. Minor additional slowdowns are needed to manipulate the lakitus so they can be used to jump to safety.
L4
This is the first level which was designed to require a truly elaborate sequence of events - just watch to unassisted WR video to get an idea of the interplay required among moving platforms, a P-block and the mushroom power-up.
Having the leaf makes things much faster!
F1
The level design is impassable as big Mario. Damage taken on initial spikes allow jumping while getting P-speed and avoiding effect of conveyer belt.
L6
I re-did the entire run from this level due to noticing the WR attempts pressed up to jump coming out of the waterfall, which I neglected to do. That, combined with manipulating the bullet bills to fire as early as possible saved about 2 seconds.
L7
The bizarre raining cheep-cheeps are used to advantage to boost up to the frog suit, getting it much more quickly. For the frog section, it's mainly notable that jumping is faster than swimming, and with an acceleration trick the frog can jump at speed 41, whereas with other suits the max non-P-speed would be 40. I tested getting the P-switch at the end to take the earlier shortcut; it's slower due to the slow-down required while diving to the P-block.
L8
A major skip is taken here using small-Mario-only wall-scaling.
L9
Keeping the shell from the beginning and carrying it through most of the level requires re-stomping it twice but saves several seconds being able to Shell-Ninja over an otherwise impassable jump.
F2
We first see the big ? glitch here as there's only one usable block to get the Hammer suit from.
Several seconds are saved keeping the Hammer suit instead of getting the Frog suit and star. Skipping the Frog suit is also what makes the Tanooki suit available in Bowser's Castle.
L11:
Here we again see the big ? glitch -- the first few big ?'s are unavailable due to using the big ?'s in L2 and F2 without dying.
On the second screen, single-frame ducking is needed to get past the Thwomps without a delay. You can't duck while holding a shell, so after throwing the shell to kill the Thwomp, Mario lands on the muncher-turned-block for one frame so he can duck.
The pipe can be entered without taking damage due to quirky clipping behavior when in the statue mode. This actually allows the player to steer the statue around somewhat, so I use about 1.5 seconds of speed-entertainment tradeoff to show off a little marching routine. Keeping the Tanooki saves almost a minute on the next level, so overall it's still a win time-wise!
L12:
This is one of the most novel and memorable levels in the game, so it was gratifying to find a strat to decimate it. Having the Tanooki from the prior level makes a variety of strats available, such as taking damage to run on the spikes or continuously tail-flipping a shell to keep the Tanooki. By far the fastest, though, is to clip above the spikes.
The strat on the 2nd screen with all the P-blocks is enabled because there's a single frame you can jump when you hit a P-block. Luckily, the 2nd platform is just long enough to get P-speed back; without P-speed there's at least one Thwomp that would require a slow-down to dodge around.
L13:
This was the most difficult level to optimize due to the complex platforming, lag, and multiple suit changes.
Killing the enemies at the start of the level is complicated by the fact that the initial set up uses all the slots for active white blocks -- so the game won't let Mario pick one up until one of the enemies' sprites has left the screen.
I thought it'd be simple to use the shell-ninja strat to boost into a wall jump over the final pipe, keeping Fire Mario, but the pipe is about 10 pixels too high. Plan B uses the throw-stomp glitch with a wall jump to create a platform from which to do a shell-jump/wall-jump combo which easily clears the pipe.
L14:
After the struggles with L13, L14 was refreshingly simple. The level design is intended to make Mario do clever jumps on moving platforms, etc, to dodge Thwomps and avoid getting the star until the last second. Starting as Fire mario, though, we get the star immediately and take damage twice to reach the P-switch, leaving it intact using a glitch described above.
F3:
The part with the walking flames is an odd little section; the flames walk toward Mario after a delay when he turns his back, so the best strat I found was to find the right speed to get past the last flame just as it moves out of the tunnel, jumping continuously to avoid losing speed.
The instant horizontal braking getting the leaf is achieved by standing up into the block for one frame; this saves a lot of time going back left to make room to accelerate for the flight rightward.
The second screen has a nearly invisible (for some unknown reason) P-switch; the game's trying to make you get the P-block, fall through the coins in such a way that you can climb back up again, and get the flower at bottom. Fortunately, it's just possible to clip into the pipe on the 3rd screen with the leaf, making the flower unnecessary.
A few frames are lost on the 3rd screen for luck manipulation and to reduce lag; also the jump to tail-flip a giant hammer is actually done to start the P-speed expiration timer at the right time to optimize acceleration on the boss screen.
L16:
Time is sacrificed here to finish the level with the leaf, which saves time in the next level. The pipe must be entered using the pipe glitch as big Mario can't otherwise enter a pipe in a one-block tunnel.
L17:
The hope was to use the leaf to repeatedly boost and tail-flip koopas, saving a ton of time climbing rather than waiting for the rising platform. Alas, only small Mario can move rightward quickly/low enough to not get hit by the spikes right at the start, so all we have is Super Mario. In testing, it turned out to be about 1 second faster to keep the leaf in L16 and use the big Mario-->small Mario invincibility period to hasten the climb in L17 rather than take damage twice in L16 to get past the munchers and quickly get P-speed. Of the 2 strats, I also felt this was better entertainment-wise.
L18:
In the second set of bullet bills, Mario doesn't quite bounce off the front of the right-most one. This appears sub-optimal, but is really the best that I could accomplish due to the distance between the two bullets and the need to clear the low overhang above the left bullet.
The stack of 5 bullets is manipulated so the middle 3 comes 1 x pixel out of synch every other frame. This is enough to let us kill them first, saving the top bullet for last - thereby saving about 30f taking the final jump higher and therefore earlier.
Bowser's Castle:
As noted above regarding the big ? block glitch, strategy for this level is affected by completing the game without deaths thus far -- making the frog and hammer suits unavailable. It's faster to skip the frog suit anyway, but not being able to get the hammer suit costs a few seconds scaling a wall to avoid the second spiked tunnel. Since we didn't hit the frog-suit block in F2, the Tanooki is available here -- that's good, since I don't think the level is beatable without it.
Having the leaf permits a nice coasting strat to get past the Thwomps that drop into water on the first screen.
A trick is needed to maintain P-speed while climbing the vertical wall above the spiked tunnel, which wouldn't ordinarily be possible. On the first wall-jump, Mario uses P-speed to embed into the wall by 1 extra pixel, giving 2 frames to do the wall jump. Jumping on the second frame resets the expiration counter leaving enough time to reach the top without losing P-speed.
The strat for getting the Tanooki suit is odd because it's actually faster not to lock in P-speed here as it would cause slowdown while gliding and expire at an inconvenient time on the next screen. I found a wall-jump strat that gets to the pipe at nearly full speed.
A handful of frames are sacrificed for entertainment to kill the Thwomp with the Tanooki statue rather than gliding over it. This could probably be done unassisted and might save a second or so.
It's possible to use a duck jump to get the flower from below like how the SMB3 runs get the 1-1 mushroom, but it's not useful since Mario can't then make the jump to the pipe.
Seven frames are lost to manipulate the quick-drop Bowser pattern; the next good pattern I found is 16 frames later, so would require a 9-frame improvement to be found.
Thanks
- AGDQ 2016 for introducing me to KMB3; once I saw it I had to TAS it
- Trioct for a useful WIP of the first two levels
- Tompa for watching my WIPs
- MitchFlowerPower and ClassicGameR88 for truly awe-inspiring WR videos
Nach: These types of hacks normally have two things in common, they are far from aesthetically pleasing and provide extremely limited play making TASs indistinguishable from regular play which completes them. I'm happy to say this hack is not entirely like that. The level layout from an aesthetics point of view wasn't too horrible, and the game does offer plenty of room to maneuver with multiple play options for a nice chunk of the game. On top of that, this TAS does some things in its own way too.
Since this is a well known hack, and well received by our viewers, I'm accepting this as a first publication for this game.