FractalFusion's ロックマン&フォルテ (Rockman & Forte) in 29:08. It is 5 minutes and 23 seconds faster than the published run due to usage of items and glitches.
Used Snes9x Improvement 9, but should work in all later versions.
Watch at least 15 seconds in advance of anything that looks like a desync.
Aims
- Uses no predefined saves
- Uses Forte
- Aims for fastest time
- Abuses programming errors in the game
- Takes damage to save time
- Uses death as a shortcut
- Manipulates luck
About the game and the run
Rockman & Forte is the Japanese version of a game that was, before it was released on GBA as Mega Man & Bass, not distributed in North America. As such, most of the game is in Japanese. The Robot Masters' names are in English (or Latin alphabet, depending on your POV). The item names are in largely decipherable katakana, but, since I don't understand their descriptions, I had help from
mmhp.net. The plot? I won't go there, since even without knowing Japanese, I know it sucks anyway.
I started this run back in December 2007, after parrot14gree and I came up with groundbreaking glitches in the game. It consumed more rerecords than any of my other TASes, partly because I had to redo some sections. I also knew that a new run would save at least 4 minutes.
Programming errors abused
- Ice Wall was used to enter a wall. Both top-left and top-right corners can be entered, but top-left entrances require a menu cancel.
- Ice Wall was also used to push Forte through sprite doors.
- Once Forte is in a wall, it is possible to do some zipping:
- Forte glitches upward by jumping. It is not as fast as zipping.
- Forte zips horizontally by dashing in the opposite direction. There are two types of dashing: period-3 dashing and period-7 dashing. Period-3 dashing is slower but must be done when Forte is only partway into a ceiling (when it is easier to escape downward). Period-7 dashing is faster and is done when Forte is completely in a ceiling. However Forte may be permanently stuck.
- Forte can also zip horizontally by L. Bolt if the opposite direction is pressed when L. Bolt is used.
- Forte zips vertically by L. Bolt. If Forte is at rest or moving upward at the moment, L. Bolt zips Forte upward. Otherwise, it is downward (jump, then L. Bolt two frames later).
- Horizontal and vertical zips can be combined to zip diagonally by L. Bolt.
- Note that it is not possible to go upward to the next screen if you have to climb a ladder to the next screen.
- Entering a boss gate with L. Bolt active cuts out the animation where Forte has to be in position before the boss appears.
- The levitation trick is used in some spots. By pressing the opposite direction and alternating dash, Forte can go off a ledge and hang there.
- The glitch that allows two quick hits on Perfect King at the end was used.
Damage and death taken
The majority of damage taken in this run was to set up the Counter Attacker item (henceforth called Counter), which allows Forte to do 2 extra damage per hit when at 7 health or less (note: a "hit" that does 0 damage is a miss). This extra damage is what speeds up many of the boss fights, as follows:
| Max damage per hit (ignore Counter) | Hits without Counter | Hits with Counter |
|---|---|---|
| 1 | 28 | 10 |
| 2 | 14 | 7 |
| 3 | 10 | 6 |
| 4 | 7 | 5 |
| 5 | 6 | 4 |
| 6 | 5 | 4 |
Shock Guard is used once to take a hit without dying on spikes in Ground Man's stage.
Anyway, I take a grand total of 265 damage in this run, enough to kill Forte 9 times over.
The death was taken after the ship miniboss in Fortress 2 to avoid a half-minute sequence. It advances Forte to the next area right away.
Luck Manipulation
The RNG is advanced by certain events, a few of which is firing Forte Buster, or the Alternate Buster, which advances the RNG by 1, or Spread Drill, which advances the RNG by 14 or 15. If any shot hits anything, it advances the RNG by 1. The Spread Drill is useful for manipulation whenever Forte dashes a lot, since he cannot fire a Buster while dashing.
For the first few levels, bolts are manipulated so I can buy items. For the last few levels, weapon energy is manipulated since I use a lot of weapon energy (Ice Wall, Tengu Blade, L. Bolt).
Items used
- Counter Attacker[1] (カウンターアタッカー): See Damage and death taken above. I will refer to it as Counter.
- High Speed Dash (ハイスピードダッシュ): Allows Forte to accelerate to a higher max speed during a dash (from 2.0 p/f to 4.5 p/f). Normally acceleration is from 2.0 p/f to 3.5 p/f. Dash-jumping is 3.0 p/f. Tengu Blade dash is 4.5 p/f.
- Shock Guard (ショックガード): Allows Forte to take a 0-damage hit on spikes once without dying.
These items are all bought after the third Robot Master is defeated. It requires 310 bolts.
Weapons
- Forte Buster: Main weapon. Can shoot horizontally, upwards, and diagonally. There can be up to 4 shots on the screen, but can only shoot at the fastest 15 Hz (4 frames/shot). It cannot shoot through walls, and it cannot charge up.
- Alternate Buster: Although not listed as a weapon, any weapon except Forte Buster has this property, although only Ice Wall and Copy Vision do not require an empty meter. It is basically the uncharged form of the Rock Buster, which every Mega Man fan should be familiar with. It doesn't travel fast, though.
- Ice Wall: A platform on which Forte can stand. Like the Magnet Beam in MM1 and Item-x in MM2, Ice Wall can be used to enter a wall and zip.
- Wave Burner: Shoots fire. When held down, the stream of fire can change direction. It is a tracer weapon, meaning that it is influenced by Forte's motion. Underwater, it shoots heat waves.
- Remote Mine: A mine that sticks onto enemies and can be detonated at will. It has a long animation, though.
- Spread Drill: Fires a drill which can be split up to twice.
- Tengu Blade: Can be used to dash forward faster, and to pass through enemies. I use this a lot when I get it.
- Magic Card: Can pick up items, including weapon energy. Unfortunately, you can't switch to force the energy to refill a desired weapon unless that Magic Card hits an enemy, dropping whatever it was holding.
- Copy Vision: Creates a holographic copy of Forte that shoots.
- L. Bolt: Due to the game being unable to spell "Lightning" correctly, I will always refer to this weapon as L. Bolt. Anyway, it causes a full-screen effect but slows down Forte (if he is not in a wall). If he is in a wall, Forte can use this to zip up or down, sideways, or even diagonally.
Route taken
I use the following route:
Cold Man, Burner Man, Pirate Man, Astro Man, Dynamo Man, Ground Man, Tengu Man, Magic Man.
Because Counter doesn't show up until three bosses are defeated, and because Forte only does a max of 1 damage if he doesn't have a weak weapon for a boss, the first three bosses are forced to be in weakness order. The only starting options are Cold Man, Astro Man, and Ground Man. Cold Man first is most useful because of Ice Wall, despite Cold Man's 2s recovery (more than Astro Man or Ground Man's 1.5s recovery) which makes it 13.5s slower to beat.
I jump to Astro Man for the fourth boss because I want L. Bolt, which helps in Ground Man's stage. I feel L. Bolt makes up for the 4.5s loss.
Bosses
For the X-series games, I often say "one less hit means one second saved". Well now, one less hit means one and a half seconds saved. There is one item that significantly reduces the number of hits, and that is Counter (see Damage and death taken above).
When setting up Counter, I often take at least one hit from the boss to lower HP. If some hits do not require Counter, I try to take more hits (so I can take less hits during the level).
Memory Addresses
I made extensive use of memory addresses in this run. Here they are in Snes9x memory viewer format:
[ROCKMAN&FORTE] 7E0C20,2s,Pos X 7E0C22,2s,Pos Y 7E00AE,2s,Cam X 7E00B0,2s,Cam Y- 7E0C54,1u,negDash- 7E19EF,1s,enemy HP 1 7E1AEF,1s,enemy HP ? 7E1A35,1s,enemy HP 2 7E1A2F,1s,enemy HP 3 7E0BBD,1s,enemy HP 4- 7E0EEF,1s,cannon HP 7E0F6F,1s,head HP 7E0F2F,1s,back HP- 7E0BBB,1s,char HP- 7E00FB,2x,RNG- 7E0B9C,2u,bolts
Thought Process
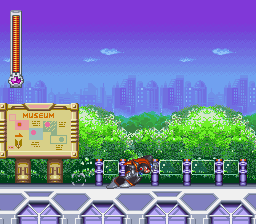
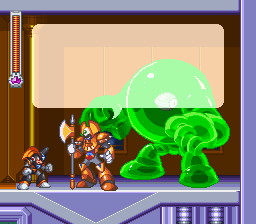
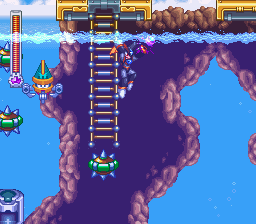
Intro level
Starting out, I was new to TASing this game, but I learned quickly. Forte's shots manipulate the mini-drills. It is faster to stay on the ground to dash. I know I missed a levitation trick at the second boat, but I don't like how it looked anyway. By opening up the slime boss and going forward while shooting, I do 5 damage per opening, as opposed to 4 in the previous run. Bablo's run of this level is 12 frames faster than mine.
Cold Man
OK, I need 200 310 bolts (surprise, I didn't know about H. Speed Dash until later). As usual, I waste shots to manipulate for bolts.
Burner Man
More bolts. Now, it's time for zipping. I redid this level at least twice, hex-editing in parrot14gree's zipping locations later on which I missed. I also messed around with one of the drops (even hex-editing to change the drop from a weapon energy capsule to bolt and back to a weapon energy capsule). Burner Man fails.
Pirate Man
Tons more bolts. I do the zip a few times; it's easier underwater since the Ice Walls float. I save a hit on Pirate Man by hitting him last with Wave Burner out of water.
Auto's Shop
OK, I have exactly 310 bolts. I grab Counter, H. Speed Dash, and Shock Guard. Strangely, I have 1 bolt left over. Errant math?
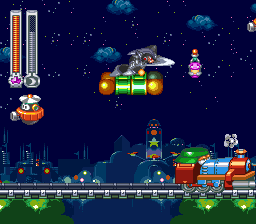
Astro Man
Why does my playing suddenly look sloppy? Oh, it's because I need to take damage here. See, now I have Counter, and I plan to use it on bosses. I get the notes wrong but I still pass, because I glitch through the door with Ice Wall. I play around with Astro Man and deliver the final hit... wait, where's Forte?
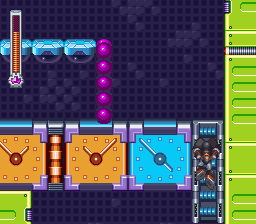
Dynamo Man
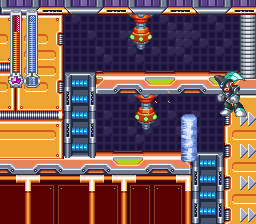
No, the blue blocks do not allow glitching into the ceiling. Not much zipping opportunity. I do skip the miniboss the same way as in the previous level. Don't laugh at me for skipping the CD; I made up for it later in Magic Man's level.
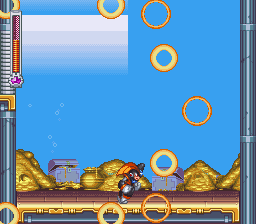
Ground Man
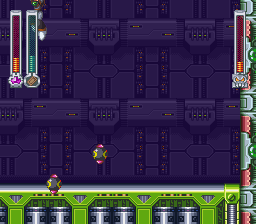
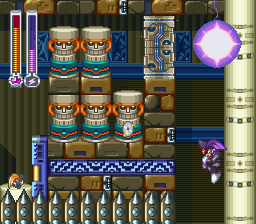
Time for a lot of zipping. Just watch and see. I used up the Shock Guard here. I need to destroy the red stone pillar or else for some reason, I die when I go down to the next area. As for Ground Man, the explosions need to be near him or he won't be ejected from the floor or ceiling. I make sure no Remote Mine residue remains when he explodes because it delays the celebration music.
Tengu Man
More zipping. More hex-editing. I hex-edited an alternate zip in which was superior to the previous one. Tengu Man takes so much from Spread Drill that I only save one hit with Counter.
Magic Man
Time for some real luck manipulation. Weapon energy capsules don't show up as often as bolts do, but I need the energy to power Tengu Blade. Spread Drill helps to waste RNG values. I like the route for the only zip in this level. Strangely, I didn't save a lot of time. :|
Teleportation/Crystal stage
I was unable to duplicate the through-the-wall Ice Wall that parrot14gree did in the Rockman 100% run.
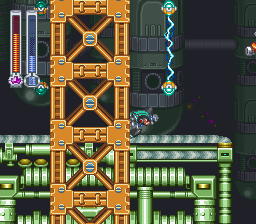
Fortress 1
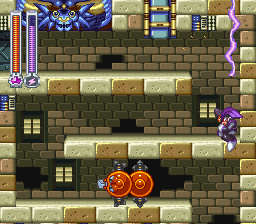
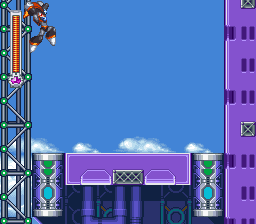
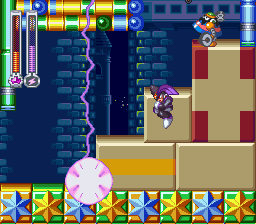
Time for some super energy crisis. This is the first Mega Man game I TASed where weapon energy does not refill after fortress stages. You can zip through spikes with L. Bolt, but I cancel partway through the zip with the menu since otherwise I end up in the ceiling which gets me stuck. As far as I know, I need to cancel the Ice Wall when entering a top-left corner. I do a Magic Card trick to dispose of the spike-ball-throwing large enemy and grab two weapon energy capsules. I try to save energy so I don't use Tengu Blade that often. At the boss, I jump straight up because otherwise there is too much lag. The boss does not peek out of his hiding spot until the meter is full.
Fortress 2
Because of the large rhinos, I can take 20 damage quick. I save Ice Wall, only using it three times on the tank. In fact, it is possible to warp out while standing on an Ice Wall, but it doesn't save any time. :( I also tested, and dying while beating the miniboss does not advance you, unlike the ship miniboss next up. It wouldn't help anyway because I have to keep my health down.
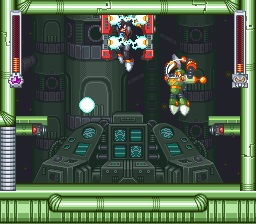
I did try to zip on the ceiling where you enter but problem is that either you can't get out, or you grab three health energy capsules. A couple of zips later, I am at the platforms of doom. I hit the ship at the earliest point possible; note that if you hit the ship while it is flashing, it takes no damage but it prolongs its period of invincibility. I find a novel way to die as well as destroy the ship before it fades out.
I can't do the zip on the obvious corner because the wall is too short. I do the King skip and beat Perfect King saving one hit with Counter even though I start with full health. You can hit him twice quickly at the end; I don't know why. Even though the tank and ship are fused, this boss does twice as much contact damage as their respective minibosses combined.
Fortress 3
I am certain that 8 hits is the minimum that can be effectively done on Cold Man. Besides, it doesn't suck up my L. Bolt energy as much. I make Astro Man half as boring. Zip to Dynamo Man, and I use up all the Copy Vision, hitting him twice with one clone. I found out that using L. Bolt while zipping upward into a door cancels the animation of Forte landing in position before the boss can appear. This applies both before Pirate Man and Burner Man.
I get the lion coin to clear the necessary blocks so I can zip downward, grabbing two weapon energy capsules along the way. Then comes Magic Man; I zip into the floor before beating him so I can zip upward to Ground Man's gate. The damage trick works before Tengu Man. I zip in, music glitch, and then kill Wily first form. Forte must be in position and at rest before the first form is defeated so the explosion takes as short as possible. In the second form, I manipulate for Wily to appear as soon as possible. Although I end input early, Wily's final meter plunges to zero at frame 104933.
Thanks
Thanks to Gigafrost for the previous run and parrot14gree for the Rockman 100% run as well as some shortcuts and glitches.
Thanks to
mmhp.net for giving me a rough idea of what the items do.
Also, this submission number (#1998) deserves to be twice that of Gigafrost's run (#999). It works out. I initially planned it for #2000, but hey, I should give it to someone else. :)
[1]: For the longest time, I believed it was called Counter. Then I thought it was called Counter Attack. This is partly due to public confusion about the names as well as my misreading of katakana. In Mega Man & Bass, it is known as Cost Attack.
NesVideoAgent: Hi! I am a robot. I took a few screenshots
of this movie and placed them here.
Oh! I also corrected the ROM name.
- You indicated
Rockman & Forte (J).smc - I updated it to
Rockman & Forte (J) [h2].smc
FractalFusion: Hi! I am a TASer. I took a few screenshots of this movie and placed them here. Here goes! Feel free to clean up the list.


adelikat: Accepted as an improvement to the published movie.