About This Run
The main goal of this run was to get everything in the game (100% completion) as fast as possible. Getting all the items (even though I don't use most of them) is necessary to acheive the "good" ending, and also makes for a more entertaining video, I believe. My main chances to shine were during boss fights. The bosses in this game are (for the most part) highly manipulatable, making many of the normally frustrating bosses look extremely simple.
This is 2212 frames (or about 37 seconds) faster than my previously submitted run, which I cancelled due to the fact that I could spot large costly mistakes even after submitting it. Improvements cover a broad range of techniques and route changes, as well as movement optimization and me not being stupid.
- Aims for fastest possible time.
- Items: 100%
- Takes damage to save time.
- Uses death as a shortcut.
- Abuses programming errors in the game.
- Manipulates luck.
- Genre: Platform.
Sync Settings:
- Use WIP1 Timing: ON
- Allow Left+Right / Up+Down: ON
- Volume Envelope Height Reading: OFF
- Fake Mute desync workaround: ON
- Sync samples with sound CPU: OFF
- I used the modified version of SNES9x with reset recording to record this particular run. Other versions of SNES9x that support the smv should run it fine though, since I don't use the reset feature.
The Run
Level 1
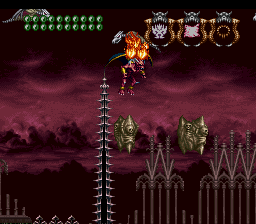
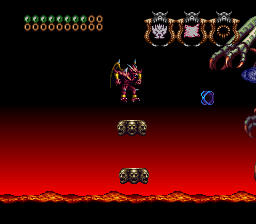
- Hippogriff 1 is manipulated by headbutting him a few frames late. This causes him to die near the ground, saving time.
- The extra jump from the floating platform is used to manipulate a later platform to come sooner. Killing the spider soon after is also necessary to manipulate the one above it.
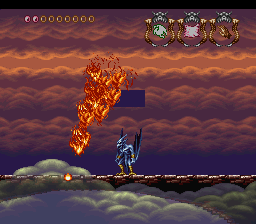
- Arma 1 is manipulated by hesitating before entering the boss screen, so that he dies on the ground, saving time.
Level 2
- From this point out, I try to use the Ground Gargoyle as much as possible to get through areas quickly. Jumping at the end of the dash extends the dash quite a bit, hence all the dash-jumping.
- It seems to be impossible to dash back through the water after collecting the vial, seeing as I don't have quite enough vitality. There is a very good reason why I don't come back for the vial when I have more vitality (i.e. on the second and third runs through the level), but it's a long explanation involving having enough vitality to mitigate the lag in the first underground area, which is important.
- Speaking of the first underground area, this is my best attempt at lag reduction. Though I do get hit a lot, and the dashing is jerky, it still ends up being considerably faster than just killing all the enemies as you see them.
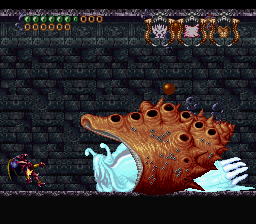
- Ovnunu's slime passage is a lag fest--unless you collect the vitality as early as possible and stay off the walls and in the slime.
- You'll notice that Ovnunu "pulses" within his slime. He "checks" to see if his mini-eyeballs are dead every once in a while, which means there's a frame rule on when he comes out of the slime himself. I can't seem to kill the mini-eyes fast enough for him to come out after the third "Ovnulation Cycle" (an endearing term coined by Dromiceius). This would save a lot of time if it could be broken (about 130 frames).
- On the third run through the level, you may notice that I don't just die to exit the level. The reason is that the very thing I came here for (the life extension) would bring me to full health. I tried several ways of dying while collecting it, but the game just won't let you do it on the same frame. So I just walk out of the level by entering the boss room.
Level 4
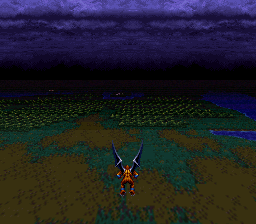
- The horizontal section is quite windy, in case one is wondering why I'm able to fly so fast. Same goes for the large outdoor vertical section, except the wind is blowing up this time, aiding my jumps up the wall.
- Right before entering the room with the three statues and the Crown talisman, you may notice I get snagged on the door. This is on purpose and saves time (for some unknown reason).
- Arma 2 gets caught in a loop, but to do this, I had to tweak my shots a little (which is why they look unoptimized). The loop is necessary so that he stays near the ground half the time, where the Ground Gargoyle shots do 2X damage.
Level 3
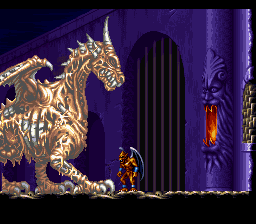
- Even though the Aerial Goyle can snap those vines, I use Ground because he's still faster.
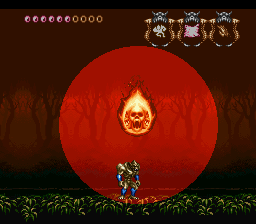
- Dying at the boss is necessary to burn the canopy prematurely so that I can collect that Life thingy that was inaccessible before.
- Killing the boss while I was inside him saved a huge chunk of time. This is because the item falls on top of me, and I'd otherwise have to wait quite a while before I could walk over and pick it up.
Level 6
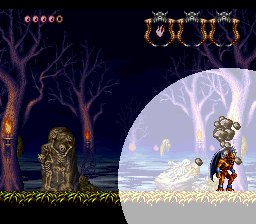
- I could have flown to the right until I exited the area after collecting the first Vial, but it was pretty boring up there in the sky. I sacrifice a few frames and take the ground route, which is more entertaining.
- I jump around a lot in this level instead of walking because the ground has slippery properties, wasting frames if you try to walk on it.
- The dark room is the Desync Room of Death. Just thought I'd let everyone know that I hate it.
- Shots aren't optimized at the very end of the Arma 3 battle so that I can get him to the ground before he dies.
- The odd sliding through the air right before I fight Grewon is partly for entertainment value, though it's also faster for some reason.
Level 1
Just backtracking to pick up a few items.
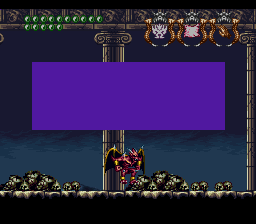
Head-Butt Mini Game
Looks easy, but is actually quite difficult in real time. I manipulated the skulls to appear on the bottom two rows only. I'm quite pleased with how this came out on this run.
Level 5
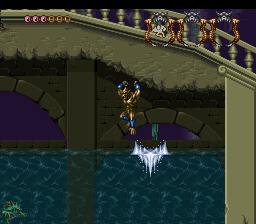
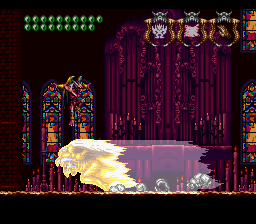
- When Crawler (the pile of puke or whatever) falls down from the ceiling, you're supposed to run away from him to the right and wait for him to transform. You're also supposed to return later and head up into the area that he falls from to get a Life Vessel. I do neither and simply walk through him, which saves me from returning to the area later, and also saves me the hassle of waiting for Crawler to reach the boss area and transform.
- The aquatic parts of this level were the hardest to optimize, especially the areas where I had to continuously avoid spikes, destroy blocks, and kill the swimmy guys. The parts where I touch spikes or otherwise get hurt are to better position myself to eliminate as much as possible on the screen to reduce lag, which is a plague in this level. It's also necessary to space out your shots, even though it slows you down, since firing too many at once causes horrible lag.
- Switching to Legendary Gargoyle during the Holothurion fight (the snail) is faster, despite the fact I am slowly drowning. Also, his invincibility times after he gets hit vary wildly for no reason whatsoever, which is why I can hit him at odd times.
Level 3
Not much to say about this section, really. It's as easy as it looks, even for the casual player, including the pathetic boss.
Final Level
- When I ring the bell, it takes forever for the Life Extension to fall out, hence me falling back down and messing around.
- I never thought I'd actually use the Claw shot in this run, but it proved itself invaluable in the horizontal wind section, especially when I realized that I can stand on top of the goo in addition to using it normally to latch on to.
- Annoyingly enough, Phalanx is one pixel out of reach, forcing me to switch to Aerial Gargoyle, fly up, and switch back to Legendary. Phalanx's third form is amazingly brutal for the casual player. It's stupidly simple in this movie. I fly to the left towards the end to end input sooner.
The one minor glitch
If left and right on the control pad are held down while firing, Firebrand will shoot a fireball to the right, but it comes out of the back of his head rather than his mouth. I use this a lot to kill enemies that are behind me, and to manipulate bosses into positions I normally wouldn't be able to. This is especially valuable in the Holothurion fight.
Special Thanks
Zurreco for various suggestions and his 100% route
Mechuyael for various suggestions
Dromiceius
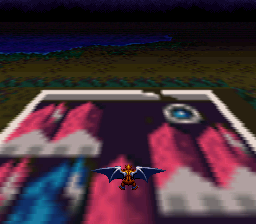
Suggested Screenshot
NesVideoAgent: Hi! I am a robot. I took a few screenshots
of this movie and placed them here.
Here goes! Feel free to clean up the list.


Truncated: Some small possible improvements have been mentioned, but nothing that I feel keeps this run from getting accepted.