NES Widget -Revision 4- By CtrlAltDestroy
Everyone's favorite purple glitch is back, and with lots of new tricks up his sleeve!
This is an improvement of 793 frames (~13 seconds) to the published run.
- Emulator used: FCEU 0.98.15 - .17
- Aims for fastest time
-
Abuses programming errors in gameThe entire game is a programming error - Abuses L+R and U+D (A lot)
- Takes damage to save time
Since this will probably be my last run of the game, I'm going to write an essay so that you can read about what's actually happening in the movie if you'd like.
When I started this run, I only intended to implement a real timesaver that KennyMan666 had found in the very first room. But as I went on, I found more and more timesavers, and they really added up...
The Story
One day, Widget the World Watcher is sitting up in his base when he gets 5 distress calls from different planets. Some villains are doing truly awful stuff, like kidnapping baby whales! So he gets his blaster that can only shoot 1 bullet at a time (and it can't even shoot through walls! Jeeze, and this guy calls himself a Mega Man ripoff??) and goes to take down the baddies, and seal his evil twin Ratchet into oblivion once and for all.
Basic Mechanics
This game basically works the same way as Mega Man: you can visit the first four planets in any order, collecting powerups and health expansions and stuff. When you beat a boss, instead of stealing their weapon, you somehow absorb the DNA of some random animal and gain the power to transform into it. Once all four stages are cleared, the fifth stage opens up and you can go kill the final boss.
This game is infamous for two things: really bad glitches, and even more abysmal level design. Most of Widget's potential powers aren't even used, and bonus powerups are usually located at the end of impossible death courses that render them not worth getting. Truly a gem of the NES era, this is.
The Gun
The gun can only have one bullet on the screen at a time, but I can shoot another one immediately when the first one disappears. In this way, I can rapid-fire enemies to death pretty quickly at close range.
The gun can also be upgraded. There are two types of gun upgrades: one increases the size of the bullets, the other one changes their color. By collecting 2 of each upgrade, the gun will reach its max power. When I have both color upgrades, the bullet turns into an uber black ball of death that rips through enemies and walls. Unfortunately, the second color upgrade is located at the very end of the game! Poor design, if you ask me.
The gun can also be shot with an upward slant, which sometimes comes in handy.
Transforming
Widget has the power to transform into a few different animals. Unfortunately, only one of them is useful/necessary in a TAS: the mouse, which becomes available after the first stage is beaten. The mouse has much different physics than normal Widget, and has the ability to run really fast, so it's used in many long stages. However, in the shorter stages, it can't be used because it takes a bit of time to transform and untransform.
TAS Tricks
Basic L+R
This is what makes Widget such a fun movie: the L+R glitch. If you hold down L+R, it does something like corrupting Widget's hitbox, turning his collision detection into utter nonsense. The actual hitbox will be applied to somewhere above and to the right of Widget, but it seems to be skewed, and acts differently depending on the shape and nature of the current stage. This trick has lots of useful applications, including:
- Walking through walls
- Standing on invisible platforms
- Evading collision with enemies
- Grabbing items that are nowhere near you
- Entering doors that are nowhere near you
- Firing bullets that appear on the right side of you but travel left
- Zipping
Of course, whether or not you will be able to do many of these tricks depends on the level layout. For example, you can't stand on an invisible platform if your glitched hitbox can't touch one.
Pressing L+R near the end of the stage (and sometimes a lot sooner) may cause Widget to exit the stage early. This trick is, of course, used as much as possible.
You will exit the L+R state as soon as you take a step sideways.
The Big Freeze
If you collide with an enemy while in the L+R state, the game will enter an invalid hurt sequence and freeze for approximately 1 minute and 40 seconds. Very bad for a TAS. Because of this, I have to take extra care in stages with lots of hazards or enemies so that my glitched hitbox doesn't touch any of them. Sometimes I even take damage so that I can zip with the protection of mercy invincibility.
It should be noted that animal transformations are immune to the Big Freeze, and instead will just display a glitched sprite during the hurt sequence.
Sometimes the Big Freeze can also inexplicably be caused by holding down L, R, and Up, and firing a bullet that hits an enemy.
Zipping
If you alternate L and L+R, you can zip across the screen at a high speed. There's a drawback, though: although you can zip across the entire screen, zipping does not move the camera, and any attempt to move the camera will replace Widget in the center of the screen. Therefore, it is usually only useful to zip to the center of the screen at the beginning of a stage, then zip to the door/ladder at the end of a stage. Zipping only works from left to right. While zipping, you must take care not to activate the Big Freeze.
Ladders
The ladders in this game are really, really glitchy.
- If you hold U+D, you can extend ladders. If you climb all the way to the top of the screen in this manner, releasing D will either replace you at the bottom of the screen, or, if there is a room above you, take you there. Sometimes it will take you to a glitched area. This happens once in this run, where it was miraculously possible to find an exit.
- Ladders in this game break a lot, especially if you grab them after zipping. If you are lucky, you can create shortcuts where ladders put you in the wrong position on the next screen. If you are unlucky, you could get trapped inside of a block trying to do this. This behavior relies heavily on several variables. Depending on the screen position and Widget's position, sometimes ladders will break, sometimes they will not, and sometimes you just cannot grab them.
- If you are too far down on the screen (Zipping, about to fall into the pit), you cannot grab a ladder with Down. However, it's still possible to grab it with Up and then climb up a few pixels and then Down to go to the next screen. I use this trick several times to save many frames of climb time.
- It is possible to extend ladders down, but it's a lot more complicated and not useful in a TAS.
Mouse Physics
The physics are a lot different for Mouse Widget. Obviously, I spend a lot of time as Mouse Widget, so these physics are very important.
Running through stuff
The mouse can't zip, but it's possible to run through blocks while going right. To do this, just run up against the block, release B (it doesn't work while running), then press L+R, L, L+R, L, and then you can just run through it. Repeat for every block you wish to run through.
The "Wrap Warp"
If you hold L+R as the mouse, you'll walk to the left, sometimes through walls. If you do this while you're at the left side of the stage and there's no wall, you can run off the left side of the screen and appear on the right side of the screen. From there, you can attempt to run right and get replaced at the center of the screen. This is faster than zipping on stages where you must turn into a mouse.
The "Glitch Mouse" Trick
The Glitch Mouse is seen twice in this run. It's a very handy trick that saves some transformation time.
It's only useful when going through doors FROM a mouse room TO another mouse room. While a mouse, press L+R to exit a door and take damage at the same time. If successful, Widget will enter the hurt sequence as soon as you appear in the next room. However, since Widget is currently neither in the normal state or in the mouse state, but in the "Tornado" state, it will not trigger the Big Freeze, and instead will perform a hurt sequence with garbled graphics before morphing you back into normal Widget.
However! There is a 1-frame window of opportunity, before you unmorph, to open the menu. If you do this and select the mouse transformation, the unmorph will be cancelled (since the game still thinks you're a mouse). This has the very useful effect of completely bypassing a transformation animation, and the laughable effect of turning mouse Widget into missingno. The glitch mouse behaves exactly like the normal mouse, it just looks silly and doesn't have the special transformation music.
Stage Walkthrough
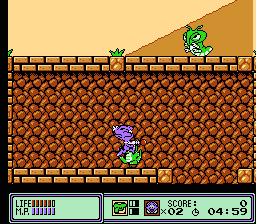
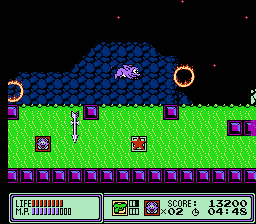
Mega Slank Room 1
I choose to start at this stage for 3 reasons:
- The cursor is already there
- There is a gun color upgrade and a gun size upgrade in this level
- The mouse transformation is unlocked after beating this level.
The first big item, the gun color upgrade, is right beneath me as soon as the game starts, but there are a lot of ways to cause the Big Freeze here. In the last run, I walked to the left and jumped down, avoiding the freeze zones, then zipped to grab the gun upgrade. Here, I do something even faster: I zip forward, take damage, fall down through the floor with mercy invincibility, then grab the gun and shoot the slug.
I also saved a few frames by jumping up through the floor a little sooner. Since collision is only checked every 8 pixels, I can jump early and not bump into the next block like I did last time.
The biggest improvement here was discovered by KennyMan666: I can leave a whole page earlier, saving exactly 256 frames.
- Frames saved: 288
Mega Slank Room 2
The intro zipping here is faster by 1 frame.
When I shoot the first slug, I actually have to manipulate it so that it does not drop an item, but instead stays visible and drops off the screen. If the sprite is still on the screen, the next slug will not appear in the hallway and force me to take damage.
As soon as I jump over the first pit, you might notice that a ceiling tile magically disappears. This is caused by me pressing L+R to grab a bullet size upgrade that's one floor below me. I actually did this trick a little faster than last time, saving about 2 frames.
I grab the end ladder a lot lower than last time by pressing up instead of down, saving a bunch of frames.
- Frames saved: 13
Mega Slank Room 3
Instead of climbing down the ladder, I transition between this room and the previous room a few times, causing the ladder to break and putting me in a better place. This trick was actually suggested in the Widget thread by Tafatt, so credit goes to him.
- Frames saved: 51
Mega Slank Room 4
A lethal room, there are so many ways to cause the Big Freeze.
I saved some time by conserving vertical momentum for a little longer and also grabbing the ladder from deeper in the ground.
- Frames saved: 7
Mega Slank Room 5
Pretty much the same as last time, but the evil hamburger was a little slow in attacking me so I didn't have to take damage.
Unfortunately, I can't zip through the wall because I'm going left instead of right.
- Frames saved: 1
Mega Slank Room 6
A long, boring room. The only trick here is hitting the conveyer belts at the right time for a speed boost. I fixed a zipping error in the last movie for a tiny improvement.
- Frames saved: 1
Mega Slank Boss
The easiest boss in the game. Just jump, zip, and blast away. It looks like I had it perfect last time.
I grab that purple star in the top right corner with a L+R. It's a magic expansion pack, which is needed for the next stage.
- No frames saved
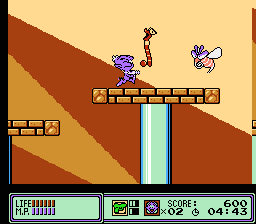
FlimFlam Room 1
Next, I need that 2nd bullet size upgrade. I could go to either Bizzarre Brain's stage, or here. I go here only out of tradition, there's no real time difference, even with cursor movement on the map.
Finally, I can use the mouse on this stage.
I jump at the very end so that I can hit the last fire hoop and trigger the glitch mouse trick on the next screen.
I actually found a faster way around the fire hoop over the acid pit, but the improvement was negated by some dumb lag frames.
- No frames saved
FlimFlam Room 2
Notable improvement here comes from using the Wrap Warp trick at the beginning of the stage. Otherwise, it's pretty much the same as last time.
- Frames saved: 12
FlimFlam Room 3
I use the Wrap Warp at the beginning instead of zipping. I also save a frame by running through the wall a little higher: the bullet I'm chasing actually freezes for a frame when it hits the wall, making it possible to run into it.
I also found a much faster way out of the ambush pit of doom which doesn't involve taking damage.
- Frames saved: 38
FlimFlam Boss
In order to properly fight this boss, he must be manipulated into appearing at the rightmost position first.
Pretty big improvement here! Not only do I get an early shot off him, but I figured out how to rapid-fire him properly. Last time, I kept triggering the freeze every time I tried to jump off the invisible platform, but then I realized it only freezes when FlimFlam is flashing at the rightmost position. So, I got in and out of the L+R state as fast as I could, allowing me to jump up and take him out really quickly.
- Frames saved: 34
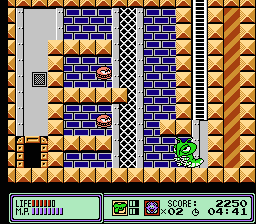
Bizzarre Brain Room 1
Getting past that first block with the clam on top is tricky. Previously, I pressed L+R to take damage, then continued on with mercy invincibility. I could not find a way to jump over it or use a damage boost to keep moving forward.
Turns out I needed to go in from the bottom instead. I take a proper damage boost, saving 11 frames.
You might notice how I stop to wait for a few frames sometimes. This is because I'm manipulating the crabs into not blowing bubbles, which lag the screen horribly.
The last crab, though, I manipulate into blowing a bubble in a very specific direction (up-right), and I use it to trigger an all-new glitch mouse sequence. Luck manipulation and setting up the trick took 42 frames total.
- Frames LOST: 31
Bizzarre Brain Room 2
The "Dolphin Skip" room. Previously, I could jump over the big pool of water by taking a well-timed damage boost from the clam's bullet. However, I found out that waiting for the crab to fire the bullet would completely negate the time saved with the glitch mouse trick. I didn't want that, so I hung around and tried to find a way across the water without using the clam.
It was hard, and it took several months to find a way. I tried manipulating that crab on the next platform to blow bubbles the right way, it didn't work. I tried searching for invisible platforms, it also didn't work.
Finally, I accidentally found a singular invisible platform that became available only after taking a damage boost. Not only was it farther than I could jump, but I have to perform a very tricky manuver to jump off it since I will be re-placed at the center of the screen as soon as I move.
But, I did it, and it saved time in several ways. I used the glitch mouse trick, the Wrap Warp trick, and I didn't have to wait for the clam!
- Frames saved: 158
Bizzarre Brain Room 3
Straightforward room, almost ruined by some stray lag.
- No frames saved
Bizzarre Brain Boss
Bizzarre Brain is easily the most annoying boss to fight. His hands have ridiculous collision detection, invisible platforms are scarce, and he has a habit of randomly turning visible and invisible (completely depending on Widget's X position). His hands also block all bullets. He also starts out above and to the right of you, an easy place to trigger the freeze from. :(
Bizzarre Brain can't be hit while he's invisible, and he immediately turns invisible any time he's hit.But, if I'm fast, I can hit him 3 times per turn: once on the frame he appears, once on his pain state, and once more before he disappears.
I was actually surprised that I found an improvement here. I hit him once with a cheap shot, and I manipulated his hand to come attack me so that I could jump in and start shooting a little earlier.
- Frames saved: 15
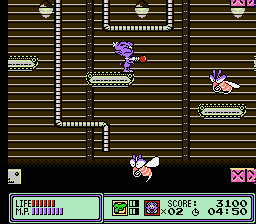
Dr. Dante Room 1
Dr. Dante's stage is tiring. It's filled with ladders that never act the way you need them to. And lots of freezing.
In the first room, I can't do the intro zip because, for some reason, it will break the ladder and cause it to trap me inside of blocks.
I found a good improvement by zipping to the ladder a lot earlier than last time.
- Frames saved: 33
Dr. Dante Room 2
Due to the improvement in the previous room, I was on the ladder in a different position in this room, causing me to be a frame behind.
- Frames LOST: 1
Dr. Dante Room 3
Why does this room remind me of I Wanna Be The Guy?
I actually jumped up the ladder instead of climbing it this time.
- Frames saved: 12
Dr. Dante Room 4
Use of the Ladder Extend trick here. Nothing to improve.
- No frames saved
Dr. Dante Room 5
The glitched room.
To leave this room, I must first scroll the room to the right, then to the left, then zip to the center of the screen. I don't know why, I'm assuming it's because there's a valid door one screen to the right.
I pressed buttons in a better order for one frame of improvement, but because of the improvemen back in Room 3, I started on a different position on the ladder and negated the improvement.
- No frames saved
Dr. Dante Room 6
That stupid snake and its bullets caused me tons of trouble, blocking my Wrap Warp dropoff area and causing lots of lag. I got by him, but not without suffering some loss of frames over the last movie. I had to wait for 2 frames so that his second bullet would pass.
Thankfully, in the second part of the room where I unmorph and zip to the ladder, THOSE snakes were very cooperative and didn't cause as much lag as last time.
- Frames saved: 8
Dr. Dante Room 7
Because of the screen position of the last room when I grabbed the ladder, I caused the ladder to break and eject me into the center of the room, saving me 128 frames (in general, since I have always used this trick) of walking, and letting me avoid the Abomasnow.
In this run, I tried breaking the ladder further to position me in the wrong place so I could get off the ladder earlier, and it worked, but it was about 12 frames slower.
- Frames saved: 1
Dr. Dante Boss
The 2nd easiest battle in the game. The only catch is that you have to manipulate him to either jump at you or run at you.
Unfortunately, he didn't, and I had to burn 1 frame to get him to cooperate.
- Frames LOST: 1
Ratchet Room 1
Now that the four robot maevil villains have been defeated, I can go take out Ratchet and... save the galaxy, or something. I dunno, I didn't pay much attention to that cutscene.
I found a faster way to get underneath the bricks, and grabbed the ladder a lot lower/sooner.
- Frames saved: 6
Ratchet Room 2
When I got to this room, I was surprised to find that I'd somehow rigged the ladder to extend downward. I had to hit U+D to drop off the ladder at the right time. Unfortunately, I lost some frames doing this.
The room is otherwise simple. I can't zip because I'm going left instead of right.
- Frames LOST: 3
Ratchet Room 3
I could just zip to the door... if there weren't two stupid Lava Lotuses in the way filling the screen with projectiles. I take damage, using the platform to cancel the hurt sequence early, then zip out.
I saved a frame this time by finding a single opportunity to zip for just a moment.
- Frames saved: 1
Ratchet Room 4
I can run right through the brain enemy because I still have mercy invincibility from the last room.
It amazes me each time that the narrow jump behind the pig is actually possible.
Shortly after that jump, I finally snag the final gun upgrade with L+R, giving me the BLACK BULLET. Too bad the movie ends in like 45 seconds from now.
This also amazes me every time I see it: after running through the wall, look closely at the floor tiles. Some are shaped differently. Those are actually fake floors... you'll fall to your doom if you walk into one. Cruel, cruel level designers...
- No frames saved
Ratchet Room 5
I saved a frame here with a better intro zip.
You can see how the BLACK BULLET kills stuff, then just keeps going until it goes off the screen. Pretty cool. I still wish I had that thing for the entire game.
Also, in this room, I... died. Or not.
- Frames saved: 1
Ratchet Boss
The FINAL BOSS!
Ratchet flashes for a while, then becomes vulnerable as he prepares to shoot a fireball at you. Your bullet will simply pass through him if you try to shoot him while he's blinking. He will also immediately deflect the bullet as soon as he takes damage for one frame, then disappear again.
Last time, I always made sure the boss was damaged on the first frame he became vulnerable. This time, I used a different strategy: I shoot him right after he shoots his projectile. Somehow, as he's changing his own state from "shooting" to "disappearing", he forgets to deflect my bullet until it gets all the way to his tail, ripping through his innards as it goes.
The result: I beat him in four rounds instead of six!
- Frames saved: 166!
Final Comments
Thanks to the following people:
- theenglishman, of course, for being the first to TAS this game
- KennyMan666, for accidentally finding the trick that prompted this run
- adelikat, for encoding the previous Widget runs (even though Widget is always blue)
- GeminiSaint and Zero7 for being supportive and watching my WIPs
- Everyone responsible for FCEUX, as it will make TASing this game so much easier if I ever do it again in the future
- Caffine, for letting me type this essay
And... that's all!
NesVideoAgent: Hi! I am a robot. I corrected the ROM name.
- You indicated
Widget (U).nes - I updated it to
Widget (U) [!].nes
Truncated: Nice improvement. Accepting...
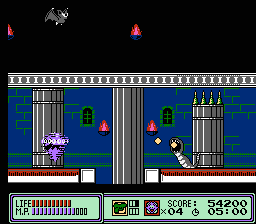
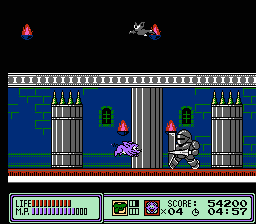
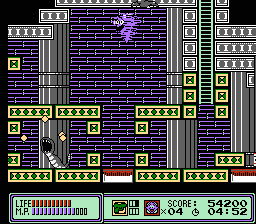
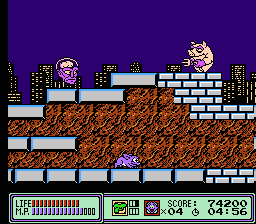
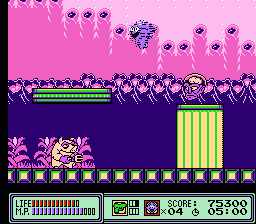
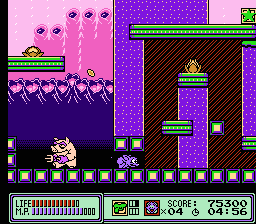
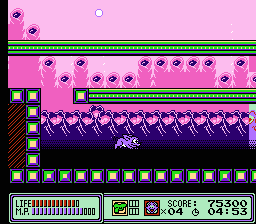
NesVideoAgent: Hi, it's me again! I took a few screenshots
of this movie and placed them here.
Here goes! Feel free to clean up the list.

Chaosv1: Encoding...