Futari wa Precure Max Heart (GBA) in 31:41.
Encodes
Note: Encodes contain some bonus stuff at around 33:20.
Nicovideo (account):http://www.nicovideo.jp/watch/sm19910324
Mediafire download (MKV, ~133MB): http://www.mediafire.com/download.php?jsm7ibw6vnj5va5
Note to encoders: Don't use TASBlend or any frame blending. There is no 30Hz flickering anywhere.
ROM information
2067 - Futari ha Precure Max Heart - Maji Maji! Fight de IN Janai (J).gba
MD5: 8174d9620184763725f25e149b228e79
SHA1: fb6b864b13f41af2521c7e9c7bec0b490962452f
CRC32: 541c18f9
SHA1: fb6b864b13f41af2521c7e9c7bec0b490962452f
CRC32: 541c18f9
Goals
- Aims for fastest time
- Takes damage to save time
- Genre: Platform
I end the movie on the last frame of white screen before the last cutscene (frame 114055), because I choose to control Hikari for the few seconds of control during white screen. From my movie, input can be ended as soon as 113874 (input to deliver last hit), the first sprite indicating last boss defeat is on frame 113913, and the first frame of white screen is frame 113945.
Game script:
If you like, you can view the game script as an HTML file (extraction from ZIP file required): https://files.tasvideos.org/common/SubmissionFiles/3839S/precurescript.zip
The game script contains all dialog lines in Main Game, as well as the intro cutscene. Script is given in Japanese kana, Japanese, and English translation.
About the game
Precure, also known as Pretty Cure, is a franchise known (in Japan) for its numerous Magical Girl anime series. Basically, it comes down to this: Girls transform, then beat the stuffing out of some monsters[1], then blow them away with rainbow mana attacks. However, for the purposes of this video game, which only loosely resembles the second anime season, you can cross the first and third items out. Here it is all about beating up monsters; transformations and magical attacks don't exist except in cutscenes. In the case of this TAS, it is running/kicking/flying through levels as fast as possible. Because it is also a platform game, complete with wall-jumping, the TAS is essentially just parkour stunt perfection.
There are three girls in this game. They are Nagisa, Honoka, and Hikari (also known as Cure Black, Cure White, and Shiny Luminous respectively, but I never use those names). They functionally act the same in-game (apart from the swimming sections in Aqua World where Honoka is the only one doing them), so there is no real need to distinguish them from a gameplay standpoint.
This game is pretty easy if you have enough patience. However, speeding through this game is another matter entirely. Details of this game are as follows:
- You only start each level with 3 HP as indicated by the heart bar (except in boss levels; there you start with 7). Each hit takes away 1 HP, and running out of HP results in death.
- Collecting hearts increases HP by 1, and collecting five orbs also increases HP by 1. They tend to be out of the way.
- Bonus rounds allow you to collect orbs. While you definitely want to play these rounds during normal gameplay, they are extremely time-consuming and serve no purpose to this TAS. Accessing one also unlocks that bonus round in the Extra Game menu, not connected to normal gameplay.
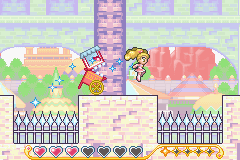
- There are presents to collect, but they are completely optional (in fact, collecting one slows you down because the game reports it after the level). They serve no purpose except for some furniture dressing and hide-and-seek mode. As you can tell from the names of those modes, they are not real gameplay.
- There are four worlds in the game (Marchen World, Aqua World, Jungle World, and Mystery World). Each world has five levels, four normal levels and a boss level.
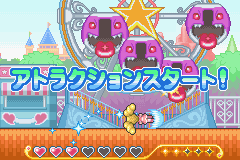
- Each normal level has four areas, of which the third area is always the Attraction. The Attraction is an area with a unique setting and (usually) unique enemies, in which a goal is to be performed, such as "Get to the end" or "Defeat this enemy" type goals. The name of the level tells you the Attraction.
- A boss level just has a single area where you fight a boss. Because the game has to shoehorn all the girls into the battle, there are three forced switches during the fight. No, I didn't count wrong; one girl gets two appearances. Technically, in the final boss level, you fight three different bosses.
Physics
- Walking is a normal 2 units per frame (u/f)
- Screw kick (basically a dash kick that acts as an attack) is 3.5 u/f. It can only be used in air, and lasts until you hit the ground. It is possible to cancel the screw kick in the middle of flight; this is sometimes faster, since it increases vertical speed downward.
- Assuming flat ground, optimal speed is a jump of 12 frames of A, followed by a screw kick (B _ B), an average of about 2.822 u/f.
- A wall-jump is 2 u/f away from the wall. However, by interrupting the wall-jump with an air kick or screw kick, then cancelling the kick with A, you can now control your character by pressing left and right, but with an extra 2 u/f velocity (away from the wall) added onto the character in mid-air. So by pressing toward the wall, the velocity is 0; not pressing anything, 2 u/f; pressing away from the wall, 4 u/f. So it is possible to go very fast from a wall. However, the downside is that your character is unable to attack any enemies that are in the way.
- It is best to interrupt the wall-jump with an air kick and then cancel with A, because an air kick preserves upward velocity (if cancelled), whereas a screw kick does not. Screw kicks are only used in this trick if there is no benefit to upward velocity (such as, if it is better to have downward velocity).
- It is entirely possible to wall-jump from a slope, in the direction where the slope slants downward. Around where the vertical position is a multiple of 16, by starting an air kick into the slope and cancelling it (may also occur from going very fast into a slope), the slope is treated as a wall (think of steps on a staircase). This is abused in a few places.
- However, by interrupting a wall-jump with an air kick, and then not cancelling the kick, the extra 2 u/f velocity is not applied, and it is possible to return to the same wall to wall-jump again. This trick is abused to climb walls which are intended to be impassable without the use of other routes or platforms. It takes a while though, since the air kick must not be interrupted, so it is only used in a few places.
- Enemy boosting is used a lot in this run. By using a screw kick to hit an enemy, normally it slows you down (backwards 0.5 u/f), but when hit from above, it is possible to be boosted forward by 7.5 pixels in a frame. It only lasts a couple frames at most, and may occur in conjunction with being slowed down.
- Cornerboosting is used as well. Jumping up into a bottom corner of an overhang or fixed platform will boost you up to 14 pixels in a single frame.
- Sometimes there are platforms with spikes covering the top. Even if the spikes go to the edge of the platform, there is still a safe zone of about 2 pixels off the end of the platform which you can stand on.
Note about game modes
There is only one real game mode: メインゲーム (Main Game). The second mode is プリキュアのへや (Precure Rooms) where you can view each of the girls' rooms. Presents collected in Main Game fill the rooms with furniture and allow you to play hide-and-seek. The third mode is エクストラゲーム (Extra Game), where you can play all the bonus rounds that you have accessed in Main Game.
RAM Addresses
| Address | Description |
|---|---|
| 300015D | Player X pixel position |
| 300015C | Player X subpixel position |
| 3000161 | Player Y pixel position |
| 3000160 | Player Y subpixel position |
| 300079C | Drop Tower HP |
TAS Log
Note: The six hours after midnight are considered to be part of the previous day.
| Date | Progress | Rerecord Count | TAS work time (hours) |
|---|---|---|---|
| Jun. 12, 2012 | Test run through Worlds 1 & 2 | - | - |
| Jun. 13 | Test run complete. | ~8400 | - |
| Jun. 25 | 1-1-1 through 1-1-3 | ~3000 | 4 |
| Jun. 26 | 1-1-4 through 1-2-4 | 5752 | 4 |
| Jun. 28 | 1-3-1 through 1-4-1 | 9284 | 4 |
| Jun. 29 | 1-4-2 through 1-5 | 13022 | 4 |
| Jun. 30 | 2-1-1 to beginning of 2-1-3 | 14380 | 1.5 |
| Jul. 1 | 2-1-3 | 16024 | 1.5 |
| Jul. 2 | 2-1-4 through 2-2-3 | 19718 | 4.5 |
| Jul. 3 | 2-2-4 near end of 2-3-3 | 22668 | 4 |
| Jul. 26 | 2-3-3 through 2-3-4 + hex attempt | 23582 | 1.5 |
| Jul. 27 | 2-4-1 | 24488 | 1 |
| Jul. 28 | 2-4-2 through 2-5 | 27737 | 4 |
| Aug. 9 | 3-1-1 through 3-1-4 | 31235 | 4 |
| Aug. 10 | 3-2-1 | 32220 | 1.5 |
| Aug. 11 | 3-2-2 to 3-2-4 | 34121 | 2 |
| Aug. 12 | 3-3-1 into 3-4-2 | 38549 | 5 |
| Aug. 13 | 3-4-2 into 3-5 | 41272 | 4.5 |
| Aug. 14 | 3-5 | 42755 | 1.5 |
| Aug. 29 | 4-1 testing | 43268 | 0.5 |
| Sep. 1 | 4-1-1 to 4-1-2 | 44724 | 2 |
| Sep. 2 | 4-1-3 to 4-2-2 | 47349 | 3.5 |
| Sep. 3 | 4-2-3 into 4-3-2 | 50390 | 4 |
| Sep. 4 | 4-3-2 into 4-3-4 | 53216 | 3 |
| Sep. 18 | 4-3-4 and testing 4-4 | 54350 | 1.5 |
| Sep. 19 | 4-4-1 into 4-4-2 | 55976 | 2.5 |
| Sep. 21 | 4-4-2 and testing 4-4-4 | 56333 | 1 |
| Dec. 19 | Finished 4-4 and testing 4-5 | 59917 | 4.5 |
| Dec. 20 | Testing 4-5 | 60887 | 2 |
| Dec. 22 | Finished 4-5 | 62038 | 1.5 |
| Dec. 26 | Fixed 4-5 a bit | 62146 | 0.25 |
Excluding test run, total TAS work time is about 78.75 hrs and 62146 rerecords, for an average of 789.16 rerecords per hour.
Run notes
Test run
I did a quick test run to see how long the game would be. My first TAS came out to be 36 minutes, but was much improvable (especially on the last world).
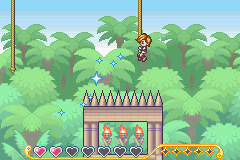
1-1 ロープウェイ Tram Line (Nagisa)
- Beginner's luck
OK, this entire world is child's play. Right off the bat there is a sloped roof. You know that means a wall-jump, even though the game never expects you to wall-jump off a slope. There are tons of orbs and hearts around but they are not needed because Nagisa never takes damage here. This level is too easy to waste time getting hit.
- Zakenna of the day: Giant enemy crabs
The Attraction has you support Nagisa's useless mascot (Mepple) on the tram to the top. Crabs appear on the rope in both directions. If they touch the tram wheel on the rope, they will reverse the tram which wastes time. These crabs don't have a weak point so just beat them down. Near the end, I manage to glitch Nagisa under the rope (this is possible by being squeezed between the left side of the screen scrolling and the rope in the bottom left corner).
You'll notice that a number of enemies start as harmless background objects that turn harmful as you pass them. There are many enemies like this. It might be unsettling at first, but you'll get used to it because there are so many of them. The walking cannons are weird.
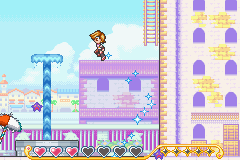
1-2 かんらんしゃ Ferris Wheel (Hikari)
- Balls and round objects
Ah yes, balls. Those things that you can roll around (but only by stepping on them) and are intended as mobile platforms, usually. Of course I always ignore riding the balls, because it's slower anyway. In this level, I use a lot of cornerboosting.
For some reason, Hikari is forced to walk to the center of the ball if she lands anywhere on it. The only way to avoid it is to screw-kick from the wall like I do here.
In the second area there is a ball that is intended to use as a platform to mount the next ledge. But this intent is defeated by the fact that there are (admittedly destructible) erect pillars. By not destroying them, Hikari can easily jump from the second one and dash-kick onto the ledge.
- Zakenna of the day: Ferris plum-like things
For the Attraction, Hikari has to fight possessed Ferris cars. This is quite simple. Hit the Ferris car that is highest on the left side (to reduce the waiting time). Take out most of the Ferris cars, then hit the last one at the highest point, and then nail it when it reaches the ground. Ferris cars cannot be hit during the time when they detach from the wheel and before they touch the ground.
In the fourth area, by standing on the highest point of the pyramid, then jumping and wall-jumping off the platform where the present is, Hikari can just barely reach the soft platform above, and so bypass the entire next section without using the ball and without the wall-climbing trick (which only requires one air kick but it is slower). The developers could have easily made the jump impossible but they were too nice, I guess.
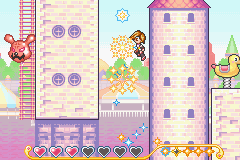
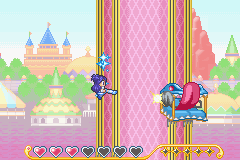
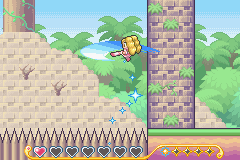
1-3 フリーフォール Drop Tower (Honoka)
- Cars, popcorn, fountains and rubber duckies
In this level there are enemy popcorn machines as well as water fountains that act as platforms. The rapid dash-kicking at the end of the second area is the best way to speed up Honoka, even though it doesn't look or sound like it. The ceiling is really low there.
- Zakenna of the day: Rock factory starring bird and railcar
But now for the first on-rails Attraction. It's weirder than any Attraction so far.
Here, Honoka is riding a drop tower section, while another possessed section with a misplaced tongue throws rocks. The physics here seems weird; Honoka is affected by the section moving up and down, even when mid-air.
Anyway, to defeat this abomination, you have to reflect the rocks it throws to hit it 6 times. The "evil birds" up there are useless in any case. On the last hit, I defeat it as soon as possible by reflecting the rock very close to it. And for some reason, the drop tower continues to operate, and we see the useless birds are gone. I don't know what for.
In the next area, it is faster to avoid bouncing on the rubber duckies. Also, the part avoiding the evil race car requires pixel-perfect accuracy.
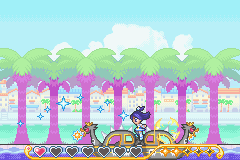
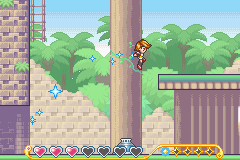
1-4 ジェットコースター Roller Coaster (Nagisa)
- Transportation center
What's better than riding on top of bubbles? Riding in one! I'd like to know what material those bubbles are made of, since they are obviously capable of supporting humans.
This is the first level where I use the wall-climbing trick. The only alternative is to activate the mobile car and use it as a platform. Using the car takes longer.
A lot of toy horses in the second area. With careful use of the dash kick, however, it is entirely possible to take them out in one hit, with some enemy boosting as well. A whole lot of trick jumping later, and we're at the Attraction.
- Zakenna of the day: LOLercoaster
It seems there is nothing that can't be possessed. Now we have an infinitely spawning rollercoaster speeding left for injustice. They have a habit of catching things in their path and pushing them back some distance.
Because of all the downslopes here, there are plenty of places to wall-jump off a downslope, then use the trick to fly forward fast. This place is nutty so I suggest not spending a lot of time here.
1-5 パイレーツシップ Pirate Ship (Nagisa→Honoka→Hikari→Nagisa)
- 3 girls 1 ship
I delay entering the level by 2 frames, in order to manipulate the ship into shooting first (this is the fastest). By keeping it near the ground, I can minimize the time it takes for the game to switch the girls. The hit just prior to switching should be a dash-kick (because you can dash-kick and then immediately land on the ground). The hit after switching should just be a kick. This is the fastest action to hit the ship after a switch. The ship takes 8 hits.
The ship is defeated and everyone is happy. The end.
Or is it?
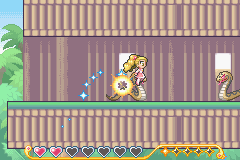
2-1 じょうきせん Steamboat (Honoka)
- Swimming episode
Wait, what? No way!
Apparently, the game decided to be different, and throw in a new mechanic. It's called "swimming". It shows up in 4 areas, and only when Honoka is used. Anyway, it's quite simple; arrows to move, B to use the Psycho Crusher, I mean, water spindash. A can jump, but only when near the surface. Anyway, it is far faster to travel above the surface as much as possible, and then otherwise use water spindash to go forward (usually).
Before we even get there, Honoka must first go through the first area. The enemies in this world are more difficult, with some of them taking multiple hits. One thing to note is that the dark-colored "building" that looks like it has two ladders on each side isn't actually a building. It's a piece of background art and you can pass entirely through it.
Now for some swimming. First of all, the ugly clam monster is timed, but starts only when Honoka's X-position reaches 261 or greater. Second of all, the area is really short. That's to make up for all the long swimming sections in the future.
- Zakenna of the day: Mudkip invasion
It's a nice day to spend the summer on top of a steamboat. Unfortunately, the party is spoiled by the appearance of a whole lot of aquatic demons. Fortunately they aren't very smart. Some of them fail to even jump on the boat properly and get themselves killed. Also, it is possible to trap them just by standing in front of them. This is a waiting game, so I do as I please.
Back to swimming. The bubbles at the beginning try to get in the way, so Honoka has to go around them. Other than that, it's pretty easy. The fastest way to bypass the squid thing in the middle section is to go over it, above the surface. It is a frame faster to jump twice when surfacing, rather than one jump to the top platform. The appearance of a lot of spikes in a body of water is worrying.
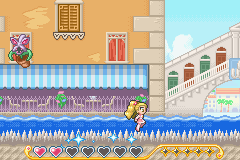
2-2 ベネチアすいろ Venetian Canal (Hikari)
- Water park
The appearance of sharks in a girl-high "body of water" (in effect a background decoration) is also worrying.
Because of an HP need, I get the heart here. It loses very little time (since it's right in the way) and makes up for it later. I use the wall-climbing trick to get on top of the lighthouse thing quickly. You're supposed to climb the ladder on the left and dash-kick from there.
- Zakenna of the day: Falling plants of doom
This Attraction is intended to be a long game of staying on or near the boat all the way to the end of the area, while dodging mutant falling houseplants. However, because of the wall-climbing trick, it can be beaten without waiting for the boat.
First, the boat must be touched or else it will not go and the area will not complete no matter what (even if the trick is used). After that is done, I have Hikari go on without the boat. There are a couple places where a hit must be taken (because of the illogical spikes in the "water") but other than that, get to the end as fast as possible, use the wall-climbing trick, and that's it.
The fire hydrant enemies are annoying (but wait until Jungle World for even worse enemies). They take 3 hits to kill, and block small passages. The first one is all right and can be beaten quickly without much loss, but the second passage has two of them so it is better to take damage.
2-3 ゆうれいせん Ghost Ship (Nagisa)
- Seashore
There is some rolling rock here in the first area, but whatever. They will come back in Jungle World.
In the second area, the fountain that takes you up to the ladders doesn't spawn until Nagisa reaches X-position of 534 or more. As far as I know, it is not possible to get Nagisa on the fountain directly from the ground without waiting. However, by using a fast wall-jump from the right wall, it is possible to get on the fountain just barely. I don't even know how this is possible, but OK. Also, the fire hydrants are taken out quickly.
- Zakenna of the day: Zombie pirate bird lover
Anyway, this is the first stage with an Attraction that designates a specific enemy to be defeated. It is the skeleton captain at the right end of the ship. It has 15 HP. The fastest way to take down its health is to use an air kick followed immediately by a screw kick, over and over, with a triple ground hit as the last three hits. This applies for all designated enemy fights (except that the last three hits may either be triple ground hit or air kick and screw kick, depending on which is faster).
The fourth area is a mashup of everything that happened before. Not a lot of new stuff here.
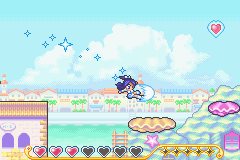
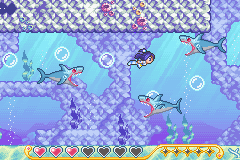
2-4 アクアコースター Water Coaster (Honoka)
- Jaws
Another swimming section.
In the middle part of the first area, the bubbles interfere, so I have to wait for them to pass. It is possible to take out sharks without getting hit when approaching from above. Taking a hit near the end saves time. Note that Honoka cannot turn around without wasting time.
In the second swimming area, it is faster to take a hit on the puffy things, and then use them as an enemy boost while spindashing. The upper path is faster, although there is some lag when first emerging from the water to dash-kick.
- Zakenna of the day: Water
The Attraction takes a while. Honoka must defeat the water demon that appears 5 times. Its hitbox is smaller than it looks. I do as I please here.
Since Honoka has only 1 HP left, damage cannot be taken. The jump between two enemy things must be pixel-perfect or else Honoka dies. That's why I wait before taking the fast wall-jump. The rest of the level is elementary.
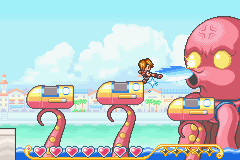
2-5 オクトパス Octopus (Honoka→Hikari→Nagisa→Honoka)
- Naughty tentacles
For this TAS, the goal is to defeat the octopus without allowing it to use the platform throw attack (except maybe at the very end when the last hit is performed). The platforms are the only way to attack it quickly; if the platform throw attack is used, your character ends up on the ground and the octopus face is too high to hit. So I have to wait 8 frames before entering the stage, in order to manipulate it (there are some weird things during the fight that somehow change luck as well). Hex-editing helped out a lot here.
Again, the hit prior to switching should be a dash-kick and the hit after switching should be a ground kick. On one occasion, Nagisa was unable to hit with a ground kick after switching in, so an air kick was used instead. This boss takes 12 hits to defeat, unlike the previous ship, which only took 8.
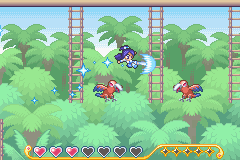
3-1 ジャングルボート Jungle Boat (Nagisa)
- Jungle fever
You can already see how much tougher these levels are becoming. I take damage a couple times in the first area to save time. There is a lot of opportunity to do tricks in this world because of all the walls, ropes, and stuff. Note that it is possible to stand on the edge of a raised spike floor without being hurt. It was used previously, but is more obvious in this world.
In the second area, the apes that cannot be bypassed can be killed quickly with the screw kick. Nagisa has only 1 HP left so she cannot take damage here. The last ape can somehow be bypassed even though the ceiling is very low.
- Zakenna of the day: Hungry hungry fish
At the Attraction, here's what happens: Nagisa is attacked by weird aquatic animals while riding a boat. Nothing different so far; Honoka suffered this a world ago. The big difference is that these fish-like things tear 86% of the boat apart. If you let them do so, of course. Otherwise, there isn't much to do other than play around.
I take the heart here (it is hardly out of the way) and use it to go through a snake and two apes, even though they are so far apart that it seems impossible to bypass all of them in the invulnerability time.
3-2 しょくぶつえん Botanical Garden (Hikari)
- Don't wait for platforms
Good thing for the "wall-climbing" trick. If it weren't for that, the first area of this level would take forever. In the test run, I tried doing a wall-climb on the first wall (before the open area with the moving platform; even though you get an extra heart, it still takes way too long (about 10 air kicks) compared to the 4 air kicks in the platform area. Wall-climbing is done again where the spike floor is, with the wall intended to force you to take the moving platform route. Damage is taken twice.
The second area: Yes, it is possible to squeeze between a snake and a bat in the tunnel with a well-placed screw kick.
- Zakenna of the day: Poison vegetable
The target plant in the Attraction suffers the same fate as the skeleton captain in 2-3. Just get to the end and smash the plant at the end with air kicks and screw kicks.
In the next area, I need the heart here, in order to take damage in the spike part instead of using the ball to get to the upper platform.
3-3 トロッコこうざん Ore Mine (Honoka)
- Obstacle course
I take 3 hits in the first area. There's a lot of stuff going on. In particular, the part where you are supposed to ride the bubble can be passed just by taking damage and using a lot of wall-jumps. Then there's standing on the edge of a raised spike floor. Just because every pixel of the platform is covered in spikes doesn't mean you can't stand on the edge.
Notice that going down ladders takes longer than going up them. One thing I noticed about ladders is that sometimes your character skips 12-pixels horizontally onto a ladder and sometimes not. I don't know for sure what causes this.
In the second area, I use a wall-climb followed by a fast wall-jump, aided by cornerboosting, to take an unexpected route up. You're supposed to go all the way to the right to get up there.
- Zakenna of the day: The environment hates you
What follows is an almost scripted part. Honoka has to avoid exploding boxes on the rails, as well as lava spouts. Otherwise, it's goodbye. There are three minecart rides in this Attraction. It's pretty obvious how to handle this.
In the fourth area, I don't need to take the heart, because the nice route has hardly any resistance. I use a wall-jump air kick cancel to get up to the moving platform on this route. The bottom route has a present in the way, and a lot of enemies.
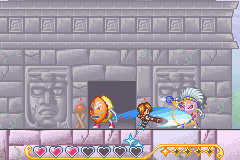
3-4 こだいしんでん Ancient Temple (Nagisa)
- Parkour extreme
There's nothing more fun than taking unconventional routes through this game. Last time I checked, walls are for obstructing you, but that's obviously not the case here. I get the heart on this route.
Nothing much in the second area. Just get to the end. Who needs to ride bubbles anyway? At the end, I exploit standing on the edge of a spike platform in taking a route which the developers didn't intend. Nothing new, really.
- Zakenna of the day: Arrow rain and fighting mask
Again, the Attraction is a "defeat this enemy" type. Just go up the temple as fast as possible, then lay waste to the thing at the top.
In the fourth area, after the second rope, where the next ape spawns seems to depend on Nagisa's position while falling down the shaft. It is good to have it back rather than right on top of the ladder. Damage is taken twice, once to avoid climbing down ladders and instead fall through where the spikes are, and once to bypass 4 snakes.
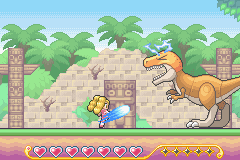
3-5 きょうりゅうえん Dinosaur Park (Nagisa→Honoka→Hikari→Nagisa)
- Dino crisis
The dinosaur's behavior consists of one of four actions, three of which are followed by turning its red eye blue. Only when its eye is blue can it be hit. So this battle takes a while. The four actions it can do are as follows:
- Just turn its eye blue. This is most desirable.
- Lower its head and do its "barking" threat, then turn its eye blue.
- Corner you at the left wall, then do a tail whip, then turn its eye blue.
- Breathe fireballs. This one is not followed by turning the eye blue so it is not desirable.
It is important to manipulate its behavior. Manipulation must come before selecting the level; this pretty much determines its entire behavior for the battle. It is best to have as many of the first two actions above as possible. I took a long time to test which frames between 80202 and 80301 give feasible behaviors:
80220
80229
80248
80273
80286
80287
After further testing, 80220 gave the fastest behavior. Once that is done, I simply did the level, hitting the dinosaur as soon as possible, reducing delays caused by switches, and playing around. There are a couple places where the dinosaur turns blue so fast after a switch that it is blue for more than one frame, this can't be helped. By the way, the dinosaur has 12 HP.
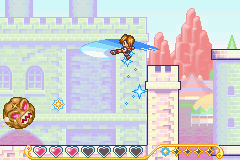
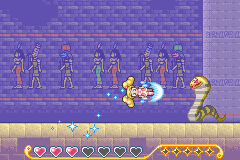
4-1 ピラミッド Pyramid (Hikari)
- Haunted world
This world is difficult. Every normal enemy here takes three hits to defeat.
Single bats under low ceilings can be passed under with the correct screw kick and positioning. However, there are a lot of enemies in small spaces and it requires taking a couple hits.
You'll notice there are vertically-moving spike boards that lower when you are near them. Even though they take up almost all the room in ceiling crevices, Hikari can still do a wall-jump from the lower corner without getting hit.
- Zakenna of the day: Snake in a pyramid
The Attraction is a pyramid, with mummies, bats (regular enemies?) and a giant cobra. There is plenty of room for some parkour action here, because of all the walls, steps, and overhangs. The cobra is of course the enemy to defeat, which we do quickly. Fortunately, it didn't do its spinning action, which would have made it invulnerable for a while.
In the next area, damage is taken to go through a moving spike board. By the way, only vertically-moving spike boards can be passed through this way, not horizontally-moving ones. You've probably noticed the ghosts in this world. They are like the Boos from the Mario series; only approaching when your character looks the other way. They also seem to have a low hitbox, so it is possible to go over them even when its sprite indicates that it probably should have hit. This is abused in two places in this area. However, the ghost at the end needs to be moved a bit and so Hikari has to face the wrong way for a few frames.
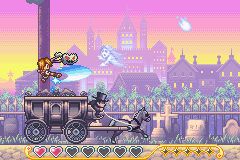
4-2 ゆうれいぼち Ghost Graveyard (Nagisa)
- Castlevania
Again, a hit is required to go through the spike board. There are a lot of hearts in this area but none of them are required.
In the second area, a hit is taken to go through the two ghosts, which would take too much time to move out of the way. Somehow five orbs are obtained along the way for another HP, although it is not required.
- Zakenna of the day: Banshees and evil tree branches
The Attraction is just an auto-scroll, where Nagisa fights off a bunch of possessed tree branch things and screaming ghosts.
In the next area, Nagisa has to jump near the springboard in order to activate it without getting hit (because of the spikes on the walls). There are some golden cannons around but they are ineffectual.
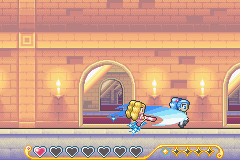
4-3 よじげんりょこう Space-Time Journey (Honoka)
- Machinery in the old times
The temporary wall at the beginning has to be broken (that's the only way Honoka can reach the ladder). Five orbs are collected for another HP. Again they are not needed; they just happen to be in the way. There are a lot of conveyor belts in this level.
Obviously, it is faster to walk on the conveyor belts in the second area. I take damage on the chest monster in order to pass the next part by wall-jumping on the spiked wall without getting hit. I don't take damage on an earlier chest monster because timing is everything. When climbing down the ladder, I make Honoka face left, so that the ghost goes into the wall giving chase, which clears the tunnel ahead.
- Zakenna of the day: Your worst nightmare
And another auto-scroll, this time very weird. It's not often you get to fight ghost-like blobs while standing on a flying bed.
Yes, I skip the heart in the fourth area even though it is right there. Honoka has too much HP anyway. In the tunnel, the horizontally-moving spike board makes waiting necessary, in order to go behind it.
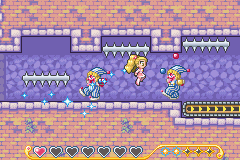
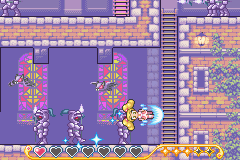
4-4 かがみのろうか Corridor of Mirrors (Hikari)
- Hard mode
This is the hardest level in the game. There are way too many enemies here.
There is a glitch with the horizontally-moving spike board, where, if you screw kick into it correctly, not only does no damage occur, but you still get damage invulnerability. In any case Hikari has to get hit by the spike board in order for it to move back. A hit is taken in the hallway near the end where the chest monsters are.
In the second area, another hit is taken to go through a spike board. Hikari now has only 1 HP left, and it will stay that way for almost all of the rest of the level. You might not want to try this unassisted. Now I do gain an HP back, but only by collecting 5 orbs, and this is just to take a hit later on. I take an orb near the end (after some maneuvering to squeeze between two bats and a soldier).
- Zakenna of the day: Shadow Hikari and Dark Hikari
What follows is an interesting Attraction. The mirrors in this area are magic mirrors that produce Shadow Hikari when Hikari walks in front of them. There are two sets of Shadow Hikari mirrors which produce 6 shadows per set. You can have all 6 of them running around causing havoc if you want, but since we must beat 6 of them as fast as possible, I don't have so many of them running around. For the first set of mirrors, the last shadow is destroyed at the right side of the right mirror so that I can advance as fast as possible. Same thing for the second set of mirrors. Then we must fight ... Dark Hikari. Which is quickly destroyed.
I couldn't come up with better names for the Hikari clones, but they don't need good names since they are pretty much cheap palette swaps of Hikari which run, jump, and use the first ground kick like Hikari does, but are highly chaotic. Note that Hikari's sprite completely overlaps one of the Shadow Hikari for a couple seconds during the fight, and there are a couple near-total overlaps in other places as well.
In the fourth area, I do the following: Squeeze underneath two bats with frame-perfect accuracy, squeeze between a bat and a soldier twice within 0.5s, and collect 4 orbs in rooms full of enemies. Not something to try on your first playthrough. The 5 orbs give an extra HP which I promptly use on the next hallway. After this hallway, there are a couple hearts hidden above the screen but I don't need them at this point.
Trust me, I made this level look much easier than it actually is.
4-5 さいごのたたかい Final Battle (Hikari→Nagisa→Honoka→Hikari)
- Round 3, FIGHT!
You've got Team Precure versus Team Dark Zone in a tag-team matchup. Who wins the fight?
The three villains, who are Biblis, Uraganos, and Circulas, each have 12 HP. The fight may be hard to follow so I'll break it down:
- Hikari fights first against Biblis.
- After Biblis is hit at least 9 times, Nagisa switches in.
- After Biblis is defeated, Uraganos switches in.
- After Uraganos is hit at least 6 times, Honoka switches in.
- After Uraganos is defeated, Circulas switches in.
- After Circulas is hit at least 3 times, Hikari switches in.
- After Circulas is defeated, the game is over.
The "at least" part is for this reason: Precure switches only occur when the character lands on the ground not performing any action, such as after a screw kick, or after a three-hit combo on the ground. So it is possible to get in more hits before switching.
Note: I use AK for "air kick", SKn for "screw kick for n hits" (max of 3), and GCn for "n-hit ground combo" (max of 3). "+" is used to indicate joining these actions together in one combo.
All villains attempt to perform their next attack after being hit, unless comboed quickly. The largest possible combo is 7: AK+SK3+GC3. A Precure switch must not occur between screw kick and ground combo in order to join them together in one large combo.
Biblis has two actions: Jump and charge at Precure's last position, and spin attack. I manipulate Biblis into only using the jump and charge, since she cannot be hit during the spin attack phase. All manipulation must come before selecting the level so I delay 11 frames.
Because of the forced switch at hit 9, it is impossible to defeat Biblis while having her use only one action. So two actions must be allowed. It is important to lure Biblis over to the right, since Dark Zone switches involve the defeated villain exiting the right side.
I start out SK1+GC3. The GC3 shifts Hikari to the right before Biblis uses jump and charge, so this is good. Then, AK+SK3, leaving the hit count at 8. I have Hikari walk right briefly to lure Biblis as far to the right as possible. Then AK+SK3 to finish Biblis off without even switching. The switch occurs after the last hit is delivered.
Now Uraganos has a couple of actions, both of which grant him invulnerability. However, because he is so slow, he sometimes ends up walking around to try and get into position before using any action. This is abused easily.
Right when Uraganos subs in, I use AK+SK3. He continues to walk around, so I use AK+SK2 and the hit count is at 7. Now Honoka switches in. Uraganos tries to use an action, but he is interrupted by GC2, followed by GC3 to finish him off.
Circulas has two actions, one which is a four-kick and one which he fires energy balls. The energy ball one is the shortest by far so I must make him use that action. I also must defeat him allowing only one action.
Right when Circulas comes in, I use AK+SK1+GC3 and the hit count is 5. The screw kick can only hit for one hit because otherwise Honoka is forced to switch out (from hit 3 on Circulas), which ruins the combo. Hikari switches in, Circulas uses energy ball, and then we finish with the 7-combo: AK+SK3+GC3.
I end the movie on the last frame of white screen before the last cutscene (frame 114055), because I choose to control Hikari for the few seconds of control during white screen. From my movie, input can be ended as soon as 113874 (input to deliver last hit), the last boss defeated animation is on frame 113913, and the first frame of white screen is frame 113945.
Sorry for this section being so long.
Other comments
Unfortunately, more recent Precure video games don't have much regarding action gameplay, instead becoming more like minigame compilations, dress-up, dance, and music. Not that Precure is known for video games, anyway. You won't see Precure games like these any time soon:
Screenshots


[1]: Except Hikari, who is almost entirely passive in the anime. But you wouldn't know that just from looking at this game.
feos: Accepting for Moons.