Castlevania Legends is the often overlooked origin story of the Belmonts that was later removed from the official storyline. Regardless the mother of all Belmonts deserves some love! Watch as she whips enemies, climbs ropes in odd ways, & even screenwraps on her adventure to the end of Dracula's castle.
Legends is actually a much deeper game than it appears on the surface. A much later release than the previous two GB titles it takes the formula and adds a few new details such as controlled jumps, burning mode, soul weapons over sub weapons, & collectibles for an alternate end sequence. There's also a very slight nuance to the jumps that function similar to a "regrab" in Super Mario World. During a jump if the player attacks and holds jump during the attack animation they will fall slightly slower than normal. Although slight this is used multiple times in the run to both regulate my jump height and even manipulate bat enemies offscreen. You also have the ability to cancel knock-back if it occurs on the same frame as landing on the ground.
- Emulator used: Bizhawk 2.3.2
- Aims for fastest time with 100% completion
- Takes damage to save time
- Suffers death to save time
- Abuses programming errors
- Genre: Action
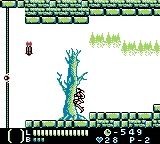
Stage 1 - Graveyard
The first stage honestly felt like it took forever! Both in terms of it being my first experience with TAStudio, but also the level length is considerably longer than the others.
This stage was extremely hard to optimize as there are multiple spots where lag management is key. This becomes a difficult balancing act. In the end destroying things such as candles & enemies is generally in your best interest as the slight time loss from jumps is often outweighed by less lag frames overall. You can even delay/prevent lag frames in some cases with a small jump. This becomes beneficial when you can delay lag frames enough that you will eliminate one by the time you reach the door, end of the laggy spot, etc.
You will see me jump in other seemingly random spots during 1 as well. This was my method of manipulating the bats to go offscreen faster. They are a big contribution to the stage 1 lag and if left to linger they can really cost you time. I do jumps in certain spots to manipulate their direction. To take it a step further unknown to the audience I am randomly holding jump during the end portions of certain jumps to do this as well. This doesn't actually impact my jump at all but for some reasons the bat enemies respond to this.
When it comes to the boss I was able to save time by manipulating his movements and taking advantage of the fact that Sonia doesn't get hit by enemies in iframes. I also take strategic damage boosts off the boss to ensure I'm able to damage them again ASAP which will be an ongoing theme for this run.
I end the stage with TONS of hearts but Legends is kind and allows you to carry them forward. As a result there is no time loss for this (no heart countdown at end of stage) & gives me the option to use them later.
Stage 2 - Castle Halls
Remember all those hearts from Stage 1? This is basically where I decide to use them all! After the first stage we get the Wind soul weapon which acts like the Stopwatch from other games. At 5 hearts a piece each use is costly but effective.
Much shorter than 1 but the name of the game in Stage 2 is lag reduction again. This time using the Wind weapon to avoid enemies, get them offscreen faster, etc.
You get to see more of the quick rope/chain climbs that were seen briefly in Stage 1. These ONLY work when jumping off the right side of the rope/chain. This time we take it a step further using it for 2 screenwraps in the section with the doors locked by knights. As long as you're not in Burning Mode it's actually slightly faster to wrap than sliding down while holding jump. The 2nd wrap has the added benefit of dropping out of the ceiling closer to the knight for a quicker kill.
The boss is more of the same mentality. Doing everything I can to manipulate his pattern while keep him in iframes.
Stage 3 - Clocktower
After each boss Sonia gets automatically equipped with her new weapon. We have no use for this one as it fully heals the player at a cost of 20 hearts so at the start of Stage 3 I immediately swap back to Wind. Due to how vertical this stage is it's all about the quick climbs and taking smart damage. Sonia doesn't get knocked back while on a chain which is helpful in damage boosting through a lot of these enemies.
This stage is mostly vertical and will be the only stage where I don't opt to use Burning Mode in the stage and instead will save it for the boss aside from the revisit to Stage 5. I tried a death abuse since I have extra lives and there is a small horizontal portion but between the time it takes for the death and pause when getting whip upgrades back it wasn't worth it (~1.5 seconds slower).
Burning Mode is saved until the boss spawn as he quickly jumps back and forth and the added speed allows me to keep him in iframes for the majority of the fight. I would have liked to use it earlier as I'm left with 4 bars but sadly it depletes during the cutscene where the chains rise and floor seals prior to the boss fight starting.
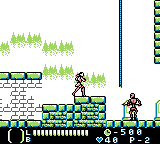
Stage 4 - Castle Keep
See all those extra lives? This is where I make use of them. With large horizontal sections including some where the player has to wait on chain cycles I plan to use as much Burning Mode as possible in this stage.
Although I'm able to avoid some of the spiders at the start I actually want to damage down here for the later death abuse. The Fire soul weapon is great for damaging all enemies on screen at the cost of 5 hearts & I use it a couple of times during the stage to kill enemies & reduce lag. Hearts are set to zero on death so there was little reason to save any of my stockpile from back in Stage 1 knowing I was going to death abuse here.
I enter the Medusa midboss with just enough health to leave with 1. Interesting to note that while Sonia will not take damage from enemy/boss hitboxes if they are in iframes both Medusa & Alucard's weapons are the exception to this rule. These attacks are not considered part of the boss due to the added sprite and must be avoided even if the boss is in iframes as they will damage you.
Upon exiting the door I take the immediate death to get Burning Mode back. When back to life I activate immediately to rush through what is otherwise a laggy spot due to the knights, multiple candles, & enemies that pop out of the ground. At the end of Burning Mode I pause for a brief moment to take damage off the spikes twice setting me up for the 2nd death abuse in Stage 4 shortly after. I also grab no whip upgrades here knowing it will only cost time as I will be dying again shortly.
Continuing on I use the 2nd death abuse just after grabbing the Holy Water. This is not only for the additional Burning Mode but actually cuts back on backtracking as the checkpoint is back at the bottom of the section I just climbed and I need to go left.
As I proceed left towards the boss you will notice things look... not quite rite. Based on how I scrolled the camera in the vertical section this makes the environment higher than it should be resulting in lots of enemies simply falling offscreen.
Alucard was tough to optimize but follows the same idea as all previous. Keep him in iframes constantly and take smart damage boosts to do it (while avoiding his sword).
Stage 5 - Inner Den (Part 1)
Our first trip to Stage 5 and we will only see half of it. It's a good culmination of everything I've done up to this point. Lag reduction, regulating jump height while whipping for precise lines, manipulating bats with jumps, & smart damage boosts on the mid boss. I make use of the new Saint soul weapon
Where this stage really shines is the section after the mid boss. More quick climbs where possible and shorted jumps to control the camera scroll. When I reach the top you'll notice the transition seems odd and the stage music plays while Sonia enters a new area. This is done by grabbing the rope above the transition. Normally this would take you to the screen below, which in this case just happens to hold the trigger to start Stage 6.
Stage 6 - Secret Dungeon
Stage 6 is short, sweet, & right to the point. Our only goal here is to collect the Cross which is the last optional item needed for the 100% ending. After grabbing it I again make use of Burning Mode to get through some areas with heavier lag. It's worth noting that when I made the climb up in Burning Mode before heading back to the right I jump to force the camera scroll up. This actually adds lag but must be done otherwise when I go through the door I will actually be bumped down a floor and end up right back in the room with the Cross.
Executioner fight was a little tough to optimize as he like to jump up high. I negated this best I could by slightly moving away after each attack forcing him to move forward and realign. I also negate one knockback at the end of the fight where I drop through the platform to ensure I can jump back up immediately after.
Stage 5 - Inner Den (Part 2)
We return to Inner Den after the Executioner. It puts us back at the door after the mid boss so I'm forced to do the climb again. I actually do this slightly less "optimal" than before because if I don't I'll end up wrong warping to Stage 6 again. The extra time taken is simply to scroll the screen.
I manage my heart count very carefully in end game to ensure I have enough to use our new soul weapon which makes all enemies on screen vanish regardless of health. After these uses I switch back to the Saint soul weapon for the final fight.
Dracula always follows the same pattern so it was simply down to keeping him in iframes as much as possible. Phase 1 goes down quite quickly. Phase 2 I optimized by using my soul weapon from the platform slightly off center. It gave me enough height to jump & hit him and in addition it didn't lock me into an attack animation which allows me to get back to the platform on the right again. After a short time the deed is done and the vicious repeating cycle of the Belmont family we know & love begins.
This is my first attempt at a TAS so I expect there to be some places for time saves. Lag is an ongoing balancing act. Would have been nice if I could have worked in an additional death abuse as I had the extra life picked up earlier, but just couldn't find a spot that seemed beneficial. Regardless I hope folks enjoy & I look forward to exploring the idea of working with more (and more complex) games!
Samsara: Sonia's judging Sonia!
Samsara: Welcome to TASvideos, strizer86!
This is incredibly impressive work, especially coming from a first-time TASer! The huge time cut over the published run, the attention to detail with the lag management, the death abuses to refill Burning mode, and the variety of new tricks made this a treat to watch.
Overall, the optimization looks solid, but as I mentioned when you first posted, I'd recently started working on this game myself, so I have a couple comparison points that I'd like to bring up. Here's my WIP. Up to where my file ends (right after collecting the axe in Stage 1), I'm 73 frames ahead (not counting for the different BIOS in my run), primarily due to two movement improvements:
In the room where Burning mode is used, I jump off the ledge at the very end and catch the rope right before dying, then screenwrap with the rope into the next room. This allows me to jump straight from the rope to the platform with the extra Burning time I have. This saves about a second over this submission.
In the room with the axe, I push myself ahead using the rope so I don't have to kill that armor knight. This causes extra lag, but makes up for that time in movement, totalling 24 frames.
There is one more improvement, which my boy scrimpy brought up quite recently: The first clip in this video, also in the first stage, shows off a method of controlling screen scrolling, which not only saves time on the ending rope climb, but causes multiple enemies to fall offscreen.
I point these all out for a couple reasons: One, I'm a judge with some knowledge of this game, it's in my nature to notice and point out improvements. Two, they'll be useful for the next TAS of this game. Finally... They don't affect my decision. All of these improvements are in the first stage. The rest of the run looks incredibly solid, and as far as I can tell, no tricks have been missed at all, including the rest of the tricks shown in scrimpy's video. It's clear you've learned a lot since you started the run: The tricks used for said improvements are used to their full potential over the rest of the run (i.e, you're not constantly losing time from not knowing something important). Implementing improvements in this game would take far more effort than just basic resyncing (the lag gets thrown off immensely even for small improvements, and the entire run would have to be redone from scratch), and given how long it seems to have taken to make this run (BH 2.3.2 was released in June 2019, so I'm estimating at least a year of work), I can't possibly ask you to redo everything just for a few seconds of improvement in a 20+ minute run. Plus, even in the first stage, you were able to reduce lag much better than I was able to in my WIP (a good 20-30 frames over me, and I thought I did a pretty dang good job), so it's clear that there was a lot of effort put in even from the very beginning.
All that being said, I'm accepting this as an improvement to the published run, and since the audience reception has been pretty positive (myself included, I found myself quite entertained watching it), I'm giving it a bump up to Moons as well. With a first run this good, I'm expecting great things out of you in the future. Keep it up!
Zinfidel: Processing...