This page documents information about Super Metroid
,
Metroid Super ZeroMission
,
Super Metroid: HISHE
,
Super Metroid: MockingBird Station
,
Metroid Legacy
,
Super Metroid Redesign
. Many of the tricks demonstrated here are near impossible in real time and documented for the purposes of creating Tool-assisted Speedruns.
Super Metroid has a host of tricks and glitches to exploit, frame-precise and otherwise. Most of them are feasible in speedruns, some of the others can also be found here.
Table of contents
- Varying Samus's hitbox
- Morphball tricks
- Bomb jumping
- Gravity jump
- Walljumping
- Avoiding turnaround animation
- Exploiting the turnaround animation
- Exploiting the animation lock
- Shoulder pumping
- Charging shinespark in shorter distance
- Wrapping beam shots around
- Passing through solid objects/surfaces
- Exploiting enemies
- Avoiding cooldowns
- Entering green gates backwards
- Crystal Flash
- Charge beam combos
- Glitched beams
- Murder beam
- Space/time beam
- Chainsaw beam
- Any other combination involving Spazer+Plasma
- Technical details
- Murder beam (cpsiw)
- Spacetime beam (0psi0)
- Chainsaw beam (0ps0w)
- Nonstandard glitched beams
- Tile beam (0ps00)
- Charged tile beam (cps00)
- Uncharged murder beam (0psiw)
- Charged space-time beam (cpsi0) and charged chainsaw beam (cps0w)
- Executing arbitrary code (total control)
- Specific Boss Tricks
- Malicious bugs and glitches
- Mechanics of the in-game timer
- Useful memory addresses
- Notes
- Fun stuff
- Contributors
Many of the techniques described here can be seen in the various Super Metroid runs on this site:
- Taco & Kriole's any%
- cpadolf's 100%
- cpadolf's 6% no-boss/miniboss (low/any% involving significant glitching)
- Saturn's any% ingame
- Taco, Kriole & hero_of_th_eday's reverse boss order
Movies known to be in production:
- NameSpoofer & Cpadolf's 100% improvement
- TBA projects by NameSpoofer and members of Super Metroid TAS team
Unassisted:
Hacks:
TODO:
- Screenshots and SMV demonstrations.
- Should SMV's be in a separate section (like memory addresses), or spread throughout in each relevant section (like is currently)?
P.JBoy: I think they should stay spread out as they are, that way they're more in context and easier to find.
- Should SMV's be in a separate section (like memory addresses), or spread throughout in each relevant section (like is currently)?
- Hacks section
- Redesign certainly needs its own page since so many properties of the game were changed - most tricks listed here are either done differently, or not done at all
- Interaction with abnormal environments (water, acid, lava, quicksand)
- Route ideas and data for various types of runs (discussion appreciated)
- Could also go on a separate page?
- More details on Samus's physics and optimal ways of doing certain actions
- Damage values from Samus's weapons, enemies and other game hazards
- Timings of all timed objects/events (bombs, doors' opening/closing, time until bosses appear, etc.)
JXQ: I ordered these in my opinion of importance. I feel that some of these ideas are too detailed to need a spot on this page. For example, timed events can be found by anyone who just goes to the part in the game they are curious about, and subtracts frame counts.
I also think a few tricks would benefit from an animated gif, especially "Charging a shinespark in shorter distance".
P.JBoy: Would this page benefit from some lua scripts? Even just for non-bot scripts such as displaying hitboxs or displaying offscreen positions.
moozooh: A solution I once proposed to JXQ back in the day was to split the page into two separate ones: the trick/glitch page (most of this page's content at this point) and technical data page (memory addresses, tables, event sequences, timers, damage values, scripts, and so on). Back then it wasn't warranted, but I'm fairly sure it is now.
Varying Samus's hitbox
Samus's hitbox when jumping is not matched perfectly to her visual sprite. This allows for some time saving maneuvers.
Landing earlier
When aiming down or somersaulting, Samus's sprite is smaller vertically. By pressing up, L, R, or shooting, Samus will stand up fully and land a couple frames earlier.
Note: By pressing the shot button for only one frame while somersaulting, Samus will unspin, but not shoot. However, if you have Charge Beam collected, or have any other weapon selected, Samus will shoot immediately after unspinning.
Corner hugging
When jumping to clear a platform, a somersaulting jump may not get the height needed. However, a jump of the same power and speed may be able to clear the platform if Samus aims down a few frames before she would normally catch the platform, as the hitbox for aiming down is even smaller than the somersaulting hitbox.
Preserving the aimed-down posture while falling forward
(AKA "back-down fall")
Usually, when you push down during a fall to enter the aimed-down posture (for instance, in a preparation for a corner hug), Samus's horizontal speed is reset. However, if you simultaneously press back and down on the d-pad, she will continue moving forward, preserving all the benefits of having reduced vertical hitbox at the same time. It can be used for more effective corner boosting or clearing certain vertical rooms without stopping. Note: sometimes it requires shooting right before pressing back in order for this trick to work.
Corner boosting
When falling alongside a wall or a ledge that ends, aiming down and then immediately left/right on the d-pad at the right frames will shift Samus's position a few pixels down and, in case of pressing d-pad towards the ledge, go under it faster. It happens due to "aiming down" hitbox having about half the normal height; by pressing left or right Samus restores her full-size hitbox and gets immediately pushed down out of the ledge boundaries her hitbox is colliding with.
This trick is the most effective at the beginning of the jump/fall. At full downward speed, Samus will sometimes fail to be pushed down if she falls too fast for the hitbox to "reach" the ledge's boundaries.
Platform grabbing
Samus can jump up to a platform faster than normal by aiming downward on the final frame that the jump button is held, and then immediately moving toward the platform for one frame.
In case you need to continue moving in the same direction, it is advised to time your jump so that you don't bump into the platform's edge before grabbing it. Sometimes it means doing a higher jump or pressing down a frame earlier.
Morphball tricks
Morphing ball is the signature item of every Metroid game. It has many uses in Super Metroid due to its high manoeuvrability and initial momentum.
Morphball bounce
Pressing down twice in mid-air will put Samus in morph ball mode in mid-air. Samus's horizontal velocity will remain until she hits the ground if the jump button is held while pressing down, and holding forwards after morphing.
When hitting the ground as a ball, Samus will bounce once before fully entering the "ground" state, where her speed is reduced to that of morph ball's roll. This bounce can be useful in a situation where a lot of small platforms would otherwise cause slower jumping.
Waterball
When using a morphball bounce while jumping into the water (without the gravity suit), the speed before hitting the water can be kept until the end of the morphball bounce.
Graveworm says:
"Water ball" works because, as a ball, you keep all your speed when going into the water. You can even keep Speed booster even if you don't have the Gravity suit if you jump into the water from the ground. You can also use the "mockball" technique underwater if you build the speed up from the dry ground and jump into the water. Also, since gravity is changed underwater, you bounce much higher and can keep your speed longer, even though the water slows you down due to friction.
Mockball
A mockball is a method of using the morph ball without resetting running speed. To perform it, jump into the air when at the desired speed. After reaching the peak of the jump (or releasing the jump button), hold the jump button and press down twice to morph into a ball, followed by immediately holding forward. If done close enough to the ground that Samus doesn't bounce, Samus will instead glide smoothly along the ground in ball form at the speed she was previously running with.
Morphing through platforms
(AKA "kagoball")
Certain objects (such as Kagos, moving or temporary platforms, certain enemies — generally everything that is of the "SPECIES" object code[1]) in the game can be passed through if Samus morphs one frame before landing on the object, providing falling speed is sufficient[2]. A well-known example is the two vertical moving spiked platforms to the right of the Elite Pirate guards near Ridley's lair.
Bomb jumping
Morphball bombs can be used to propel Samus in the air. While very slow, this technique is so robust that there are nearly no limitations to its explorative properties.
When Samus's hitbox is "caught" by bomb explosion, you temporarily lose control over her. The lock happens when the bomb countdown timer reaches 9. If you're caught in a lock, you have to wait until Samus is propelled and the upward speed reaches zero.
Hovering
Hovering is basically IBJ (see below) without gaining height. It can be used to lose height (albeit very slowly), wait for something without unmorphing, or as a preparation for IBJ.
To hover without gaining height optimally, you need to lay a new bomb every time the counter on the previous one reads 7, and once per 2-3 jumps, 6.
To descend while hovering, lay a new bomb every time the counter on the previous one reads 5, and, once per 3-4 jumps, 4.
Infinite bombjump
(AKA "IBJ")
In Super Metroid, it is possible to reach unlimited height with bombjumps. There are two different ways to do IBJ.
- Through hovering: an easier method. Each new bomb should be laid when the counter on the previous reads 12 (except the first one). Visually, the button should be pressed as Samus's sprite is about to touch the previous bomb's sprite while falling. Each jump gains ~15 pixels of height on average with this method.
- Through copying double bombjump: harder to do, but more effective. Each new bomb should be laid when the vertical speed address reads 0.1024[3] (visually, at the apex of each jump). Each jump gains ~21 pixels of height on average with this method.
Diagonal bombjump
Diagonal bombjumps are used to cross pits or other similar obstacles which are impossible (or at least infeasible) to cross otherwise. There are three different ways of doing this type of bombjump.
- Simple diagonal bombjump.
- Extended diagonal bombjump.
- Height-oriented diagonal bombjump (Terimakasih's method).
TODO: add demos and explanations here.
Horizontal bombjump
(AKA "HBJ")
Horizontal bombjump is a way to travel across long distances without gaining height (mainly useful in rooms that have low ceilings, rendering diagonal bombjump impossible). There are two ways of doing HBJ:
- Through hovering.
- Through diagonal bombjumps.
TODO: add demos and explanations here.
Springball jump extension
Springball doesn't check if Samus is on the ground to initiate a jump — only her vertical speed. By letting a bomb propel Samus and pressing jump when her upward acceleration reaches zero, you can successfully springball from mid-air. You can extend the jump height afterwards further by infinite bombjumping. You can't do double springball jumps in such fashion, though.
Gravity jump
After obtaining the gravity suit, when underwater, press start to pause the game, then jump just as the screen is fading out, the later the jump, the higher the jump will be. Switch to Samus's status screen and turn off the gravity suit. When the game resumes, Samus will jump extremely high, even if her jump carries her out of the water. This trick also works with Spring Ball, although this is hardly useful due to lower jump height.
By using Speed Booster to increase the jump strength further, it's possible to jump really high.
Walljumping
(AKA "WJ")
One of the key moves in the game when it comes to traveling through vertically aligned rooms. To execute it, Samus must be somersaulting near a wall. Press away from the wall for atleast one frame, then press jump while holding the d-pad in the same direction. If Samus hasn't strayed away from the wall by more than 6 pixels, she will kick it and receive vertical acceleration close to that of a normal jump.
To walljump effectively, you need to find a good balance between keeping the amount of jumps low and not letting the acceleration decay long enough to slow you down. Good idea would be to monitor the RAM addresses for vertical speed (listed in the table below) and not let it fall under a specific (chosen arbitrary) value. Letting it drop under 3 pixels/frame is almost always slower than doing another jump, though.
Continuous walljump
(AKA "CWJ")
By not turning around prior to walljumping, Samus keeps her speed intact after a jump. It has many timesaving applications, such as:
- Old MB room on the way to blue Brinstar;
- Pre-Wave beam room missile pack skip;
- Wrecked Ship missile lake room;
and many others.
The only drawback of using this method is that you won't be able to release jump and continue somersaulting without losing speed. This can only be worked around by exiting the spinjump state by shooting or other similar way (see the OMBR demo above).
Note: The missile lake jump is actually manageable in realtime. To do it, you must be standing right in front of the door and start running from there, then jump on the last possible frame. When you reach the pole, you have exactly two frames to press jump until you drown, so the timing is pretty strict. Presence of the missile on that pole won't change or interfere with the timing involved in this trick.
A special case of the CWJ is "upwards CWJ". Its use is very limited, but it can save a few frames if a good application is found. One example of this is:
TODO: Add more relevant demos
Entering doors and getting items early
(AKA "walljump pickup")
When spinjumping forward, the game checks the tile immediately behind Samus
to see if she can wall jump off of it, starting with the top-most tile and
moving down. If any solid tiles are found, the game stops checking and
allows Samus to walljump.
Additionally, the game considers Samus as touching any tiles checked, allowing you to trigger items and doors earlier by spinjumping and turning around right as the tile is within walljump range. If an item that is to be collected requires Samus to turn around immediately after collecting it, using this technique can get the item a bit faster. This can also be utilized when entering doors that do not require momentum in the direction they are entered (such as boss rooms).
The maximum distance of a remote trigger pickup depends on Samus's velocity by the moment of the walljump check and can go as high as 8 pixels away from the target. This is especially noticeable during Torizo skip.
If you don't need to turn around nor continue rising after touching the trigger, but instead want to preserve the horizontal speed, you can substitute the turnaround with pressing back+down in a way similar to back-down fall.
Avoiding turnaround animation
(AKA "elevator hop")
By pressing either left or right on the d-pad and pressing jump during one of the next frames, it's possible to spinjump (and thus turn around) instantly, without having to wait for the full six frames of turnaround animation cycle. This is especially useful when regaining control after elevator rides, such as in Ceres.
Exploiting the turnaround animation
When not somersaulting, Samus has a short animation whenever she changes direction, which has several interesting properties.
Fall through crumble blocks quickly
(AKA "edgehogging")
When landing on a crumble block (or a block about to be destroyed by a bomb), if Samus is in one of her turnaround animations, her falling speed will not be reset — instead, her vertical speed will continue rising even though she's not moving.
This can be performed on consecutive rows of crumble blocks in succession.
It is a good idea to use this technique when waiting for a block to detonate, instead of making a high jump to build vertical speed up. Compare: with edgehogging, without edgehogging.
Jump continues rising when turning around
If Samus is jumping up while turning around in mid-air, she will continue to rise until the animation is complete, even if the jump button is not pressed. Also, if Samus bumps into a ceiling during this animation, but is no longer under the ceiling when the animation finishes, her jump can continue to rise, despite being "stalled" by the ceiling.
Corner jump
(AKA "flatley jump")
First introduced by Michael Flatley (hence the name), corner jump is a technique that effectively allows jumping from mid-air. To do it, run off a ledge turning around just before Samus enters the "falling" state, and press jump while turning around.
Exploiting the animation lock
Samus has several uninterruptible animations that can be used to avoid unwanted effects such as damage knockback or other slowdowns. The first one is morphing/unmorphing, the second is turning around when unmorphed and not somersaulting.
Normally, taking a hit from an enemy will throw Samus off from her intended movement. If you time it so that the damage source touches Samus while she is in one of the intermediate animation frames, it will register a hit but won't affect her movement in any form.
It can also be used to prolong beneficial effects, such as running speed and speed echoes.
See also: kagoball.
Shoulder pumping
When running, each time L or R is pressed or released, Samus's position is shifted forward by one pixel. By putting L or R on autofire, Samus's running speed is effectively increased.
Note that this does not actually increase Samus's forward velocity; rather, it is a series of increases in her forward position. Thus, when jumping, this extra "speed" is lost, because shoulder pumping does not affect movement in the air. For this reason, there are times when shoulder pumping is a slower strategy than regular running — particularly, when a short platform is followed by a long jump.
Shooting Samus's beam (particularly, making her thrust her arm cannon forward) yields the same effect, although it is of much lesser use.
Note: Alternating L and R or shooting inbetween doesn't give any additional benefits, but may serve as a shortcut when optimizing lag-filled sequences.
Stop-on-a-dime
Pressing L or R with no direction held for one frame will bring Samus's movement to an immediate halt.
Charging shinespark in shorter distance
After getting the Speed Booster, Samus's speed is kept track of in two different ways. Her actual horizontal velocity is increased each frame that the dash button and the forward direction are pressed together. During a certain frame of Samus's run animation, the game will also increment the boost counter if these buttons are pressed. This is kept track of visually by the speed of Samus's running animation. Once the boost counter is incremented four times, the speed echoes appear and Samus can break speed blocks.
The fact that these are kept track of separately makes for some useful applications.
Samus's boost counter is tied to her running animation, specifically to the "magic frame" ( ), on both NTSC and PAL ROMs. Thus, pressing the dash button on only these check frames (while constantly moving forward) will give Samus her speed echoes — even though she's moving at near walking speed!
), on both NTSC and PAL ROMs. Thus, pressing the dash button on only these check frames (while constantly moving forward) will give Samus her speed echoes — even though she's moving at near walking speed!
- NTSC: If forward is pressed from frame 0 and on, dash should be pressed on frames 25, 50, 70, and 85. On frame 85, both dash and down can be pressed together and Samus will charge her speed in preparation for a shinespark.
- PAL: If forward is pressed from frame 0 and on, dash should be pressed on frames 20, 40, 60 and 70. On frame 70, both dash and down can be pressed together and Samus will charge her speed in preparation for a shinespark.
Once unleashed, the shinespark travels at full speed, even though Samus was hardly running previously! This allows charging the shinespark in areas that do not have enough running room to charge up normally.
The distance can be made even shorter by using a type of "stutter-walk" during the first 24 frames (NTSC) / 20 frames (PAL). This is done by releasing the forward button following a certain pattern. Samus will be able to achieve the first level of boost in almost no distance at all, and from there the technique is the same. The optimal patterns are:
- NTSC — press forward for 3 frames, release for one frame, 4 more, release, 4 more, release, 4 more, release, 2 more, then without releasing forward in between press forward+run for 3 frames, and lastly release forward but keep holding run for 1 more frame before pressing forward+run on frame 25 (3-4-4-4-2+3B). The minimum distance required to charge the spark using this technique is 163.1875 pixels (164.1875 to full stop).
- PAL — press forward for 3 frames, release for one frame, 4 more, release, 3 more, release, 2 more, release, 3 more, release (3-4-3-2-3-). The minimum distance required to charge the spark using this technique is 157.668 pixels.
Wrapping beam shots around
Doors on the far left of a room can be triggered by firing a shot diagonally off the far right side of the room, at the same height as the door. Charged Wave/Spazer and uncharged or charged Wave/Plasma are known to work. Beams disappear as soon as they're offscreen, so the beam must be at full width as it reaches the edge of the screen in order to trigger the door. You should hear the opening sound of the door if done correctly. This generally does not work firing left to open a door on the right, but under extremely specific circumstances it might be possible.
Passing through solid objects/surfaces
Samus's positioning and block collision checks can be abused over and out due to numerous quirks including crouching, shinesparking or the X-ray climb.
Jumping through ceilings
At the right height below a thin (one-block) ceiling, Samus can jump through it by jumping straight up while kneeling. A correctly-placed frozen enemy can be used as a platform as well. It works because crouching prior to the jump makes Samus start it about half a block above the ground, effectively placing her inside the ceiling.
Horizontal platforms thinner than a full block can be passed through simply by jumping straight up through them if the vertical speed is sufficient.
TODO: add a demo here.
Falling through thin floors
Floors that are thinner than a full block can be passed through by having Samus unmorph or stand up in a place with not enough room vertically. Since collision check while unmorphing/standing up gives a priority to the upper side of her hitbox, the lower side sinks into the ground, allowing Samus to pass through a thin floor. This is used to enter the Maridia tube from the outer side without breaking it.
Passing through robots
Robots on the Wrecked Ship can be passed through if Samus is invincible from recently taking damage and the robot is moving toward her.
See also: kagoball.
Passing through Zebetites
To pass through the first Zebetite in Tourian, you must take damage for the invincibility effect (therefore you __must disable Screw Attack__). Freeze the lower Rinka (fireball) as soon as it spawns, and then spinjump onto it to "land" on it. This will push Samus to the left very slightly, but enough to jump straight up and walk through the Zebetite provided you are still invincible. The remaining three Zebetites will not appear.
The other way to pass through the Zebetite is to diagonally shinespark beneath it. After the crash animation ends, Samus will end up inside the pillar; after that you need to jump up and aim downwards, jump up again and finally walk or damage boost through the Zebetite.
X-ray climb
(AKA "door glitch")
Known mainly as the door glitch of NES Metroid fame, this technique allows an incredible amount of sequence breaking and traveling out-of-rooms possibilities.
To execute it, get yourself stuck in a door (by trying to walljump off of it from the other room) or an array of self-restoring blocks, crouch and enable X-ray scope, then turn around and immediately release dash button. If you do it before the turnaround animation is finished, Samus will be forced to stand up upon turning around with her vertical position shifted up by 5 pixels. By crouching and repeating the process, you can wrap around the screen, travel out-of-rooms and do other interesting things, including 6% runs and no-boss runs.
The optimal way to x-ray climb is to repeat the following (starting from a crouched position): press run for 11 frames, then backward for a frame, then down for a frame, and wait 4 frames.
Exploiting enemies
Despite being inherently harmful, enemies and most other hazards that deal collision damage can be abused in many ways to ease travelling, gaining speed, and other things.
Enemy knockback
Most easily exploited on spikes, but possible during any hit, enemy knockback will send Samus flying at high speed in the direction opposite to the one she is facing at the moment of being hit. To perform this trick, you must be hit by an enemy and enter the "ouch" animation. There is a window of 4 frames (the first two frames of the "ouch", and two frames before it) during which you must press and hold the jump button and backwards. She will continue to fly backwards until either of these buttons are released, or until she lands on solid ground (in which case she will instantly turn in the direction she was flying).
This technique is quite robust; depending on the direction and height the collision takes place at, and timing of pressing jump, enemy knockback can start higher or lower, and go shorter or farther. Experiment depending on the situation.
Passing through enemies unharmed
If an enemy is taking damage at the moment its and Samus's hitboxes collide, the hit will not be registered. However, there is little to no chance that Samus will have enough speed to pass the enemy's hitbox by the time it finishes taking damage. By shooting an enemy with a plasma beam, it will become intangible for a number of frames, thus allowing Samus to pass through it easily until that timer runs out and beam finishes colliding with the enemy's hitbox.
Note that the enemy that Samus is passing through doesn't need to be actually harmed by the plasma shot to be rendered harmless.
The effect won't work on solid damage sources and enemies that eject Samus out of their collision zone (Mother Brain is an example of such enemy).
The same can also be done using power bombs, but in that case the enemy must be harmed in order to be rendered intangible.
Screw Attack invincibility cancel
After being hit, Samus is invincible for a brief amount of time. In certain situations, it may be desirable to take damage as fast as possible. Using the Screw Attack will cancel any damage invincibility and allow Samus to get hit again much faster.
Note: This only happens if there are active enemies in the room. If there are no active enemies, such as a room with only spikes, Screw Attack will not disable invincibility after being hit.
Avoiding cooldowns
There are situations when you have to wait for a certain weapon-related effect to "wear off" until you regain full control of Samus and her weaponry. There are several ways to bypass such effects or reduce their duration.
Grappling beam cooldown cancel
Each type of weapon has a certain time span, during which it renders Samus's gun inactive (see "cooldown timer" in the RAM address table). After the cooldown timer is activated, no other weapon can be used, including bombs. However, it does NOT include the Grappling beam. The grapple can be used immediately after it is selected, and in the right situation, can hit certain enemies or open doors a few frames faster, since this delay is no longer present.
Shinespark crash animation cancel
It is possible to cut 31 frames off the usual shinespark crash animation by using a powerbomb shield. It will work only on the second and subsequent sparks, and only until you leave the room.
Entering green gates backwards
(AKA "green gate glitch", "GGG")
This can only be done when a gate can normally be opened from the left. By jumping at the gate, aiming diagonally up, and shooting a Super Missile in mid-air, a green gate can be opened from the wrong side.
Drewseph claims this trick can also be done with a gate facing right, provided the speed is sufficient. Unfortunately, none of such gates in SM have enough flat ground to accelerate before them.
Crystal Flash
(AKA "CF")
The Crystal Flash is a way to gain back energy at the expense of weapons. To perform a Crystal Flash, drop a power bomb, and hold the weapon button, the "down" direction, L, and R. The bomb will explode, and a few seconds later, Samus will be encased in a white ball as her energy fills.
The prerequisites for this technique are 10 or more Missiles, 10 or more Super Missiles, 11 or more Power Bombs, and 50 or less energy (with empty reserve tanks).
Note: It is possible to do the Crystal Flash with only 10 (or even less) power bombs, which might be useful if you want to keep the amount of Power Bomb tanks picked up as low as possible. This, however, requires that the power bomb you drop to initiate the Flash kills an enemy which drops a bomb refill. If you manage to pick it up it and return to the initial position (where you dropped the bomb) in time, the Flash will start. Obviously, you won't be able to use this workaround in rooms that have no enemies in them.
Charge beam combos
(AKA "powerbomb shield", "beam shield", "SBA")
Various beams can be deactivated temporarily. By activating only the Charge beam and any other beam, and selecting the power bomb icon, Samus can use a variety of special attacks simply by charging the beam. The type of attack will depend on the beam selected and they all do 150 damage. The attack will be unleashed once the charge counter (see RAM address table) reaches 120 (in other words, after two seconds the button is pressed).

Ice: This combo causes four small ice crystals to circle Samus. The crystals will disappear when they strike an enemy, but they inflict moderate damage. Any remaining crystals will fly straight outward on the 20th repetition of the sound effect.
Wave: This combo creates four small purple projectiles. If Samus is standing still, the projectiles oscillate in the shape of an X. If she is moving, they will orbit her in a wave pattern. The projectiles are very powerful but vanish after striking an enemy. Any remaining projectiles will vanish partway through the 10th repetition of the sound effect. By far, the most effective combo.
Spazer: This combo creates two groups of three needle-like projectiles (similar to Spazer beam shots). They start just above Samus' head, circling down below her, then circling high above her, and finally raining straight down and vanishing. They are powerful, but disappear after striking an enemy.
Plasma: This combo causes four large green circular projectiles to circle around Samus. The projectiles start near her, then move outward, inward, and fly away. They inflict a great deal of damage and, like the Plasma beam itself, cut straight through enemies.
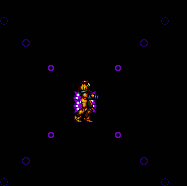
Glitched beams
A glitched beam is a side-effect of having both Spazer and Plasma equipped at the same time. It is done by placing the selection box on either of the boot upgrades, then pressing left and A simultaneously. Be warned, though: the beams are very buggy (can corrupt the game cart's SRAM, for example) and should be used with great caution.
Kejardon says:
"The beams use a simple index to find just about all their relevant data, and so when you overflow the index (which happens with any combination of plasma + spazer), the game starts pulling data and code from essentially random locations. What it does from there is anyone's guess. No, let me rephrase that — what it does from there, nobody can guess. The only way to know would be to read the game's programming."
Murder beam
Usage: charge your beam and go to the menu, then equip all five beams. Exit the menu and fire it while facing straight to the left. Dispatching it in any other direction will crash the game. Shooting it uncharged will crash the game.
Effect: the result of a dispatched murder beam is a kind of an area-of-effect weapon that is considered charged power-bomb damage-type beam that can freeze, go through enemies and through walls. Different enemies react to this damage differently, so experiment in each case. It is known that it deals 200 damage per 16 in-game frames to Mother Brain, though.
Known applications: Mother Brain's 3rd form, Ridley, Golden Torizo.
By far, the most useful glitched beam. It is commonly used in unassisted speedruns to speed up Mother Brain's 2nd & 3rd forms kill.
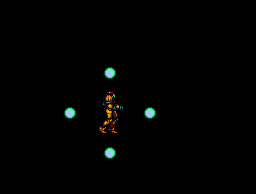
Space/time beam
(AKA "ISP beam")
Usage: equip Ice, Spazer and Plasma (Charge optional), shoot anywhere.
Effect: …is pretty much unpredictable. The S/T beam is considered bomb damage-type beam that can freeze and go through enemies, but its main feature is corrupting the game's memory (differently, depending on where and how you dispatched the beam). This is a severe hardware glitch that can destroy the game's SRAM, crash it or produce very interesting results that differ on different emulators. Unless you're dispatching it at point-blank to a solid surface, the game will lag heavily. Experiment at your own risk.
Known applications: out-of-room travelling, triggering Zebes's explosion, resetting picked up items and room statuses.
TODO: Show these applications.
One interesting application this beam allows is bypassing the point of no return in Tourian and exiting it backwards.
Note: triggering Zebes's explosion does not work on Snes9x. Also, dispatching a bomb spread during the effect helps to ease the lag.
Chainsaw beam
Usage: equip Wave, Spazer and Plasma, shoot anywhere at point-blank (shooting straight up doesn't work). Works with Charge beam equipped, too, but that removes the chainsaw beam's only significant advantage — see below.
Effect: destroys beam-destroyable blocks, opens blue hatches. The beam is considered super missile damage-type, possesses a high rate of fire (similar to that of the Grappling beam), but very limited range, and it doesn't deal actual damage.
Known applications: nothing useful is known so far.
Effect: destroys beam-destroyable blocks, opens blue hatches. The beam is considered super missile damage-type, possesses a high rate of fire (similar to that of the Grappling beam), but very limited range, and it doesn't deal actual damage.
Known applications: nothing useful is known so far.
Any other combination involving Spazer+Plasma
Effect: simply crashes the game. Thus, only these three glitched beams are known.
Technical details
The game processes the list active beams in a function at position 0x90aece:
$90/AECE 08          PHP
$90/AECF C2 30       REP #$30
$90/AED1 A9 12 00    LDA #$0012
$90/AED4 8D DE 0D    STA $0DDE
$90/AED7 AA          TAX
$90/AED8 BD 40 0C    LDA $0C40,x
$90/AEDB F0 0A       BEQ $0A    [$AEE7]
$90/AEDD FC 68 0C    JSR ($0C68,x)
$90/AEE0 22 E9 81 93 JSL $9381E9
$90/AEE4 AE DE 0D    LDX $0DDE
$90/AEE7 CA          DEX
$90/AEE8 CA          DEX
$90/AEE9 8E DE 0D    STX $0DDE
$90/AEEC 10 EA       BPL $EA    [$AED8]
$90/AEEE 9C D2 0D    STZ $0DD2
$90/AEF1 28          PLP
$90/AEF2 60          RTS
This is equivalent to the pseudo-code
for(x=0x12;x>=0;x-=2) {
  if(!$0c40[x]) continue;
  call $0c68[x]
  call $9381e9
}
where $0c40[x] stores two bytes of data per active beam shot x, and $0c68[x] stores a set of function pointers which handle particulars for shots of that kind. These tables are computed based on the formula
$0c68[x] = charged ? $90ba3e[2*beam.L] : $90b963[2*beam.L]
$0c40[x] = $0000[(charged ? $9383c1[2*beam.L] : $9383d9[2*beam.L])+ 2*dir + 2]
where beam=$0c18=(beam.L,beam.H) is a two-byte variable with the bits (0000psiw,000c0000), where c=charged, p=plasma, s=spazer, i=ice and w=wave (so if you equip plasma and wave, it would be p00w=9), and dir is the direction you're shooting in, taking the values (0=UUR,1=UR,2=R,3=DR,4=DDR,5=DDL,6=DL,7=L,8=UL,9=UUL) (UUR indicates shooting straight up while facing right, etc.).
Since you're not supposed to be able to equip plasma and spazer at the same time, the tables are only dimensioned to handle values of beam.L < 12, while using all the beams allows us to go all the way to beam.L = 15. This makes the game read outside the bounds of the tables. If we ignore the unglitched beams from now on, $0c40[x] will take on the values
         U   UR    R   DR    D    D   DL    L   UL    U
0ps00:  8e77 8e8b 8e9f 8eb3 8ec7 8ec7 8edb 8eef 8f03 8e77
0ps0w:  8f17 8fa3 9027 90ab 8f1f 8f1f 8fa3 9027 90ab 8f17
0psi0:  912f 912f 912f 912f 912f 912f 912f 912f 912f 912f
0psiw:  9153 91df 9263 92e7 915b 915b 91df 9263 92e7 9153
cps00:  9ebb 9ec7 9ed3 9edf 9eeb 9eeb 9ef7 9f03 9f0f 9ebb
cps0w:  9ebb 9ec7 9ed3 9edf 9eeb 9eeb 9ef7 9f03 9f0f 9ebb
cpsi0:  9f1b 9f27 9f33 9f3f 9f4b 9f4b 9f57 9f63 9f6f 9f1b
cpsiw:  9f87 001e 9fbf 0008 a007 0008 a039 0000 a06b 012c
while $0c68[x] is will be
0ps00: 3920   cps00: 1cad
0ps0w: b0ac   cps0w: 0a0a
0psi0: ad16   cpsi0: 0a0a
0psiw: 0dc2   cpsiw: a4aa
The first table explains why the murder beam must be fired to the left: In that case, $0c40[x]=0, and the loop body is skipped. And that's where all the really interesting stuff happens. For the glitched beams, $0c68 contains nonsensical values, which we then treat as memory addresses for code to execute! For the three "standard" glitched beams, we have
Murder beam (cpsiw)
Jumps to $90a4aa (ROM) (but only if not fired to the left. Otherwise nothing happens here). This is half-way through some other function, which due to an extra PLP instruction fails to return properly, leading to the function failing to return properly, and almost certainly leading to a crash. What happens depends on the direction the beam was fired in, as well as the controller input for that frame, and lots of other stuff on the instruction pointer's wild romp through the ROM. That makes this a promising avenue for exploits.
$90/A4AA 30 1C       BMI $1C    [$A4C8]
$90/A4AC CD 99 9E    CMP $9E99
$90/A4AF 10 17       BPL $17    [$A4C8]
$90/A4B1 AD FA 0D    LDA $0DFA
$90/A4B4 29 00 FF    AND #$FF00
$90/A4B7 09 01 00    ORA #$0001
$90/A4BA 8D FA 0D    STA $0DFA
$90/A4BD A5 8F       LDA $8F    Controller button pressed this frame!
$90/A4BF 2D B4 09    AND $09B4
$90/A4C2 F0 04       BEQ $04    [$A4C8]
$90/A4C4 22 BC 98 90 JSL $9098BC
The intial value of A no longer matters at this point.
$90/A4C8 AD 1C 0A    LDA $0A1C
$90/A4CB C9 81 00    CMP #$0081
$90/A4CE F0 39       BEQ $39    [$A509]
$90/A4D0 C9 82 00    CMP #$0082
$90/A4D3 F0 34       BEQ $34    [$A509]
$90/A4D5 80 00       BRA $00    [$A4D7]
$90/A4D7 A5 12       LDA $12
$90/A4D9 F0 1A       BEQ $1A    [$A4F5] Perhaps
$90/A4DB AE 96 0A    LDX $0A96
$90/A4DE AD 94 0A    LDA $0A94
$90/A4E1 C9 01 00    CMP #$0001
$90/A4E4 D0 0F       BNE $0F    [$A4F5]
$90/A4E6 BD 14 A5    LDA $A514,x
$90/A4E9 29 FF 00    AND #$00FF
$90/A4EC F0 07       BEQ $07    [$A4F5]
$90/A4EE A9 2F 00    LDA #$002F
$90/A4F1 22 49 90 80 JSL $809049
$90/A4F5 AD D0 0C    LDA $0CD0  =0000
$90/A4F8 C9 3C 00    CMP #$003C
$90/A4FB 30 12       BMI $12    [$A50F]
$90/A4FD A5 12       LDA $12
$90/A4FF D0 0E       BNE $0E    [$A50F]
$90/A501 A9 04 00    LDA #$0004
$90/A504 8D 6E 0A    STA $0A6E
$90/A507 80 06       BRA $06    [$A50F]
$90/A509 A9 03 00    LDA #$0003
$90/A50C 8D 6E 0A    STA $0A6E
$90/A50F 20 40 90    JSR $9040
$90/A512 28          PLP This messes up the stack!
$90/A513 60          RTS Will return somewhere crazy
Spacetime beam (0psi0)
Jumps to $90ad16 (ROM). This also jumps into the middle of a function (actually into the middle of a STA instruction, turning it into a harmless CMP ($7e,x) the first time through):
$90/AD12 B7 00       LDA [$00],y
$90/AD14 9F C0 C1 7E STA $7EC1C0,x
$90/AD18 E8          INX
$90/AD19 E8          INX
$90/AD1A C8          INY
$90/AD1B C8          INY
$90/AD1C C0 20 00    CPY #$0020
$90/AD1F 30 F1       BMI $F1    [$AD12]
$90/AD21 60          RTS
with y=$0c40[x] (and x still being the loop counter in the loop at the beginning of this section) (actually $0c54 looks like it might affect this). For this beam, y always starts out with the value 912f (see the $0c40-table above), so this will essentially do (notice that the loop won't stop until long after y has overflowed)
memcpy(0x7ec1c0+x+2,*(int24*)0+y+2,0x6eef)
so it will overwrite the RAM range $7ec1c2:$7f30b1, shifted by up to 12 bytes up depending on the value of x, with values pulled from an area determined by the value of the first 3 bytes in memory. This will clobber palettes, status bar tilemaps, various vram-related stuff, explored locations, events, collected items, opened doors, map stations, PLM-related stuff, including PLM Goto Instruction Pointer ($7edebc-$7edf0b) and half of the bytes for the current room's tilemap (see the RAM map). The event-related stuff is what allows this glitch to make the bosses come back to life, or make the planet blow up. But even more interesting is the PLM goto instruction pointer part, which could potentially be used to gain control if the right values could be copied over.
Chainsaw beam (0ps0w)
This jumps to $90b0ac (ROM), among a group of functions that actually have to do with handling beams (the wave beam handling is just beyond the end of this code block).
... $90/B0A9 22 AC 9C*94 JSL $949CAC We enter at the "*" $90/B0AD 60 RTS-- $90/B0AE BD 04 0C LDA $0C04,x $90/B0B1 29 F0 00 AND #$00F0 $90/B0B4 F0 05 BEQ $05 $90/B0B6 22 B7 AD 90 JSL $90ADB7 $90/B0BA 60 RTS $90/B0BB 20 57 C1 JSR $C157 $90/B0BE 22 AC 9C 94 JSL $949CAC $90/B0C2 60 RTS
Since we enter half-way through an instruction, the JSL and RTS change into
$90/B0AC 94 60 STY $60,x
which will overwrite any of addresses $60-$72 (depending on x). According to the RAM map, this could affect values that will be written to some color-related registers later. But otherwise, the chainsaw-beam seems to end up executing a valid beam or projectile handling routine. This one has little potential for arbitrary code execution.
Nonstandard glitched beams
But in addition to these "standard" glitched beams, there are 5 other glitched beam combinations. And unlike the the former, the latter all results in jumps to RAM. That is why they almost always end up crashing the game. But since RAM is variable, and to some extent controllable by the player, this means that one could potentially coax the game into running something useful instead of crashing.
Let's look at these nonstandard glitched beams:
Tile beam (0ps00)
Jumps to $903920 (RAM). This is part of the layer 3 tilemap, and varies from room to room, though many rooms don't use it, and leave it unchanged. Tiles tend to come in repetitive patterns, so it might be hard to get useful bytes here, but it still deserves further investigation.
Charged tile beam (cps00)
Jumps to $901cad (RAM). This is the position in the room of the PLM in slot 38. I've only seen this change when clearing a large number of blocks with a power bomb, but it deserves further investigation.
Uncharged murder beam (0psiw)
Jumps to $900dc2 (RAM), the beam charge counter, a 16 bit number which takes the values 0-120. But since this is an uncharged shot, our range is restricted to 0-60 (i.e. up to 0x3c). It is followed by a 16 bit number containing a block index. This index is written to during Samus' collision detection, and hence reflects her position. This is a very promising beam for taking control!
Charged space-time beam (cpsi0) and charged chainsaw beam (cps0w)
These jump to $900a0a (RAM), which is Samus' super missile count, followed by her power bomb count, selected item, etc. These all take one a relatively wide range of values, and are directly controllable by the player!
Executing arbitrary code (total control)
Several of the glitched beams make the game execute RAM as code, giving us some partial ability to execute code of our own choice. For example, with the charged space-time beam (the most promising one, control-wise), the game will execute the number of super missiles as code. In ram, these and the following addresses are laid out as
                           Typical range
a0a  num super missile low    00-32
a0b  num super missile high   00
a0c  num power bomb low       00-32
a0d  num power bomb high      00
a0e  selected item low        00-05
a0f  selected item high       00
a10  samus x-direction        {04=left,08=right}
a11  samus movement type      {0=stand,1=run,2=jump,3=spin,4=ball,5=crouch,6=fall,8=airball,e=turn,f=morph,17=airturn,1b=spark}
a12  health low               00-ff
a13  health high              00-05
So we have 1/5 of the total instruction set to choose from (values 00-32, based on the max number of super missiles one can normally get). The only somewhat usable instructions in this range are ORA, TSB, ASL, BPL, TRB, JSR, BIT, AND, ROL and BMI, out of which only the subroutine call JSR really does anything, considering that the next byte is 0, preventing all the Bxx conditional jumps from working). Starting at a14 is a range of zero bytes that will be interpreted as BRK (hang the CPU), making this section is a dead end anyway, so JSR seems like the only sensible choice here.
The machine code for JSR is 20 (which is 32 as a decimal number), so to perform this jump, our current number of super missiles must be 32. JSR takes a two byte argument, which in this case is (target.L,target.H) = (sm.H,pb.L). Since we have less than 256 super missiles, the high byte of the super missile count will be 0, so our control of where to jump to is quite limited, and completely controlled by our number of power bombs. Possible target addresses are $0000, $0100, ..., $3200, which are all in RAM.
How to choose where to jump? Unless one plans to continue to flit around memory in a permanent search for manipulatable bytes to execute, it's necessary to jump somewhere much more controllable than normal gameplay variables. The most promising address range is $4218-$421f: The joypad auto-read registers. These are not real RAM addresses, but provide an interface to the joypad input which updates once a frame. This auto-polls 4 joypads each of which has 2 bytes worth of buttons, for a total of 8 freely choosable bytes in a row. And if that isn't enough, we can update them all each frame.
Sadly $4218 is doubly out of range - the low byte isn't zero, and the high byte is higher than 0x32. So we can't jump there directly. We first need to jump to some other memory location, and then jump to the controller registers using one of the long-range jump instructions JMP (4c,5c,6c,7c,dc), JSR (20,22,fc) or BRL (82) to get the rest of the way.
While we have 51 memory addresses to choose from, most of these are poorly known and/or hard to manipulate. Two areas are promising though:
$400: OAM
$400 is in the middle of OAM memory, which contains screen-relative position and tile information for all the active sprites. In particular, starting at $400 we have [x y ? ?] for one sprite, followed by a similar 4-byte record for another one. Since the positions are screen-relative, we can basically freely choose the first two bytes. That reduces the problem to finding a sprite with the right 3rd byte. This simple-sounding situation is complicated by the game rearranging the OAM table for every frame, making it difficult to get the correct sprite with the right position in the right slot at the right time. To end up at the auto-read registers, we want something like
          x  y  ?
$90/0400 4C 18 42    JMP $4218
or
$90/0400 82 15 3E BRL $3e15
etc.
$b00: Samus and screen related stuff
The memory at $b00 is laid out as
b00 height       stand=(15,ORA,A),jump=(13,ORA,A),aimdown (0a,bad),crouch=(10,BPL,nop)
b01 00
b02 coltype      L=BRK, R=ORA, U=COP, D=ORA, so R or D are OK,  though both modify A.
b03 00
b04 x_screenrel low  practically any value
b05 x_screenrel high nonzero only if Samus is off-screen
b06 y_screenrel low  typically between 2c and c0
b07 y_screenrel high
The low bytes of Samus' screen-relative position can be chosen very freely just by moving about in a room, but the high bytes are usually zero, which limits where one can jump from this location. However, by going out of bounds (for example by firing the normal uncharged space-time beam), the high bytes can be made arbitrarily high. It is therefore feasible to make $b04-$b06 take on any values, for example
$90/0B04 4C 18 42 JMP $4218
which would jump to the auto-read registers. This requires going 24 screen-widths off-screen.
A detailed example
This video uses the charged space-time beam to jump to the joypad auto-read registers using the OAM method in the green pirate room in Crateria (it's certainly possible many other places, but the details will change from room to room). The space pirates' beams (or perhaps the pirates themselves while firing) have a third OAM byte equal to 3e at least some of the time, making the BRL approach mentioned above possible with the right positioning (the object must be near the middle of the screen (0x82), close to the top of it (0x15-0x1a)). In this case, uncooperative OAM lead to y-position 0x19 being used, so we jump to $421c.
The input loop
Once in position in the input registers, we must secure our position by creating a loop (entry point marked by *):
 4218        <-+
 4219          |
 421a          |
 421b          |
*421c          |
 421d          |
 421e BRA 80   |
 421f f8  f8 --+
That leaves us 6 bytes for other purposes. However, in order to do anything interesting, we will need to change the values of these registers for the next frame (by changing which buttons are pressed), and this does not happen instantaneously. And even if it did, we wouldn't know where in the loop we are at that point. So we need a way to wait long enough for the registers to have updated. Masterjun suggested a simple way of doing this: Activate some huge DMA transfers. These will pause the CPU while in progress, and can easily last for several frames. By virtue of the way we got here, the accumulator and x/y registers are all 16 bit, and A contains the value 9f33. Writing this to $420b (the DMA activation register) will start 6 maximally-sized DMA transfers, but 3 of these will be killed by the HDMA we start at the same time (due to A being 16 bit), leaving 3. These transfers take a whole 6 frames to execute, which is more than enough to get our new inputs in place before the next instruction executes. Incorporating this, we get
 4218 STA 8D
 4219  0b 0b
 421a  42 42
 421b NOP ea
*421c NOP ea
 421d NOP ea
 421e BRA 80
 421f f8  f8
By the time we get to the NOPs, 6 frames will have passed and all these registers will be updated with our new inputs. From this point, one has a stable, changeable loop, and full control over the game.
The demonstration video goes on to make the loop a bit more efficient by switching the accumulator to 8-bit mode, and using X and Y to write to the DMA register, leaving us with 4 free bytes per iteration:
 4218 STY,x 94
 4219  00   00
*421a
 421b
 421c
 421d
 421e BRA   80
 421f f8    f8
From there, it writes 0x26 to the game mode variable at $998, and returns control to the game (after removing the charged space-time shot and cleaning up the stack a bit). A game state value of 0x26 means that the game has been won, and the game dutifully fades out into the ending sequence.
Faster input
For a bigger payload, the auto-read joypad registers are too slow. The loop above achieves on average 1-2 bytes per frame worth of instructions, which is horribly slow. Thankfully, there are also the manual joypad registers at $4016-$4017, which can be polled many times per frame.
Specific Boss Tricks
Bomb Torizo
You can escape Torizo by the use of shoulder pumping, walljump trigger pickup and very precise positioning.
The door timer (RAM address 7EDE6A,1u), before it starts the countdown, oscillates between "1" and "2" each frame. Depending on what the value is by the time of triggering the bombs, you'll get either 41 or 42 frames to escape once you regain control. You need 42 — it will not work with 41.
Then, you should pick up the bombs by using the walljump check, meaning you have to press away from them at the maximum possible distance (horizontal position 180.xxxxx is recommended). Picking up the bombs farther than 180.65535 will put you at 180.65535 regardless; this is the best you can hope for.
You should land immediately after you take the bombs. Ideally, you should have only one frame of air movement before you land. You can check it by pressing and holding shoot button before the control over Samus is regained: if she still has time to unspin before landing, try to take the bombs lower.
Upon landing, start running with 30 Hz shoulder-pump immediately, and jump at the last possible frame that allows you to clear the corner and get stuck in the door. If you get stuck at horizontal position of 28.0, everything is alright. If more, something is wrong.
After you succeed in getting 28.0, just load a state at the moment of the final jump and press away from the door when you come close enough to it (usually less than x=36.0). If everything is alright, you'll catch the trigger before the door slams shut.
TODO: Port Kriole's method here, since it's faster and easier to do.
The trick also works on the PAL version, but due to differences in event timing, you have much greater margin of error. It apparently is enough to be feasible on console (although still requires very good timing).
Spore Spawn
Spore Spawn only needs to be fought to get Super Missiles. By getting them in the first room on the right in green Brinstar (by using the mockball or shoulder pumping), this mid-boss becomes useless. Even the Super Missile expansion that Spore Spawn was supposed to guard can be collected by entering the chamber through its exit with an appropriately timed Super Missile, or by using the Crystal Flash in the chamber.
Kraid
Kraid can be killed before fully coming out of the ground with four super missiles or three super missiles and one missile. If you move forward during the last shot, the projectile will connect with Kraid faster, resulting in a faster kill. A charged Wave+Plasma shot can also speed up the battle if Kraid is fought after Draygon.
Note that the screen will not fully scroll if Kraid is killed during the first phase, but leaving the room through either door will fix this.
Crocomire
Saving Crocomire until after you get the plasma beam makes the fight a breeze. One charged Ice+Wave+Plasma shot will hit him enough times to send him crawling all the way back into the lava.
Phantoon
Phantoon can also be hit more times than normally allowed by using the Doppler effect — running forward very slowly (see "stutter walking" under
Charge shinespark in shorter distance) while constantly firing missiles. With enough missiles (and one super missile at the end), Phantoon can be killed in one round.
In fact, as much as a single missile pack is enough for the task.
Botwoon
10 super missiles will take down this miniboss, but four can be substituted by using a Wave SBA. Both techniques allow killing him in one round under TAS conditions, however only the latter allows the same in realtime play.
Draygon
Draygon is a unique boss in the way that he takes damage from Samus during a shinespark — 150 damage per frame (as much as 2400 damage can be delivered in a single charge). Using this property, Draygon can be killed in two rounds by combining Wave SBAs and shinesparking through him, with super missiles used as necessary.
Draygon can also be killed quickly by abusing the X-Ray Scope together with the Plasma beam, which, however, requires you to obtain Plasma before killing Draygon, which may be infeasible in a speedrun.
Finally, if Draygon is killed via shinespark, the variable that determines whether or not Samus is "blue" is not reset. In this state, a new shinespark can be charged simply by ducking. The drawback to the blue suit is that it is lost by pressing the dash button. In the existing runs on the site, the blue suit glitch is used to shinespark along the top of the large room just two rooms outside Draygon's lair.
Golden Torizo
Each charged plasma shot can register two hits if Samus is ducking nearby and shooting straight up (press L and R at once to do so). During one of the Torizo's jumps, the beam will register two hits with just an up-angled shot.
Keep in mind that Golden Torizo is able to dodge regular missiles and catch supers. While the latter can be bypassed by spamming them while he prepares to throw the caught missile back, the former can be used to temporarily interrupt his attacks.
However, if you aren't going for 100% item collection, it is advisable to simply skip this fight. It's possible (and is even faster) to take Screw Attack from behind, anyway.
Ridley
When Ridley's health hits 0, he will die the next time he grabs you, but you often have to wait for his AI to decide to do so. Placing a power bomb will instantly cause Ridley to attempt to grab Samus, however, allowing you to end the fight quicker.
On the other hand, you don't have to be grabbed if you don't want to: Ridley will still die all alone after several seconds.
Mother Brain
The Mother Brain fight is divided into three distinct phases, each with separate energy count:
- First form — 3000 energy units. Harmless by itself. Requires breaking the glass before the actual damage can be dealt. When energy reaches zero, the room is locked in a single screen.
- Second form — 18000 energy units. The fastest way to deal with this form is shooting charged Ice+Wave+Plasma. Murder beam is slower both in-game and in realtime. When energy reaches zero, Mother Brain starts shooting the beam that drains Samus's ammo and energy, which initiates the metroid cutscene.
- Third form — 36000 energy units. The damage is dealt as soon as the energy count is reset, if any of the methods listed below are used. When energy reaches zero, Mother Brain dies.
It is possible to have Mother Brain's energy drained away right at the start of the third phase while Samus is supposed to be uncontrollable; it requires shooting the Murder beam right before Mother Brain delivers her last beam attack. After you acquire the Hyper Beam, it will take only 1-2 shots to finish her off.
Note that, while this method is preferred if you're aiming solely for lower in-game time, it is much slower (and uglier) in realtime due to heavy lag and having to enter the menu at least once.
With enough energy, it is also possible to retain control of Samus during the metroid cutscene. All that is needed is having 700 to 999 energy (must be current energy, not in reserves) and de-equipping the Varia Suit before Mother Brain uses her final attack. The game will still attempt to put Samus into the kneeling pose a few times during the cutscene, but this can be circumvented by being in mid-air each time the game attempts to enforce Samus's pose.
Even with the metroid on you, you can still attack Mother Brain by firing point blank. However, the metroid stops following Samus as soon as she has full health, though it will teleport to her again when Mother Brain attacks it.
TODO: add an SMV demonstration.
Malicious bugs and glitches
While Super Metroid has an enormous amount of useful bugs and glitches, some of them should be avoided as they can interfere with the play, crash the game, or have other unwanted effects.
Springball lock
If you morph in midair instead of on the ground or through mockball, you lose the ability to control the height of a springball jump. Even if you unmorph during such jump, Samus will continue rising. It has no known benefits as of now — thus, springball jumps should only be done after prior mockballing.
Shinespark glitches
(AKA "Things not to spark into".)
There are several objects and environments that do not cope too well with Samus's ability to shinespark. They include:
- Lava and quicksand
Effect: Samus will move at a pathetically low speed (about 0.11 px/f) with her energy drained as usual, until she runs out of it (then the game might crash regardless). Note: the speed will vary depending on how deep Samus is submerged (compare: the same lava demo, but two pixels higher).
- Mother Brain
Effect: energy depleted at a very fast rate.
Effect: game crashes.
Mechanics of the in-game timer
(paraphrased from moozooh)
Super Metroid keeps track of completion time to display upon completion of the game. The timer does not run at all times, however. The main goal of the in-game timer is to measure the length of the actual play, as opposed to sequences that do not involve input.
The in-game timer stops for the following:
- Door transitions
- Item acquisition message boxes
- Frames of lag
- Pause screens (but ONLY after complete fadeout; thus, it is impossible to save any time by pausing)
- Ceres station exploding animation
The in-game timer does not stop for the following:
- X-ray scope
- Elevator rides (except for small portion)
- Refilling energy from reserve tanks (when done without pausing)
- Refilling energy in Samus's ship
- Crystal flash
Due to the nature of the timer, aiming for the fastest frame count does not always coincide with aiming for the fastest in-game timer. There are several techniques that can lower the in-game timer while raising the frame count, such as:
- Taking routes which have more door transitions, but are shorter within the rooms
- Pausing to disable certain upgrades for sequences that may be faster without them
- Performing lag-causing actions that would be faster (in real-time) if lag were removed (such as the Murder Beam)
- Entering doors at a different height, which will cause the screen to move the door to its appropriate spot before scrolling
Opposite actions can be taken to have the reverse effect on the timers. The main point is that both timers cannot be satisfied simultaneously in all circumstances. This raises the question, "Which one do I use when making a TAS?" The answer is that it is up to the author's preference.
Aiming for frame count exclusively
Aiming for frame count gives more consistent, but less varying and overall slower action.
| Benefits | Drawbacks |
|---|---|
| Less non-action sequences | Slowest action sequences |
| Less time spent collecting items | Less items available to vary technique |
| Little to no laggy scenes or menu entering | Lag and menus are not "free" options |
| Shorter door transitions | Optimizing screen scrolling is a concern (if your position at the moment of entering the door is shifted from the center of the screen, it will take much more time to catch up) |
Aiming for in-game timer exclusively
Aiming for in-game timer gives more waiting, but faster and more varying action.
| Benefits | Drawbacks |
|---|---|
| Fastest action sequences | Longest in realtime |
| More items, which allows more variety in technique during play | More non-action sequences |
| No concerns about using menu screen (that is, as much as needs be) | More visually redundant scenes ("menu action", etc.) |
| No concerns about minimizing lag | More laggy scenes |
Many authors choose to do a combination of the two timing methods. For example, one author might aim for frame count, but not take extra time to optimize door transitions because he or she thinks it looks sloppy. Another author may aim for in-game timer, but avoid entering the pause menu when unnecessary because he or she thinks it disrupts the flow of the run.
It's up to each author to decide what they feel will make the most entertaining TAS.
Useful memory addresses
More memory addresses can be found at Kejardon's RAM Map.
| Address | Parameters | Meaning |
|---|---|---|
| 7E0AF6 | 2 bytes, unsigned | Horizontal position |
| 7E0AF8 | 2 bytes, unsigned | Horizontal sub-pixel position[4] |
| 7E0AFA | 2 bytes, unsigned | Vertical position |
| 7E0AFC | 2 bytes, unsigned | Vertical sub-pixel position |
| 7E0B00 | 1 byte, unsigned | Vertical hitbox radius |
| 7E0B42 | 1 byte, unsigned | Horizontal speed[5], pixels |
| 7E0B44 | 2 bytes, unsigned | Horizontal speed, fraction of a pixel |
| 7E0B46 | 1 byte, unsigned | Horizontal momentum[6], pixels |
| 7E0B48 | 2 bytes, unsigned | Horizontal momentum, fraction of a pixel |
| 7E0B2E | 1 byte, unsigned | Vertical speed, pixels |
| 7E0B2C | 2 bytes, unsigned | Vertical speed, fraction of a pixel |
| 7E0B3F | 1 byte, unsigned | Speed boost level |
| 7E0A68 | 1 byte, unsigned | Shinespark charge timer |
| 7E0DC2 | 1 byte, unsigned | Beam charge counter |
| 7E0CCC | 1 byte, unsigned | Weapon cooldown timer |
| 7E0BDC | 2 bytes, signed | Projectile 1 X speed, 1/256th pixels[7] |
| 7E0BF0 | 2 bytes, signed | Projectile 1 Y speed, 1/256th pixels |
| 7E0B64 | 2 bytes, unsigned | Projectile 1 X position, pixels |
| 7E0B8C | 2 bytes, unsigned | Projectile 1 X position, fraction of a pixel |
| 7E0B78 | 2 bytes, unsigned | Projectile 1 Y position, pixels |
| 7E0BA0 | 2 bytes, unsigned | Projectile 1 Y position, fraction of a pixel |
| 7E0BDC | 2 bytes, unsigned | Projectile 1 X speed, 1/256th pixels |
| 7E0BB4 | 2 bytes, unsigned | Projectile 1 X hitbox radius, pixels |
| 7E0BC8 | 2 bytes, unsigned | Projectile 1 Y hitbox radius, pixels |
| 7E0C86 | 1 byte, unsigned | 1st bomb timer |
| 7E0C88 | 1 byte, unsigned | 2nd bomb timer |
| 7E0C8A | 1 byte, unsigned | 3rd bomb timer |
| 7E0F8C | 2 bytes, unsigned | First Enemy's (Most Bosses) energy |
| 7E0FCC | 2 bytes, unsigned | Second Enemy's (Mother Brain) energy |
| 7E0F9C | 1 byte, unsigned | First Enemy's (Most Bosses) invincibility timer |
| 7E1842 | 2 bytes, unsigned | In-Game frame counter[8] |
| 7E09DE | 1 byte, unsigned | In-Game Minutes |
| 7E09DC | 1 byte, unsigned | In-Game Seconds |
| 7E09DA | 1 byte, unsigned | In-Game Frames |
Notes
[1]: Can this be applied horizontally (except on moving wrecked ship robots), may be a faster way to skip the Zebetites.
[2]: How fast must you be falling, does it vary?
[3]: Is this optimal? Maybe laying the bombs earlier so that you have a greater average speed is best [4]: Samus's position and speeds are tracked down to 1/65536th of a pixel, although the effective values are all multiples of 256, ±1.
[5]: Speeds and momentums are unsigned. Regardless of which direction Samus is moving, these are always positive.
[6]: Momentum and speed together determine how far Samus moves per frame. Momentum often must reach 0 before Samus can stop or change direction.
[7]: This value increments by 1 for each frame that counts toward the in-game timer, and wraps at 65536. Useful as a frame-counter when measuring by in-game time rather than absolute time.
[8]: Add 2 to the address to get the next projectile's data. Bombs count as projectiles 6-10. Super missiles use up two projectile slots, but the second projectile used can be ignored.
Fun stuff
- Dying in Ceres: contrary to the popular belief, it is possible to die that early in the game before it has a chance to blow the station up. Provided by P.JBoy.
- Super Metroid Inanity: series of funny glitches involving Mother Brain. By Kejardon.
Contributors
This page is a collaborative effort of the following people:
See also
- Game Resources - we have resource pages for other games too!
- Common Tricks - tricks common to many games
- Boss Fighting Guide - tricks specific to boss fights
GameResources/SNES/SuperMetroid last edited by adelikat on 4/15/2024 9:41 PM
Page History Latest diff List referrers View Source