The time has come to make this happen. I'm posting what I have here about the mechanics of this game. PJ and I did a speedrun of this at AGDQ and we later got a 21:59 in real time. We can apply some of our strategies here to TASing and hopefully produce something that's optimized and entertaining.
Note: RAM Addresses are in the format that SNES9x uses. BizHawk of course will be used for the actual TAS.
Difficulty Differences:
The main differences between easy and normal are the bomb count. Each character starts with one bomb on normal and no bombs on hard. Certain enemy attacks inflict more damage on hard and some minor enemies (but not bosses) have more health on hard. The difficulty differences are very minor and the ending is the same. I'm on the fence considering the normal difficulty for the TAS as opposed to Hard.
Character Differences
As far as I can tell both characters have the same movement and slide speed. The differences between characters involve their charged up B attacks and Bomb attacks.
Charged up B
Pocky: Pocky will spin rapidly and this can be used to continue moving forward while blocking many enemy attacks. If a shot hits at the right angle, this attack can be interrupted.
Rocky: Rocky will turn into a statue (think Mario 3) and will be completely invulnerable. The statue slightly damages enemies, but the animation is too long to be used effectively in a speedrun. It can be used for entertainment in several places, particularly stage 4's auto scroller
Bombs
Pocky: Pocky's bomb starts as a small cloud and then splits off in 4 directions rapidly.
Rocky: Rocky's bomb starts as a slightly large cloud and then envelops most of the screen. It can be used to deal much more damage.
Sliding - Sliding is much faster than walking. Normally, you can slide every 51 frames. Your character ends the slide and gets up before the game allows for another slide. If you take damage midslide it cancels the standing up animation and it allows you to slide again.
Double Dash - When Pocky and Rocky dash into each other, they both start sliding around the screen and bounce off walls. During this time they are invulnerable to all damage except for things that would crush them (like the barrels and spiked balls in stage 5).
Firing Weapons
-----------------
Shot Canceling - The rate at which characters fire is tied into the animation where they move their arms back and forth. Your character fires as the arm moves forward. The shot is released just before the arm reaches head level and your character does a follow through motion with the arm. By pressing forward in the direction that the character is facing on certain frames you can cancel the follow through animation and fire more frequently. This can be manipulated to get a character to shoot at up to double speed.
Shot limit - There is a shot limit of 6 shots on the screen at once.
Upgrades
----------
Blue powerups give you a spread shot while red power ups give you a fire shot.
Pocky's Weapon's health
7E00E7
Rocky's Weapon Health
7E00E9
When you collect a power up the value will be:
2 at first powerup
6 at second power up
10 Third Power Up
Value is subtracted by 1 when you take damage, though falling off of things subtracts more
0 No weapon
1-3 First level weapon
4-7 Second Level Weapon
8-10 Third level weapon
0 Basic Weapon
1-3 First Level Weapon
4-7 Second Level Weapon
8-10 Third Level Weapon
Damage
---------
16 - Card/Leaf/Fire Shot - Note: Your A/Y button attacks all do the same damage. The spread shots and upgraded fire all do the same damage as regular shots
4 - Magic Wand/Tail Wag
32 - Sending objects/ attacks back at enemies - Wagging certain projectiles and even enemies will do 64 damage to things that they hit.
64 - Respawning animation - If your character loses a life and respawns 64 damage is instantly dealt to everything on screen. You also get this if you fall off a cliff and come back
200 - Bomb Damage per frame - Bombs deal 200 damage for every frame that an enemy is vulnerable and within the range of the bomb. In practice, I've been able to get
Side notes on Spread/Fire
Spread: Due to the invlunerability window, a volley of spread only damages a single enemy once
Fire: Level two and level three fire shots split off when they hit enemies. The splitoff does 16 damage to anything it hits. Fully upgraded fire will splitoff and continue along until it hits enemies. Against enemies that have larger hitboxes, the fire split off can damage the same enemy allowing two hits per shot. This mechanic makes it easy to optimize damage against large enemies. Fire should be used carefully because the splitoff makes shots take longer to exit the screen (interfering with the shot limit) and the splitoff also gives fire a greater tendency to lag. The split is useful for damaging enemies otherwise out of reach and can be used very effectively against the stage 2 bamboo mid boss.
Invulnerability Period - Enemies with health can only be damaged once every 4 frames. This mechanic seriously hampers the effectiveness of upgraded weapons and makes two player damage a lot less useful.
Lag Management
-------------------
Lag management will be critical for TASing because this game can lag a lot as more enemies and shots are on the screen. When possible to do efficiently, it can be faster to stop and kill enemies. Other sections may be better to double dash or slide through. I'll have more on this as I continue TASing, I'm sure.
Item drops
------------
There are presents throughout stages. Some have fixed drops, some have random drops. For random drops, they tend to change on what I believe is every other frame.
Barrier: Barriers will provide protection for two hits. They are used up quickly if you make physical contact with something. They can also be useful because when taking damage they negate knockback.
Sage Patterns
------------
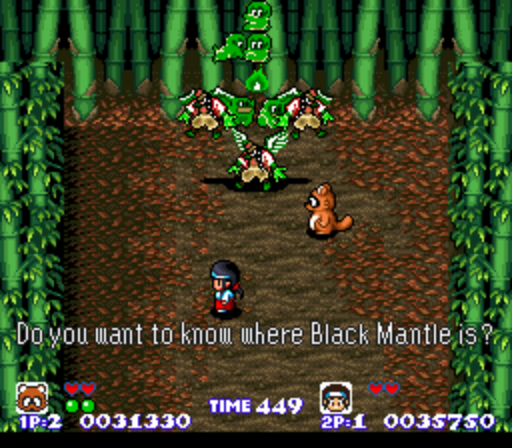
This is perhaps the most important thing to optimize. Bombs are game breaking and so it's critical to get as many as possible. With the exception of stage 5, every stage has a bomb in a present, getting more bombs greatly speeds up boss fights. At the beginning of every level a cut scene is played. Pressing start advances the cutscene. While I don't fully understand the game's RNG, pressing start on a particular time during this cut scene will determine what sage you get for the next stage. The address below and its value will determine if you've manipulated the sage correctly. The Mandalin lady drops a bomb and a "dog" which can provide invulnerability that is useful for stage 5, but relatively useless for most of the other stages. The other bomb sages drop barriers.
Sage Address 7E1050
(P) Indicates the Sage will drop power ups
(B) Indicates the Sage will drop a bomb
Knight 00 (P)
Fisherman 01 (P)
Mandalin Lady 02 (B)
Old Man with Fan 03 (P)
Old Man with Cane 04 (B)
Reclining Man 05 (B)
Man with hat and mushroom 06 (P)
Kitty 07 (Not used in rotation)
===================
Enemy Boss Health
===================
First Boss
7E1F18 Value 2048
Cyclops
7E1898 Value 1024
Bamboo Mid Boss
7E1D18 Value 1792
Second Cyclops
7E1C18 Value 1024
Raft bomb thrower
7E1818 Value 2048
Second Boss
7E1F18 Value 1280 128 per cycle
==============
Stage Three
First Phase Boss fight
7E1F18 Value 1280
Genie Fight
7e1818 Value 1536
Second Phase Boss Fight
7E1F18 Value 1664
Stage 4
Cloud
7E1818 Value 384
Boss
7E1F18 Value 2048
Stage 5
Boss
7E0FAE
7E1F18 Value 32767 - begins second phase at 322239 (I don't fully understand the mechanic here)
Second phase 1536
======================
Stage 6
Armor Boss
7E1F18 Value 2560
Black Mantle
7E1F18 Value 4096
Note: Normally Black Mantle is only vulnerable after one statue is destroyed. He may be damaged for approximately a second at the very beginning of the fight.
Left Statue
7E1F38 Value 640
Right Statue
7E1F58 Value 640
So I haven't posted in a while, but I'm still working on this. I've completed stage 1 so far and if anyone has any suggestions I'd love to hear it.
In stage 1 you can start to see the double dash in action. The pause before the next double dash is intentional. It is done to manipulate a skeleton in the bridge area near the sage to disappear. This instantly allows me to trigger the sage and setup the next double dash. I also showcase what I call the zombie hover where when a player only has 1 heart left you can keep sliding over and over again.
https://dl.dropboxusercontent.com/u/3677753/Pocky%20%26%20Rocky%20(USA).bkm
Done on BizHawk 1.4.0
With the boss, I didn't think that it was possible, but Rocky's bomb was able to do 2000 damage leaving the boss with only 48 health.
Not sure if it's available to lurkers, but if it is you could try using the TASVideos userspace. http://tasvideos.org/userfiles/my#uploadfile
Also, do you have a powerful enough computer to do your own encodes? If so, could you provide one? My laptop is sufficiently old that I can't power SNESHawk to 60fps.
It looks pretty good so far. But man, you weren't kidding about lag.
Going into my opinion for a sec: I think games of this sort are a lot more entertaining when they slow down a bit and slaughter everything in sight. Trading speed for entertainment is...well, maybe not common, but a lot less frowned upon since the three-tier publication system was implemented, and with the tier system, TASVideos is just as focused on entertaining as it is on record-keeping. Don't know how much of this you already know, but I've seen you at a couple of SDA's marathons, and I know they're focused on speed above all else.
To close this out, here's a minor optimization trick you seem to have overlooked: since the game counts down your health for bonus points, and you're taking damage to save time anyway, try to end each stage with both characters health as low as you can get it. It won't save too much time, but it'll probably be something.
Hey thanks for the feedback. I totally didn't think about the heart countdown. Rocky's health would've been at one heart had it not been for the unfortunate tea pickup which I couldn't avoid. Thanks for catching that. A few double dashes before the boss fight starts will take care of that.
For this particular run I am definitely going for speed. I feel like most of the entertainment value will be to show off how broken the double dash mechanic is and how broken the bombs are. Killing enemies with frame perfect precision is something that I'll be including in stage 2's autoscroller. For stage 1 I was able to do a little bit of that in the bridge. I couldn't do that with the skeletons because they take 6 hits to kill and have 4 frames of invincibility after each hit. The first part of stage 1 just lags so badly that it's not an ideal candidate. The card/leaf with no upgrades is also just a really slow way of taking out enemies. The fastest way to deal with lag is utlimately to just double dash out of the areas that cause it.
Also, do you have a powerful enough computer to do your own encodes? If so, could you provide one? My laptop is sufficiently old that I can't power SNESHawk to 60fps.
Hey, just putting out what I know:
Back in 2007, there was a playlist of 6 videos on Youtube of a Japanese player who speedran this game (1-player on Normal), but it seems that the videos have been deleted. And at the moment, I can't remember the name of the author.
I remember the run being quite impressive (...but I was pretty noob to the game back then). IIRC, I think it was also no damage, though.
Anyways, this is the forum post I had found it from and the speedrun video that was deleted. From some searching, I've found what appears to be therestofthevideos...that were deleted.
If anyone's able to find a mirror of the run, it may be interesting to see what the run did, and maybe you can also get/learn something out of it.
Edit: Also, on the forum thread I linked to, someone mentioned this:
On hard, Japanese version plays at a faster rate, gives you two lives and one bomb at the start, and has a max bomb capacity of 3.
So, take note that Hard appears to be different in the Japanese version. It may be of interest to run this category.Edit #2: Err whoops, actually just read page 2 of that forum topic and realized he was comparing a Japanese cart to a PAL cart - where the latter is 50FPS and not 60FPS, which is what led the poster to believe the J version was faster.
I also tried comparing Hard between the US and J versions; and at least from the 1st stage, everything appeared to be the same.
So nvm :\
Joined: 7/14/2014
Posts: 57
Location: Kansas City, MO
Anyone still working on this?
I'm thinking about giving this a shot as my first TAS since I'm already familiar with the title (and its sequel) and it's not terribly long. Between everything I've read/watched here and my own venture into the game (~2700 frames and counting), a well-made and entertaining TAS feels attainable.
Definite kudos to Mr_K for the info provided here (and on the co-op w/ PJ run comments over at SDA), it's been immensely helpful in getting started on this game. The only discrepancy I've run into so far is the sage value memory address.
The memory values per sage and the RNG occurring before the start of each level match my observations, but unless my newbishness is causing me to miss something here, the 7E1050 address doesn't look like the right location. I see it go to 15 every time on the first level (regardless of cutscene skip point and resulting sage type), go to 0 as the boss fight starts, and then remain unchanged as the second level starts. I haven't checked it later in the game yet, but I'm guessing it won't be helpful there either.
Unfortunately I have yet to find another location that holds a value like that (or one it may be derived from), but I did find these:
7E120C - active sage value - gets set one frame before the sage appears and is reset to 0 when the sage starts to despawn
7FF200 - similar to the above address but gets set one frame before it and persists until another sage appears or the stage ends
I'll still keep looking periodically, but for now I can get by with manually delaying the cutscene skip and just seeing which sage pops out when the level is run.
One other thought for now:
Dashing a character into the other one while they're standing triggers an individual version of the double dash (provided they have hearts to spend) which I'll just call "super dash" for now. In doing so, the first dash is canceled. If you dash again in the same direction very shortly afterwards (about 3 frames IIRC), you wind up going through the other player and recover on the other side of them while they're still super dashing in the same direction. Basically, this can propel you forward (albeit at a sub-optimal speed) with damage/invulnerability super dash business covering your rear. This definitely isn't a trick for speed (unless you push the other person with no hearts to spend like Mr_K's video), but could provide some good entertainment value if used in the right places.
Current Project: Pocky & Rocky (SNES) improvements
Status: Stage 2 - fighting the octopus
Frames improved so far: 577
The memory values per sage and the RNG occurring before the start of each level match my observations, but unless my newbishness is causing me to miss something here, the 7E1050 address doesn't look like the right location. I see it go to 15 every time on the first level (regardless of cutscene skip point and resulting sage type), go to 0 as the boss fight starts, and then remain unchanged as the second level starts. I haven't checked it later in the game yet, but I'm guessing it won't be helpful there either.
The impression I get from a description like this is that the memory value (or a block containing it) is dynamically allocated per stage, so you should look for places in memory that hold 7E1050 or any value closely lower than it, and see which of said places in memory change when you change the stage. If so, you've found a 'pointer' that will tell you where it's moved to.
Joined: 7/14/2014
Posts: 57
Location: Kansas City, MO
Patashu wrote:
The impression I get from a description like this is that the memory value (or a block containing it) is dynamically allocated per stage, so you should look for places in memory that hold 7E1050 or any value closely lower than it, and see which of said places in memory change when you change the stage. If so, you've found a 'pointer' that will tell you where it's moved to.
Good point (no pun intended), I have yet to dive into the likes of pointers for this game or the SNES in general. Will most certainly have to track down some reading material. That said, the value held within 7E1050 isn't of any use to us with regards to sages AFAIK (on account of 15 being outside the 0-7 sage value range and never changing with RNG), so even if we did know what pointed to it, it likely wouldn't help.
After some further experimentation though, I think I might have at least found the RNG pattern:
7E0002 (1-byte) is part of a 2-byte frame-based counter and it spins through 0-255 repeatedly during the cutscenes (among other places). After you provide input to skip the cutscene, it will stop 4 frames/increments later. If you divide that final number by 8, you get a remainder equal to what the upcoming sage *should* be.
For example, you hit start on a frame where 7E0002 is 79. The counter will finish incrementing on 83. 83 mod 8 = 3 = Old Man with Fan.
I said "should" earlier because it appears there might be level-specific exceptions to which sages are available. Here's what I've been able to confirm so far:
Stage 1: 0-6 match perfectly and Mandolin Lady (2) fills in on 7
Stage 2: 0-3 match perfectly, but you're stuck with Mushroom Guy (6) on 4-7
EDIT: Stages 1 and 3-5 are all the same. There is no sage AFAIK in 6.
Since 7E0002 resets and resumes at the start of the level, I'm inclined to believe the stage's sage value (by way of that timer value or some mathematical equivalent) is still out there somewhere... just not sure where yet. I'm hoping it's just a matter of time at this point.
Mr_K wrote:
The pause before the next double dash is intentional. It is done to manipulate a skeleton in the bridge area near the sage to disappear. This instantly allows me to trigger the sage and setup the next double dash.
I was a bit worried about executing this in my own run since my 2nd double dash, while being executed in a similar manner, had a different setup and marginally different location/timing. I kept getting all four skeletons over and over and even came up with a way to work around them, but it wasn't pretty. After trying a few different setups and bumping the execution frames around, I actually lucked out with a relatively minor variation on my original/preferred routine. The correct skeleton disappeared and all was well. This really is a critical trick.
After comparing our videos, my best guess at this point is that a well-timed lag frame during fast movement and/or crowded sequences is the cause. The lag frame will hit and skeleton tries to appear at the edge of the screen for the next ~2 frames, but nothing comes of it. I think I've seen similar occur during unrelated testing to other enemies and even some projectiles (generally while solo dashing), so perhaps there is even more potential for this to be abused throughout the game.
Current Project: Pocky & Rocky (SNES) improvements
Status: Stage 2 - fighting the octopus
Frames improved so far: 577
Joined: 7/14/2014
Posts: 57
Location: Kansas City, MO
Finished Stage 1 last night. Feel free to let me know if you have any feedback or suggestions.
Link to videobk2 file
Notes:
The first vertical stretch and double dash are fairly straightforward. Minimal kills will cost lag frames, but enough of the enemies spawn late to the point where it seems like you're better off just dashing through.
The first double dash is pretty forgiving and leaves plenty of room to fine-tune how the characters exit it (who's in front, how far apart, etc.) simply by when Pocky starts her half of the dash.
As I mentioned previously, the actions taken on the way to the 2nd double dash don't seem to impact your ability to skip the spawn of the 3rd skeleton adjacent to the sage. Rocky had some frames to spare, so I went ahead and killed the umbrellas that spawn from the well.
From the sage until the stage starts moving vertically again is a positively brutal area in terms of optimization. You're juggling enemy manipulation and sage manipulation while trying to work yourself into a very precise position to avoid the first sage item drop (for minimal health bonus time), grab the second (bomb), and get ready for the next double dash, which is the least forgiving of the stage. If you kill too many skeletons, more will spawn and you'll get wrecked with even more lag frames during the double dash (we're talking a good ~45 additional frames here). Unfortunately I still wound up with a few more lag frames than Mr_K during this sequence (likely on account of a skeleton spawning difference which I haven't figured out yet), but found a more favorable dash path.
The threshold to move the stage vertically again is surprisingly far to the right. Even with as far as my double dash made it, I still had to spend a few frames sending Pocky over to trigger it.
The "zombie hover" pointed out by Mr_K is a really potent move. The player being pushed is essentially executing a brief super dash (complete with invulnerability and damage dealing) and the player doing the pushing gets their dash canceled for free. What's not to love?
Considering how fast the zombie hover goes, you can easily outpace the screen. Unfortunately, I don't think it's possible to get past the leading edge, as the game seems to treat it like an invisible wall (won't stop me from occasionally trying though). If you bump the other player into it, they'll bounce off at a 135 degree angle. This is also why you can't just double dash directly forward.
As an alternative to repeatedly zombie hovering one player, you can have both players dash into each other and both will bounce off in the same manner. This may not seem nearly as helpful, but since characters will bounce in the direction opposite their dash and they can collide while dashing in the same direction (if executed simultaneously in very close proximity), you can actually bump both characters forward at the same time. Again, this isn't the fastest way to move (since you'll move backwards for a few frames first), but it's stylish and occasionally helpful if the screen is still trying to catch up to you. I use it twice in the video.
Boss strategy is essentially the same, though getting full damage out of the bomb required much more precise positioning and timing than I expected.
Current Project: Pocky & Rocky (SNES) improvements
Status: Stage 2 - fighting the octopus
Frames improved so far: 577
This looks great! I love the 1up race at the end. Hahaha. It's so cool to see some of the double dashes Mr. K and I came up with for real-time runs being used in the TAS. ^_^ Can't wait to see the other stages!
That was awesome! Nice use of the double dash and zombie hover, and all the entertainment you did during and after the boss was perfect!
For hard-to-optimize parts like the horizontal section in this level, I recommend giving it a few good tries and then moving on with your best attempt. One annoying section isn't worth losing your motivation for the whole run.
Joined: 7/14/2014
Posts: 57
Location: Kansas City, MO
Thanks for the encouragement! Time has been a little scarce the last few days, but I've managed to figure out a solid route to the first cyclops so far. Once I get the two double dashes leading up to him optimized to my liking (they're very nearly there, but wow that vertical section is a pain to cleanly bounce through), the rest should progress smoothly. That, and I'm really hoping my ideas for some fun on the raft work out like I think they will.
PJ wrote:
It's so cool to see some of the double dashes Mr. K and I came up with for real-time runs being used in the TAS. ^_^ Can't wait to see the other stages!
Your co-op video has been an excellent point of reference so far. I'll still be making improvements where I can, but you can certainly expect to see a few more of those dashes (or something very closely resembling them) being put to use in the stages to come. The setup and resulting path on some of them are too good to pass up.
CoolKirby wrote:
For hard-to-optimize parts like the horizontal section in this level, I recommend giving it a few good tries and then moving on with your best attempt. One annoying section isn't worth losing your motivation for the whole run.
Yep, that's more or less how I'm going to be approaching this one. I'm trying to get this to be as perfect as possible, but from that area I quickly realized that crunching through all of the possibilities to find the ideal combination of lag reduction and speed in several areas of this game is going to take an inordinate amount of time. I figure that part will be best left to future revisions after I get a competent baseline run completed.
Current Project: Pocky & Rocky (SNES) improvements
Status: Stage 2 - fighting the octopus
Frames improved so far: 577
I'm looking forward to this run, hope i can find some stuff i can use for future RTA's although im running Solo%. Not sure if this will help you in any way since youre probably going to kill all bosses with bombs, but the lich looking creature on stage 3 is manipulateable and does his attack based on your position.
Joined: 7/14/2014
Posts: 57
Location: Kansas City, MO
Go home bamboo boss, you're drunk.
It seems you can deny the game from switching the boss's sprites over to the appropriate set by constantly spamming it with changes to both player sprites (like tapping a direction every other frame). Time to see how far I can take this without sacrificing the integrity of the run.
Current Project: Pocky & Rocky (SNES) improvements
Status: Stage 2 - fighting the octopus
Frames improved so far: 577
Joined: 7/14/2014
Posts: 57
Location: Kansas City, MO
Very nearly done with stage 2. The raft segment has lived up to my expectations for the most part and should be a fun watch. I've finally got the bomb thrower down (which took more time and restarts to choreograph than I'd care to admit), so all that's left are a few token enemies and the main boss.
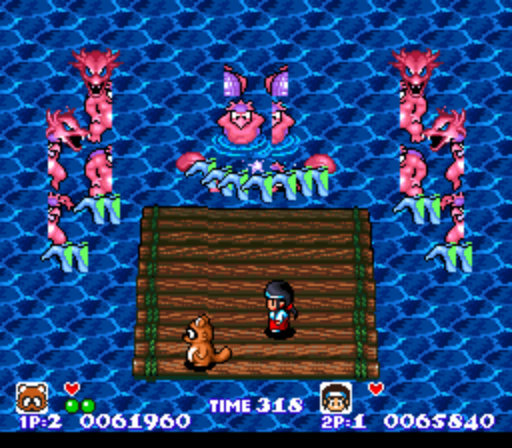
Also, while messing around during a break from the run, I tried the same sprite load delay glitch on some other bosses and, well, you can see for yourself below.
I'm guessing this will work on any boss or miniboss that has a full intro (music, text, 10+ lag frames to load, etc.) at this point. I'm tempted to do it on every boss possible in this run (excluding the first for various reasons) provided I can keep it from becoming stale. I'd like to get some thoughts on this from the stage 2 video once I'm done with it.
Akisto wrote:
I'm looking forward to this run, hope i can find some stuff i can use for future RTA's although im running Solo%. Not sure if this will help you in any way since youre probably going to kill all bosses with bombs, but the lich looking creature on stage 3 is manipulateable and does his attack based on your position.
Thanks. The guaranteed bomb availability and double dashes will keep much of what I'll be doing here irrelevant in solo RTA but hopefully I can provide some useful technical info as I go along. I'll include anything that might come to mind as I upload each level.
Current Project: Pocky & Rocky (SNES) improvements
Status: Stage 2 - fighting the octopus
Frames improved so far: 577
You may as well do it as often as possible if it doesn't waste time! If people want to see the game as intended, that's what longplays are for, after all.
Basically for me to beat my own Solo run i need to get atleast 3 Bomb sages, i get that about once per 10 runs, yesterday however i managed to get 4 but i failed on Stage 5 bigtime and i'm experimenting with a new strat of using a bomb on the first boss. if i could get bombs on all 4 stages(excluding 3rd) i should be able to cut 21, if i manage to get a Dog on Stage 4+5 especially 5 it would save hell alot of time. Not sure if i mentioned this as well
The Lich on Stage 3(mini boss) i don't know if you'll use bomb on him but his movement/use of weapon is manipulateable by the position of your character, i can force him to do a really good pattern
Joined: 7/14/2014
Posts: 57
Location: Kansas City, MO
Realized part-way through the stage 2 boss that I can actually cut down the total number of cycles, so that's being re-recorded now. Explanation and some maths ahead for those that are interested. If not, just wait for the video :-) I figure better to type this out now than in the already lengthy notes I have to go with the video of this stage.
The stage 2 boss has 1280 HP and goes through a 300+ frame period (longer if there's a wait between cycles) of invincibility/absence that starts immediately after you do 128 damage or more. The keyword here is "or more", so to surpass 128 damage and try to get this done in fewer than 10 cycles, you'll want to get as close as possible to that number then land one final hard hit.
In theory, this means the most damage you can do per cycle is 324:
12 melee damage (3 hits) + 112 projectile damage (7 hits) = 124 (just under threshold)
124 + 200 damage from a bomb = 324
However, considering the scarcity of bombs and their effectiveness on other bosses, this would be a massive waste.
Sticking to 3 melee + 8 projectiles alone unfortunately won't cut it. It stops just shy of saving a cycle and actually is worse off than a normal projectile-only kill. It's 140 damage per cycle and will save you 6 shots on the final one (~30 frames), but in total you're actually LOSING frames by doing all of that melee (~135 frames).
So where else can we look? As it turns out, we'll need to think outside the raft. If you run a character off of the raft and drown, they'll drop back on and do 64 damage (which ignores enemy invincibility frames) as part of respawning. This happens regardless of fully dying or just taking damage. By combining 3 melee, 7 projectiles, and 1 fall, we're up to 188 damage per cycle.
If we stick with that all the way through:
1092 -> 904 -> 716 -> 528 -> 340 -> 152 -> 0
That's 7 cycles! Compared to a projectile-only kill, it does incur some frame costs by way of melee and one character being preoccupied with drowning. If one character is handling both melee and projectile attacks, they're too close to the edge to move cancel every shot. If you have one character do melee and then jump off the edge right before the other does the projectile attacks, you will have to wait for the respawn animation (which can take ~100 to ~220 frames depending on whether or not you fully die).
I haven't yet crunched the numbers on these costs, but I'm pretty sure that the savings (3 cycles / ~1000 frames) should more than make up for them.
Beyond that, there's still a little more optimization to be found. Considering that there is only 152 HP to burn through on the last cycle as shown above, we can skip the melee hits on some cycles altogether (for 176 damage per cycle). After doing the math, the optimal combination is as follows:
4 cycles * (3 melee + 7 projectile + 1 fall) = 752 damage
3 cycles * (7 projectile + 1 fall) = 528 damage
752 + 528 = 1280 = dead boss
The only downside at this point is the cost of dying. The number of lives spent depend on how much health you have.
Both characters at full or nearly full health (4.5 - 5 hearts) = 1 life
Both characters low on life (0.5 - 2 hearts) = 3 lives
Anything in-between = 2 lives
Fortunately, I don't think there is anywhere else in the game where completely dying is beneficial, much less in a way that would save as many frames as it does here. My current route has me in the 3rd category (for various entertainment reasons), so here's hoping that leaving only one life in reserve doesn't come back to bite me later :-)
~~~~~~~~~~~~~~~~~~~~~~~~
What does this mean for RTA?
If you're running co-op, you could easily coordinate 6 cycles of 7 shot + 1 fall and save 2 cycles. Number of saved frames will be substantial but also depend on how well you can coordinate the respawn damage timing. Again, losing lives would be the only potential downside here.
If you're running solo, there are gains to be found, but they're much smaller and much more difficult. Full death respawns take too long to be beneficial, so you're basically limited to two non-death respawns (assuming full health). Unfortunately two falls will still put you 32 damage away from saving a cycle, so melee would be required. If you can pull it off (which won't be easy), the net gain would likely be ~150 frames at most.
Current Project: Pocky & Rocky (SNES) improvements
Status: Stage 2 - fighting the octopus
Frames improved so far: 577
i will look into this as i play solo, however you will always die atleast once on stage 5 to dboosting, i've managed to get to the end of room 1 with half a health once with the perfect monster movement RNG, but I am likely to die on the last boss unless i get the TOTAL perfect Sage RNG and get a bomb from every sage that will make me have 3 bombs for the last boss, unless you figure out a way of killing the last boss with 2 bombs in a perfect position i really need 3 and then i have figure out a way of sometimes mitigating the damage if youre lucky you can tailswipe mantra during his lightning phase and if he is on a really good position you can damage him withotu taking as much damage(you negate the damage from the lightning a bit as well lol)


 Go home bamboo boss, you're drunk.
It seems you can deny the game from switching the boss's sprites over to the appropriate set by constantly spamming it with changes to both player sprites (like tapping a direction every other frame). Time to see how far I can take this without sacrificing the integrity of the run.
Go home bamboo boss, you're drunk.
It seems you can deny the game from switching the boss's sprites over to the appropriate set by constantly spamming it with changes to both player sprites (like tapping a direction every other frame). Time to see how far I can take this without sacrificing the integrity of the run.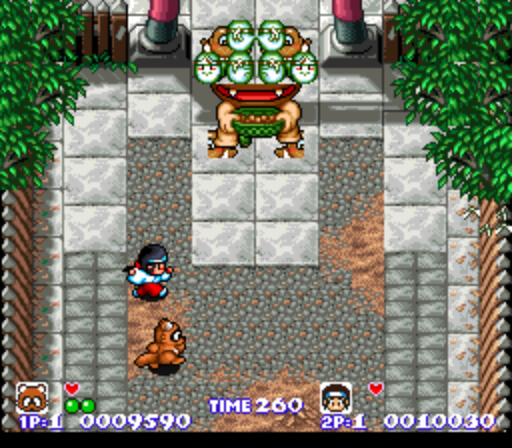
 I'm guessing this will work on any boss or miniboss that has a full intro (music, text, 10+ lag frames to load, etc.) at this point. I'm tempted to do it on every boss possible in this run (excluding the first for various reasons) provided I can keep it from becoming stale. I'd like to get some thoughts on this from the stage 2 video once I'm done with it.