Paper Mario: The Thousand Year Door any% in 2:22:25.58 by Malleo
Overlay and Audio Commentary: https://www.youtube.com/watch?v=CguPESVuZ3Y
No Overlay or Commentary: https://youtu.be/kNaokSKIsd0
Subtitles: https://www.mediafire.com/?ck64la1btdy16v6
Game Overview:
Paper Mario: The Thousand-Year Door is an RPG developed by Intelligent Systems and is the second game in the Paper Mario series following Paper Mario for the Nintendo 64. It incorporates a world made of paper and turn-based battles, much like its predecessor. In it, Peach asks Mario to help find a treasure hidden in Rogueport. When he arrives, she is missing as usual, and he must collect 7 Crystal Stars to save her and open the Thousand-Year Door to collect the treasure.
Except, Mario is tired of Peach getting kidnapped, so he decides to skip 4 of the 7 Crystal Stars and rescue Peach in only 2 hours.
To sync the run:
- Emulator used: Dolphin 4.0-3741
- Idle Skipping Off
- Dual Core Off
- DSP LLE Recompiler
- No Memory Card
Objectives:
- Aims for fastest time
- Manipulates luck
- Takes damage to save time
- Major Skip Glitch
- Abuses programming errors in the game
- Genre: RPG
I use the Japanese ISO with the MD5 checksum:
bec52fb8c1912bc6f8014801b6281422
Overview:
Welcome to my first second third fourth -fifth Tool-Assisted Speedrun of this game. TTYD has come a long way as a speedrun. Ever since CoolKirby’s, Masterjun’s, and my first TAS of this game (link), there have been many new glitches found: Fish Glitch in the first TAS; Bookcase Jump, UHE and the Chapter 2 retrigger in the second TAS; Yoshi Skip and Teleporter Room Early in the third TAS (unpublished); and finally Bobbery Early in the fourth TAS. This new find pretty much trumps all others. At the end of the last TAS’s submission text, I explained how there was really one major glitch left that would save a large chunk of time. That major glitch has been found by SolidifiedGaming, Really_Tall, and myself: This is Palace Skip.
Addresses
| Name | Offset |
|---|---|
| X-Pos | aff6ec |
| Y-Pos | aff6f0 |
| Z-Pos | aff6f4 |
| RNG | 4181a0 |
| X and Z Speed | aff7ec |
Explanation of Glitches/Tricks:
Speed Swap
In this game, Mario walks faster when moving up or down compared to moving left or right. The game takes 2 frames to update Mario’s speed normally. By moving up or down for one frame and then jumping in any direction, Mario maintains his greater speed value. Jumping on the first possible frame when landing from a jump maintains this speed value.
Walking Speed Swap
Peach and Bowser cannot jump during their intermissions. Therefore, they can’t speed swap the same way that Mario constantly does. You can move up or down for a minimum of 2 frames and walk in any direction for the next 14 frames with the increased speed value. I occasionally use this method with Mario to cover more distance wherever jumping doesn’t cover enough distance to reach a loading zone optimally.
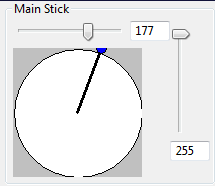
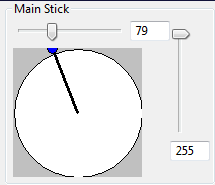
Wall Boosting
As Mario, you can push against walls for a small speed boost. The optimal angle is 79 or 177, where 79 represents slightly left/downward and 177 represents slightly right/upward. https://i.gyazo.com/581624f2a3c2952bfea005f48592cf7e.png
https://i.gyazo.com/af1577663429019377bb303456e360e7.png
While on Yoshi, it is most optimal to push at an angle of 82 or 174.
Prologue Staircase Skip
After the Goomba Trio fight, you can skip waiting for the platform to the pipe by jumping from the second stair on the left. This isn’t possible before the fight due to the presence of an invisible wall that goes away after the fight.
Plane Panel Edge
Using the plane ability on the edge of a panel causes the game to think Mario is no longer on the panel when his hitbox value changes. Since the game thinks I’m not above the plane panel, Mario can dip down faster behind or in front of the panel, allowing him to gain speed earlier.
Goombella Buffer
Using Goombella and then moving 3 frames later allows Mario to ignore all loading zones while moving for one frame. This is used in the Shhwonk Fortresses and Hooktail’s Castle in Chapter 1 and in the Great Tree in Chapter 2. A variation of this trick is required for Palace Skip, explained below.
Shhwonk Fortress Skip
Using the Goombella Buffer explained above, Mario can get out of bounds. There are no invisible walls surrounding the loading zone out of bounds, so Mario can maneuver around the seam of the room and reach the right side to trigger the loading zone and skip the fights in both of the fortresses.
Switch Pausing
There is a one frame window in which you can pause when landing on a switch. After closing out of the pause menu, there is a two frame window in which you can jump in any direction without the normally slow bounce off of the switch. This allows me to enter Hooktail’s Castle without using Koops and activate some blocks without the use of Koops.
Hooktail Bridge Skip
Using a speed swap just outside of Hooktail’s Castle on the right side of the left bridge, you can jump right and press up near the end of your jump to clip up onto the right side of the bridge, skipping the use of a Plane Panel.
Red Bones Early
There is a 2 frame window to move after activating Red Bones. By jumping one frame after activating Red Bones, the game thinks that Mario's jump is stored next to Red Bones. After Mario gets pushed left by the Dull Bones, there is a small window in which you can jump before your partner begins talking. By jumping during this window and right after activating Red Bones, the game thinks Mario is jumping into Red Bones and starts the fight immediately.
Staircase Room Skip
If you take the purple block up to the lookout in the room to the right, you can Goombella Buffer out of the loading zone, meander around the seam of the loading zone out of bounds, and land back in the room. This skips the cutscene of hitting the switch in the previous room to turn the stairs around to grab the door key. The door becomes unlocked even though we never get the key.
Speed Glitch
This glitch occurs in different ways. The first involves jumping first frame out of a battle while on the ground. The other case of this glitch seems to occur when you jump underneath a low ceiling with odd collision. This glitch results in a speed value of 3, which is a decent amount higher than speed swap.
Unspin Cancelling
On the same frame as you begin unspinning, you can jump. By pressing A while holding neutral on the control stick one frame before landing, and then holding a direction on the next frame, Mario skips the unspinning animation. I am able to speed swap while doing these unspin cancels since Mario can travel at full speed in this glitched state.
Jumping with Koops Active
If you shoot Koops out just barely close enough for him to grab an item, it takes him a few extra frames to grab the item. In those extra frames, you can jump with Mario in any direction. This saves time because you can cover distance while Koops comes back towards Mario rather than standing still.
Paper Mode Cutscene Walks
Mario can walk through certain cutscenes by holding Koops out in front of a switch and letting go of him while holding a direction in paper mode.
Pause Buffering
There is always a one frame window in which you can pause when in contact with an enemy. Doing so multiple times allows you to pass through enemy hitboxes without getting into a battle with them.
Sort Glitch
By pressing Z in the item menu, you bring up the sort menu. By pressing start along with either up, down, or A, the game closes the menu while sorting the item list. Next time you open the menu, the game still thinks you have the sort menu open. You can use an item while in this menu. Once you start using the item, pressing A will cause the game to re-sort your items. In doing so, it moves your item to the opposite position in the item menu. This confuses the game and causes your item to remain in your inventory even after using the item. This essentially allows for infinite item usage. I use this with a Honey Syrup to continuously regenerate FP throughout the run.
Paper Mode Item Jump
Unspin from paper mode for 1 frame, and then jump and press up on the D-Pad on the next frame. Using an item very soon after this will allow Mario to perform two jumps essentially. This is because when the item gets used, the game resets your Y-speed. Since Mario is constantly jumping due to the pause while jumping and since Mario’s Y-speed resets to 0, the game thinks Mario is on the floor for a split second, automatically causing Mario to do a second jump when the item gets used.
Flurrie’s Room OOB Clip
Going into paper mode behind the third tree from the left and jumping while unspinning behind the tree can cause Mario to get pushed out of bounds. From there, Mario can walk right directly to the pipe. This saves time over walking all the way to the right, going into paper mode, and then going left towards the pipe.
Shadow Sirens OOB Respawn
You can get pushed out of bounds by jumping in between the leftmost tree and the left wall in the room with the Shadow Sirens fight in Chapter 2. Doing so will cause Mario to respawn to wherever he entered the room from, which is to the right. This saves time over having to normally walk all the way right.
Paper Mode Momentum Cancel
Going into Paper Mode right before falling off a ledge causes Mario to lose his momentum. The game then resets his angle to 180.05, meaning that he’ll start moving down. This is only used in Chapter 2 when getting the Power Punch because it lets me get to the bush quicker.
Puni Glitch
The game only checks to see if the Punies are with Mario when he is on the ground and moving away from them. By jumping away from them, then moving towards them for one frame while on the ground, and then jumping away from the Punies, I can trick the game into thinking the Punies are still with Mario. This allows me to skip the Bubble Room puzzle which involves using Flurrie to blow them across the room.
Cage Skip
I can use a Goombella Buffer in the room to the left of the 100 Jabbi fight. From here, I can maneuver out-of-bounds and drop down into the pipe in the room below. This skips a sequence in which the Punies get trapped in a cage and Mario has to get Super Boots to rescue them. Since we skip this sequence, and since Really_Tall found a way to perform Teleporter Room Early without Super Boots, we can immediately go to the Crystal Star room and fight Magnus von Grapple.
Teleporter Room Early
The first part of this trick involves getting a weird Paper Mode glitch. The collision between the pillar and the wall to the right is just far apart enough that Mario can walk through. For some reason, when you go into Paper Mode between these two walls, the collision allows Mario to continue moving at full speed even though he is in paper mode. To get to the next part of this trick, we need to jump up 3 times. Normally if you land while in glitched state, Mario will slow down and unspin from Paper Mode. To avoid this, we perform the unspin cancel glitch after each time we jump. When we enter the bar, the game thinks we are still in Paper Mode. Since walking in Paper Mode is slower than walking normally, Mario’s entry into the bar is slowed down, allowing him to remain out-of-bounds when he stops moving. We can perform a trick called a Flurrie Superslide that will allow us to slide past the Teleporter Room side wall. By pressing X, waiting 3 frames, and then pressing A to open the bar door, Mario will simultaneously begin using Flurrie and enter the bar. Mario is now in a glitched state where he can repeatedly use Flurrie while moving left into the bar. By tapping X a certain number of times, the game redirects Mario’s and Flurrie’s angle to 180,05, sending them both down into the Teleporter Room below. This works because during door transitions, walls are not solid. Since we’re moving with Flurrie during a door transition, the game does not check to see if Mario is going through a wall.
Gold Cannon Skip
Mario’s hitbox while in Paper Mode is just small enough to squeeze in between the Gold Cannons by moving right at first and then slightly up right.
Delayed Goombella Buffer
Normally Goombella will start talking 3 frames after pressing X, but by performing neutral jumps and moving far enough from Goombella, her text box won’t show up for an additional frame. This additional frame allows Mario to activate other things, such as cutscenes, doors, and loading zones.
Text Storage
This glitch requires both an item and an enemy to be in the same room. By performing a Delayed Goombella Buffer into an item, the game will prioritize the item acquisition. In doing so, enemies in the room will stop moving like they normally do whenever you pick up an item. Mario can close out of the item acquisition text box, and due to the additional frame it takes for Goombella to start talking, she begins talking now. Since I closed out of the acquisition text box though, the enemies in the room will start moving again even though Goombella’s text box is up. If the enemy is close enough to Mario, it can start an encounter. By entering the battle and then running from it, Goombella’s text box will remain on screen even though I have control of Mario. This glitch can be duplicated up to 6 more times by performing more Delayed Goombella Buffers into items with an enemy in the room. If you attempt it an 8th time, the game does not open up another Goombella text box, and you are forced to close out of all the text boxes in order to gain control of Mario again.
Yoshi Teleport
If Mario closes out of the text box that is stored, the game resets Mario’s partners to a state in which they can be used again. When Mario does this while Yoshi is out, this will cause Mario to teleport to the Y-position of Yoshi.
Double Jump
After ending a battle, there is a one frame window in which you can perform a jump. This is because right before you gain control of Mario, his Y-speed is set to 0. Because Mario’s Y-speed is 0, the game thinks Mario is on flat ground, allowing him to jump. This is used, but isn’t entirely necessary to perform Palace Skip, which I’ll explain right below.
Palace Skip
This glitch can only be performed in the room right before Gloomtail due to the fact that we need both an item and an enemy in the same room. I can defeat the left Ember and manipulate an item to drop from the battle. Prior to entering this room, I have 10 items already in my inventory. This way, I can perform a Delayed Goombella Buffer into the dropped item and then toss the item away due to the full inventory. This means that the item remains in the room, and I will be able to perform another Text Storage later. I get the first Text Storages by Delayed Goombella Buffering into the dropped item and then getting encountered by the right Ember. While running away from the first fight, it’s important that I press Z while pressing A to run away. Otherwise, the text box would close in the middle of the battle. After getting the second Text Storage, it’s vital that the text boxes do not overlap. What I mean by this is that the two text boxes have to be on different parts of Goombella’s message. Otherwise, one A press will cause both of them to close on the same frame. I have to constantly scroll one text box back while scrolling the other one forward whenever I need to press A. While in the second battle, I switch to Koops and run away. With Koops out, I press and hold X to keep him in an active state. I walk to the left of the room and face right. I release Koops in such a way that he hits the right ember. In battle, I switch to Yoshi and run away.
When partners are so far offscreen, the game likes to respawn them right behind Mario. In doing so, the game places Yoshi to the left of Mario, which is out-of-bounds. This causes Yoshi to fall down for a while. I can perform a Yoshi Teleport by closing the text box from one of the Text Storages. Mario teleports to Yoshi’s Y-position, which is beneath the floor. In any other room, Mario would fall far a while until the game respawns him back in the room by the door since he entered from there. Conveniently, there is a spring loaded below this room. It may seem really odd to have a random spring out-of-bounds, but it is actually part of the room below, even though the rest of the room isn’t loaded. Most people don’t realize that the hallways leading up to Gloomtail are actually in the same area as the last couple of rooms before Grodus’s Lair. These rooms are only normally accessible when the staircase drops after completing the Riddle Tower.
After hitting the spring, I can maneuver Mario so that he lands on the seam of the room. I walk to the right for a bit until I get close to the Ember. I perform neutral jumps to the right to get farther away from Yoshi. On my last neutral jump, I hold down for a bit and then hold back up to barely make it back on the seam of the room. This is significant because partners like to follow Mario’s movement. Because of this, Yoshi will walk right for a bit and then fall off since Mario held down for a bit mid-jump. This sets me up for another Yoshi Teleport. I hold up until I am in the center of the room and very close to the Ember. I close the text box very early in Yoshi’s fall. If you close the text box earlier in Yoshi’s fall, this causes you to teleport to a higher position relative to the first Yoshi Teleport that got me out-of-bounds. By performing a Yoshi Teleport that causes Mario to float just underneath the floor, I can first strike the Ember. Normally you can’t first strike enemies while on Yoshi, but Mario is in a weird state where he’s moving with Yoshi but floating above him. If you were to hit the ember without first striking him, Mario’s Y-position decreases significantly, but the game slows down Mario’s animation when first striking enemies. This means that by first striking the Ember, I barely lose any height once I enter the battle.
After running from the battle, I can perform a Double Jump while holding up. This allows me to jump just barely underneath the floor. Just like the spring, the loading zone for the key to Grodus’s Lair is actually loaded at all times. I land from my Double Jump into this loading zone. The key to his lair updates the game’s sequence position, meaning the game now thinks I’m past Riddle Tower. This causes the invisible room below the Ember fights to appear, allowing me to get to Grodus’s Lair.
Summarized Route
SP=Star Points
I = Items
C = Coins
FP = Flower Points
Prologue
- Lord Crump [9SP]
- Fright Mask for Goomba Trio [95C][1I]
- Fright Mask for Sun Stone Fuzzy fight [90C][2I]
- Fright Mask for Power Rush battle in CH1 [85C][3I]
- 7 Fright Masks for Chapter 3 fights [50C][10I]
- Free Mushroom gets stored
- Request contact
- Robbed for half your coins [25C]
- Goomba Trio Fight w/ Fright Mask [10SP][9I]
- Fire Flower from block for Blooper [10I]
- Plane ability
- Equip Power Smash
- Blooper Fight w/ Fire Flower [30SP][9I]
Chapter 1
- Close Call for Shadow Queen fight
- Fire Flower for Moon Stone fight [10I]
- Moon Stone Fuzzy battle w/ Fire Flower [46SP][9I]
- Manipulate HP Drain from Fuzzy battle for Golden Fuzzy [10I]
- Sun Stone Fuzzy battle w/ Fright Mask [47SP][9I]
- Gold Fuzzy battle w/ HP Drain [69SP][8I]
- Get Multibounce
- Fire Flower and Mystery on the way to Hooktail’s Castle [10I]
- Paratroopa fight w/ Fright Mask for Power Rush [70SP][9I]
- Get Power Bounce
- Red Bones Fight w/ Fire Flower [103SP](Level up FP to 10) [8I]
- Get Attack FX R after Paper Mode
- Unequip Power Smash, Equip Power Bounce, Attack FX R
- Hooktail [134SP]
- Get Mushroom when returning to Sewers for PMIJ
- PMIJ with Mushroom to TTYD Room
Chapter 2
- Honey Syrup when walking right [9I]
- Paper Mode Item Jump in room with plane panel
- Clip oob to Flurrie’s house
- Get P-Down D-Up P
- Paper Mode Cutscene Walk the plane panel switch to skip cutscene
- Shadow Sirens battle w/ Mystery and Earth Tremor [170SP][8I]
- Clip oob and respawn to the right
- Get Flurrie
- Enter Great Tree
- Gale Force first X-Naut battle [180SP][6FP]
- Power Bounce X-Naut in Key Room [185SP][3FP]
- Power Punch when returning to entrance [9I]
- Get 11 Punies
- Sort Glitch to use and keep Honey Syrup
- Gale Force X-Nauts in Bubble Room [195SP][4FP]
- Coin block [26C]
- Cage Skip with Goombella Buffer
- Gale Force on X-Nauts [205SP] (Level Up BP to 6)[0FP]
- Equip Power Rush
- Magnus Von Grapple [237SP][8I][4FP]
- Get into danger
- Power Punch on Mario
- Power Bounce x9
- Power Bounce x8
- Use Honey Syrup to PMIJ to TTYD Room and SORT GLITCH to keep it [9FP]
- Sell P-Down D-Up P [126C]
- Buy Power Rush [91C]
- Buy Contact Lens [81C]
- Buy Dried Shroom and Dizzy Dial [67C][10I]
- Buy Mega Rush [7C]
- Equip Mega Rush, Power Rush #2
- Get Blimp Ticket
Chapter 7
- TRE w/o Super Boots
- Read Red Note to advance game state to CH7
- Grodus Room Key
- Elevator up to Sublevel 1
- Quiz: 3,4,2,3,1
- Back down to sublevel 2
- Tile Room on left
- Elevator down to sublevel 3
- Tile Room on left
- Gear Room on right
- While in pause menu, sort glitch
- Paper Mode Item Jump in Gear Room with Dried Shroom
- Magnus von Grapple v2.0 [277P][3FP]
- Get in peril
- Power Bounce x7
- Power Bounce x7
- Fourth sublevel for TEC
- Second sublevel for Teleporter Room
- Unequip Power Bounce, Equip Multibounce
- Hammer Bro for Mega Rush [299SP][1FP]
- Go to Glitzville
Chapter 3
- Bypass the guard by the minor league door
- Fright Mask Goombas - [300SP][9I](Level Up BP to 9)
- Multibounce KP Koopas - [306SP][8FP]
- Fright Mask Pokey Squad - [307SP][8I]
- Multibounce Dull Bones - [313SP][6FP]
- Fright Mask Spike Storm - [314SP][7I]
- Fright Mask Bandits - [315SP][6I]
- Fright Mask Mind-Bogglers - [316SP][5I]
- Fright Mask Punk Rocks - [317SP][4I]
- Fright Mask Bombs - [318SP][3I]
- Hammer Bro for Mega Rush [340SP][4FP]
- Unequip Multibounce, Equip Mega Rush #1, Mega Rush #2, Power Bounce, and Close Call
- Get Gradual Syrup and Slow Shroom [5I]
Chapter 8
- Stop Watch in Staircase Room [6I]
- Shooting Star [7I]
- Boo Sheet in Fire Bar Room [8I]
- Dark Bones [438SP][0FP] (Level Up FP to 15)
- Gale Force
- Ultra Shroom [9I]
- Jammin’ Jelly [10I]
- Ember Battle
- Left battle for 12SP [445SP]
- Palace Skip
- Grodus [486SP][12FP]
- Get into Peril
- Use Yoshi to kill Grodus X
- Power Bounce x4
- Bowser and Kammy Koopa [538SP][9FP] (Level Up FP)
- Power Bounce Bowser x4
- Power Bounce Kammy x3
- Shadow Queen [543SP]
- Power Bounce x7 (7DMG)
- Get into danger
- Power Bounce x6 (16DMG -> 23DMG)
- Power Bounce x6 (7DMG -> 30DMG)
- Close Call
- Power Bounce x8 (9DMG -> 39DMG)
- End of Phase 1
- Hit SQ with Mario
- Close Call with Mario, kill partner
- Boo hits Shadow Queen
- Hit SQ with Mario
- End of Phase 2
- Get into peril
- Power Bounce x11
Chapter Plots
Prologue
Mario receives a letter from Peach, in which she says she went to Rogueport in search for a legendary treasure. Upon arrival, Mario meets Goombella who is being attacked by Lord Crump and his subjects, the X-Nauts. After running away, Goombella and Mario talk. Mario explains that he’s looking for a hidden treasure, and Goombella decides to join him. Goombella suggests that they visit Professor Frankly, who might be able to offer some more information regarding Mario’s quest. Frankly deduces that the map will guide them towards the treasure. To obtain the treasure, Mario will have to open The Thousand-Year Door with 7 Crystal Stars scattered across the world.
Chapter 1
Mario and Goombella travel to Petal Meadows, the location of the first Crystal Star. They’re immediately frightened as a large dragon flies across the screen towards a castle in the background. Upon entering Petalburg, the nearby village, Mario and Goombella learn that the dragon, Hooktail, has been terrorizing the villagers. In order to access the castle, the Mayor informs Mario that he’ll need to collect the two stones from Shhwonk Fortress. With the Moon and Sun Stones, Mario and Goombella travel towards the castle and meet Koops along the way. In hopes to reconnect with his missing father, Koops obligingly joins. After navigating through the castle, Mario and company make it to Hooktail’s Lair and challenge her to a battle. Mario comes out victorious. Afterwards, they discover that Koops’s father was trapped inside of Hooktail. He’s finally able to escape and reunite with Koops and give Mario the Diamond Star.
In a currently unknown location, Princess Peach realizes she was abducted by a group called the X-Nauts. The X-Nauts notify Grodus that someone has already gotten the first Crystal Star, and Princess Peach accidentally blurts out Mario’s name. Grodus orders the Shadow Sirens to steal the map given to Mario and hunt down the Crystal Stars for Grodus. Peach meets TEC, the main computer in the X-Naut Fortress. TEC is interested in Peach’s concept of love and will let Peach send e-mails to Mario if she teaches TEC about love. At Bowser’s Castle, Kammy Koopa informs Bowser that Peach has been abducted, and Mario is attempting to find all the Crystal Stars and reach the hidden treasure. Bowser and Kammy head to Rogueport to begin chasing down Mario. We return to Mario’s perspective, and Mario and the group are notified that Peach has been kidnapped. They go back to The Thousand-Year Door to reveal the location of the next Crystal Star. They find that the second Crystal Star is in The Great Tree. Upon searching for the pipe, Mario encounters Punio, one of the creatures living in The Great Tree. Punio informs them that the X-Nauts have taken over The Great Tree, so the group decides to help him.
Chapter 2
Inside Boggly Woods, they encounter the X-Nauts, but they don’t recognize him because they lost a sketch of his face. The group sneaks fast them and arrive at The Great Tree, only to find that the X-Nauts have installed a door in the front. Unable to get in, Punio suggests that they search for Madame Flurrie to help find the Tree’s secret entrance. Flurrie explains that she lost her necklace and can’t come outside without it. The group backtracks to the Shadow Sirens who have her necklace. They also find the sketch of Mario that they lost and instantly realize that Mario is standing right in front of them. Mario and company come out victorious and obtain the necklace. They return to Flurrie’s house and give her the necklace. She willingly joins the party and helps them enter The Great Tree.
After defeating two X-Naut guards, a few Punies come out of hiding and talk with Mario and his party. They send the group off to rescue the Puni elder. After retrieving the key from an X-Naut, the Puni Elder gives Mario a Puni Orb that will help him complete certain puzzles in upcoming rooms. The Elder also sends 11 Punies to go with Mario along the way. They defeat a group of 10 Jabbis and retrieve the blue cage key and free the other 90 Punies. With all 101 Punies, they set out to defeat the 100 Jabbi group. Afterwards, they head to the final room in the tree, which holds the second Crystal Star. Unfortunately, Lord Crump beat them to it, and they chase him back to the tree’s entrance. Crump becomes Magnus von Grapple and fights Mario. Mario comes out victorious in the end and retrieves the Diamond Star.
At the X-Naut Base, Grodus is informed that Mario has retrieved the second Crystal Star. TEC asks Peach to dance with her and then lets Peach e-mail Mario. Bowser travels to Petalburg and thinks he found Peach, but it is only a picture of her on someone’s house. When Mario receives Peach’s e-mail, he discovers that the X-Nauts are searching for the Crystal Stars as well.They head to Frankly’s house to learn about the next Crystal Stars location, Glitzville. In order to reach Glitzville, they need to get a Blimp Ticket from Don Pianta. Mario buys a Dried Shroom and a Dizzy Dial in Westside Goods. This causes Peeka Boo to recognize that Mario wants to go see Don Pianta. She unlocks the back door and Mario visits Don. Don asks that Mario looks for Francesca and Frankie. After finding them in the Rogueport Docks, Mario returns to Don Pianta who gives him the blimp ticket. Normally Mario would then go ride the Blimp, but we’ve destroyed the order of events in the game.
Originally, Mario would get to Glitzville and meet Grubba, the owner of the Glitz Pit. They would then fight up the ranks and solve a series of puzzles to get to Rank #1 by beating Rawk Hawk. They also discover that the Crystal Star on the champion belt is a fake, and the real Crystal Star is being harnessed by Grubba. They chase him down and fight him once he transforms in Macho Grubba. Mario wins the fight and takes the Crystal Star. From there, he heads to Twilight Town for the fourth Crystal Star.
Chapter 4, 5, and 6 Plot
So these chapters are cut out due to Palace Skip. Their original plots are as follows:
In Chapter 4, the residents of Twilight Town are being turned into pigs by an evil monster named Doopliss. Mario chases him down, but the monster takes Mario’s identity. Mario meets up with Vivian and team up to hunt down Doopliss and retrieve the Ruby Star.
In Chapter 5, Admiral Bobbery, Flavio’s crew, and Mario all travel to Keelhaul Key. Their boat sinks from a surprise attack and they’re left stranded on the island. Mario rescues Bobbery from two Embers. With the help of Flavio, they enter the Pirate’s Grotto. Mario gets the boat ability and travels to Cortez’s ship. After fighting Cortez, Mario retrieves the fifth Crystal Star. Upon escaping, Mario learns the one of Flavio’s crew members, Four-Eyes, is actually Lord Crump. They fight, but Mario comes out as the winner as per usual. They travel back to Rogueport and learn about the next star’s location.
In Chapter 6, Mario does another favor for Don Pianta in order to get a train ticket. After boarding the train, Mario solves a series of mysteries before reaching Riverside Station. The bridge is up, so Mario goes inside the station to lower the bridge. He completes a series of puzzles and flips the switch after hammering away strange creatures called Smorgs. He boards the train once again and heads for Poshley Heights. After talking to the train conductor, the Smorgs take over the train, and Mario climbs to the top of the train to fight Smorg. After winning, the train passengers escape from Smorg and Mario gets the 6th Crystal Star.
Chapter 7
The beginning of Chapter 7 is skipped in this run. Originally, Mario would travel to Fahr Outpost. In order to reach the moon, which Mario learns is where Peach is being held, he needs to find both General White and Goldbob. After Mario locates both of them, they take the cannon to the moon and find the X-Naut Base.
Once inside, Mario has to collect 3 Card Keys to access the factory room. Afterwards, he defeats Magnus von Grapple 2.0. I find it humorous that Mario fights Magnus von Grapple 1.0 and then 2.0 right after. Bowser makes it to the Poshley Sanctum but discovers that Mario already took that Crystal Star, even though he didn’t actually take it. Mario heads toward TEC’s room and TEC begs Mario to save the Princess who has been taken to the Palace of Shadows. Normally, Mario teleports back to Rogueport and travels to the Palace of Shadows, but us speedrunners don’t want things to make sense, so we travel back to Glitzville.
Chapter 3
The order of events not only probably confuse you all, but it also confuses the game. We head to the Glitz Pit only to find that Jolene is in charge. We start to fight up the ranks, only to find that Grubba is the announcer for our first fight. After another fight, an egg appears out of thin air. We reach the Armored Harriers and run from the battle. The egg hatches into a Blue Yoshi. We’re not really sure what determines the Yoshi’s color when we’re in a post Chapter 3 state. Normally its color is based off of how long it took you to hatch the egg, but that is not the case when in a post-Chapter 3 state. After getting Yoshi, it would make too much sense to go beat the Armored Harriers, so we just leave Glitzville and head to Chapter 8.
Chapter 8
With the seven (three?) Crystal Stars, Mario and his six (four?) partners head into the Palace of Shadows. Mario passes through some hallways and takes down Dark Bones. He gets past a few Gold Cannons and reaches the area outside Riddle Tower. We head into the series of hallways to the right. Instead of beating Gloomtail, we perform Palace Skip. In doing so, we also never go to the Riddle Tower. Afterwards, we head into Grodus’s Lair and defeat Grodus, Bowser, and eventually the Shadow Queen.
Chapter-By-Chapter Explanations
Prologue
Right off the bat, I perform Speed Swaps and push against the right railing for a speed boost. I jump into the cutscene to cover a bit more distance than I normally would be able to. I take Lord Crump out in two turns by jumping and superguarding him. Afterwards, I jump up the stairs to Central Rogueport. When Toadsworth appears, I waste frames in a certain order to manipulate RNG. This doesn’t actually waste time overall because Mario and Toadsworth don’t talk until after the background cutscene with Gus and the Piantas is over. This manipulation changes Zess T.’s position in such a way that after Mario crushes the contact lens, she won’t have to walk very far before yelling at Mario. Inside the shop, I buy 10 Fright Masks. Normally if you have 10 shop points, the shopkeeper will give you a free Mushroom, but because my inventory is full, they will hold onto it for me. I talk to the other shopkeeper and request that they order Zess T. another contact lens. I Speed Swap to the right and then push against the back wall while jumping into Goombella’s cutscene. Since I’m never going to save throughout this run, it’s faster to go through this cutscene than use one of the save blocks. With Frankly I head into the sewers and fight the Goomba Trio with a Fright Mask. Afterwards, I perform the Prologue Staircase Skip. While waiting a few frames for the platform, I do a certain number of jumps to manipulate enemy positioning RNG in the room below. After jumping around the Goombas, I manipulated the Fire Flower in the item box to go left. I acquire the plane ability and fly to the Thousand-Year Door room.
After leaving Frankly’s house, I immediately equip Power Smash. I need to equip it before the upcoming fight, and not doing so immediately causes Goombella to talk about equipping the badge once I re-enter the sewers. I fly to the room to the right and jump on Blooper’s tentacle. Inside the battle, I use a Fire Flower to knock him down from the ceiling. Next, I perform an uncharged Power Smash. I manipulated RNG in such a way that a bucket drops on Blooper. This allows me to skip charging my next Power Smash, saving about 30 frames.
Chapter 1
The first couple rooms involve me just Speed Swapping the entire time. I get Close Call on the second screen so that I can actually beat Shadow Queen. You can’t superguard any of her attacks on the Japanese version of the game, so I’ll need to use this to dodge her attacks. For some reason, it’s faster to jump in the background than walk. When talking to the gatekeeper in Petalburg, it’s faster to talk to him as soon as possible rather than take a direct angle towards the gate and talk to the gatekeeper from behind. This is because once Mario talks to the gatekeeper, the game moves him to a fixed position when Koops starts talking to Mario. In the Shhwonk Fortresses, I can use Shhwonk Fortress Skip to avoid the Cleft and Bristle battles. I grab the Fire Flower after the second fortress for an upcoming Fuzzy fight. During the Shhwonk quiz, I occasionally had to manipulate RNG such that he does not ask me “Are you sure about that answer?” for questions 2-4. He always asks on questions 1 and 5. I head into the sewers.
It’s fastest to head towards the left first. Inside the Fuzzy fight I use a Fire Flower and take them out right away. I manipulate some FP to drop for the upcoming Gold Fuzzy fight and Red Bones fight. I now head to the right. Right before grabbing the Moon Stone though, I perform a delayed Goombella Buffer. This allows me to manipulate RNG a lot by advancing Goombella’s text box on a certain frame. In doing so, I manipulate an audience of Shy Guys who are able to drop the item “HP Drain.” With this item, I’ll be able to take out the Gold Fuzzy in one turn rather than 2. I take these current Fuzzies out with a Fright Mask. I enter the Gold Fuzzy fight and perform a charged Power Smash to deal 4 damage. After the hoard comes out, I manipulate a bucket to drop on the Gold Fuzzy, dealing 1 damage. I have Goombella use the HP Drain on the Fuzzy to kill him off in one turn, skipping a long process of the hoard and the Gold Fuzzy attacking Mario.
I retreat back to the entrance to the castle. After getting Koops, I grab both the Fire Flower and Mystery. The Fire Flower will be used the Red Bones in a small bit while the Mystery will be used in Chapter 2 for the Shadow Sirens. I use switch pausing and Speed Swap to the other switch, cutting out the slow process of having Koops charge up to hit one of the switches. In the Hooktail Castle bridge room, I can actually speed swap to the right and hold up right before going underneath the bridge, allowing me to just barely clip back up to the other side. This eliminates the need to ride the plane panel, saving a few seconds. I used RNG manipulation prior to entering the next room, which causes one of the Parakoopas to hold a Power Rush. I need this to increase my damage for the Chapter 2 boss fight. When enemies hold an item, there’s a 20% chance that they’ll drop it afterwards, so I manipulate RNG to make that happen. In the following room, Mario and Koops enter a cutscene. It’s fastest to enter the cutscene by right rather than directly up right towards the pile of bones. When the camera begins to pan in, Mario and Koops start walking, and there’s a few frames before they start talking. By walking right instead of up right, I trigger the cutscene earlier, and the few frames of wait before they talk allows Koops to start talking at the same point in the cutscene. I perform Red Bones Early and save about 1.5 seconds. In the following two rooms, I perform the Staircase Room Skip. In the cell room, I am actually able to shoot Koops to the right to hit the red switch and then Speed Swap to the rightmost time. Speed Swapping allows me to make it underneath the cell doors right before they close. The archway into the next area has some pretty weird collision on the lowest parts of its ceiling. By jumping underneath one of the lower parts, I can get what’s called the Speed Glitch. I do the same thing on the way back. I use the Unspin Cancels to get towards the cell with Attack FX R in it. This badge lowers Hooktail’s defense by 1 which will allow me to Power Bounce her. This is faster because Mario normally unspins while moving at 1 unit per frame, whereas with this glitch he will unspin at 2 units per frame. Afterwards, I perform Unspin Cancels until I get to the door. I’m able to open it while in this glitched state, eliminating the need to unspin at all. I perform the Jumping with Koops Active glitch when retrieving the key to the left. Afterwards, I use Switch Pausing to make it onto the rising green block. This occurs off-screen, but due to some weird programming, having Koops fall off and respawn causes him to moonjump. In this case, he moonjumps to the right, through the wall and falls out of bounds.
After making my way up the staircase, I perform a Paper Mode Cutscene Walk. I have to be a certain distance away to start. Otherwise, Mario will fall below since he thinks the bridge isn’t there. From here we can jump directly to the window, skipping the use of Koops to hit the other blue switch. I was able to jump behind the Dull Bones in the next room, which I previously thought wasn’t possible to do. I then use Switch Pausing to make it onto the rising green block. After retrieving the next key, I use Pause Buffering to bypass the hitbox of the Dull Bones that I would normally encounter right after gaining control of Mario. I can jump while triggering the lock at the same time, allowing me to get right up against the door and press A right away. I ride the yellow platform up and get a Speed Glitch off of the platform by jumping underneath of it when the yellow block is high enough. I use an unspin cancel on top of the plane panel, which allows me to activate the plane panel quicker. Normally I wouldn’t be able to activate the plane panel until after unspinning, so this saves about 20 frames. It’s possible to hit the yellow block in the air while falling, which saves time over having to land and then jump to hit it. I perform the Jumping with Koops Active glitch and make it up to the first stair while he gets the key. After making it up the stairs while wall pushing, I make it up to the top and jump while triggering the lock like earlier. On the bridge to Hooktail’s Lair, I push against the wall in the spiral at a constant angle for a speed boost. During the Hooktail battle, I manipulated an 11 cap and then a 10 cap which deals 20 damage since the first jump doesn’t hit. Whenever you Power Bounce, there is a randomly determined maximum number of jumps you can deal in one turn called a cap. This cap for Hooktail is as low at 8. There is a ⅓ chance that you don’t get capped, and this can be manipulated by changing RNG by wasting frames on different parts of the battle menus. It’s faster to take the 5 points of damage from Hooktail than say no several times. Afterwards, I deal 10 Power Bounces to defeat Hooktail. For the Peach and Bowser intermissions, I perform Walking Speed Swap for all of my movement.
I Speed Swap back to the Rogueport Sewers. On the way, I grab a Mushroom by the castle entrance. I’ll be using this in a small bit. A few rooms later, I use an unspin cancel to jump directly to the pipe. Once in the room right before the Thousand-Year Door room, I use a Paper Mode Item Jump. After visiting Frankly and returning to the sewers, I perform an unspin cancel through the bars to reach the loading zone quicker.
Chapter 2
I grab the Honey Syrup on the second screen while I Speed Swap to The Great Tree and then to Flurrie’s house. In the plane panel room, I perform a Paper Mode Item Jump with Sort Glitch to skip the plane panel. I use Sort Glitch because I’ll need the Honey Syrup later in the run. In the next room, I perform the Flurrie’s House OOB Clip to access the pipe quicker. A funny side effect of this glitch is that Punio talks to Mario in the background. On the way back, I use a Paper Mode Cutscene Walk to make the plane panel rise. It is quicker to perform this Paper Mode Cutscene Walk and then take the plane panel compared to doing another Paper Mode Item Jump. I use unspin cancels across the next room. In the Shadow Sirens fight, I use Earth Tremor to deal 6 damage and then manipulate a Shooting Star from the Mystery item to finish off the Shadow Sirens. I use the Shadow Sirens OOB Respawn to save time traveling to the right loading zone. I take the plane panel towards Flurrie’s house and then perform the same Flurrie’s House OOB Clip. I then head to The Great Tree.
I use a Gale Force to take out the first set of X-Naut guards. I jump first frame after leaving the battle, which actually allows me to jump forward while to cutscene starts. I use Power Bounces to defeat this X-Naut because it is faster than Gale Forcing. After rescuing the Elder, I grab the Power Punch from the bush after doing a Paper Mode Momentum Cancel to reach the bush easier. In the bubble room, I Sort Glitch with the Honey Syrup to gain some more FP and keep my Honey Syrup. I defeat the group of X-Nauts in the bubble room for XP since I want to level up before Magnus von Grapple. I perform the Puni Glitch to skip the Bubble Room cutscene. I used RNG manipulation to defeat the Jabbis as quick as possible. While grabbing the key, I jump, allowing me to get on top of the chest. From here I can jump to one of the stairs and exit the room. It isn’t necessary that I keep the Punies with me, so I just leave them behind in the bubble room. I retrieve the other Punies and head back down towards the 100 Jabbi fight. After using RNG manipulation to defeat this group of Jabbis as quick as possible, I performed Cage Skip, allowing me to go directly to the end of the chapter. During the escape, I fight some more X-Nauts, causing me to level up. With more BP, I can equip Power Rush. In the Magnus fight, I take 3 turns to get into danger, activating my Power Rush. With the Power Punch, Mario’s attack gets boosted by 2. Normally I would be doing 4 damage, but Magnus von Grapple has 1 defense, so I can only do 3. I do enough Power Bounces to defeat Magnus in 2 turns. During the Peach Intermission, I perform Walking Speed Swaps towards TEC’s room and then dance with him. It doesn’t matter where Peach stops dancing at; TEC starts talking at the same time afterwards. Optimizing the Bowser Intermission was really difficult: I had to hold right the entire time AND press A whenever a pipe or block was in my way.
With the Honey Syrup that I’ve been Sort Glitching throughout Chapter 2, I can perform another Sort Glitch and Paper Mode Item Jump to get to the Thousand-Year Door. Right before leaving East Rogueport, I manipulated RNG such that a Power Rush is on sale in the badge shop and Charlieton is selling a Mega Rush. I head directly to the Lovely Howz of Badges and sell my P-Down D-Up P and Attack FX R badges.In addition, I buy Power Rush on sale. I use a Paper Mode Momentum Cancel to get to the shop door quicker and buy Zess T.’s contact lens. In doing so, the shopkeeper gives me the Mushroom that was stored since I had a full inventory in the prologue. Inside West Rogueport, I re-store the Mushroom and buy a Dried Shroom and Dizzy Dial to get to Don Pianta’s office. I Speed Swap to the docks and back while visiting Charlieton on the way for a Mega Rush. I head down to the sewers and perform Teleporter Early without Super Boots to get to the Chapter 7.
Chapter 7
Inside the X-Naut Base, I Speed Swap directly towards the room with the Red Note. This advances the game to a Chapter 7 state. I then get the Key in Grodus’s office. I take the elevator up to the first sublevel and take the quiz for another key. I go back down to the second sublevel and enter the tile room on the left. I can save a bit of time by Speed Swapping on one of the tiles and land right by the chest rather than walk across the last couple of tiles. From there, I take the right elevator down to the third sublevel and enter the left tile room. In this room, the tiles are already moving upon entry, and it’s intended that Mario stands on the first platform to reset the cycle. Mario can actually Speed Swap onto the moving tiles when they swing back around later in their cycle, saving a few seconds from resetting the cycle. Because I don’t have Vivian, I can perform a Paper Mode Item Jump with my Dried Shroom while Sort Glitching it to get over the right wall. I used the Dried Shroom because it’s going to be easier to get into peril when I have 5 health rather than 4. I Sort Glitch it because I will need 10 items in my inventory for Palace Skip, so I might as well save this one rather than get another. Once I navigate through the background, I switch to Koops and use him to hit the switch to the right while jumping left. This allows me to cover more distance when I would instead have to wait for the platforms from the right side. Because we don’t have Yoshi at this point, I take the plane panel to the Card Key. Since I don’t have Spring Jump, I have to navigate through the background to the left, take the platform back up, and go through the background yet again. From here I can climb the stairs to Magnus von Grapple 2.0. After getting into peril, I can take him out easily with some Power Bounces. For the Bowser Intermission, it’s faster to go behind the columns than go in front of them.
After regaining control of Mario, I head to TECs room and then leave via the Teleporter Room. On my way to Glitzville, I manipulate a Mega Rush to appear and drop from the Hammer Bros. fight in the sewers.
Chapter 3
Immediately upon entering Chapter 3 I….leave? And then come back? When we enter Chapter 3 from this point, the game’s confused about our state, and we need to leave and re-enter to refresh it. Basically, the game recognizes that this is our first time entering the chapter, so it requires us to look at the Rawk Hawk fight inside the Glitz Pit before entering the back doors, but the fight isn’t there since the game also recognizes that we’re post-Chapter 3. In order to fix this, we have to leave and re-enter. Once this is fixed, we can head to the back. By going to Chapter 3 in a post-Chapter 3 state rather than a Chapter 3 state, I skip some cutscenes with Grubba. Since I’m in a post-Chapter 3 state, the door to the Minor League room can be triggered, even though there’s a guard there. Normally we would have to talk to Jolene in Grubba’s Office (She’s there because this is Post-Chapter 3.), but we can face the opposite direction as the guard and trigger the door by getting close enough to it. The next part of the chapter consists solely of manipulating the fight conditions by wasting a frame in different parts of Jolene’s text boxes in the fighting console. I also manipulated RNG such that enemies run away from my Fright Masks. I leveled up BP so that I can equip more Mega Rushes. Once I reach the Armored Harriers, I run from the fight and acquire Yoshi. Once again, we don’t really know why he’s blue this time. I leave and return to the sewers. I used RNG manipulation in the badge menu to cause another Mega Rush to drop from the Hammer Bros. fight. I now have 3 Mega Rushes and 2 Power Rushes for a 19 damage increase. In the next room, I grab the Gradual Syrup and Slow Shroom. I then head to the Thousand-Year Door and enter the Palace of Shadows.
Chapter 8
Once again, I want a full inventory in order to perform Palace Skip, so I grab the Stopwatch in the staircase room. Then I grab the Shooting Star. I perform Gold Cannon Skip as well. In the spike room, I can squeeze in between the last two set of spikes which saves time over having to move all the way up. On top of the platform in the middle of the fire bar room is a Boo Sheet that I can grab. It’s actually possible to jump down and around the fire bars. In the Dark Bones fight, I manipulated RNG in such a way that the Gale Force works on all 5 enemies. This saves time over having to Multibounce and then attack Dark Bones with Flurrie since I don’t have enough damage to take them all out with just my Multibounce. In the next room I grab the Ultra Shroom from the block and use Gold Cannon Skip to avoid the two encounters. From the block in the next room I grab the Jammin’ Jelly. With my five items, I can head into the hallways to the right of the Riddle Tower. In the final hallway before Gloomtail, I perform Palace Skip and reach the loading zone below. I grab the key, which advances the game’s state and then head to Grodus’s Lair. I get into peril quickly with the Grodus Xs and then defeat Grodus with a few Power Bounces. I do the same with Bowser and Kammy Koopa. The Shadow Queen fight was a bit difficult to route due to not being able to superguard her attacks on the Japanese version of the game. Ultimately, getting Close Call from Chapter 1 was the best way to avoid her attacks. To end the first phase I have to deal 39 damage to the Shadow Queen. I perform a few Power Bounces and then get into danger. With my Power Rushes I can do a bit more damage. She then raises her defense so I do less damage. I use Close Call to avoid dying from the Shadow Queen and then use a few Power Bounces to do enough damage. On the next phase, I have to attack her 3 times, with a pause in between. This might sound confusing, but let’s simplify this by saying that each turn is an attack with a pause after it. I manipulated her to kill Flurrie after my first attack because I’ll be able to end the next turn earlier since I don’t have to swap partners during Flurrie’s turn. I actually had a really rare case of RNG occur this time. A boo from the audience came up and slapped Shadow Queen’s hand, registering as another attack with a pause after it. With two attacks down, I can take one more turn to hit her and end the fight. On the last phase, I manipulate her small hands to appear, allowing me to get into peril. I manipulate RNG during my Power Bounces to give me an 11 cap, taking out the Shadow Queen in one go.
Author’s Comments
I am really happy with how far this game has come. It’s been a pleasure to work with the community over the years. We’ve shared the excitement as each glitch got found and this game gradually became more and more broken. We’ve all dreamt of this glitch being discovered, and the day is finally here. I’m really happy with how this TAS turned out, both optimization-wise and route-wise. We’re done right? That’s it? Well…. Maybe not.
Theoretical Timesavers
Blimp Ticket Early/Skip
If we can somehow advance the game’s sequence position from Chapter 2 to post-Chapter 2, we could retrieve the Blimp Ticket immediately after getting Flurrie rather than after completing the entire Great Tree. This would probably save 25 minutes.
Palace Skip without Yoshi
The single largest timesaver right now would be if we found a way to perform Palace Skip without Yoshi. This would cut out not only the Glitzville sequence, but also the need to finish Chapter 2. The only reason we finish Chapter 2 is so we can go through the Blimp Ticket sequence, which can otherwise not be triggered. This means we would get a Flurrie from Boggly Woods and immediately go to Chapter 7 and then Chapter 8, cutting out approximately 35 minutes.
Funny Stuff
Koops jumps through a wall off the edge. Though this occurs off-screen, it’s technically in the TAS. https://www.youtube.com/watch?v=_h-DsDDAvVM
Yoshi performs Yoshi Skip off-screen. https://i.gyazo.com/2ce7fb14f81b6eca327dc2134df4a667.gif
Palace Skip has done more than save us time, but it’s prevented Grubba from becoming evil. Peach never has to squeeze into the smelly X-Naut suit. Vivian and Bobbery didn’t really feel like helping, so they decide to only show up right before the credits. Toadette to this day is still waiting for Mario to one day come and find her so she can explain a boot or hammer upgrade. Pennington is still waiting in his room for Luigi...wait, Mario?... to solve mysteries on the train. Flavio decided to sail with his crew, including Lord Crump...err I mean Four-Eyes, but his ship was sunk. He is now stranded on the island, living off only a limited supply of Wacka Bumps.
We skipped 4 Crystal Stars, 2 partners, all hammer and boot upgrades, 4 Peach intermissions, and 4 Bowser intermissions.
Suggested Screenshot
VI: 423238
http://i.imgur.com/y7xpddA.png
Special Thanks
Almo - speedrunning, getting me interested
Nathanisbored - finding Goombella Buffer
Cronikeys - Finding various glitches
Masterjun - finding speed swap, working on first TAS
CoolKirby - first TAS
Dsydude - finding Double Jump
SolidifiedGaming - Text Storage, Teleporter Room Early, Double Jump, Paper Mode Item Jump, Sort Glitch
Really_Tall - Yoshi Teleporting, Chapter 2 oobs, TRE w/o Super Boots, some PMIJ applications
Tiwill14 - Cage Skip, Teleporter Room Early
Jdaster - star point calculator making routing easier, info about audience members and their drops
TTYD Community - being friendly and motivating me to work on this game five times
Fog_TAS - building a custom version of Dolphin so I can properly encode the TAS.
Stryder7X - remastering audio in my encode
Nach: This is quite a nice improvement, great audience response, definitely accepting. The question to me was whether this should be Starred or not. After some deliberation, I considered that for those that don't know the game so well, and that this run is in Japanese which is only understandable by a smaller portion of the audience, this run won't come across as appreciated as it should be. Therefore I decided to not personally accept it to Stars, however I still consider this to be a strong candidate for Stars. If another Starman finds the less entertaining segments are minimal enough and believes this will be well received by a very wide range of audience, then by all means Star it.