Categories
- Aims for fastest time
- Abuses programming errors
- Takes damage to save time
- Colors a DNA
- Staves off alien invasion using only the power of multi-layered time paradoxes
- Jumps through a bunch of arbitrarily placed hoops
- Does not drive author to verge of suicide this time
- Drives main character to suicide
- Gains advantage through the dark power of Dolphin sacrifice
- Is possibly the Chosen Undead
About the Game
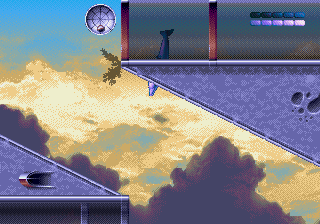
Ecco: The Tides of Time is the sequel to Ecco the Dolphin, and has been one of my favorite games for a long, long time. It is also highly resistant to speed-running. At top speed, Ecco swims just under 40% faster than Super Sonic can run, but has an eight-frame rule on steering (except orthogonal flips), and no way to slow down, except for orthogonal flips, which take too long, or crashing into walls, which slow Ecco too much. Otherwise it takes 30 frames without any form of acceleration before Ecco begins to lose speed, and even then does so at a maddeningly slow rate. Additionally, the way acceleration works is obscure, requiring a repeated pattern holding the button for 11 frames, than releasing for 1, the fastest way to get to top speed from a dead stop is to accelerate for 5 frames, charge, immediately cancel the charge, and then charge again eight-frames later when the cool-down wears off (maintaining the optimal acceleration input all the while). On top of all this, the game tracks position to the 65536th of each pixel, which combines with the eight-frame steering rule to snowball tiny variations in position and timing into gigantic differences in result. And, of course, the developers must have thought they were developing a PS2 game or something, because the game uses a wide variety of polygonal hit-boxes and detection boxes, and terrain collision is achieved by a bunch of invisible collision polygons that vaguely conform to where it looks like walls/floors/ceilings are supposed to be.
Also, there's an entire set of levels that involves navigating along mostly dry-land while the gravity changes almost at random, many levels are sprinkled liberally with obstacles or enemies that will kill you instantly upon contact, and there are five long 3D sequences that require literally jumping through hoops to complete.
Fortunately for a TASer, the game's engine is essentially composed of a multi-layered wad of gum and floss, which exposes a large variety of bizarre corner cases in game logic to exploit.
About the Movie
This movie completes the game on hard mode. Hard Mode differs from easy mode in that there are two additional autoscrollers, bosses have more HP, the collection quests are longer, and several levels have additional barriers that slow you down.
Oh also there’s one added level that’s not an autoscroller.
This movie does not use the Japanese version of the game, because I did not learn that the Japanese version has less lag on 3D stages until I was nearly halfway through the run and would have had to spend an excessive amount of time retiming everything and probably rewriting portions of the special tools I used to help make this TAS easier.
Techniques used
Faster Acceleration
About halfway through my first draft of this movie, I realized that there was a faster way to reach top speed that I had been unaware of on my prior TAS.
There are three ways to accelerate in this game:
- Pressing the accelerate, which increases Ecco’s speed by a varying amount depending on his current speed and how long the button has been held down. This is most efficient in 12 frame cycles of 11 frames down 1 frame up.
- Performing a short charge (charging with initial speed of at least 3 pixels per frame), which immediately increases Ecco’s speed by 4 pixels per frame, followed by overriding normal acceleration for 19 frames of charge acceleration (slower than standard swim acceleration at low initial speeds, faster at high initial speeds), then decreasing Ecco’s speed by .5 pixels per frame for 5 frames before ending and allowing a new charge. (Normal acceleration is possible during these final five frames of the charge).
- Performing a long charge (charging with initial speed below 3 pixels per frame), which immediately increases Ecco’s speed by 4 pixels per frame for 1 frame, followed by 23 frames of base 0.15625 pixels per frame (during which 1 frame worth of standard acceleration can apply for speeds of up to 0.65376 pixels per frame), then 2 frames of 4 pixels per frame per frame acceleration, 3 frames of charge acceleration, and then getting the full cycle of a short charge without the initial speed boost.
Additionally, any charge can be cancelled at any point via the sonar button, unleashing a damaging sonar blast, and skipping immediately to the final 8 frames of the charge sequence.
On my prior TAS, I believed fastest acceleration was simply 5 cycles of holding accelerate for 11 frames than releasing it for 1, which achieves maximum speed in 60 frames.
While a long charge achieves nearly top speed in 48 frames, it has the long period of near standstill, and then the unavoidable tail of deceleration, resulting in overall less distance covered in the 60 frames it would take to achieve top speed normally.
Additionally, I tested performing a single short charge as soon as possible during standard acceleration, and found that it was even slower at the 60 frame mark than a long charge.
However, if you immediately cancel that short charge, and then follow it with another, non-cancelled short charge, this gets top speed faster than 60 frames, and results in a larger distance travelled at the 60 frame benchmark.
Angle Optimization
Ecco’s swimming angle can only be changed once every eight frames, and only by intervals of 45 degrees. However, Ecco does not immediately turn to his target angle, but rotates smoothly at 4.21875 degrees per frame until reaching his target angle. As a result, you can achieve average swimming angles in between those 45 degree set-points by alternating directional inputs every 8 frames. In many cases, this results in a shorter distance travelled to navigate around distant obstacles than the old technique of travelling at the nearest 45-degree angle until it’s possible to swim in a straight line past the obstacle.
Nudging
Because it takes more than 8 frames to turn 45 degrees, hitting a direction once for just eight frames before returning to Ecco’s original angle allows for relatively small position adjustments. Useful for adjusting position in narrow tubes without bumping into walls.
Cutting Corners
First, some dolphin anatomy:
Ecco’s collision is a composite of two boxes mounted on a spine of five test-points.
- Head box
- Nosehole
- Mid-front vertebra
- Blowhole (absolute midpoint)
- Mid-back vertebra
- Butthole
- Tail box
Each collision or detection polygon tests a specific point, box, or subset of these 7 possibilities. With proper information about the shapes and test point of these polygons, it’s possible to swim safely past certain enemies or obstacles in positions that would appear dangerous.
Super-breach
By charging on the exact frame Ecco leaves a body of water, he can exit with a velocity of 4 pixels per frame above maximum swim speed.
Jump control
When out of the water, if moving upward quickly enough, Ecco can initiate a spin-jump by pressing C. While spin jumping, every frame in which C is held increases Ecco’s height by two pixels versus if C had not been pressed. This allows for very precise control over the timing of re-entering water, so that Ecco can re-enter water at any desired time within the 8-frame steering cycle.
Breaching speed
When it is necessary to travel long distances horizontally, speed can be gained by traveling along the ocean surface and repeatedly super-breaching with a very low exit angle.
Camera Manipulation
Camera position is based on Ecco’s position, angle, and movement speed. Game objects are loaded and unloaded based on their position relative to the camera, and even when loaded, many objects are not fully processed while off-screen. This can used to reduce lag, propel objects through obstacles, and a whole host of other things too varied to list.
Kill Boosting
Destroying an enemy immediately ends a charge without going through the end-of-charge deceleration sequence. The most common way of doing this is by colliding with the enemy while charging, but that immediately sets your speed to 0, which is even worse than losing a tiny bit of speed to the charge ending.
However, hitting an enemy with a charge-sonar blast also immediately ends the charge, and doesn’t set your speed to zero. In this way, whenever there’s an enemy in our path, we can gain ~4 pixels by hitting charge to get the single frame 4 pixel speed boost, and then hitting sonar to destroy it before we collide.
Unfortunately, when an enemy is destroyed, it spawns a remnant star object which changes the meaning of the charge button from “perform a charge” to “prevent this enemy from respawning” when you are within its detection radius, so it’s not possible to get 8 pixel boosts from two enemies that are close together.
Charge Strafing
During a charge, Ecco will home onto enemies in a certain detection area. This allows movement perpendicular to the swim direction without a related reduction in swim speed. Helpful to adjust position slightly without having to go through the slow process of changing angles.
3D Level Lag Reduction
In 3D levels, enemies cause lag.
In 3D levels, sonar blasts kill enemies.
In 3D levels, sonar blasts cause lag.
Situational Tricks
Ring Manipulation
The teleport rings in 3D Levels appear in fixed positions. However, their movement type (stationary, slow moving, or fast moving) depends on the random number seed when they are spawned. And the random number seed updates every four frames.
Teleport rings with the highest spawn location are fastest to pass through when they are slow moving, as their vertical position requires a low enough jump that it’s possible to return to water within a single charge cycle.
Barrier Clipping
In certain situations, there are barrier walls composed of a number of smaller objects that check head and tail box collisions. However, within a given frame, the game will stop checking for head collisions after finding a single one, and the game will stop checking for tail collisions after finding a single one. Therefore, depending on the loading order of these objects, it can be possible to swim through these barriers by overlapping the collision box with multiple objects at the same time.
Used in: Crystal Springs, Lunar Bay, and possibly in Four Islands (other stuff is going on and I’m not sure whether this technically happens or not).
Rocket Propelled Rocks
Falling rocks that shield Ecco from currents will assume Ecco’s full vertical speed when his nosehole collides with them closer to their top or bottom than their left or right sides.
In most cases, though, colliding with one of these rocks will kill most or all of Ecco’s downward speed just before it gets transferred to the rock. However, it is possible to avoid this effect somehow through careful approaches that I was not able to determine full boundary conditions on, but seemed somehow related cases involving corners.
Also, turtles are technically rocks.
Used in: Two Tides, Maze of Stone, Four Islands (Entertainment only), Sea of Green, Atlantis
Barrier Skipping
When a barrier glyph is placed to block a mid-air water tube, it is possible to skip around it by exiting the tube with a vertical super-breach, and using mid-air directional control to move left and right around the force-field trigger box, splashing back into the tube above the barrier.
Used in: Trellia’s Bay, Skyway
Hover-turns
The game doesn’t seem to test if Ecco has left water if Ecco is in the middle of a quick flip turn when he would leave it.
Used in: Sky Tides, Aqua Tubeway, Gravitorbox
Trigger Squeezing
Almost all end of level triggers test against Ecco’s blowhole. In auto scrollers, it’s possible to get this much closer to the leading edge of the screen by turning to be parallel to that edge, which allows for squeezing into the end-of-level trigger a few frames sooner.
Used in: Sky Tides, Dark Sea, New Machine.
Eight-way Swooping
When Ecco is a seagull, it is possible to perform a dive-swoop by pressing charge while down is pressed on the D-pad. But once the dive-swoop is initiated, the speed can be directed in any of the eight semi-cardinal directions without concern for gravity. This practically doubles the Seagull’s movement speed, and makes it possible to gain or lose height much, much faster than standard seagull flight, as the seagull cannot normally fly upward or downward at a greater than 45 degree angle. Embarrassingly, for the first TAS I wasn’t even aware that standard downward swooping was possible.
Used in: Fin to Feather, Eagle’s Bay
Eagle Clipping
Eagles can fly through walls, and will capture and care you in their talons.
Used in: Eagle’s Bay
Suicide
When Ecco gets caught between the level boundaries (or the camera boundaries during autoscrollers) and a solid obstacle, or a wall and another solid obstacle, he will be crushed to death, which restarts the level.
This is somehow useful.
Accidentally discovered by Dolfinh, of the real-time Ecco speedrunning community.
Used in: Level id 30
Forcefield Clipping
If Ecco is caught in a barrier glyph forcefield in the same frame that the game transitions to a dialogue screen, the forcefield will fling him at extremely high speeds (potentially through walls) as soon as normal gameplay resumes.
This was discovered by Aludra, of the real-time Ecco speedrunning community.
Used in: The Eye, Big Water
Zipping
When Ecco is caught clipping two or more solid walls at the same time, a chaotic system results that can have great impact on Ecco’s speed values.
Used in: Deep Ridge, Vortex Future
Swimming Through Walls
When Ecco would otherwise be crushed, but is near enough to the seam between two wall collision boxes, they simply both eject him to the seam and consider him not to be stuck.
There is more to this that I don’t fully understand, which prevented it from being used in Black Clouds or City of Forever.
Used in: Dark Sea, New Machine
Transformation Skipping
Although the Metasphere in Fish City has a much larger bounding box than it appears, it still only tests against Ecco’s nosehole, making it possible to avoid being transformed into a very slow moving school of fish.
This trick also works on the levels that don’t appear in this TAS because I avoided being carried off by Vortex Drones or swallowed by the Vortex Queen.
Used in: Fish City. Duh.
Level by Level notes:
Selection screen
The two frames saved here are entirely due to emulation timing differences during the loading sequences.
Home Bay
Fastest acceleration pattern plus angle optimization results in a slightly faster trip to the teleport ring.
3D Shells
Horizontal and Vertical camera motion slow the camera’s Z-ward movement slightly, which delays the spawning of teleport rings, so I save a few frames by moving the minimum amount necessary to make it through each ring without being slowed by the poison bubbles.
Crystal Springs
5 Frames saved by faster acceleration and better angle optimization
Fault Zone
So, during the first TAS I assumed that bumping into walls was always slower. But, when I have to wait on other things, and bumping into walls is the fastest way to brake, which gives much better control over position, it turns out bumping into walls is absolutely the way to go.
Saved a bunch of time with better positioning to push the rock after breaking the first barrier.
Two Tides
Faster acceleration, better angle control, and faster/more productive turtle harassment. There are a few points where you’re forced to stop in this level, so the faster acceleration methods really shine.
From now on, just assume that faster acceleration and better angle control save frames on every level except auto scrollers. They do. I won’t mention it every time.
Trellia’s Bay
Biggest time-save here comes from a better understanding of how psychic dolphins work, so I could boost faster away from the one that’s necessary to use.
Skyway
Angle optimization, mostly.
Sky Tides
First instance of trigger-squeezing to shave frames off the end of an autoscroller.
Tube of Medusa
So, The Medusa’s spawn triggers are at set locations, but The Medusa’s spawning position is camera dependent. The Medusa always spawns with Ecco’s horizontal position, and a vertical position a set distance offscreen. Whether it’s above the screen or below the screen depends on whether the spawn trigger is above or below the mid-point of the screen. Because I want to ride The Medusa upward, I want it to spawn at the highest possible point below me, which is a job for camera manipulation.
Camera manipulation also allows me to prevent The Medusa from re-spawning at a second location later, reducing lag.
Aqua Tubeway
So, normally I would only be able to use trigger-squeezing to save a few frames, but because the next level spawns Ecco in midair, and because midair rotation speed is capped, but not reset, on level load, there’s some extra considerations to take at the end of the level. In my first TAS I had no idea what affected midair rotation speed, and just took the first ending I could get that let me splash down with a favorable angle in the next level. Turns out this can be accomplished at least a second faster.
Skylands
Lots of use of super-breaching for horizontal speed at the start of the level. Most of the time savings here come from better angle control when breaching.
Fin to Feather
Eight way swooping.
3D Vines
The Vines cause some lag, but there’s no way to destroy them or prevent them from spawning, so we fall back to minimizing horizontal and vertical movement to save frames.
Eagle’s Bay
So, you’re supposed to transform into a gull, fly left to get a key song from a glyph, turn back into a gull, fly right to get past a giant rock wall, and then sing to the barrier glyph to get it out of your way. Which is exactly what the old TAS did.
It’s much faster just to fly right and find a friendly eagle to carry you out of bounds, where you can swim around the barrier glyph without singing it out of your way.
Asterite’s Cave
Some better strategies for pushing around the top-halves of the broken glyphs. Some better strategies for pushing around the rock eating worm. Also, when the top half of a broken glyph gets within the detection range of a bottom half, it instantly stops and then slowly magnets toward the bottom half, where it will heal into a key-glyph when it gets close enough. I saved some time by using camera manipulation to prevent this from happening until the top half was much closer to the target point. Also, on the first one, I use sonar to make the bottom half bounce around so that the target point would oscillate closer to the top half and save a few more frames.
Swimming through the giant DNA is a huge, slow pain, but I couldn’t manage to get swimming around it to work.
The Lost Orcas
Whole bunch of time saved by letting myself bump into walls. Also, more optimal destruction of shell barriers, so I don’t have to stop for them multiple times. Also, better breaching angles. Also, better approach vectors to the lost orcas to make them follow me faster. Also, some lag reduction by being careful about which enemies I let respawn for future kill boosts.
Nothing to be done about having to follow the slow orca to the end of the level. There’s a rock barrier in the way if I try to swim there without the orca’s guidance. And even if I could clip past or swim through that barrier, the end of level trigger doesn’t spawn unless the guiding orca got close enough.
Maze of Stone
Rocket propelled turtle. Rocket propelled rock. Oh, and some better positioning for pushing the initial, barrier-breaking rock. Oh, and better positioning for sonaring the rock-breaking star wreath around. Oh, and damage boosting through part of the swarm of falling shells.
Four Islands
Slightly faster strategy for getting through the shell barrier. Slightly faster strategy for singing the rock barriers apart at the end. Nothing to be done about the slow dolphin I have to follow to get the rock breaking song, Except hope he doesn’t randomly get drunk and break physics for no reason, of course.
(flowplayer module removed)
At least the level end spawns without having to find and follow the second slow dolphin guide.
Sea of Darkness
Some lag reduction by being careful about which enemies I kill and where, and which ones I prevent from respawning versus keeping around for kill boosts.
Vents of Medusa
Better understanding of the no-charge area around remnant stars allows me to take a better path through the swarm of jellyfish. Also, damage boosting through part of it.
Gateway
Nothing special.
3D Jellyfish
So, in 3D levels, constantly charging is the fastest way to move. But Ecco homes very strongly onto 3D Jellyfish, while charging which can make it difficult or impossible to navigate into the rings if jellyfish are in the other direction. So I spent a lot of time manipulating the spawn positions of jellyfish, and sonaring jellyfish to kill them so that I could constantly charge without missing hoops. Jellyfish are also the laggiest of the 3D level enemies.
Sea of Green
I think rocket propelled rocks, were the biggest improvement.
Moray Abyss
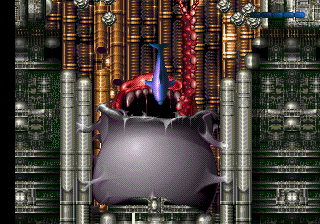
This level is essentially a long boss fight. There’s a giant conch shell which floats down an undersea ravine, occasionally trying to crush you against the walls, or summoning gigantic eels that kill you nearly instantly. Once the shell settles at the bottom of a ravine, a large eel comes out that you can kill, ending the level.
So, it turns out that Ecco can push the giant conch shell around. In the first TAS, I never learned this, because you take damage every time you bump it, so I never thought to check actively swimming into it.
Simply constantly swimming down into it from above saves about 39 seconds. But the speed you run into it also matters, so hitting charge against it whenever possible saves just over 12 seconds more.
There are some other factors like needing to refill health from occasional schools of fish, and regularly spaced eels in the walls that will kill you in two hits and don’t grant invincibility frames, but these are minor details (that happen to add a huge amount of complication to TASing this boss.)
Sea of Birds
In Lordran, the flow of time itself is convoluted, the past, present, and future can intertwine with each other, and you can experience things from a timeline not your own.
The Eye
This level is long and annoying, so I skip it.
Big Water
This level is not long or annoying, but I skip the important part anyway. (Even though this skip is much, much harder and more frustrating to make work.)
Deep Ridge
Like all undead, Ecco will respawn from the nearest bonfire upon death, as though no time had past since resting there, and yet, some of his prior life's effects upon the world may remain…
The Hungry Ones
Although the shark has a higher top speed than the dolphin, the shark cannot cancel charges, and thus cannot super breach as often. Thus, it is faster to use the dolphin.
Secret Cave
That was short.
3D Sharks
While, in 2D levels, charging into an enemy brings you to a complete stop, in 3D levels, it has no effect on your speed whatsoever, but allows you to charge again immediately.
In 3D levels, charging provides acceleration based on a continuous formula that depends only on how many frames are left in the charge. The more frames left, the more acceleration you get.
Combined, this means that running into as many sharks as possible actually makes the level go faster. So long as you don’t get carried away and forget to hit each ring.
Also, Sharks aren’t very laggy, so there’s no need to kill them with sonar.
Lunar Bay
That thing I did in Crystal Springs? Turns out it also works here. But only on the second barrier. Still have to ask a glyph to suck the first barrier into a black hole.
Vortex Future
Did you know that dolphins can fly?
Black Clouds
Because I enter the final tube from the side, there’s no need to sonar the first barrier-eating glyph which removes the top-most barrier. It was dumb of me to do it the first time.
Gravitorbox
Because of super-breaching, it’s faster to enter the middle tube along the bottom. Even if it does cut short the fun bizarre-gravity section.
Globe Holder
Gained about eight seconds by learning how the boss works.
Convergence
Sadly, there is nothing for Ecco to gain by killing himself here.
Dark Sea
A combination of camera manipulation and swimming through walls makes it possible to start the autoscroller section partway through, saving a bit over a minute. Also, some trigger squeezing action at the end.
New Machine
Just a trigger squeeze, nothing important.
Vortex Queen
It turns out that making the queen pop out at the start of the fight actually makes her take longer to become vulnerable. Also, it turns out that it’s barely possible to get one extra hit in on her first cycle. Also, after she vomits up her tongue, the fight won’t proceed until all the pieces fly off camera and despawn.
Home Bay Again
Nothing major, only 13 frames found.
3D Mixed
Unbeknownst to the other 3D levels, the dark lord forged one additional lag in secret. One lag to rule over the bearers of all other lag. That lag is in this level. I fought it off as best as possible, but still managed only to gain 8 piddling frames over the original.
Atlantis
Better angled-jumps for the surface portion. Better stone-handling makes up most of the rest of the difference. And one last instance of a rocket propelled rock.
Fish City
As a dolphin, this is a pretty short level, but I still found some time savings by more optimal maneuvering around the currents, and strategic use of the 4-pixel boost from starting a charge to get out of the strongest current segments faster.
City of Forever
More like City of Takes forever to TAS. This level is littered with stone gateways that only open for an enemy that can kill you instantly if it gets mad. It’s supposed to be a stealth mission where you follow the Vortex Larva as it wanders aimlessly through the mazelike ruins of Atlantis.
But it turns out to be faster to just swim right in front of it in a few places to get it to swim directly at the gate, instead of through a convoluted series of waypoints.
Also, when it’s angry, you can push it with your sonar, and how hard it gets pushed depends on how fast you were swimming when you loosed the sonar blast.
It’s an improvement so there has to be a
Timing Comparison Table
| Level | Original End Time | Draft End Time | Draft Level Savings | Draft Overall Savings | Final End Time | Final Level Savings | Final Overall Savings | Total Level Savings | Total Overall Savings |
| DiffSelect | 1027 | 1025 | 2 | 2 | 1025 | 0 | 0 | 2 | 2 |
| Home Bay | 1921 | 1893 | 26 | 28 | 1872 | 21 | 21 | 47 | 49 |
| 3D Shells | 4415 | 4365 | 22 | 50 | 4313 | 31 | 52 | 53 | 102 |
| Crystal Springs | 4752 | 4697 | 5 | 55 | 4645 | 0 | 52 | 5 | 107 |
| Fault Zone | 6210 | 6038 | 117 | 172 | 5882 | 104 | 156 | 221 | 328 |
| Two Tides | 10588 | 10305 | 111 | 283 | 10033 | 116 | 272 | 227 | 555 |
| Trellia's Bay | 11735 | 11408 | 44 | 327 | 11128 | 8 | 280 | 52 | 607 |
| Skyway | 12420 | 12078 | 15 | 342 | 11766 | 32 | 312 | 47 | 654 |
| Sky Tides | 15237 | 14896 | -1 | 341 | 14581 | 3 | 315 | 2 | 656 |
| Tube of Medusa | 16022 | 15635 | 46 | 387 | 15297 | 23 | 338 | 69 | 725 |
| Aqua Tubeway | 19881 | 19430 | 64 | 451 | 19092 | 0 | 338 | 64 | 789 |
| Skylands | 21524 | 21038 | 35 | 486 | 20678 | 22 | 360 | 57 | 846 |
| Fin To Feather | 22651 | 22024 | 141 | 627 | 21649 | 15 | 375 | 156 | 1002 |
| 3D Vines | 25270 | 24506 | 137 | 764 | 24071 | 60 | 435 | 197 | 1199 |
| Eagle's Bay | 27936 | 25650 | 1522 | 2286 | 25172 | 43 | 478 | 1565 | 2764 |
| Asterite's Cave | 31170 | 28567 | 317 | 2603 | 27954 | 135 | 613 | 452 | 3216 |
| Time Travel 1 | 32083 | 29480 | 0 | 2603 | 28867 | 0 | 613 | 0 | 3216 |
| The Lost Orcas | 45181 | 41842 | 736 | 3339 | 41038 | 191 | 804 | 927 | 4143 |
| Maze of Stone | 50122 | 46156 | 627 | 3966 | 45205 | 147 | 951 | 774 | 4917 |
| Four Islands | 54740 | 50533 | 241 | 4207 | 49552 | 30 | 981 | 271 | 5188 |
| Sea of Darkness | 56938 | 52543 | 188 | 4395 | 51463 | 99 | 1080 | 287 | 5475 |
| Vents of Medusa | 58180 | 53687 | 98 | 4493 | 52607 | 0 | 1080 | 98 | 5573 |
| Gateway | 58708 | 54212 | 3 | 4496 | 53126 | 6 | 1086 | 9 | 5582 |
| 3D Jellyfish | 61586 | 57024 | 66 | 4562 | 55620 | 318 | 1404 | 384 | 5966 |
| Sea of Green | 63494 | 58874 | 58 | 4620 | 57434 | 36 | 1440 | 94 | 6060 |
| Moray Abyss | 69657 | 62699 | 2338 | 6958 | 60529 | 730 | 2170 | 3068 | 9128 |
| Sea of Birds | 72670 | 65654 | 58 | 7016 | 62825 | 659 | 2829 | 717 | 9845 |
| The Eye | 89308 | 66554 | 15738 | 22754 | 63695 | 30 | 2859 | 15768 | 25613 |
| Big Water | 91011 | 68232 | 25 | 22779 | 64621 | 752 | 3611 | 777 | 26390 |
| Deep Ridge | 106398 | 82977 | 642 | 23421 | 77807 | 1559 | 5170 | 2201 | 28591 |
| The Hungry Ones | 108396 | 84923 | 52 | 23473 | 79753 | 0 | 5170 | 52 | 28643 |
| Secret Cave | 108835 | 85337 | 25 | 23498 | 80167 | 0 | 5170 | 25 | 28668 |
| 3D Sharks | 111250 | 87645 | 107 | 23605 | 82475 | 0 | 5170 | 107 | 28775 |
| Lunar Bay | 114509 | 90522 | 382 | 23987 | 85287 | 65 | 5235 | 447 | 29222 |
| Vortex Future | 118395 | 94263 | 145 | 24132 | 86443 | 2585 | 7820 | 2730 | 31952 |
| Black Clouds | 121012 | 96671 | 209 | 24341 | 88365 | 486 | 8306 | 695 | 32647 |
| Gravitorbox | 122425 | 97969 | 115 | 24456 | 89663 | 0 | 8306 | 115 | 32762 |
| Globeholder | 124997 | 100211 | 330 | 24786 | 91754 | 151 | 8457 | 481 | 33243 |
| Time Travel 2 | 125905 | 101449 | 0 | 24456 | 93143 | 0 | 8306 | 0 | 32762 |
| Convergence | 127522 | 102705 | 31 | 24817 | 94245 | 3 | 8460 | 34 | 33277 |
| Dark Sea | 138080 | 108923 | 4340 | 29157 | 100446 | 17 | 8477 | 4357 | 37634 |
| New Machine | 145898 | 116727 | 14 | 29171 | 108250 | 0 | 8477 | 14 | 37648 |
| Vortex Queen | 148544 | 119378 | -5 | 29166 | 110573 | 328 | 8805 | 323 | 37971 |
| CRD | 155087 | 125911 | 10 | 29176 | 117110 | -4 | 8801 | 6 | 37977 |
| Epilogue | 155740 | 126552 | 12 | 29188 | 117750 | 1 | 8802 | 13 | 37990 |
| 3D Mixed | 158286 | 129220 | -122 | 29066 | 120288 | 130 | 8932 | 8 | 37998 |
| Atlantis | 162350 | 132933 | 351 | 29417 | 123887 | 114 | 9046 | 465 | 38463 |
| Fish City | 163200 | 133758 | 25 | 29442 | 124684 | 28 | 9074 | 53 | 38516 |
| City of Forever | 169903 | 140095 | 366 | 29808 | 129632 | 1389 | 10463 | 1755 | 40271 |
Total final savings: 40271 frames = 11:11:11 in mm:ss:ff format.
I swear I didn’t manipulate my savings to make this happen. I actually had no idea until I was dividing out the number to figure out how to render it as a human readable time. Kinda fun coincidence, though.
City of Forever is special and gets a comparison table all for itself
| Gate | Original Trigger Level Frame | Draft Trigger Level Frame | Draft Gate Savings | Draft Overall Savings | Final Trigger Level Frame | Final Gate Savings | Final Overall Savings | Total Gate Savings | Total Overall Savings |
| 1 | 586 | 559 | 27 | 27 | 403 | 156 | 156 | 183 | 183 |
| 2 | 1531 | 1451 | 53 | 80 | 971 | 324 | 480 | 377 | 560 |
| 3 | 2536 | 2439 | 17 | 97 | 1959 | 0 | 480 | 17 | 577 |
| 4 | 2865 | 2761 | 7 | 104 | 2280 | 1 | 481 | 8 | 585 |
| 5 | 3961 | 3894 | -37 | 67 | 2646 | 767 | 1248 | 730 | 1315 |
| 6 | 4549 | 4430 | 52 | 119 | 3155 | 27 | 1275 | 79 | 1394 |
| 7 | 5071 | 4840 | 112 | 231 | 3575 | -10 | 1265 | 102 | 1496 |
| 8 | 5187 | 4956 | 0 | 231 | 3686 | 5 | 1270 | 5 | 1501 |
| 9 | 5645 | 5186 | 228 | 459 | 3900 | 16 | 1286 | 244 | 1745 |
| 10 | 6300 | 5835 | 6 | 465 | 4507 | 42 | 1328 | 48 | 1793 |
| 11 | 6368 | 5916 | -13 | 452 | 4567 | 21 | 1349 | 8 | 1801 |
Possible Improvements
I did not do any of the complex math required to prove that my steering is optimal. In fact, I did not even bother to figure out how to pose those math problems. Therefore it is possible that my steering is suboptimal.
Multiple real time Ecco speedrunners have reported that, on occasion, for no apparent reason, after a Time Travel cut-scene, the level starts normally, instead of taking a few seconds to make Ecco spin in. I was not able to reproduce this, and, in reverse-engineering the game I was not able to find a code path that should cause this to happen. There was also speculation that it has to do with failing to power-cycle the console before starting a new run after entering the debug/level select code.
Multiple real time Ecco speedrunners have reported that, in Vortex Future, they were able to get an antigravity ball to push them through a wall. I could not reproduce this, but also see no reason why the same thing shouldn't work in Black Clouds. Or why Vortex Larva wouldn't be able to do it in City of Forever.
Multiple real time speedrunners have video evidence of Ecco "randomly" failing to collide with walls and/or floors in the vortex future levels. I could not reproduce this, but it would allow for significant skips in these levels if the mechanism were determined.
Both Black Clouds and Gravitorbox have the level geometry required to initiate zipping in the way I used in Vortex Future, but due to collision box loading order or other reasons, I was not able to initiate any useful zips in those locations. Again, these would produce significant time saves.
Screenshot Suggestions
Memory: Claiming for judging
Memory: Syncs on 2.3.0 release.
Optimization is superb, a gigantic improvement on the current publication.
The run was really fun to watch, with fast movement and various tricks and glitches. Of note was the zip sequences. Even with the additional autoscrollers of hard mode, the run never stopped being entertaining. The audience agrees with only positive comments and positive votes.
Accepting to Moons as an improvement to [1180] Genesis Ecco: The Tides of Time by upthorn in 47:38.72.
feos: Pubthorn!