Game Objectives
- Emulator used: Dolphin 4.0-5371 Zelda Edition 6.0 (Zelda Edition is a custom Dolphin version made by dragonbane0. It supports extra functions for TASing Zelda games such as Tingle Tuner support for The Wind Waker and a load area manager for Twilight Princess)
- Uses Warps
- Heavy luck manipulation
- Heavy glitch abuse
- Takes damage to save time
- Uses a game restart sequence
This run is done on the PAL GameCube version of Twilight Princess and uses the German language for the fastest available text speed. The goal of this run is simply to get from the beginning to the end as quickly as possible (Any%) using the fastest known methods.
I originally started this TAS in March of 2016 after finishing a previous attempt at TASing Twilight Princess which had a final (RTA) time of 2:42:42. The original TAS that I made was rather sloppy but gave me necessary experience in TASing Twilight Princess that ultimately led to the run that we have now. All the inputs in this run were solely recorded by me, but I did have help in theorizing and routing from the rest of the Twilight Princess community.
Important Techniques and Glitches
Back in Time (BiT)
- By voiding out in an area and resetting the game on a specific frame (using the Start+B+X button combination), we respawn Link onto the title screen map. This allows us to mess with save files in various ways and even save the dummy file used on the title screen.
Savewarp
- A common technique used in some Zelda games, savewarping involves saving the current file, resetting the game and reopening the file. This can alter Link’s position and be used to cut out backtracking in many situations.
Long Jump Attack (LJA)
- When Link targets a faraway object (any object that link can “lock-on” to with the L button) his jump attack speed can increase dramatically based on how far away the object is. This is used to cross wide gaps or jump over triggers that attempt to limit progression at certain points. This effect is most notably achieved with the Gale Boomerang and is the reason the Gamecube version is chosen over the Wii version (as the Wii version cannot perform LJAs with the Gale Boomerang).
Super jump
- As wolf Link, it is possible to target enemies with Midna’s B attack charge and then jump to them while they are far away. Wolf Link will attempt to jump directly to the enemy no matter how ridiculous the distance is between him and the enemy. This is used to cross large gaps or get onto higher ledges that normally should not be accessible.
Rupee Diving
- If Link falls off an edge at the same time he collects a rupee (which has a cutscene associated with it), Link will fall during the rupee collection cutscene and clip through walls or floors in some situations.
Brakesliding
- Brakesliding is a technique that allows us to preserve higher speed values across regions where speed would normally be hindered. We can overcome such regions such as upward sloped hills and quicksand by switching Link’s speed value from positive to negative, as these terrains are programmed to limit positive speed, not negative speed. This sign switch on the speed value comes by targeting (while Link is moving) and holding what’s known as ESS position in the opposite direction that Link is facing. ESS position refers to any input in a small region directly outside the controller’s deadzone.
Swim with Water Bombs
- Using the iron boots, it is possible to swim underwater while holding a water bomb. This is useful as releasing the bomb while swimming with it will replenish Link’s air meter while underwater. This allows us to skip collecting the Zora Armor.
Rocket Link
- If you let go of a water bomb underwater almost immediately (doing the described glitch above, but just sooner) Link will instead shoot to the surface of whatever water body he is swimming in.
Map Glitch
- If you call Midna with Z at the same time you bring up the map to warp away with, Midna will interrupt the warp cutscene and all loading zones and loading triggers will be disabled on the current map (however, loading that is triggered by cutscenes will be fine).
Clawshot L-Sliding
- When Link shoots the clawshot, he can move around slightly while the clawshot is shooting out by holding a direction and targeting. This is used for some clips and the Clawshot Actor Displacement glitch mentioned below.
Clawshot Actor Displacement (CAD)
- If Link grabs onto certain actors with the clawshot that he gets pulled to, and at the same time manages to do an L-slide and fall off a ledge, the actor will instead get pulled to Link. This allows us to clip through some walls and reshape level geometry in our favor in a few situations.
Damage Boosting
- In some situations, taking damage is necessary to reach slightly higher platforms or to interrupt Link during certain actions which cause desirable effects, such as stopping a CAD or clipping through a wall that Link is partially through already.
Important skips and sequence breaks
Ordon Gate Clip
- Using a rock, we clip through the Ordon Gate right at the beginning of the game to access a void and perform the first instance of BiT. In this instance we save the dummy title screen file as File 1 as it spawns us with a sword, shield, and several other useful flags already set in game. This allows us to skip the first 2 days of Ordon Village.
Sword and Shield Skip
- After completing the castle rooftop twilight section as wolf Link, we’d normally need to go and obtain the Ordon Sword and Ordon Shield from Ordon Village. However, we skip collecting those items by luring a bulblin all the way across the map and using it to perform an LJA over the trigger that normally blocks us from entering the Faron Twilight without the Sword and Shield.
Early Master Sword (EMS)
- This is one of the most important sequence breaks of the run. As wolf Link, we can access the Sacred Grove area of Faron Woods much earlier than intended by using a shadow bests to superjump up onto an out of bounds ledge and jumping down to the grove. From here we continue through the Sacred Grove as normal and obtain the Master Sword before beating any of the game’s dungeons. The Master Sword gives us the ability to warp using warp portals whenever we want and transform between human and wolf Link whenever we want (even in twilight sections). The Master Sword also does significantly more damage and has a larger hit range than the Ordon Sword. EMS is also the sequence break that allows for a lot of the other early sequence breaks in this game to be useful.
Early Monkeys
- Using a variation of Back in Time known as Back in Time Equipped (BiTE), we can set a certain flag in memory (typically called the “BossFlag”) by resetting the game and skipping the cutscene that would normally precede the first fight with King Bulblin. This flag happens to correspond to the number of monkeys the game believes we’ve saved in the Forest Temple. So, when we enter the Forest Temple, we save the first monkey, and then the rest of the monkeys that we need to gain access to the Gale Boomerang room appear out of nowhere due to the BossFlag. This skips needing to go through a good chunk of the Forest Temple.
Faron Escape
- Faron Escape allows us to get out of Faron Woods without having completed the Forest Temple or the Faron Twilight. We can bypass the trigger that blocks us from escaping Faron Woods by doing a precise LJA with the Gale Boomerang as human link.
Gorge Skip
- Before gaining access to Kakariko Village, the player must normally warp a lost bridge from Faron to the Kakariko Gorge. However, warping this bridge requires having beaten the Forest Temple and Faron Twilight. By doing an LJA onto a fence next to the Gorge and collecting a yellow rupee at the same time, we can move for a few frames on the fences slippery slope thanks to the yellow rupee cutscene. During this time, we backflip over the fence to get on the side of the gorge, and from there perform an LJA to jump across the Gorge completely.
Lanayru Gate Clip
- While we clip through many gates in Twilight Princess, clipping through the Lanayru Gate gives us access to Lake Hylia and Lanayru Twilight very early on, and skips having to go all the way around Hyrule as wolf Link to access it.
Early Lakebed Temple
- Right after we perform Lanayru Gate Clip, we immediately go to do a Rupee Dive and enter Lakebed Temple much earlier than intended. Once inside we savewarp past the water tunnel that we’d normally have to swim through. This savewarp only works because we have the Master Sword. This allows us to get the clawshot early and obtain Ooccoo for a glitch we perform later in the run.
Early Snowpeak
- Using Map Glitch, we disable the void out zones in the peak province that prevent us from climbing up Snowpeak early. Normally we’d be required to go on a quest to get the Reekfish Scent which disables these loading zones. Once we climb up Snowpeak, there is a convenient howling stone which we use to reload the mountain area and reactivate the loading zone which allows us to proceed onward.
Lakebed Boss Key Skip
- Out of all the boss keys in this game, Lakebed’s is the most time consuming to obtain. But, we skip it by clipping through the bridge that rotates atop the small room containing the loading zone to the boss room. Lakebed Temple is the only temple where a boss key skip is possible, as all other boss loading zones in other temples are tied to opening the door in front of them before they activate.
Stallord Skip
- During the Stallord fight in Arbiter’s Grounds, Stallord will spawn enemy skeletons that Link can clawshot and be pulled too. Using CAD, we instead pull one of these skeletons to Link and drag it into the corner of the gate that blocks us exiting and the wall next to it. We then perform an L-Slide with the clawshot on the skeleton to clip through one wall and get partially out of bounds, then use a bomb to interrupt another clawshot grab on the skeleton to clip through a second wall and get out of bounds enough to just run into the loading zone behind the gate.
Early City in the Sky
- This is the final huge sequence break of the run. By transforming into wolf Link with a specific angle and position in front of the owl statue that normally guards the City in the Sky Canon, we clip through the statue and obtain the Canon without needing to beat the Temple of Time or Snowpeak Ruins. To enter the Palace of Twilight, the game will only check for the Mirror Shard that we get for completing City in the Sky, as it assumes you must have all the other shards if we have the last one.
Ordon Village – Master Sword
The start of the run (after doing Ordon Gate Clip and BiT) is mostly filled with a lot of rolling. Most of the time, rolling in Twilight Princess is not as simple as going in a straight line from point A to point B with frame perfect rolls. Link’s ground speed in Twilight Princess (and other Zelda games with a similar engine) is affected by the slope of the ground he’s moving on. The fastest speeds are obtained on flat ground, slightly lower speeds on downhill slopes, and slower speeds on upward slopes. To move around the fastest, we avoid going over upward slopes (usually referred to as invisible hills) if possible, which creates weird looking movement in a few places, but it is in the interest of speed.
If we start at a standstill in an area, it’s fastest to start with a roll, walk for three frames, and then continue to do frame perfect rolls towards where we need to go. If we enter an area and we’re already walking, then it’s fastest to walk for three frames first, and then begin doing consecutive rolls all the way to where we need to go. There are also some instances where even when we start from a standstill, it’s fastest to begin walking until we hit the walking speed that translates into the fastest rolls and begin doing rolls then. In these situations, we get to the desired speed fastest by targeting for the first two frames of movement and then releasing the target.
There is also a useful technique that we use pretty much everywhere in the entire run called Angle Locking (some in the community have referred to this as “Stick Glitch”, but “Angle Locking” is more descriptive I feel). Due to some weird property with the game’s camera, if we target very briefly and then release target while holding a direction on the control stick, the control stick will be interpreted as if the camera is still in the last frame of target mode (regardless of where it is afterwards). This directional lock only applies on +/- a certain angle range of where the initial lock took place. Once the control stick returns to neutral or goes outside the “lock range” the Angle Lock ends and the control stick is interpreted with the current camera once again. This technique makes running in straight lines with the game’s varying camera very manageable. We simply lock an angle on my first frame of movement and see if it fits the desired path we want to take on the current map. If it doesn’t, we can reload the savestate right before the angle lock and try again with a slightly different angle until we find the perfect control stick position for traveling in a straight line. Angle Locking also gives me the ability to pan the camera around and make the viewing more cinematic in certain situations without worrying about where Link is going.
Anyway, that about covers basic movement, so back to the route. After rolling around a lot and obtaining the lantern to burn some webs, we battle two bokoblins to free Talo and the monkey. With these enemies, we attack them once with the same sword slash, and then perform a spin attack while they’re equidistant from Link so that we defeat them both on the exact same frame. This allows only one hit stop effect to happen and saves us a few frames over hitting the bokoblins at different times, which would cause two hit stop effects. Hitting enemies on the same frame to avoid multiple hit stop effects is present many other times throughout the run.
Next, we have the goats. TASing goats wasn’t that bad (at least from what I remember since this part of the TAS happened almost two years ago). The path used for herding is the same path that RTA runs have used for years, and this is the fastest time I could squeeze out with it, which is also the fastest TAS herding time ever achieved. This is also our last use of Epona until one of the final battles with Ganondorf.
We enter Bo’s house very early thanks to one flag set by the BiT file we saved with earlier (specifically the flag of having tamed Epona in Kakariko Village). When we talk to Bo, his text is will only go through one or a few lines at a time as we didn’t activate the cutscene which normally regulates his text. We must talk to him many times before he finally gets to the point about the having us wrestle him. The wrestling for the Iron Boots is all RNG manipulation. Bo has three moves he can perform, so we must manipulate the move which is vulnerable to a slap both times. We then slap Bo and push him out of the ring in one cycle to obtain the Iron Boots way earlier than intended. Upon exiting Bo’s house, we choose the right door since the animation going out the ride side of a set of double doors is shorter than the animation of the left side. This applies almost everywhere else in the run. Once outside in Ordon Village we save over file 2 so that we can use this save later for the Early Monkeys glitch.
Now we turn into wolf Link and go through the Hyrule Castle sewers and rooftops. Nothing much out of the ordinary is going on here, but there are a few techniques we use as wolf Link to help speedup movement. The first is called Dash Cancelling. When wolf Link initiates a dash, he usually cannot dash again for almost two seconds. However, if he begins a dash but is interrupted by another animation (such as jumping off a ledge or a b attack), the cooldown is skipped, and another dash can begin right away. The second technique we see is what’s known as a first frame Midna jump. During some sections, Midna will prompt use to use her as an assist for jumping to ledges that are too far away or too high. If Midna has something to say right before the jump begins, there is one frame after her text disappears in which we can jump immediately to the first spot in her series of jumps (normally you wait around two seconds to do the first jump). There are also some text skips that we do here to skip talking to Midna, such as at the bottom of the spiral staircase by avoiding contact with the water (where we first jump off to activate Midna jumps) and once outside on the rooftops by jump attacking on the first frame of control we have. We also save on the rooftops over file 3 as a convenient way to do BiT quickly again for the Early Monkeys glitch. After the rooftops, we perform Sword & Shield Skip and enter Faron Twilight.
This Twilight Section begins by us losing to a trio of shadow beasts (a scripted event) and then learning the Midna Charge so that we can deal with them all at once. During shadow beast fights, the goal is to generally target all the shadow beasts except one (if possible) so that wolf Link doesn’t make an extra attack and instead kills two shadow beasts with the final hit.
We skip having to complete this Twilight Section thanks to later sequence breaks, so for now we run past the spring and through Faron Woods, skip some Midna jumps using regular jumping and keese LJAs and make our way to North Faron where we have another set of shadow beasts. With the shadow beast on the left we perform a superjump to begin the EMS sequence break and head to the Sacred Grove. In the Sacred Grove we chase skull around normally (while also collecting some rupees and doing a “quick climb” on one ledge), and then solve a simple puzzle to finally access the Master Sword.
Master Sword – Entering Lakebed Temple
Now that we’ve obtained the Master Sword, we warp back to Faron Woods and make our way to the Forest Temple. Before we get there however, we save our current file over file 1, and load file 3 which is saved at the Hyrule Castle rooftops. We quickly perform BiT since this file spawns us in convenient proximity of a void. When we open this file, the reason we jump attack down to the path and then sidehop off instead of just jumping straight off is to avoid triggering extra text from Midna that we skipped earlier. After doing BiT, we perform BiTE to load ourselves into the King Bulblin 1 fight on file 2 and set the BossFlag for the Early Monkeys glitch. Then we load into file 1 again and continue on our way to the Forest Temple with the changed BossFlag value. We skip past the warp portal in North Faron using another superjump since this portal is not necessary for the rest of the run.
Once inside Forest Temple we complete the first two rooms normally (manipulating spiders to not attack us while climbing vines) and once we enter the room with the broken bridge, we see the effects of the Early Monkeys glitch when suddenly we have three extra monkeys. With these monkeys, we cross the destroyed bridge and make our way instantly to the Gale Boomerang room and fight Ook. The lowest amount of times Ook can jump around is twice, and we manipulate the boomerang he throws to turn around and hit him fairly quickly after he releases it. This fight becomes only a single cycle with the Master Sword (whereas with the Ordon Sword it would have been two) and we now collect the game’s most broken item: The Gale Boomerang. This item will allow us to perform an LJA nearly anywhere that we want. It’s also the only reason we came to Forest Temple at all, so now we perform a savewarp and leave.
We warp back to the portal at the southern end of the Faron Woods and then dash over to the gate that leads to Hyrule field and exit with Faron Escape. After escaping with the Gale Boomerang, we run across Hyrule Field as wolf Link and then transform back into human Link temporarily for another LJA to skip a mailman trigger before heading the rest of the way to the Eldin Twilight. We defeat another set of shadow beasts and then perform a trick known as the Gorge Void (a frame perfect jump attack into the Kakariko Gorge) to respawn us at the field entrance and delay activating a cutscene that would force us to warp back to Faron Woods. Right after this, we dig up a yellow rupee and perform the Gorge Skip so that we can get into Kakariko Village. On the way to Kakariko we bonk on the gate that’s near the entrance and clip through during it’s swinging animation to save a few seconds over digging under it. There is a trigger behind this gate that we have to avoid which is why we go way off to the right and around the center of the path to eventually reach the Kakariko loading zone. (This trigger would normally take us to the King Bulblin 1 fight, but we don’t need to fight King Bulblin so it’s unnecessary to ever trigger.)
The only reason we came to Kakariko Village now is so that we save the warp portal it has for convenient use later to cut out backtracking. So, after we get it, we leave, avoid the King Bulblin trigger again, clip through the gate again, and now we activate the cutscene that we avoided with Gorge Void a minute ago. After the forced warp back to Faron Woods, we perform Faron Escape again and this time we run across Hyrule Field to the west and perform the Lanaryu Gate Clip to get to the Lanayru Twilight and Lake Hylia much earlier than intended. Due to the water level being as low as it is, we can dig up a blue rupee as wolf Link and perform the Rupee Dive technique as human Link to enter Lakebed Temple extremely early.
LakeBed – Eldin Twilight
We start our first visit to the Lakebed temple by savewarping which will put us past the long water tunnel the dungeon starts with. This savewarp only works because we have the Master Sword; if we couldn’t do EMS, this sequence break would be useless. After reopening our file, we use a precise backflip to clip through the gate in the first room, and then proceed to do a series of LJAs across the next room to skip knocking down the stalactites (which would normally require bomb arrows). The jump right before the door allows me to attain the fastest rolling speed quicker than normal and saved a few frames over normal movement optimizations. In the room with the large staircase, we perform another LJA and then clip into the giant staircase so that we can run back up while inside the railing and perform another LJA to reach Ooccoo. Obtaining Ooccoo gives us a fast way to exit the dungeon (as we’ll be making multiple trips to Lakebed) and will also be used to steal a bomb bag later in the run. After obtaining Ooccoo the ManChicken, we jump down a floor and head to the east side of the dungeon where the clawshot resides (and of course use more LJAs to help us get across).
We enter the Deku Toad fight from where you’re normally supposed to exit; however, we still have a remnant of the Boss Flag left over, and we use that to start the fight by just looking at the ceiling. Normally this is only possible after activating a certain trigger further inside the room. For the fight itself, we defeat all the little tadpoles as soon as possible, and then agitate the Deku Toad so he attempts to squash us. After he fails, we defeat him in one-cycle (once again, thanks to the Master Sword) with a series of sword slashes. In Twilight Princess, the direction of each slash is determined by the position held on the control stick, so we use whichever combination of control stick inputs results in the fastest slashes. The timing is tight for this one-cycle, so we don’t activate a full four-slash combo until the final hit, as the fourth slash always takes a long time to recover from (relative to the other slashes in the combo). Once the fight is over, we get our clawshot and savewarp back to the front of the dungeon before using Ooccoo to warp out to Lake Hylia. We can’t Ooccoo out of the dungeon from the Deku Toad room, but we need to get back to the first room of Lakebed anyway once we return, so this doesn’t waste any time.
Now we run across Lake Hylia and trigger the kargoroc fight which will let us fly up to Zora’s Domain once finished. This fight can be done quickly by luring the kargoroc partially underwater. This will kill the twilight bulblin which sits on top of the kargoroc since many enemies are programmed to die if they get submerged underwater. When flying through Zora’s River, we clip out of bounds at the beginning and save some time flying in a straight line instead of following the slightly zigzagged path of the area. The game will try to steer us back towards the center of the path automatically, so during some parts we must resist by flying away from the center. This flight normally takes place as wolf Link, but since we entered this area as human Link, we must transform back into wolf Link for the game’s camera to work properly, but thankfully the flight doesn’t stop while we’re transforming.
We quickly go through the next area by jump attacking out of a Midna text trigger and then heading to Zora’s Domain (not taking the straight path to avoid invisible hills). In Zora’s Domain we use keese LJAs to jump over some invisible hills both before and after the Midna jump section. In the middle of the Midna jumping section, we jump a lot while running on the ice since wolf Link’s jumping speed is higher than his ground speed on an upward slope and jumping also allows us to cut corners on the path. The shadow beasts at the top of the domain are unfortunately separated by a wall, so we need to take them out in two separate charge attacks. After getting this warp portal on our map though, it’s time to head back to Kakariko Village.
Eldin and Lanayru Twilight
Now we come to the twilight sections that we need to clear. After heading to the graveyard, we kill the first bug and then collect it as human Link while we clip into the basement (the clip here skips having to get to the basement the normal way). Since it takes a while for bugs to die, we push them in their death animation to be closest to where we need to go next. Once in the basement we quickly lure all three bugs together and kill them in quick succession. The targeting between the last two bugs may seem random, however these bugs will stop moving if you target them. So, by switching the target between them we prevent both from moving at all and keep them close together until we hit them. Now we warp back to the main village and go get the Malo Mart bug; we can attack the inside of the Malo Mart in a certain way which will agitate the bug and make it drop down in front of us which is very convenient. Throughout collecting the bugs in Kakariko Village, we also manipulate blue and yellow rupee drops as we’ll need 300 rupees later in the run to fix the City in the Sky Canon. The point at which we crash through the window to enter the bomb shop was when brake sliding was discovered, and thus we use it from this point onward for the rest of the run (mostly as wolf Link).
When we go outside again, we do a very precise jump as wolf Link over to the ledge near the bomb house. This allows us to get closer to the bug which normally runs into the house and kill it earlier than intended which will change the state of the bomb house to having all three tears collectable. We still must crawl into the house collision though, since the collision won’t go away unless we reload the area. Some bugs hide in pots/boxes and, when they get revealed, have an invincibility period where they can’t be killed. Since we have to wait before killing these bugs, we spend the time doing things like collecting rupees or messing around.
Brakesliding is heavily used while climbing Death Mountain but was a little tricky thanks to all the enemies that we slide past. Anything that Link can target makes brakesliding difficult to optimize. The movement that we do with dash cancels and the shadow beast fight is thankfully fast enough to get past the steam cycle on the side of the wall in time during the Midna jump. If the movement was a few frames slower, we’d have to wait a few seconds for the steam to cycle through. The last bug has invincibility frames where we can’t attack it (as described in the section above).
Now that Eldin Twilight is finally cleared, we immediately break Malo’s neck and start the Lanayru Twilight by warping to Death Mountain and getting the meteor to break the ice in Zora’s Domain. We transform into human Link before this so that we can exit Upper Zora’s Domain from below and skip the cutscene with Rutella that normally takes place in the Lanayru Twilight. After this cutscene skip, we transform back into wolf Link and obtain the vessel for our tears. The beginning of the Lanayru Twilight is fairly standard as we go around and track down bugs, defeat shadow beasts, collect rupees, and enjoy a lot of brakesliding. After getting the first bug in Zora’s Domain, we transform into human Link again to skip the Rutella cutscene a second time since the trigger still exists. We also get to perform a pretty sweet grab with the Clawshot while falling down the waterfall to go get the hallway bug (which took about five hours to figure out and saves roughly three seconds; the most rewarding type of TASing). Any rupees that we collect above the count of 80 don’t actually matter but are of course implemented for swag points as they aren’t a waste of time.
Due to the huge distance we must cover in Hyrule Field, it’s faster to turn around and restart the brakeslide after a while since brakeslide speed slowly tapers off over time. The movement in castle town consists of constant dash cancelling due to how nerfed regular movement is. Once we finally get the lone bug in castle town, we warp back to Lake Hylia to get the remaining bugs there and in Zora’s River before facing the Boss Bug. The Boss Bug has the usual three cycle battle that we’re all used to at this point, however the second and third cycles are sped up by attacking the bug as it charges us and then timing another attack right away to grab onto it before it rises out of reach again. On the final Midna charge attack, we maneuver towards the edge of the bug in such a way that we bonk on the bug when releasing the charge. This will instantly start the death cutscene and skip watching the animation of wolf Link attacking all the bug’s legs.
Stealing a Bomb Bag and Early Snowpeak
Our next goal is to go and obtain the Ball and Chain in Snowpeak, but first we need to steal a bomb bag. So, we warp back to Zora’s Domain and make our way towards Iza’s minigame and activate the howling stone right before we get there. The howling stone will spawn a golden wolf which will allow us to learn the Final Blow technique later (which is required for dealing the last hit the Ganondorf to complete the game). When we enter the minigame, we automatically get a bomb bag, and stealing it is very easy as all we must do is use Ooccoo Jr. and warp back to Lakebed Temple. However, this bomb bag won’t be able to stay in our inventory for the rest of the game. When we savewarp next, it will disappear. So, we must use the bombs in this bag to first obtain a bomb bag that we can keep permanently. The closest option for this is the Goron stuck in a rock at the bottom of Zora’s Domain, so we need to empty out our bomb bag entirely and refill it with water bombs to explode the underwater rock and free the Goron. This bomb bag we get from the Goron also is one of the reasons the German text is fastest, as on all other languages the text for the bag is not quick text. With this new permanent bomb bag acquired, we finally head off to the Peak Province. Since we’ll need water bombs in our permanent bomb bag later, we continuously drop the regular ones out as we go along so that we have none when the time comes to get the water bombs.
Next, we perform the Early Snowpeak sequence break with Map Glitch to disable loading zones and brakeslide up the snowy mountain to another howling stone. It’s very convenient that this stone exists, as not having it to reload the area would mean that we wouldn’t be able to progress (since we need to activate a loading zone to get to the next cave, but Map Glitch disables it until the area reloads). In the next cave we take advantage of the vines on the walls using the clawshot to make our way through. Outside we’d usually have to fight a set of shadow beasts, but we skip this by performing an LJA into the void far enough away, so the game thinks we jumped into the void off a different part of the map.
For the snowboarding section, the fastest speed we can attain is while Link is in the air, so we jump constantly and use quickspins to stay in the air slightly longer for each jump. We also take the shorter path obviously, and at the end of the snowboarding we grind on the bridge railing and increase the distance of the final jump before we’re forced off the snowboard. This distance is so great that it completely skips a Midna text trigger in front of the mansion.
Snowpeak and Lakebed Temple
The only reason we come to Snowpeak is to obtain the Ball & Chain (the dungeon’s item). The Ball & Chain has only one required use in this run, so it’s kind of annoying that we can’t skip it (and we’ll get to that use way later). To start off the dungeon we LJA over to a heart piece chest and then clawshot through the ceiling to reach the dungeon’s second floor. Normally you’re suppose to break the floor to get to this chest, so the fact that the developers didn’t bother adding collision to the ceiling below this floor makes sense. As we continue to drop bombs we LJA over to quickly grab a small key, and then LJA back before falling through a glitchy floor to the bottom level of the dungeon again. Thankfully we can use small keys on locked doors from the side opposite the lock, so now we can access the courtyard. In the courtyard there’s a giant freezard blocking the door to the Dark Hammer (miniboss who holds the Ball & Chain), but we clip through it using invincibility frames and a precise B Attack and open the door from behind to activate the miniboss room. (As mentioned before, loading zones behind doors are tied to the animation of the doors opening, so simply standing on the zone behind the door doesn’t load the next area).
The Dark Hammer fight starts off a little slowly as we need to agitate the Dark Hammer and wait for him to throw the Ball & Chain before he becomes vulnerable. The first bomb we dropped was placed in such a way that the explosion would damage the Darknut when he became vulnerable and then Link could quickly come in with a jumpslash quickspin combo and finish him off. Right before the fight finishes, there’s a single frame where we pick up the Ball & Chain and not have to go and retrieve it after the death cutscene. Because of this, manipulating the direction the Dark Hammer throws the Ball & Chain in is necessary and is what made this fight particularly challenging to do. After defeating the Dark Hammer, we drop more bombs and pick up an orange rupee (100 Rupees) from an ice bubble in the room behind the miniboss. Then we savewarp, pick up another convenient orange rupee from an ice bubble, and use Ooccoo Jr. to warp back into the Lakebed Temple.
Now that we’re back in Lakebed we’re finally going to defeat Morpheel. Before that though, we need to finish emptying our real bomb bag and fill it with water bombs, so in the second room we LJA over to the water bombs in the chest on the right side of the room and pick those up. The second to last bomb that Link threw out went into a waterfall off screen, so it would despawn immediately. Otherwise we would’ve had to wait for it to explode before we could throw away the final regular bomb (since the game only allows a maximum of three explosives to be out at any time).
Once we finally have our water bombs we perform Lakebed Boss Key Skip and sink down into the Morpheel fight. Thankfully we can sink down all the way to the fight without drowning, otherwise skipping the Zora Armor wouldn’t be possible. The first phase of the Morpheel fight is trivial with stabbing the eye twice in a single attack. Right before the cutscene that separates the two phases begins we pull out a water bomb while force unequipping the iron boots (which is unequipping them by equipping something else over them, forcing Link to take them off no matter what). After the cutscene ends we wait a little bit and then “place” down the water bomb to refill Link’s air meter (since the game believes that we resurfaced for a frame). We manipulate Morpheel to swim towards Link as quickly as possible and grab onto her eye with the clawshot to then deal damage with our sword. Normally Morpheel will throw us off after each attack, but by putting on and then force unequipping the Iron Boots after we deal the attack combo, we regain control of Link immediately and clawshot the eye again before Morpheel swims away. Three cycles later, Morpheel is dead and we finally completed our first temple of the run with a few frames of air to spare.
Midna’s Desperate Hour
The next section of this run involves a lot of running around as wolf Link which means there’s a lot of brakesliding as well. Just as before, we repeatedly dash cancel through castle town since the base running speed for this area is way lower than normal. Once we get inside Telma’s bar we do a precise jump to skip going across the left rope and save a few seconds. This jump actually requires waiting a few frames, otherwise the Goron will notice wolf Link and kick him out. After crossing more ropes and extracting a poe soul, we come to the sewers again. In the first part of the sewers brakesliding saves more time than usual due to the unique way speed is normally hindered in this area. The game will initially allow Link to run with a speed value of 45 for the first few frames of his animation before it slows it back down to 33, but we preserve the 45 value with brakesliding. The second part of the sewers is an area we’ve seen before, except this time there are more ropes and we can’t use Midna to jump. The bulblin at the base of the broken spiral staircase needs to be defeated, else he’s going to try and shoot us while we cross the ropes in the upper part of the room. Once we get outside, crossing the rooftops is nearly the same as it was at the beginning of the run, except now we use a little bit of brakesliding to speed things up. We also jump over to a bridge near the end that is dependent on a wind cycle (but thankfully the cycle works out nicely).
After meeting Zelda and turning Midna back to normal we spawn outside Castle Town and make our way over to the golden wolf we summoned from the howling stone earlier. Even though this isn’t the first golden wolf one would usually get playing the game, we still get the first hidden skill, the final blow, since the game wants to teach us the hidden skills in a certain order and doesn’t care which order the golden wolves are activated in. Oddly enough though, after learning the hidden skill, we spawn back in Faron Woods (which is normally the location of the first golden wolf).
After warping to Lake Hylia, we follow a normal progression of events temporarily by obtaining Auru’s Memo and delivering it to Fyer who then shoots us off into the desert. We brakeslide across the desert, squeeze through some wooden fences as wolf Link and then make our way to the Bulblin Camp. Here, we abuse Map Glitch again to not void out when falling out of bounds and trigger the King Bulblin flight when we’re way below the map (which then conveniently warps us back up to the map). After swiftly defeating the green punching sack we ram into a wall on a boar to activate the cutscene which loads the area right before the Arbiter’s Grounds. This doesn’t save any time but looks quite funny.
Arbiter’s Grounds
Arbiter’s Grounds was the trickiest dungeon to TAS in this entire run. The first part of the dungeon is rather trivial except for the brakeslide across the sand in the first room. However, when we reach the room with the four poe lanterns, things begin to get interesting. The game will only check for the second, third, and fourth torches to be lit for the gate at the back of the room to open (as it assumes you can’t get to the other poes if you haven’t obtained the scent from the first one). So, we simply ignore the first poe and head off to the west room. There’s a pillar sticking out of the sand here that we abuse to jump up to a higher platform which gives us access to the fourth poe first. Any of the poes can be used to get the poe scent thankfully. So now that we obtained the scent, we go and defeat the second and third poes to open the gate. During the two instances that we need push the pillar in the center of the initial east room, we get damaged by the bubble to skip the full push animation. Similarly, when extracting the second poe soul, there are bubbles flying around which can interrupt the usual extraction animation with damage and give us control of wolf Link earlier than usual, so we can run back to the door we came from. The enemies will also push us closer to the exit door during the cutscene of the poe flame returning to the main room. The small key we obtained before the second poe was used on a door from the wrong side two rooms before the third poe. Right before fighting the third poe, we pick up a red rupee(20) by killing a stalfos. This finally gives us the 300 rupees we need to repair the City in the Sky canon once this dungeon is completed. Now that the last three flames are finally in place, the gate opens, and we proceed to the second half of the dungeon.
For the second half of Arbiter’s Grounds, we head left and immediately slip between a pillar and a wall to get the boss key early. To reach the spinner we navigate backwards and fall through the rooms normally designed as spinner puzzles that would come before the boss key. In the room where we defeat three stalfos to open a gate, all that really matters is how fast we pull out the second bomb which kills the final two. Any movement after this doesn’t matter as long as we reach the gate and roll through it while it opens.
We have now reached the Deathsword miniboss. Due to how this miniboss flies around in the air during the second phase, it’s possible to target its head with a Midna charge. And then use that height to jump over the gate that normally blocks the spinner chest. This skips having to defeat the Deathsword and watch his death animation. After this, we savewarp back to the beginning of the dungeon and go straight through all the rooms we’ve cleared back to the second half of the dungeon. Since we have the spinner now, we use it to activate the necessary spinner puzzles and make our way to the boss room.
Thankfully, I discovered a way to skip Stallord during the making of this TAS. The loading zone to exit this room is always active, even if the gate blocking it is closed. So, by clipping out of bounds, we simply walk into the loading zone and skip the fight altogether. This skip was tricky to figure out since I had to bypass two walls to get fully out of bounds, but after around six hours of testing various ideas it came together nicely. The only reason we can perform CAD at this location is because the bridge (that normally forms after the fight) sticks in bounds slightly to create a ledge tall enough to fall off of. The direction the staltrooper pushes Link is also wildly random. Even changing the angle Link shoots the clawshot at by a single unit completely changes how the staltrooper pushes him. Originally, I had to use two bombs to make the trick work, but later figured out how to clip into the first wall without a bomb by abusing some very subtle L-sliding mechanics as well as better positioning. On the whole, I am very happy with how Arbiter’s Grounds turned out, and it’s probably my favorite dungeon in the entire TAS.
City in the Sky
This next segment starts off by defeating a group of shadow beasts so that we can warp back to the Mirror Chamber when we finish City in the Sky. Normally, we can’t warp away from the Mirror Chamber before bringing up the holder for the mirror. If we try to activate portals and warp away using the map, Midna will try to stop us. However, this does not apply if we zoom in all the way on the map for some reason, so any warps we do from here on out will have to zoom all the way in on the map to activate warping portals before warping away. We warp back to Kakariko Village and go to the basement of Renaldo’s house to perform Early City in the Sky by clipping through the bird statue that normally blocks the path to the Canon. This single clip skips about one hour of gameplay. We then warp this Canon to Lake Hylia and pay Fyer our 300 rupees to fix the Canon and then enter City in the Sky.
City in the Sky is a dungeon which has many void out areas in pretty much all of it’s rooms, so it’s a dungeon that’s primed for a lot of LJAs. Upon entering the ManChicken Kingdom we’re greeted with a nice, long, unskippable cutscene with annoying bird noises. After this lovely cutscene, we begin our trek across the first two straight rooms with a few LJAs and some brakesliding. Before we enter the third room however, we change form to wolf Link. In front of this particular door is a trigger which activates a fan in the third room. The purpose of this fan is to block players from being able to reach the boss key earlier than intended. However, as wolf Link we can open the door from far back enough that we never end up touching this particular trigger, and so the fan blocking the boss key never turns on. Since we did this, we now go and get the boss key by using the clawshot to ascend up some vines.
After obtaining the boss key, we need to get back down to the lower level of this room…without taking any damage (as we’ll need to take damage for a trick coming right up). The quickest way I found to do this was by grabbing a ledge right before the ground and then dropping immediately. Unfortunately, the distance we fall is too high to get a regular roll out of. We proceed on to the east wing of the dungeon, and form a bridge using a spinner groove. This side of the dungeon normally requires a small key to progress on through, but that’s only through the top entrance. The bottom entrance has no lock, so we instead drop down to the bottom and enter the next room.
Up next is the most convoluted skip in the entire run, the City in the Sky small key skip. We have to get up to the top of the room we’re currently in, but there’s no way that’s normally supposed to be possible (as the bottom of this room is meant to be a backtrack room for after getting the second clawshot). However, this room contains two actors that we can clawshot too as well as a chest to provide a ledge we can fall off of. So, we do CAD on two separate objects in this room. Simply put, by using CAD and some bomb explosions, we rearrange these actors into a specific orientation and climb up to the higher level of this room using damage boosts and the clawshot. From the top of the second actor, we get just close enough to grab a set of vines that hang on the upper level, and then LJA over to the door we need to go through next. The damage boost up onto the second actor only works because, for some strange reason, Link will get boosted upwards after grabbing the actor partially through a wall, and then letting go one frame later. If this did not happen, I don’t know if I could’ve made the trick work. This entire thirty-two second room took about ten hours to go through and fully optimize (once I had already spent hours figuring out the skip itself beforehand).
The next set of rooms are our typical LJAs that we’re used to by this point, as well as flying around with ooccaa, and regaining some health for a jump that’ll damage Link in a moment. None of the health we regained wasted any time, as the first heart was directly in our path, and the second heart was obtained while we were waiting for a fan cycle to activate. Eventually, we reach a tall room where we need to fall down as quickly as possible to the very bottom. We speed up our fall with the iron boots and skip sitting through a stunned animation by jumpslashing onto the ground. This jump takes two hearts from us and is what required regaining health after the small key skip. After this comes the skippable Aerolfos miniboss. While standing in a certain position, we angle the clawshot very precisely to grab the medallion above the gate that normally opens after the fight has concluded. This pushes us past the gate and allows us to very quickly obtain the second clawshot before savewarping out.
Once we start our file again, we proceed through the first two rooms the same way we did earlier. Upon entering the third room, we do end up activating the fan that blocks the boss key, but we already have the boss key, so this doesn’t matter. The final section of the dungeon involves a bunch of rotating clawshot panels in the last two rooms. However, these clawshot panels have a weird property that allows Link to climb on top of them if he clawshots the top of the grating from a certain distance above it (or higher). Using this property as well as some LJAs, we cross the outside area without rotating the panels and proceed on to the final room before the boss. The final room consists of a climb up the same kind of rotating panels. For the most part, we must follow what the game wants, but we skip needing to activate the final center panel by grabbing the top of the panel below it with the nearly pixel precise clawshot grabs. From this top we do another very precise clawshot grab onto the medallion above the boss door and proceed on to Argorok.
In contrast to how awesome City in the Sky is, Argorok is unfortunately a pretty slow boss. The start of the fight has us waiting for him to fly around back to the center of the platform before we attack him, but we skip the second flying iteration by grabbing onto the tail again fast enough. The start of the second phase commences with us voiding out to reset Argorok’s position and then using the double clawshots to have him try and shoot fire at us as soon as possible. We use the iron boots to cut Argorok’s fire attacks short by making him think he successfully hit us so that he becomes vulnerable to attacks sooner on all three cycles. Once Argorok is defeated, we finally have our necessary Mirror Shard to enter the Palace of Twilight. When exiting City in the Sky, we equip the iron boots and perform a jumpslash while falling into Lake Hylia so that Link lands on the wooden bridge instead of in the water, as this will allow us to warp away to the Mirror Chamber sooner than if we had to swim to land.
The Palace of Twilight
The Palace of Twilight is unfortunately one of the least broken dungeons in the game. Most of this dungeon simply consists of performing the intended route and puzzles while adding in a little bit of interesting movement or an LJA that may save a few seconds at best. Interestingly, it’s also the place where we get to see the most brakesliding as human Link. The first half of this dungeon consists of two Sols that we need to acquire in order to proceed to the final half, with each sol being contained in a wing on either the east or west side of the dungeon. The way the east and west wings work is pretty much identical, except the platforming is a little harder in the east wing. These wings each have three rooms. The puzzle for the first two rooms is defeating a series of Zant heads and then obtaining a small key in the chest that appears afterwards. The third room with the Sol is always a fight with a Phantom Zant enemy. Then we bring the Sol back through the rooms we just cleared, but fast enough to avoid a giant hand from picking the Sol back up and taking it. Then we place the Sol in the main outside area of the dungeon. When both Sols have ben retrieved, we’re rewarded with an “upgraded” Master Sword (commonly referred to as the Butter Sword) which can defeat twilight enemies in a single slash.
The second half of this dungeon consists of a lot of waiting on platforms followed by an LJA to wherever the platform leads once it gets close enough. Honestly, the most interesting thing that happens during the second half is probably the blind precise clawshot grab on the way up to the boss key. This grab skips having to do an extra clawshot grab on a lower medallion. In the room with the final small key, there’s a platform cycle which dictates how fast the room can be completed, so most of this room is dedicated to messing around since it’s possible to waste around five seconds and still hit the same cycle. The final room is simply a game of waiting for shadow beasts to fall and defeating them all with the same hit stop frame.
Zant is a very interesting boss though, unlike the dungeon he resides in. The fight is broken up into several phases based on previous bosses in the game (mostly of bosses we never ended up fighting ironically). When fighting Zant with the Master Sword, the only hit which actually matters is the fourth hit of the sword slash combo. All the other hits we intentionally miss for the most part (to avoid unnecessary hit stop frames where possible). The first two phases of the fight are dealt with in a single cycle using a precise series of jumpslashes and/or regular sword swings. During the first phase (based on Diababa) I somehow got one of Link’s jump attacks to hit Zant twice. I have no idea how this was achieved and was not able to replicate it afterwards, but it skipped doing another jumpslash, so I’ll take it. The third phase of this fight is the longest, with Zant taking his sweet time to appear inside a giant replica of his head for two cycles. Due to how long he takes, we use a water bomb again to prevent ourselves from drowning. During the second cycle the head that Zant will appear in is the farthest one away from Link’s position at a certain point in time, so we use that to manipulate the head that we want and grab him before he gets a chance to try and attack us.
The fourth phase of this fight is based on the Blizzetta boss fight that we skipped. This is the only required use of the Ball & Chain in the entire route. If we could figure out a way to not use the Ball & Chain here, it would save a ridiculous amount of time. Just like the third phase though, this fight happens in two cycles, each initiated by an attack with the Ball & Chain. Once Zant begins shrinking, we only need to hit him with the fourth slash of an attack combo. This same logic applies on the final phase as well, but the final phase is three cycles instead of two. During the third cycle of the final phase, Zant will attempt to spin attack us, but if we counter his spin attack with our own and push him into a wall, he’ll respawn very quickly and in a vulnerable state where we can attack him instantly to defeat him.
The only dungeon left on the list now is Hyrule Castle, so after exiting the Palace of Twilight we warp to Castle Town, perform an LJA to skip a mailman encounter, and proceed to watch Midna shatter the barrier that encases the castle.
Hyrule Castle
Hyrule Castle starts off with a choice on going either left or right to obtain a small key. The left side has always been known to be faster, so this is the way we go forth. We’re meant to encounter a number of fights that are enclosed by small yellow barriers. The first one of these fights we skip with a very precise LJA over a hedge, and the second fight we skip by simply walking out of the fight zone before the barrier appears. The third fight is the final iteration of King Bulblin, and once we defeat him in a single cycle, he grants us the small key we need. This one cycle is very precise, and only works with the specific timing and combination of spin attacks that Link performed. After this fight, Midna usually tries to talk to us, but we sidehop right before activating her trigger and then savewarp back to the beginning of the castle to skip this text. With our small key, we enter the main castle and make our way up to the final boss. In Hyrule Castle, it doesn’t matter which side of the double doors we enter (if they have a loading zone) since Link will always appear out of the right door when he comes out. We skip another barrier at the start of the interior by jumpslashing into the side of the collision while it forms and skipping its formation cutscene fast enough so that Link doesn’t have time to walk back into the barrier.
The next room is where we fight the only darknut of the run. A darknut’s armor has to come off first in two separate cycles, and then after he throws his claymore at us, we can very swiftly defeat him with the Ball & Chain. After this fight, we target a bunch of places around the room with the Gale Boomerang and then throw it right before the cutscene of a chest forming begins playing. The premise of the puzzle in this room is that there are torches which, when lit, will lower specific platforms at the back of the room. When the cutscene of the chest forming finishes, the Gale Boomerang will be above a torch we want to extinguish instantly, allowing us to ride up the platform as fast as possible to get to the next room, which is a lantern lighting puzzle. After this puzzle, we get to use our final bomb of the run to kill two lizalfos who get a little too close to us and after that enter the outside area of this castle one last time. Once outside, we fight off an aerolfos with the Ball & Chain to get the final small key of the run and roll to the other side of the castle to obtain the boss key (while getting saved by some people that we never met).
Now we ascend the final staircase. The first part of this giant room wants us to follow a specific path through the section of missing floor blocks, but we simply roll over the floor blocks that fall down before they fall too far and ignore the intended puzzle. We also fight some more enemies, and due to the downtime between beating them and waiting for barriers to dispel, we perform some epic sword twirls. The final darknut in this room is easily skipped by using the clawshot on the grates around the boss door and flying through the barrier collision during the cutscene of the walls forming.
The final boss gauntlet of this game consists of four separate fights. The first fight against Puppet Zelda is entirely RNG manipulation. The attacks she does, as well as the amount of time between attacks had to be manipulated so that we got the perfect attack pattern and the least amount of wait time in between attacks. The least amount of cycles possible in this fight is seven and the fastest non-energy ball move Zelda makes is the flying attack. The second fight with Beast Ganon goes through a required three cycles. However, by performing the maximum amount of damage on the first two cycles with a specific series of sword slashes, Ganon will reveal himself quicker on the third cycle using only a single portal and immediately run out of. (Normally he’ll spawn a bunch of portals and delay himself while he chooses which one to spawn out of.) For the horseback fight (hey, Epona’s back!), we simply need to be as close to Ganon as possible when Zelda shoots her light arrow so that we attack Ganon immediately after he’s stunned. In three hits he falls off and we come to the very short and underwhelming final fight. You know the drill by now, we finish this game with three attacks on Ganondorf at just over two and a half hours.
Possible Improvements
The following list is of tricks or time saving techniques that were discovered after this TAS had long passed the point where they would be used.
- Brakesliding at the beginning of the run probably would’ve saved ~20 seconds. Brakesliding was discovered over 40 minutes into the TAS, so it was never used at the start of the run.
When I originally started this TAS, I wasn’t expecting it to take nearly two years to complete. However, my motivation and free time ended up running low after the first few months as I moved away from home to attend college and got somewhat addicted to Overwatch (as well as already focusing a lot of my free time on RTA speedrunning). Putting off this TAS during those times may have ended up benefitting it though, as my motivation to continue was always spurred by new discoveries such as brakesliding, or the new CAD skips which were found during the creation of this run. If I had continued the pace on the TAS that I had started with, brakesliding would’ve probably only been used for the last half of the run. For a while, trying to make any progress on the TAS was very mentally draining, as it took many long hours of tedious testing and manipulation to get the final result we have now (as I’m sure all other TASers are well aware of). During my recent winter break however, I wasn’t able to do RTA speedrunning because of an injury to my hand/arm. At the time, I was about one hour and forty minutes into the run when I figured out Stallord Skip and the City in the Sky small key skip. Starting the day after Christmas, I ended up spending about ten hours a day for eight straight days working solely on this TAS and managed to finish the last forty minutes in that time frame (and then spent many more subsequent hours trying to correctly dump the video and sync it up with the audio which is a whole other challenge on its own).
There are many people who I’d like to thank that deserve to be credited in this TAS. I may have been the only person who created inputs for the DTM file, but it would not have been possible to keep going and complete this run without the help and support of those in the TASVideos community and the Twilight Princess Speedrunning community.
I’d like to specifically thank Pheenoh (the Meano) and Rachel for their work in pioneering Twilight Princess TASing many years ago, as it served as an initial inspiration and guide for my curiosity in TASing this game.
I’d also like to thank dragonbane0 who developed the custom version of Dolphin used for the creation of this TAS, which only desynced on me once in the entire process. Dragonbane0 also has an incredibly vast knowledge of Twilight Princess as a game and was a major help with the optimization ideas in most areas, and theories on potential skips.
If you made it this far, thank you for reading. I hope you enjoy(ed) watching the Twilight Princess TAS.
Noxxa: Excellent run - it's clear that a lot of time has been spent on this movie, and it has been put to good use. While technically the Zelda Edition is not an official Dolphin release, I think it can be considered as legitimate enough for TASing purposes, so I won't hold the use of it against this movie. Accepting to Moons.
Fog: Some other poor soul can attempt this, I'm not getting around to it any time soon.


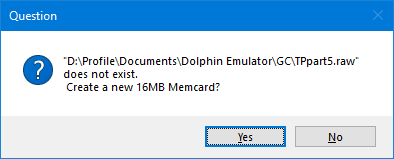 Click "Yes".
Then, immediately after, you'll get asked a second question:
Click "Yes".
Then, immediately after, you'll get asked a second question:
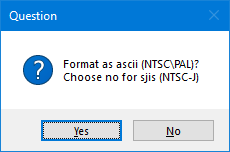 Here, you have to click "No". This will trigger the memory card format in the game when playing back the movie (see the temp encode).
As a side note, the GC system language has to be set to German (obviously) and the DSP audio engine has to be set to LLE recompiler (but using Dolphin's internal DSP ROMs instead of the proprietary DSP ROMs).
EDIT: The MD5 hash of the disc is identical to the one found on
Here, you have to click "No". This will trigger the memory card format in the game when playing back the movie (see the temp encode).
As a side note, the GC system language has to be set to German (obviously) and the DSP audio engine has to be set to LLE recompiler (but using Dolphin's internal DSP ROMs instead of the proprietary DSP ROMs).
EDIT: The MD5 hash of the disc is identical to the one found on