This page documents information about Metroid
. Many of the tricks demonstrated here are near impossible in real time and documented for the purposes of creating Tool-assisted Speedruns.
Table of contents
Glitches and Techniques
Morph Jump
Samus can jump while unmorphing.
Press up or jump to cancel morph, then jump.
If left or right is pressed between unmorphing and jumping, this will not
work. Samus will stop when she lands, losing all forward momentum.
Fall Jump
Samus can jump while falling.
Reach the very edge of a platform and release left/right.
If done at the right frame, Samus will fall, but still be
in the standing position. She will now be able to jump if
she hasn't moved. Samus will stop when she lands, losing
all forward momentum.
Bomb Boost Jump
Samus can get extra height using a bomb. Lay a bomb and unmorph.
The bomb will push her upwards, and you can then jump for extra
height, as long as you do not press any movement keys between
the bomb blast and jumping. Samus will stop when she lands,
losing all forward momentum.
Double Bomb Boost Jump
If even more height than a bomb boost jump is needed, Samus
can perform a double bomb boost jump. Don't unmorph after
laying the first bomb; instead use its blast to lift Samus
up so she can lay a bomb in mid-air. Unmorph and use the
second bomb's blast to lift Samus even higher.
Horizontal Bomb Boost Jump
If distance is also required, Samus can perform a
horizontal bomb boost jump. Lay a bomb and unmorph.
Move very slightly in the direction needed. Samus should
move only a few pixels. Jump after the bomb explodes, like
a normal bomb boost jump, and Samus will jump very high and far.
Fire Every Frame
Normally Samus can only fire every other frame, because you need
to release the fire button for one frame for the next shot to
register. She can fire every frame by holding down fire, and
every other frame, either press a different movement key, or
release movement.
Fire Missiles After a Beam / Bomb
Normally Samus cannot fire a missile if another weapon sprite is
on-screen. If you fire a missile, then fire a beam or bomb, you
are able to fire missiles afterwards.
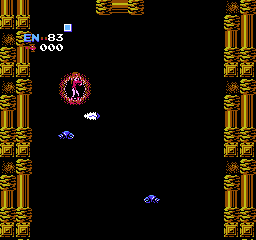
Invulnerability Exploits
When Samus is hit, she gains invunerability for a few frames,
in which time she can pass through monsters and attacks unharmed.
If Samus damages a monster, she can pass through it unharmed for
a few frames.
Door Glitch
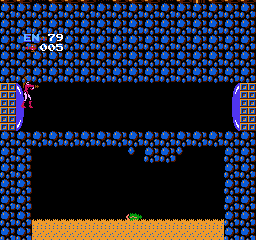 The door glitch can be used to give Samus access to areas she
otherwise wouldn't be able to, including secret worlds. To perform
this, open a blue door and stand inside it, but do not enter the
next room. When the door closes, Samus will be stuck inside of it.
By rapidly morphing and unmorphing, she can move herself vertically
through the wall. Do this repeatedly and she will wind up at the
bottom of the screen. To reach the top of the screen, stop and jump
repeatedly to scroll the screen upwards, before Samus dissapears off
the top of the screen.
The door glitch can be used to give Samus access to areas she
otherwise wouldn't be able to, including secret worlds. To perform
this, open a blue door and stand inside it, but do not enter the
next room. When the door closes, Samus will be stuck inside of it.
By rapidly morphing and unmorphing, she can move herself vertically
through the wall. Do this repeatedly and she will wind up at the
bottom of the screen. To reach the top of the screen, stop and jump
repeatedly to scroll the screen upwards, before Samus dissapears off
the top of the screen.Block Glitch
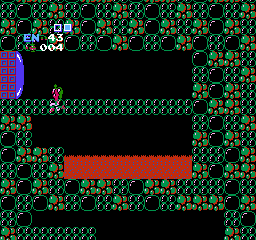 In certain areas, there are blocks that Samus can morph jump through.
This is very conditional. There must be a single row of blocks two
blocks above a platform; just enough space for her to stand between
them. Morph and quickly morph jump, and she can pass through the block
above. This is very difficult to perform in real-time.
In certain areas, there are blocks that Samus can morph jump through.
This is very conditional. There must be a single row of blocks two
blocks above a platform; just enough space for her to stand between
them. Morph and quickly morph jump, and she can pass through the block
above. This is very difficult to perform in real-time.Luck Abuse
Item Drops
As far as I can tell, item drops from monsters are determined solely
by the frame the monster is killed. Simply kill the monster at
different frames to change what it will drop.
Monster Spawning
Monster spawning can be manipulated to a degree, by the amount of monsters
on-screen. You will need to kill a monster about two screens away from the
area you wish to manipulate, or before entering a door.
Sequence Breaks and Shortcuts
Brinstar Ice Beam Without Bombs
Use the door glitch downward to get below the row of blocks and
proceed normally to the Ice Beam.
Varia Without Hi-Jump
There are actually four different ways to do this.
The fastest is to use a horizontal bomb boost jump from the
platform, just before falling through the fake blocks.
A double bomb boost jump can also be used. A slower way
is to door glitch upward using the left door. The last way
would be to lure a waver up to the top area, and then use
the Ice Beam to freeze it for a platform. This is difficult,
and is the slowest method.
See the 100% run for an example.
Kraid Without Bombs
Use the door glitch downward to get below the row of blocks and
proceed normally to Kraid's hideout.
See the Any% run
or the 1-Item run for an example.
Lower Norfair and Ridley Without Bombs
Use the door glitch downward to get below the row of blocks. Samus now
has access to Ridley's hideout, as well as the many items in this part
of Norfair.
See the 1-Item run for an example.
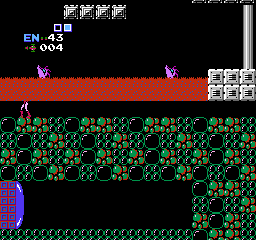
Upper Brinstar Backdoor
 Climb the far right Brinstar shaft, until there are no more platforms.
Use the rippers as platforms by freezing them and jumping onto them.
If the last ripper is in the right position, a double bomb boost jump
will lift Samus high enough to get to the next platform, and into the
top corridor. Alternatively, the waver that flies around can be frozen
to use as a platform to get up, although this is much slower and more difficult.
Climb the far right Brinstar shaft, until there are no more platforms.
Use the rippers as platforms by freezing them and jumping onto them.
If the last ripper is in the right position, a double bomb boost jump
will lift Samus high enough to get to the next platform, and into the
top corridor. Alternatively, the waver that flies around can be frozen
to use as a platform to get up, although this is much slower and more difficult.
See the 100% run for an example.
Norfair Energy Tank Quick Backtrack
 After getting the energy tank in Norfair, head back to the small
shaft to the right. Go to the top door and you can door glitch
upwards into the room before the Hi-Jump Boots. Do not exit out
the door to the right, or else the shaft will not scroll vertically!
Instead get onto the platform with the crawly monster, then jump at
full height to the left. The screen will scroll as if you entered
another room, but will scroll normally when it is done. If done
correctly, you can now exit through the door to the right, and
the shaft should scroll correctly.
After getting the energy tank in Norfair, head back to the small
shaft to the right. Go to the top door and you can door glitch
upwards into the room before the Hi-Jump Boots. Do not exit out
the door to the right, or else the shaft will not scroll vertically!
Instead get onto the platform with the crawly monster, then jump at
full height to the left. The screen will scroll as if you entered
another room, but will scroll normally when it is done. If done
correctly, you can now exit through the door to the right, and
the shaft should scroll correctly.
See the 100% run for an example.
Lag removing trick
Abusing the movement system, you can press different direction on various frames (mostly "first" frames and when Samus reaches the "next" speed (from -1 to -2 for example) while still moving to the same direction without changing the speed.
TODO:Find out why. ROM is same after 1500 frames (start-OoB) but different after (OoB-door) 2300 frames
Movement optimizing
Same as above, you can use this to decrease your speed earlier before actually switching direction. TODO:Elaborate side effects (different pos at next room and lag) and effectiveness (low but useful)
RNG
There's two values, $2E and $2F. Subroutine at $C000. TODO:And how to manipulate it?
Authors
See also
- Game Resources - we have resource pages for other games too!
- Common Tricks - tricks common to many games
- Boss Fighting Guide - tricks specific to boss fights
GameResources/NES/Metroid last edited by adelikat on 1/16/2022 10:42 PM