Throwstar Heroes is a game about throwing. Boys get thrown a lot. Retro game? More like throwback! Throws! THROW THE FIRE AND THE FLAMES WE CARRY ONNNNNNNNNNNN *tries to shred on a guitar but immediately breaks all the strings*
Table of Contents
Table of contents
- Table of Contents
- Game objectives
- Comments
- Holy hell you wrote way too much, Bag of Magic Samsara
- Difficulty
- Firing and You: How to be a Gunstar Gun Star
- Tech and Tricks
- Improvement Tables
- Stage by stage comments
- Writing List
- Known Improvements
- Possible Improvements
- Special Thanks
- Screenshot Suggestions
- Before the Afterword
- Special Thanks 2: Thank Harder
- Super Final Thoughts
Game objectives
- Emulator used: BizHawk 1.11.8.1 (Began on 1.11.6)
- Aims for fastest time
- Uses hardest difficulty
- Abuses what I can only assume to be programming errors
- Takes damage to save time
- Uses speed/entertainment tradeoffs
- Writes too much, like way too much, like a whole hell of a lot
- Same with the submission text to be honest
- Toss Boy?
- I think it might be Toss Boy!
Comments
Oh God, I'm so sorry for what you're about to spend the next week and a half reading.
I think out of every game I've TASed, this is my absolute favorite, and I mean that for both the game and the TAS itself. A passion project from beginning to end, the most I've worked on a TAS, the most fun I've had with a TAS, pretty much the best thing I'll accomplish in my time on the site unless I start getting into Super Mario 64 TASing.
And I'd rather not do that.
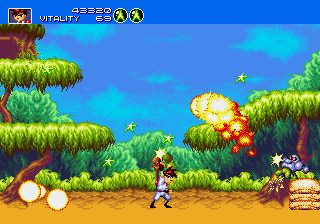
Gunstar Heroes is probably the best game on the Sega Genesis, and that includes all the other classics. It's a game about explosions, throwing your partner, explosions, lots of different guns, a little bit of mind control, explosions, color-based name schemes, similar outfits, explosions, shouting, and explosions.
This is a 16259 frame improvement over the published run. Starting this TAS sorta just came on a whim, really... Then again, I guess most TASes are like that. I went into it with a couple ideas thinking I wasn't going to get a whole lot done and came out the other side with far more savings than I expected. The bulk of the improvements come from heavy optimization of boss fights and forced fights, but there's also some insane new improvements in stage movement and just pure optimization all around.
I started doing some testing with this game back in April, but judging (lmao) from my Youtube uploads I've been interested in Gunstar TASing since February. I started out by testing Gunstar Super Heroes, finding a few minor improvements in that before realizing I should just bite the bullet and do the original first. My first few tests ended with me finding a few movement improvements in Black's stage (which didn't end up being kept at all, as you'll see) and a quicker strategy for Papaya Dance in Pink's stage (which DID end up being kept, as you'll see). After that, I got sidetracked with other projects, because I'm Samsara. I helped out with a Star Wars, did some demon game where half-naked horse men beat a woman to death in what I can only describe as the President-elect's wet dream, and I think there was some sort of weird gimmick in there as well, but a couple months ago I decided to sit my sweet ass down and dedicate myself to this run full-time. No pay, though, because all the money I earned as a Judge went immediately to Nach in order to maintain Coca-Cola Kid's Star. TAS politics ain't cheap, yo.
Now I just need to find a new job in order to continue maintaining that Star. Anyone hiring? I'm a quick learner and I have a lot of experience in sitting on my sweet ass and watching video games in some form or another. Diversified talent right here. I can watch AND play video games!
After one restart very early on that definitely wasn't because I forgot to press Start to skip the opening menus and was definitely because I found some major improvements that didn't involve pressing Start to skip the opening menus I am a very good TASer and pressing Start to skip the opening menus is something I absolutely did not miss thank you very much, I worked like hell and somehow managed to actually finish it... Assuming I actually DO finish it, since I'm writing this part of the submission text before the run is even finished. I mean, if you're reading this and you're not me, then I finished it. That's kinda how things work.
And yes, since I am writing this before finishing the run, that does mean I completely accurately predicted the final improvement time earlier in this section. It definitely written before the run was finished and I didn't go back and replace (INSERT FRAMES HERE) upon completion of the run. I'm just psychic. If you want a second prediction, donate 50 player points to my account and I'll be your Miss Cleo.
That may have been the first time anyone's remembered Miss Cleo in well over a decade, and it's in the very beginning of a friggin' TAS submission text. The world works in mysterious ways.
Anyway, have fun reading this overly wordy, yet somehow still non-informative submission text, because holy hell I wrote way too much what was I even thinking.
Holy hell you wrote way too much, Bag of Magic Samsara
What was I even thinking? Well, a couple of things, really. Also, it's just Samsara. I mean, I appreciate the comparison and all, but I'm still like 5000 words short of Mega Man Battle Network and Peace. War and Peace was a long book, right? I don't actually know what a book is. I only read visual novels. If you release a version of War and Peace that's occasionally intercut with half-naked anime babes and/or lesbian bondage, I'd be down to read it.
Lord almighty I hope other people have heard of Ladykiller In A Bind and don't just think I mentioned lesbian bondage out of personal fetishistic desire or anything.
The first reason that I mentioned too long ago for anyone to remember is simply because I was inspired by Weatherton's masterful Mario Kart 64 submission text. It's probably the best on the site, wonderfully laid out and informative and it reads like the most weirdly specific picture novel. It's like a picture book, except it's also a novel. Kinda like a visual novel. About lesbian bondage. Except instead of lesbians, it's Mario, and instead of bondage, it's Kart 64.
What the actual Christ am I talking about anymore?
The second reason is because this game just deserves an insane amount of documentation, and the previous submissions/publications for this game have been really limited on information. And jokes. And optimization, in some cases, but that's beside the point. I had to insert a good amount of information and jokes into this submission text in order to make up for every previous submission.
Or, realistically, a good amount of information and the same two jokes told over and over again. Hey, anyone remember those water puns? Maybe I should fish up a couple more! Hey, anyone remember when the submission thread for that run was nothing but more water puns?
Hey, anyone remember when this submission text actually talked about the game? Me either.
There's also just a lot to explain in Gunstar that people unfamiliar with the game would need to have explained to them, like some of the more subtle mechanics, why it's weird that some enemies can be thrown and some can't, why I primarily use like 3 guns and don't bother with any of the others, the differences between each difficulty and why Expert is the only publishable one, and most importantly, I can't think of a funny enough joke to end on. Too bad! You saw this paragraph through to the end and I disappointed you!
...Ahem.
The third reason is because holy hell I just did not have the motivation to work on the run some days, so me being a "freelance writer", which is a fancier way of saying "unemployed", I would use those moments of no motivation to just work on this submission text. I like writing. A lot. More than I should, really. Did I make that obvious yet? Working on the text alongside the run allowed me to go way more in-depth about my strategies as opposed to my previous strategy of doing the write-up after I finished the run and promptly forgot damn near everything I did in it. The more I can explain, the more I'm prone to spats of pleonasms. Look that word up, I learned it like 2 days ago and I immediately thought "Boy, wow, I sure dang use a lot of those forever!"
That being said and done, let's get into the Let's Play portion of this submission text and deeply explain the mechanics and controls of the game. I'll edit in a facecam once I can set up the greenscreen rig that allows me to put my floating head over Gunstar Red the entire time.
Difficulty
Gunstar Heroes has 4 difficulty settings, and each difficulty level is significantly different.
Easy
On Easy difficulty, your weapons do the most damage. Bosses themselves have more forgiving patterns as well, whether it be less/weaker attacks or even smaller bodies. In the Underground Mine, you only face 3 forms of Seven Force.
Normal
On Normal difficulty, everything's about average. You do a little less damage than on Easy, bosses are a bit more challenging, and you have to face 5 forms of Seven Force in the Underground Mine.
Hard
On Hard difficulty, things start to get insane. You do less damage than on Normal, bosses have more/stronger attacks, and you have to face all 7 forms of Seven Force in the Underground Mine.
Expert
On Expert difficulty, the game hates you. Every single one of your attacks does less damage, in most cases doing about half as much as they would on Easy or even Normal. There are more enemies to contend with, boss attacks are at their strongest, being even harder to avoid than Hard... And of course, you still have to fight all 7 forms of Seven Force in the Underground Mine.
Expert is chosen to give the most variety/entertainment/content. Despite the huge damage reduction, bosses are still cleared ridiculously fast, giving an extra level of TAS-ness to the run. Throughout the course of the guide, I'll be comparing Expert to Normal, because it's easier that way.
Firing and You: How to be a Gunstar Gun Star
The first thing to take note of here is the difference between the two "characters": Free Shot and Fixed Shot. Those aren't actually their names, because that would be a tiny bit weird, but it's actually how they fire their guns. It's a simple difference: Free can move while firing, Fixed cannot. And yes, the characters are tied to the firing mode. It is possible to have two identical characters (apart from color: P1 is always Red and P2 is always Blue) if both players choose the same firing mode.
Despite the name of the game being GUN-star Heroes, guns don't get a huge amount of use in the TAS, but they're still a very important part of boss optimization and lag reduction, so I'll talk about them in great, great, great detail.
There are four base weapons in Gunstar Heroes, and these weapons can be combined with each other to make 10 unique gun combinations, or "gunbinations" as I just came up with. Depending on your playstyle, whether you're a single casual player or a crazy TAS Boy, each gun has its own strengths and weaknesses. There are a few that are way better than others, naturally, so myself being one of those aforementioned TAS Boys (well, moreso the TAS than the Boy, let's be real here), I stick with what works the best for going fast. If you want more information on every gun combination, whether it be because you're genuinely interested in playing this beautiful specimen of a game or whether you just want me to pad out this submission text even more than I already am, here's a dang list of all 14 weapons. Anything in quotes is direct from the game or instruction manual.

"Force fires rapidly to a point."
The most basic weapon, acts like the standard machine gun in any other run n' gun game. Ever play Contra? Ever seen Contra? No? Well, welcome to video games! I'm so sorry this was your introduction to them. Anyway, Force is about average overall and doesn't get a whole lot of use in the run, though it's one of the best basic weapons for casual play. You generally won't be using just a single weapon when playing casually, most stages just immediately give you a second weapon before you even realize what just happened, but in general Force is just... It's pretty good. Six out of ten. That's a pretty good pet.
"Double Fireball"
An upgraded Force. The bullets are larger and have more of a spread over longer distances. It might do more damage? But not enough to be worth checking out in the TAS and, somehow, not enough to be worth looking up for this submission text, even if I looked up the names of the guns from the manual and made all these fancy pics and GIFs and goofs and gaffs to make it even more of a ripoff of a better submission text. Seven out of ten. Good pet, a little more exotic.

"Lightning fires through enemies."

Basically a piercing laser, it's not great by itself but it's part of some awesome combinations. Fires in short bursts and passes through enemies and obstacles. For casual play, you'll really only want to start with Lightning to get to the combinations. Even the upgraded Lightning isn't SUPER great. I mean, it works, but then again all of the guns in the game work. Otherwise this wouldn't be Gunstar Heroes. It would be... uh... Dudstar Heroes. Boom. Got 'em. Four out of ten. Pretty good pet, but I feel like I've had pets like this before.
"Mega-Bolt"
An upgraded Lightning that fires a constant stream of Lightning instead of just a short burst. Five out of ten. Slightly less good than it would have been.

"Chaser follows enemies."
The best base weapon in the game, and the second most-used weapon in the TAS. Chaser, as the name implies, chases enemies and does far more damage than it should for a base weapon. Only 8 bullets are allowed on screen at any given time. I'm into it, I'm REALLY into it. Eight out of ten.
...Now it's peeing. Seven out of ten.
"Star Chaser"
An upgraded Chaser. The bullets are now stars that move far faster, but do a bit less damage as a drawback. The 8 bullet limit still remains, but the faster speed means you almost never have 8 onscreen at once. Five out of ten. You son of a bitch! You betrayed my pets!

"Fire is very effective in close combat."
The standard risk/reward weapon. It has a short range that requires you to get in close to use it effectively, but it does do a good amount of damage as a result. Made up of 5 "segments". Unlike the other weapons, you cannot instantly turn while firing. The closer you are to the enemy, the more damage it does, and it is actually the most damaging base weapon if you get real all up in an enemy's grill. Nine out of ten. Just like I hoped!
"Ultra Flamethrower"
An upgraded Fire. There are two more "segments" to the weapon, giving it a little more range. It still has the same slower turning that Fire has. This is a combination of two Fires. Add their scores together, eighteen out of ten. Excellent pet.
"Rapid-fire Lightning"

Imagine the normal Lightning gun, but it has Fire's slow turns. They gave that combination the most ironic name possible. This gun does get used for the first part of the TAS, but mostly because P1's gunfire doesn't have much use. Five out of ten. Just like the Mega-Bolt. I don't discriminate!
"Chaser Force Beam"
This is basically the Force + Force combination with some decent homing courtesy of Chaser. Really good weapon for casual play. Eight out of ten. Just a big boy gettin' a big pet for a BIG score!
"Exploding Fireball"
A very slow, but interesting weapon. You fire Force bullets that explode either upon contact with an enemy, or when you release the fire button. Fun, but very hard to use effectively. Seven out of ten. Too soft, too furry-ous. Loved it!
"Chaser Lightning"

My favorite gun for casual play and one of the best guns for Free Shot. This gun fires an extremely fast bolt of lightning that homes in on any damageable object on screen. As long as you hold down the button, the bolt will remain on screen and seek out anything it can damage. One drawback: It's probably the weakest gun in the game in terms of actual DPS. Eight out of ten! Really good pet!
"Lightning Saber"
The most powerful gun in the game, it combines the piercing effect of Lightning with the insane short-range power of Fire, almost as if those were the two base weapons needed to make the combo. Eight out of ten for him, nine out of ten for me. I think he really needed it.
"Chaser Fireball"
Saved the best for last. The star of the TAS and the absolute best gun for Fixed Shot. This is basically a mobile Fire weapon that you can control with the directional pad. If you don't control it, it will loosely chase enemies and otherwise travel in a circle, but if you do control it, you can make it move wherever you want. It's also the second most powerful gun in the game, doing only slightly less damage than Lightning Saber (on easier difficulties, at least: on Expert they do the same damage). You're gonna see this gun a lot. Ten out of ten. Ahhh, it's the perfect pet! The pet I love more than all others!
Tech and Tricks
Jump Control
Something I managed to overlook until just before Save Yellow (and thankfully only has actual use starting in that stage), holding Up while jumping gives you extra height, and holding Down while jumping will decrease the height of your jump. Sometimes the simplest things are the most often overlooked, or some other pseudo-philosophical phrase like that.
Throwing
The most useful thing in the game, hands down... and hands on, too, but only for a brief moment before said hands are used to launch a boy across the screen. Throwing does insane amounts of damage, and thankfully in a 2-player run, throwing is always available. Throwing an enemy/boss itself does varying amounts of damage, anywhere from 100 to 420. That's not a joke, 420 is an actual possible value for throw damage. Throwing the other player into an enemy/boss does about 20 damage per frame on Expert, and 50 damage per frame on Normal, which is far and away the fastest DPS over long periods of time. It is the fastest form of movement in the game as well, especially under a special TAS-only condition, as you'll see a couple headers down.
Pressing Left or Right the frame after executing the throw will turn the players to face that direction, regardless of the direction they were facing before. This has very situational usefulness: It's usually either done to avoid damage or to start a Certain Thing a bit earlier.
Quick Drop
It's possible to break off a throw and instantly drop an enemy or your partner. The way to do it is kinda nebulous, but I believe it involves interrupting the start of the gunfire animation with a throw while you're in the air. It's about as awkward as it sounds, to be fair. It can be "done" from ground with the following set of inputs:
B, C, Down+B
This starts the gunfire animation, jumps for a frame, then starts a throw. If you're already in the air, you just replace C with a blank input frame, and it will still work.
One of the neat "features" of a quick-drop is that it can actually clip players into walls and objects. This doesn't have a whole lot of use for the most part and obstacles only really serve to mess up the next (and most useful) trick, as clipping into an obstacle will usually zip you on top of it, but this little quirk does have some fun uses in the run.
Speaking of that most useful trick...
Drop Chaining
Hey, we're a couple headers down now. Time for that Certain Thing.
Under TAS conditions, both players can quick drop each other in such a way that it outclasses every other form of horizontal movement. It's probably the goofiest thing in existence, the worst and the most wonderful thing I've ever stumbled across, simultaneously.
What happens is that when you start throwing anything, whether it be your partner, an enemy, or a throwable object, that thing's position jumps behind the thrower. A quick drop means the "thrown" person or object is released instantly, meaning in the case of your partner, they can start throwing you, making your position jump behind and slightly below them, and if they quick drop you, this chain can continue indefinitely.
Drop chaining actually outruns the screen, meaning the time saved is more limited than it should be, but it's still significantly faster than any other form of movement. Having it outrun the screen actually means you have a fair amount of leeway if you get caught up for whatever reason.
The Samsara Special
Remember how in nearly every run I've ever done, there's always been one discovery I make where I have absolutely no solid way of explaining or defining it? I sure do. Probably because I made all those runs in the first place, but that's beside the point. Point is that there's a real weird quirk related to throwing that I just can't figure out for the life of me.
Basically, certain things can be thrown. That much is obvious, I suppose, if you're aware of the concept of throwing. But these "certain things" are normally completely unthrowable. Giant mechs, piles of crates, the list goes on, except it actually doesn't because I've only been able to throw those two kinds of things while testing this glitch out. From what I can tell, in certain cases and with certain obstacles/huge bosses, you can actually trick the game into throwing both the other player AND said obstacle/boss. This results in the player not getting thrown and the obstacle/boss... well, also not getting thrown, but instead getting "displaced", either ending up floating in midair or lodged slightly in the ground, a few pixels away from where it was thrown.
I only found two practical uses of this in the run, which you'll see in Black's stage and the final stage, but it has another real fun use in said final stage that I'll show off when we get there. It's just for fun, though, and actually makes the game unwinnable as opposed to completely changing how I handle boss battles over the course of the run. So you can probably figure out what happened anyway. You're a smart cookie. Oatmeal raisin, probs, since that way you've made sure that nobody wants to eat you. Unless they're crazy, but crazy people generally eat other people as a rule so you're pretty much fine either way.
Jump Attack
The fastest general form of movement under non-TAS conditions. Hitting an enemy with a jump attack will do 20 damage every few frames on Expert, and 50 on Normal.
Skidding
A half-circle forward or backward + attack (B) causes what I'm calling a "skid", where you run along the ground and slide on your feet to, presumably, take those old records off the shelf. This is slightly faster than a normal slide over longer distances. Every part of this skid damages enemies at the same rate as a jump attack.
I say a "half-circle", but what I really mean is two frames of input: Down+Left, Right+B to move right, and Down+Right, Left+B to move left. Not that it matters how long the input chain is as long as Left/Right + B are done on the correct frame, but hey, I can technically get away with calling that optimization!
Sliding
Just a normal posterior-based slide. Slides are usually used over shorter distances when jump-kicking ends up being slower, or when a ledge is close by, though they mostly get used for attacking purposes, as they will damage enemies at the same rate as a jump attack/skid.
Sliding can also be done in the minecarts from Green's stage, and they really come in handy for lag reduction in the latter half of the first half of the stage. Make sense of that. That's your homework for tonight. I expect it on my desk by Monday. This is a School Office.
Quick Turnaround
Pressing Down+Left/Right to turn around saves a frame over turning around normally. Firing while turning causes an instant turnaround. This is just a simple and not-often used optimization trick, but it's worth mentioning.
Boss Optimization
Optimizing bosses to the fullest extent takes very careful throwing and tightly choreographed gun usage. Partner throws, as I said a few headers ago, do 20 damage per frame, but in between throws there's an 18-20 frame grace period where neither player can act. What this means is that each throw has to be in the correct direction, from the correct position, in order to minimize the number of throws needed to take care of a boss.
But that's not all: Further frames can be saved by damaging bosses during the grace period. Even if players can't act, any shots that are on screen will continue to exist and damage anything they run into. If I can do at least 20 damage in between each throw, that's a frame saved each time. Chaser Fireball, the best gun, does 4 damage every 2 frames and can be positioned perfectly, so it's used between almost every single throw. Careful positioning of the shot between every throw allows more than 20 damage done between every throw, which can add up to 5-6 frames of savings overall.
Bosses can almost always be damaged before their healthbar shows up, and in some cases they can be damaged while offscreen. A lot of bosses require interesting/unique strategies in order to get the maximum amount of damage done to them before forced invulnerability periods or pattern changes or whatnot. This is basically a game that's almost entirely about the bosses, and boss fights make up a huge portion of the time saved over the previous run, so... Yeah. It's all cool.
Improvement Tables
I collected all this data, I might as well show it.
By Stage
| Stage | arkiandruski | Samsara | Improvement | Total |
|---|---|---|---|---|
| Pink | 8510 | 7792 | 718 | 718 |
| Green | 32527 | 29986 | 1823 | 2541 |
| Orange | 45595 | 41734 | 1320 | 3861 |
| Black | 61453 | 56556 | 1036 | 4897 |
| Save Yellow | 71613 | 64518 | 2198 | 7095 |
| Battleship | 105353 | 96277 | 1981 | 9076 |
| Final | 127735 | 111476 | 7183 | 16259 |
By Fight
| Boss | arkiandruski | Samsara | Improvement | Total |
|---|---|---|---|---|
| Pink Phantom | 1891 | 1666 | 225 | 225 |
| Papaya Dance | 2300 | 2002 | 73 | 298 |
| Pink Phantom 2 | 3209 | 2719 | 192 | 490 |
| Bravoo Man | 4556 | 4058 | 8 | 498 |
| Pinky Roader | 8510 | 7792 | 220 | 718 |
| Green Stage Trains | 19811 | 18942 | 151 | 869 |
| Soldier Force | 22080 | 21087 | 124 | 993 |
| Tails Force | 23655 | 22603 | 59 | 1052 |
| Blaster Force (by battle frames)[1] | 1031 | 1033 | +2 | 1050 |
| Urchin Force (by battle frames) | 1623 | 1383 | 240 | 1290 |
| Tiger Force (by battle frames) | 1987 | 1385 | 602 | 1892 |
| Eagle Force | 30763 | 28408 | 463 | 2355 |
| Crab Force | 32527 | 29986 | 186 | 2541 |
| Yellow Phantom | 41046 | 38487 | 18 | 2559 |
| Swapping Reg | 41895 | 39119 | 217 | 2776 |
| Smash Daisaku | 43764 | 40299 | 689 | 3465 |
| Orange | 45595 | 41734 | 396 | 3861 |
| Black Phantom | 48417 | 44143 | 413 | 4274 |
| Timeron | 49572 | 45246 | 53 | 4327 |
| Melon Bread | 51331 | 47480 | 59 | 4386 |
| Destroy! (by time)[2] | 57.62 | 58.28 | 33 | 4419 |
| Curry and Rice | 56771 | 52149 | 203 | 4622 |
| Black Beat Stepper | 61453 | 56556 | 275 | 4897 |
| Stage 5 Phantoms | 66373 | 60440 | 1036 | 5933 |
| Pre-Smash | 68257 | 61822 | 502 | 6435 |
| Smash Daisaku 2 | 70292 | 63254 | 603 | 7038 |
| Smash Daisaku 3 | 71613 | 64518 | 57 | 7095 |
| Timeron 2 (by time) | 1.00 | 1.00 | 0 | 7095 |
| 1000mm Gun | 91394 | 83823 | 476 | 7571 |
| Seven Force 2 | 98868 | 90194 | 1103 | 8674 |
| Unit of the Hammer | 100811 | 91900 | 237 | 8911 |
| Unit of the Dragon | 103123 | 94067 | 145 | 9056 |
| Unit of the Runner | 105353 | 96277 | 20 | 9076 |
| Duck Battalion | 107284 | 98029 | 179 | 9255 |
| Duck Battalion 2 | 108095 | 98783 | 57 | 9312 |
| Pink Lobster | 110269 | 100487 | 470 | 9782 |
| Orange 2 | 112901 | 102686 | 433 | 10215 |
| Black Fly | 115879 | 103952 | 1712 | 11927 |
| Green | 120359 | 106736 | 1696 | 13623 |
| Golden Silver | 127735 | 111476 | 2636 | 16259 |
[1]: Since forms 3-5 of Seven Force are done in a different order than the published run, I compared the total number of frames the battle took as opposed just the battle-end framecounts.
[2]: In-game timers in Gunstar Heroes run at 50 frames per second.
Stage by stage comments
Opening + Setup
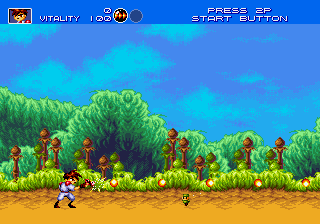
The only real difference here is that I play around with the spinning logo a bit for entertainment purposes. There's no time loss, just Fun With Logos. Difficulty is set to Expert, because of course it is.
P1 (Red) is set to Free Shot, starting gun is Force. P2 (Blue) is set to Fixed Shot, starting gun is Chaser. One frame is lost choosing Chaser, but it saves time at the very beginning of the first stage.
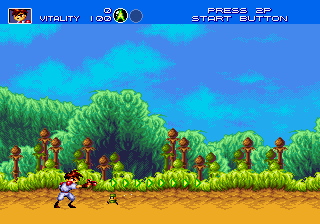
Pink's Stage - The Ancient Ruins
NOTE: Due to the much later discovery of drop chaining and my intense frustration over the thought of having to redo 2 months of working on Green for only about 10 seconds of improvement, this stage does not use it. This is also mentioned in Known Improvements below. The notes written for Pink's stage and Green's stage were written before the drop chaining discovery, and kinda reflect that by being positive about my movement improvements in Pink's stage as opposed to whining about how I couldn't even begin to get the motivation to redo both stages.'
NOTE 2: In these comments, I've sectioned off stages by boss battles or other forced fights. Improvement times at the end of each section are based on the frame in which I defeat the listed boss (i.e, the frame "DEFEATED!" appears in place of their healthbar). These improvement times will include any movement improvements before that boss.
I start off the level with the first of a thousand throws, just to get everyone into the spirit of the run and to separate Red and Blue a bit. I use a few skids in the early portion since those houses count as damageable obstacles: If I try to jump kick through them, I'll damage the houses and stay frozen for a long period of time. Can't have that happening.
I do a bit of careful firing to maximize the time spent jump-kicking while minimizing the amount of lag in the level. Along the way, I manipulate the Item Bug to give a Fire pickup, giving Blue the Chaser Fireball that I spoke so highly about in the way too long weapons section. Blue will almost never get rid of this weapon. Red picks up a Lightning to go along with his Force, mostly because it doesn't matter what gun Red has right now.
Pink Phantom (1)
Separating Red and Blue means that Blue can "activate" the Phantom as soon as possible and coax it into sliding, giving Red the opportunity to damage it with a few slides of his own. The Phantom slide, apart from being the new hit dance move among the teens, allows me to consistently damage it without it going invulnerable. Minimizing or removing invulnerability times are the key to every single battle with a Phantom, for reasons about as obvious as "I CAN'T HURT THE DAMN THING WHEN I CAN'T HURT IT". This new strategy combined with tighter movement around the Item Bug leads to nearly 4 seconds of improvement right out of the gate.
Papaya Dance
This battle is where you start to see my usual pattern for taking down bosses: Start with a throw, pull out the Chaser Fireball, dawdle around for a bit, then send the Chaser Fireball at the boss while setting up the next throw. Throws do a consistent 20 damage per frame and normally block out all other sources of damage, so I can't combine throw damage and gun damage in most cases. I use one less throw than in the published run by starting each throw in midair as opposed to staying on the ground. This allows more "hits" on Papaya Dance per throw, and saves a little over a second.
Pink Phantom (2)
As I said for the previous Phantom, the main thing you need to do is ensure that the Phantom never goes invulnerable, which can be done with careful damage management. In this case, I combine gun damage, a partner throw, and throwing the Phantom itself in order to prevent it going invulnerable.
Bravoo Man
Remember two sections ago where I said throws "normally" block out all other sources of damage? Well here's the reason why it's "normally" and not "always". Bravoo Man can actually take damage from multiple sources at the same time, so I use a Chaser Fireball shot to start the fight (it only has one "segment" but it doesn't lose any time), then combine partner throws, more Chaser Fireball shots, and jump attacks in order to take down this marvelous(s) man with The Best Music.
Due to the nature of the battle, it's actually hard to get any more improvement out of it, though I managed to make it work and knock out a couple of frames.
The sliding section afterward is one of the game's many on-rails sections, which is naturally used for playaround purposes. An interesting quirk when sliding is if you change directions within a frame, you'll continue moving in the direction you were travelling in before, but you'll face the other direction. It's kinda neat.
You may notice some writing here. Feel free to point out that it moves by way too fast and that you can't read it at all. I definitely haven't heard that from literally everyone who's commented on the movie before. It would be completely new to me.
NOTE FROM THE FUTURE: After watching the movie back way too many times, I've realized that the way I write and the way arki writes in the published run are fairly different, which I think is what lead to all the comments about my writing being harder to read. I wrote it in a way that I could read easily, and since I'm me and thus nothing I think or do matches what is normal in the world, I couldn't really see how unreadable it was to everyone else. I'm putting a section at the bottom of the submission text listing everything I wrote in the run. This entire section was meant to be blink-and-you'll-miss-it-and-then-complain-on-YouTube writing, so don't worry if you can't read it. You kinda weren't meant to.
This part's a good example of a rail section that gives me a lot to work with. The enemies raining down and the weird slide mechanics make this a nice, fluid section where a lot can happen even when not much is happening, if that makes any sense. It probably doesn't. Oh well. RTA runs generally sit offscreen at the top of the "slide", which trivializes the section by making it impossible for the players to take damage, so if you're playing this game casually and getting destroyed by this section, just move left until you're offscreen and you should remain completely unharmed.
In the short movement section afterward, I let Red fall behind so he can take out the enemy on the far left, while Blue still activates that short fight as soon as possible. It's pretty laggy, as you can see. Not much I can do to change that, sadly. Speaking of short fights, though...
Pinky Roader
Standing on the leg and using partner throws is much more efficient than throws from underneath. This is the RTA strategy and, well, it is pretty much the best strategy. Again, during throw downtimes, I utilize the Chaser Fireball to add just a bit of extra damage and save a number of extra frames in the process. The fight goes by a whole lot faster and comes with the benefit of there being a whole lot less throws.
NOTE FROM THE FUTURE: "A whole lot less throws" is a hilarious line to read after that drop-chaining discovery.
Green's Stage - The Underground Mine
This stage is almost entirely on rails, literally in fact, so there isn't much to talk about. The most notable thing about it is that I can't use throws at all, meaning bosses and fights have to be dealt with the old-fashioned way: Guns a-blazin'.
Trains
Whenever train cars show up, they won't pass by until all the enemies inside are dead. These are the only parts of the stage that aren't on rails, so I utilize those sweet guns to take out the train enemies ASAP. Red switches weapons to get the Lightning Saber, which is used extensively because it's really good.
Also, have fun with more writing you can't read. Once again, don't hold back. Tell me it's unreadable. Literally never heard that one before.
Around the second horizontal section of the stage, I start using slides a lot more to cut down on lag. The number of enemies being spawned is so great that firing shots would produce ridiculous amounts of lag, something you can see when the long train comes in.
Right before the long train, Red switches out his Fire for a Chaser, and instead of using Chaser Lightning, I opt to use the base Chaser for quite a while. The base Chaser on Expert is actually one of the most damaging weapons, and out of all the other most damaging weapons it's the easiest to use with Free fire mode. I could've switched out Lightning and had another Chaser Fireball, but where's the fun in having two?
Smash Daisaku (1)
The first appearance of good ol' Colonel Red, aka Smash Daisaku, aka Smash Daisuke, aka the Genesis' Kefka Laugh. Chaser tends to delay being fired when you change which direction you're firing in, so instead of steadily moving forward with the train as Red, I opt to jump forward in order to reduce the number of direction changes, saving a little bit of time.
Much as arkiandruski did during the long-ass Seven Force introduction, I sign my masterpiece with the name I'm more commonly known by around the internet. It's like Samsara, just without the Ra!
This is a difficult section to track improvements during, so I'll just list what I got overall before Seven Force.
Hell on Earth - Seven Force
Here's a section of the run that took damn near forever! The former Gunstar Green (well, still technically Gunstar Green but mind controlled) has his magical changebot that's called Seven Force but technically has 8 different forms if you count the little floating platform he's usually on.
...But, to be fair, this makes up for the Seven Force in Alien Soldier having only 6 forms.
Video games!
Soldier Force
Something to note about most forms of Seven Force is that they only have hurtboxes on specific parts of their bodies, meaning you can travel straight through them without getting damaged as long as you avoid certain parts. As such, Red spends a fair amount of time inside Soldier Force firing Chasers while Blue stays away and keeps a Chaser Fireball trained on the Jog Boy.
Chaser and Chaser Fireball can optimally do 4 damage every 2 frames, which the game treats as 4 damage per frame when both are being used. The key to optimizing Seven Force is making sure you're constantly doing 4 damage a frame, which isn't always the case. Lag reduction and shot/player placement are key, here. Soldier Force does give a fairly bad pattern, but nothing unsalvageable.
Thanks, lag management. That one frame would've killed me.
Tails Force
Lag central while it's firing, holy hell. The damage is intentional, taking it allows me to get close to Tails Force to get more damage in, and the slow Chaser bullets mean it does actually save time since firing doesn't get interrupted. I use Red to lead Tails Force around into positions where I can stay next to it and fire optimally.
Blaster Force
The biggest shakeup in the entire run: Blaster Force comes 3rd instead of 5th!!! Ohhhhh my Gooooooooooooood!
Nah, but the only difference this makes is that it's harder to count improvements until I reach Eagle Force. That's it. Okay.
As for the actual fight, instead of clearly rambling on in an attempt to get pad out this submission text far more than it really deserves to be, Blaster Force has no hurtboxes, which is demonstrated by Red staying inside the dang thing throughout the entirety of the fight. The published run does this with both players, but despite the short fight it's not a whole lot of fun to watch. I choose to sacrifice a tiny bit of time here by having Blue jump around and be more active during the fight. It's not much, but it's better than nothing. I actually lost a lot less time than I initially thought. I was worried it'd be on the level of a few seconds but 2 frames is definitely okay for a speed/entertainment tradeoff.
Urchin Force
Urchin Force will always move to its second pattern at 1500 health, no way around it. Otherwise, this is mostly just moving to the right position and firing from the right position. Chaser Fireball helps me save a lot of time here.
Tiger Force
The most dynamic of the forms and the hardest to optimize: Red is almost always a frame or two away from taking damage by staying inside it like that. Only the legs hurt, the body is fine, but avoiding the legs is a lot harder than it looks. The other part of the fight is lag reduction, which is mostly done by manipulating the beam it fires to be as small as possible, though that can't always be done (or at least, it's not always quicker). Damage is taken at the end to save a frame or two.
Yep, this is one of the most improved bosses in the entire run. Felt really good to realize I was so far ahead after spending a good while puzzling out a new strategy.
Eagle Force
The best form, the majestic, dancing Eagle Force. Once again, the body doesn't hurt, so staying within it is the best option for Red. I try to be a little more dynamic with Blue here for entertainment purposes, though moving around usually causes lag (and this is already a very laggy fight). Chaser Fireball remains active offscreen, so I use it to get in as much extra damage as possible even when Red can't do anything.
Crab Force
Crab Force normally sends walls at you, but extremely careful usage of Chaser Fireball destroys the walls before they're sent out. This also reduces a lot of lag over the course of the fight, like a couple seconds worth, so it's Extra Awesome.
I just barely finished Seven Force before 30000 frames, which was a fun goal to achieve. This whole stage took a solid month to motivate myself through, and it was a huge sigh of relief to finish it up. Looks real nice, too, which is a plus.
NOTE FROM THE FUTURE: The main (and last) example of me being proud of achievements before I knew about a movement technique that would've obliterated said achievement anyway.
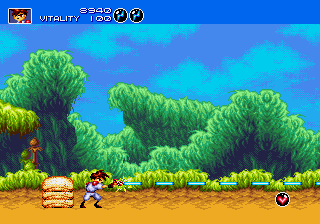
Orange's Stage - The Flying Battleship
The first two minutes is a straight autoscroller, kinda like the Underground Mine except on foot and more fun to TAS. I show off a lot of weird quirks of the battleship in the first part, like throwing Blue at the very bottom and having him pop up unharmed much higher up. The second part of the autoscroller is a lot of fast enemy killing via throwing and bombs, and I love the way it turned out. All damage taken is intentional for entertainment purposes.
Don't forget to bother me about what I write here! It's in Japanese so it's EXTRA unreadable!
Moonwalking happens, too, using the same sliding bug I talked about in Pink's stage.
Yellow Phantom
A well-placed throw, a little gunfire and a double slide take this fly boy out super quick. Coming up directly afterward is the first usage of the drop chaining method of movement. This will be used for horizontal sections throughout the entire rest of the run.
Swapping Reg
<3 that name. I prefer to think of it as shorthand for Swapping Reggie. Reggie spends the beginning of the fight offscreen, and despite it being so far offscreen, it can still be damaged just fine, so I spend a lot of time with Chaser Fireball to do a couple hundred damage before it even jumps onscreen. From there, throws. Toss Boys. The usual.
This part looks bad. Like, I have to be blunt about it. It just looks awful. For some reason, drop chaining just kept messing up here and I had to salvage it with a normal throw. There's no time loss since I'm still ahead of the screen and it starts autoscrolling once I get within range of the plane, but it's just an ugly section in general that I wish I'd gone back and fixed properly.
Smash Daisaku (2)
Our ol' buddy is back! My first version of this fight used an incredibly precise strategy to minimize invulnerability: Normally when you throw your partner at him, he'll only take 20 damage and then immediately go invulnerable for a long period, but for some reason, with this strategy, you can get 80 throw damage on him along with what you get from gun damage during the downtime.
Version 2 of the fight starts off with that strategy just to show it off a little bit, but then it gets a little more freeform jazz, a little bluesier, a little bit country and perhaps just a smidgen of rock and/or roll. I figured out that Smash doesn't go invulnerable if he's doing that divebomb attack after a throw, so I use that to my advantage to pick up a good amount of extra damage, taking him out before the ship "docks" where Orange appears. Since this is basically on rails up to that point, finishing this fight any faster (or even a bit slower) would not gain or lose any time.
Also, since Blue took a hit to make this strategy work, Red takes a fall off the plane while dealing the killing blow. Fair's fair, after all.
Orange
The big burly Buff Boy himself. You can actually let his intro text play out in full and not lose any time: In fact, clearing it ASAP is actually 5 frames slower since there's a few lag frames that come in from the gunfire, so I just let it play out. It's fine. Don't worry about it.
Orange is an interesting boss: He takes 420 (BLAZE IT) damage from throws, but cannot be damaged by throws until he's knocked into invulnerability at least once. Therefore, the strategy is to knock him down as soon as possible, but also make sure he's at a multiple of 420 (NICE) so that he can be finished off with quick drops every time his invulnerability's up.
While he's flexing at the beginning of the battle, he won't go invulnerable, so I take the opportunity to start with a throw and get a real good amount of damage in before I quick drop him and knock him invulnerable for the first time. The first invulnerability period is longer than the rest for whatever reason, and from there it's all quick drops until he's blasted off the plane.
The way this strategy works is through careful "manipulation" of Orange's pattern. If a player is below him, he will always try to use the Break Wind attack on them as long as they are the closer player. If the player on top of the plane is too close to Orange, then he will try to suplex that player, and bah god those Gunstars have families! While he's using Break Wind, he's completely open to attacks until he stops breaking wind. As long as Orange is in the middle of Break Wind when he stops his invulnerability, the throw can always happen on the first possible frame.
So this battle is basically keeping Orange occupied with trying to use Break Wind on Blue, making sure that Orange doesn't trigger the attack early enough to actually finish it, making sure that Red is a safe distance away until Orange starts to use Break Wind, and making sure Red can get close enough in time to perform the quick drop.
It's a very colorful battle is what I'm saying.
TL;DR - Fart manipulation. Smoke speed everyday.
Black's Stage - The Strange Fortress
The opening of the stage finally shows off the true potential of drop chaining as I just grunt my way past every enemy. Throws tend to prioritize your partner as opposed to an enemy, which means it's easy to slip past everyone in most cases. Slopes and higher ledges are a problem, though, since you can't travel upward while drop chaining and slopes tend to mess with the timing by making it impossible to quick drop. Which, really, is the ultimate way to mess with timing. Despite needing to slow down a few times, no time is lost due to the screen scrolling being set.
Unnamed And Dead Boss
It's got 880 health and has already exploded by the time you realize it's a boss. I think it might have attacks? Probably? But even on Expert it can be taken out in a single well-placed throw.
Shortly after, there's an awkwardly placed section where you're supposed to drop through a platform and come back up on the other side, but I don't have the time for that, so I just quick drop my way straight through the wall. The wall's thin enough that a quick drop can push a player through it, and also thin enough that said player can grab and throw the first player from the other side. I love this game.
Black Phantom
This thing's a gigantic pain in the ass. It likes to go invulnerable a lot, and it full-heals seemingly randomly. Of course, a casual player wouldn't realize that it's full-healing since Phantoms aren't considered bosses, but I've realized it and grown to hate it. With arki's strategy not working at all for me (which it did in my previous WIP, where I even managed to improve it by a few frames), I had to settle for a battle that's about a half-second slower. It's one of the sad, but negligible caveats of having a form of movement that's way too damn fast for its own good: You may get much better positioning on bosses and kill them much quicker, or you can overshoot things and have the new positioning work poorly in your favor. This isn't the only boss fight that suffers from me having moved to fast prior to it. You'll see that again in the next stage.
There are a few problems with the Phantom, the notable ones being that it can't be quick-dropped, the aforementioned random full-heal, and the arena itself. The fight ends with a normal throw downward off the ledge, which seems weird, but it's the fastest option I have. Technically, I could kill the Phantom faster by using a down+right throw instead of a downward throw so it hits the ledge instead of the ground, but his little death jumpback will jump off of the ledge and it actually takes longer overall.
Black's Silly Dice Maze
So here we are with the rest of the stage, and probably my favorite part of the game as a wee lad (arguably). In the TAS, it's basically just a short boss gauntlet with a couple HAPPY ITEM ROOMS mixed in for good taste, but in a casual playthrough there are a variety of possible bosses or short challenges that one can participate in. As a whole it's fairly self-explanatory, but there are a few mechanics at play here that aren't immediately obvious to anyone who isn't already familiar with the game.
The colors of the FIGHT squares do actually mean something: Blue squares are easier bosses/challenges, yellow squares are average difficulty, and red squares are, naturally, instant death. Okay, not really, but they're fairly difficult to get through. The "THE WAY BACK" square will take you back to the beginning of the board, though any squares you have completed will remain completed. You'll see the other squares in action in the TAS, but they're a little more self-explanatory.
The fastest possible way to "throw" the die is to quick drop it out of a one-frame jump. The earlier the better, obviously, but the earliest moment is not always possible. Dice rolls are manipulated through waiting and the direction of the throw. Even if it's a quick drop, the direction can still influence what number comes up.
When playing casually with 2 players, each square is only meant for a single player. The player who rolls the die and lands on the square is the player that goes solo into that square. RTA runs kill off Player 2 in the first part of Black's stage, as it saves both players needing to roll the dice, but there are two problems with that for the TAS. One is that it ruins the point of the run being 2 players, and the second is that there's a frame-perfect trick that can be done in the TAS in order to save about as much time on all the bosses.
Under certain, unexplainable conditions, if you execute a throw on the right frame before teleporting out, the teleportation will be "skipped", and both players will be able to move during both the fade-out and fade-in. This causes a small bit of lag, maybe a few frames, but there's the super great "side effect" of allowing you to bring both players into the battle. Even if there's a couple frames of extra lag, having both players in every battle makes up for it in whole seconds due to throws and such, so it's always 100% worth it. There's a bit more to this bug, but it doesn't come into play until the battles actually start, so I'll explain more then.
And I really don't know what the proper conditions are for making that throw work, because it doesn't always work. At first I thought it could only be done on Fight squares, then I thought it had to be the player who triggered the square, then I thought it could only be the first player, then I thought you specifically had to be facing left before the throw... It's nebulous, but it is always possible to do.
The route I take through the "maze" is the same as the published run, because it's the fastest. I mean... that's kinda obvious, isn't it? I tested a few other routes but they all came up short. Or long. Maybe long is better in this situation.
Timeron
More like Timeroff. THANK YOU, GOODNIGHT!
Timeron's gimmick is that it will follow you and drop bombs for 10 seconds, then at the end of those 10 seconds it will rewind its movement and bomb drops. It's an interesting fight and pretty challenging if you're playing the game normally, but since I have two players it's over before Timeron even drops a single bomb.
So back to that teleportation bug: The game doesn't expect two players in a battle, nor does it expect the right player to be anywhere else other than where they're programmed to appear after the teleportation. When the boss "activates", the player who triggered the square will instantly teleport to that preset position. This allows for some interesting optimization, though it's also a bit of a pain since you can't actually start a throw until after the boss becomes vulnerable.
Red triggered the square, so it's supposed to be Red's fight, so when the battle really begins and the boss can accept damage, Red will jump to the middle of the screen. I use this opportunity to set up some gunfire before he jumps, and then Blue throws him as soon as possible while Timeron is being damaged by all the gunfire. This general strategy will be used for every boss in the dice maze.
Melon Bread
Love that bread. I use the same strategy that I use for Timeron. With some careful positioning, it's actually one frame faster to finish it off with jump attacks as opposed to another throw. That's... That's about it. That's all I got.
DESTROY!
The non-attacking, grounded gunner actually gets a chance to have its health bar shown. This battle's both a pain to optimize and super fun to experiment with. Fun fact: This is the last thing I did in my old WIP before discovering drop chaining, and because of a slight mistake in dice routing it would have had to have been redone anyway. In the old run, Red triggered this fight, and this strategy was 3 frames faster in my old WIP as a result, but the dice maze movement is more consistent this way.
This is around the part where I realized that a single screen offers literally no playaround space. Literally AND figuratively, in fact. I do get to have a little fun in the item room with some drop chaining, though.
Curry and Rice
Anyone else getting hungry because of these boss names? I could really go for some DESTROY, myself.
Curry b/w Rice, as a boss, is a pain when playing casually. In a TAS, however, it's not nearly as big of a deal. Especially when you have a second player who isn't confined by the laws of NO GUN. Not that guns are any effective against Curry Mixed With Rice, but what IS effective is quick-dropping, which can't actually be done by the player who triggered the battle. So this is just a bunch of quick drops and mostly, if not completely, disregarding every possible sign related to this battle. No guns? Don't tell me what to do. Fire is strictly prohibited? You're not my dad.
There's a weird little bug with this fight where Curry With Some Rice's healthbar doesn't appear if it's damaged/thrown on the first possible frame. Only a minor visual bug, but just keep in mind that it's supposed to have a healthbar. I guess. I don't know. I can't tell you what to do. I'm not your dad.
When Curry Alongside Rice is defeated, its head flies off and explodes, which deals damage. This whole event has to happen before the teleportation countdown starts, so like the published run I just take damage on it as soon as I can do get that whole thing settled quickly.
Have a whole ton of waiting around for dice to roll until the boss happens.
Black Beat Stepper
Here's an interesting boss. It basically throws (lmao) everything I've done regarding boss optimization out the window and replaces it with new, exciting things, including throwing with Player 1 instead of Player 2. What's up with that? It's craaaaaazy.
Black's attack depends on what color he lands on, and some attacks are really bad for a quick kill. I'm not sure if it's supposed to be a glitch or intentional, but it is actually possible to throw and displace Black, which I do in order to manipulate his dice roll. If I hadn't done that, he would've thrown a 1, landing on a yellow space and performing a laser attack that would completely prevent fast throw damage. He instead throws a 3, which puts him into the corner to receive a fair amount of throw damage. The throw displacement also puts him in a better position for upcoming throws, and... Let's be honest, it's kinda funny as well. I'm glad I was able to utilize it.
Most of the beginning of the battle is the same as any other boss: Blue throws Red, Chaser Fireball is used during throw downtimes, same stuff as usual. Where things change up is when Black steps far enough over to the left that I need to shift over to his right, and with that, Red starts throwing Blue. There are a couple reasons for this.
The first reason is that Red is farther over to the right, so I can set up the Chaser Fireball shot with Blue and have the right positioning for the most damaging throw sooner. The second reason is that Black's movement pattern means that Red's Chaser works just as well as the Chaser Fireball for downtime damage. The third reason is that while Black's huddled up in the corner, Blue's throws will actually throw Red on top of Black's mech, while Red's throws will keep Blue on the side. Not sure why this happens, but it's a change of pace that doesn't lose any time, and a change of pace is super needed after watching all those dice rolls from earlier.
Post-battle, Black throws the trick gem first, then needs to be damaged to make him throw the real one. That's about it. All that is done ASAP.
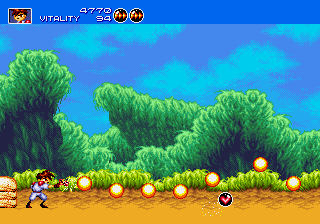
5th Stage - Save Yellow!
Here it is, the primary area where the horrifying effects of rampant tossing really come into play. This is probably the one stage where movement optimization (if you can really call what I'm doing "optimization" at this point as opposed to "madness") contributes more to the improvement than boss optimization does. It's mostly a flat plane with some obstacles in the way. Boxes, barrels, enemies, a couple of minibosses, pretty standard fare, but drop chaining does break a lot of it wide open.
The layout of the stage makes drop chaining inconsistent, though. The same thing that allowed me to pass through the wall in Black's stage is actually kind of a hindrance here, where I'll clip one player into a box, they'll end up on top of the box, and then I won't be able to continue the chain. Thankfully, Gunstar Heroes is looking out for me, and I'm usually on the far right side of the screen when this becomes an issue, so despite some weird movement sections there's no actual time loss since each issue is resolved before the screen catches up. The stack of four boxes is the only major obstacle in this first section, and passing over it leads to a lot of lag, but it's still much faster than having to break it down to get both players through. Despite the extra lag, I manage to get over it quickly enough to prevent the screen from stopping.
Pink Phantom (3)
Stage hazards are the key to all of these Phantom fights, if I can just get them working, because they're faster methods of damage than I've ever had before. I set myself up to destroy the barrel in the middle of the arena just as the Phantom gets within range. It takes him out instantly.
Black Phantom (2)
I tried a few different strategies here, and this one ended up being the fastest from what I had to work with. Blue goads the Phantom into sliding, taking damage in the process, but this way the Phantom stays on the ground. Red high jumps and throws that flying platform downward, which does 120 damage per frame upon exploding, taking out the Phantom easily. Much like the Black Phantom in Black's stage proper, I needed to find a way to minimize the death knockback. Keeping the Phantom on the ground is about 10 frames faster than letting him jump onto the box. I could not prevent the box from exploding, nor knock the Phantom from the ground onto the box before it exploded. So this is the best I could do.
I wanna say this is actually slower than the published run, and there's nothing I can do about that. My much faster movement speed keeps the platform far above me instead of having it down in the perfect place right when the battle starts. The battle isn't TOO much slower, and the section overall is definitely much faster, so it's a tradeoff I'm definitely okay with.
Some fun movement around here. There is a slight pause in order to get up to the higher platform, but getting up to the higher platform allows me to pass over the leaning tower of boxes. It's a beautiful, beautiful moment. Speaking of the exact opposite of beautiful moments: If this submission text feels like it's starting to peter out at this point, that's because everything from this line onward was written on or after November 9th, 2016. You may or may not understand why this date has significance to me, depending on how far into the future it is and how much about former U.S. history you New Earthwalkers are aware of. Let this be my message to the future: We were all fools. Fools in the worst position we have ever been in. Do not make the same mistakes we have made. Your weary, your broken, your huddled masses... Keep a tight, psychological grip on them. Let them re-learn the meaning of "common sense", a phrase that has been completely lost to us. Run your twisted world on it. Just, please, do not let history repeat itself. I apologize for what we have done to the future on this day. Accept my apology by rebuilding the world in a new, beautiful image.
...Anyway, I skipped the bunkie!
Yellow Phantom (2)
I bring Red down to the lower level to, once again, keep the Phantom on the ground. One platform throw takes it out at the same rate as the Black Phantom. It's all good. All very much good.
Now, the section afterward is just a long stretch of nothing. No required battles or anything, just lots of drop-chaining. As such, there's a LOT of improvement here from being able to move at max speed. Those big walkers are SUPPOSED to hurt you when you pass under them, so I don't pass under them. I pass THROUGH them. Big difference, buddy.
After a few seconds of free improvements, I'm finally at the final boss.
FINAL GREAT SOLDIER
Despite his limited moveset, the Final Great Soldier is damn near impossible to beat, even in a TAS setting. I'm not sure how the developers even intended you to defeat him in the first place. This battle requires some extremely tight planning and perfect coordination in order to not only maximize damage per frame, but also not be instantly killed by the dreaded Love Love Dancing.
Okay, but seriously though.
Smash Daisaku (3)
Look who it is! My best friend! And, consequently, one of the most improved battles in the run. Smash here is more or less the same as he was in Orange's stage, so I reworked and optimized the strategy I used in Orange's stage and lock Smash into a quick kill pattern where he never goes invulnerable. This is an interesting pattern, and there's a lot going on despite how simple it looks.
The pattern is as follows: First, of course, I toss Red up. It doesn't actually matter for this fight because the strategy is so tight that there's almost no room to get a shot or two in edgewise, but I'm more used to throwing Red. On the way down from throwing Red, I'll fire a few shots before using a dropkick, then I quick-drop Smash right when I land, which sends him upwards quickly. He becomes vulnerable at the top of his arc, where Red is falling. I usually try to fire a shot upward for a tiny bit of extra damage at this point, though it doesn't always connect. While both Red and Smash are falling, Blue jumps out of the way just in time to avoid being hit by Smash's divebomb, then catches Red above Smash to ensure that Red doesn't get hit by the divebomb either (as that would nullify the damage done from the throw), and the cycle repeats from there.
That's most of the battle, but there are a few cycles where things are a bit on the weird side. Despite Smash looking like he's vulnerable right at the beginning of the fight, he actually isn't until the frame I first throw him. After that first throw, I don't actually use the dropkick because it breaks the pattern: Smash would go invulnerable if I dropkicked (notice how he actually looks like he's taking damage that first time around as opposed to all the other throws), so I just fire normal shots instead.
The dropkicks actually hit three times each use for a total of 60 damage, even though they look like they only hit twice. That's because the last tick of damage is done upon landing, even if it doesn't appear to hit. This is a neat little timesaver in the fight.
The last few hits of this phase of the fight are, of course, delivered through a slide/dropkick combination instead of one last throw, because it's just faster that way, damnit. Finishing him off on the ground also starts the next phase of the battle 15 frames faster, so that's a neat added bonus.
Smash Daisaku (4)
Our fourth round with this beautiful boy is probably the worst one, because despite all my attempts to break or alter his pattern like I did with the previous form, I could not find a single substantial improvement apart from the changed beginning, which only saved about 3/4 of a second overall.
The change at the beginning of the battle is just the one time throw damage is actually effective against him. There's some weirdness happening here, and that throw should not even be possible because of it, but somehow it still works. Normally, if Smash isn't in his taking damage animation, he'll throw any player that gets close to him. You can see an example of this at the end of the battle. For this first hit, Smash can actually take throw damage without changing animations, which means that he would normally catch a player being thrown at him. For some reason, if the thrower is facing away from Smash, the thrown player will fly right through without being caught, doing a fair chunk of damage. This throw cuts the end of the battle a bit short by not needing to fire shots for the last two cycles of the upcoming, same-as-the-published run pattern.
I wanna say the reason that throw works in the first place is because of the position of the thrown player before he is thrown: You'll notice that Smash actually leaves the ground for a moment once Red passes through him, which signifies that he's going to use the mighty Bravoo Reg, or as I like to call it, the "Keep On Truckin' Attack".
Majestic. This attack is usually triggered by a player being above him, so I think that when Red is thrown, Smash sees Red as being above him, so he starts truckin', but he can't keep on truckin' because he's thrown out of it. The startup of this attack (i.e, him jumping) is actually vulnerable to throw damage, however he's immune to everything but being thrown once he reaches the peak of that initial jump. You can't get a whole lot of throw damage on him either while he's jumping because of the speed and height of his jump, not to mention that throwing him back down takes longer as a result, so unfortunately making him do that attack isn't conducive to a good pattern.
Smash takes 380 damage from being thrown, and can't be quick-dropped effectively: He'll fly up in the same way that he does in the previous battle, so I have to use straight downward throws instead. He can take exactly 124 damage from shots before going invulnerable (and of course can't take throw damage at all without going invulnerable). Something interesting I discovered here by complete accident: The base Fire weapon can actually do 4 damage per frame with only one character if the enemy is right up in your face. It's an interesting quirk, to say the least. This doesn't mean that damage from the other character will also apply: Remember that damage is normally supposed to be done once every two frames, and both players attacking at the same time means they alternate doing damage every frame. Kinda sucks, but it's not the end of the world.
I mean, the end of the world is incoming anyway. Don't worry about that.
The rest of the battle is the same as the published run: Fire and do 120 damage, then throw for 380 damage, leading to each cycle of the pattern doing 500 damage. The only difference between this run and the published run is that I'm a little more dynamic during downtimes. The published run keeps Smash directly between the two players, which confuses Smash as he's normally programmed to track toward the nearest player. This is kinda funny, but it's not the most exciting thing to watch for 8 cycles of shoot/throw/shoot/throw, so I decide to make things a tiny bit more active.
The end of the stage is just one long cutscene where input doesn't matter. It's really, really good for feeling like I'm making progress in the run when the reality is that it's just a minute and a half of not having to write input. Good stuff.
Somehow, despite this boss being almost exactly the same as the published run, I still managed to write a friggin' essay on it. Not that the rest of this submission text ISN'T an essay in and of itself, but... I mean, I've written less on bosses I've improved way more.
The Shooter Level
The mechanics of the shooter stage are explained to you beforehand, and this part can't be skipped since you have to choose which player controls the spaceship. I sacrifice a frame to have Blue handle all the ship movement, something which doesn't come into play at all until the very end of the stage.
So let's talk about this stage for a moment. The main problem I have with this stage is that it is almost purely autoscroller, much like Green's stage, except Green's stage has more things to deal with and more things to do in order to keep it interesting (or at least somewhat close to it) all throughout. This stage kinda has the bullet hell thing going on, but the ship hitbox is a little too big and the bullets are a little too sparse to do a lot of close calls and such. Green's stage also has more moments where I could possibly save time: All of the train sections in Green need to be cleared as quickly as possible, for example, whereas all there is for this stage are the 3 bosses.
The only major difference between the ship controls and the player controls is, aside from the whole "it's a spaceship" thing, the normal jump is replaced with a quick boost. This boost can be done once every 11 frames (12 frames if you want to change directions). It takes two frames of holding the direction you want to go in before the boost will actually travel in that direction, otherwise it will go in the last direction you were going.
The "satellite" player has almost no control over the movement of the ship as a whole: They can only orbit around the ship as it moves, much as a satellite does, but they can boost to throw off the rhythm of whoever's controlling the ship, as their boost takes precedence and pulls the whole ship toward them. The game claims that if both players boost, they become invincible, but in practice this is about as common as you think it is. The satellite player is always invincible, and thus is used to block shots and destroy enemies without needing to fire. This would be good for lag management if this stage wasn't strangely non-laggy. For all the stuff happening on screen, there actually isn't a whole lot of lag unless a player is firing. It's pretty great.
My goal with this stage was to try to get some gun variety in and to somehow make it entertaining despite the fact that it's a space shooter that isn't Gradius. Lag management was also a priority in order to actually save time over the published run in sections aside from the few short bossfights.
Something else I wanna mention is that the entire stage is fixed. There's no manipulation to be done at all, not by waiting, not by causing lag or reducing lag to change timings. This is just straightforward as all heck.
Timeron (2)
No improvement!
One second on the timer (50 frames, because this game is good at time) is the absolute fastest you can take it out. It has 200 health, you can do 4 damage per frame, so there's... Really nothing you can do to improve it aside from playing on a lower difficulty, you scrub. lmao.
Now we're back to the whole issue of "autoscrollers aren't very entertaining to describe in written form", so instead I'm just going to vamp about autoscroller TASing in general and why an autoscroller is basically instant death for an entertaining TAS. I'm going to call this the Splatterhouse Dilemma, because that run came first, and even though it's been over a year, I still think about how much better that run could have been without all of those scrollers.
The issue with games like Gunstar Heroes and Splatterhouse is that the action keeps getting broken up by sections that can't be sped up, whether it be autoscrollers or timed sections or waiting for a die to roll several times. Speeding up the other parts of the run only means you're getting to these slow, plodding sections that much faster, so it creates this horrible dilemma where improving the run actually makes it seem slower-paced, since with each successive improvement, you're technically spending more overall time waiting around.
It's a worse problem in Gunstar Heroes than it is in Splatterhouse, because Gunstar has longer autoscrollers, and the longer ones have the added """"""""""bonus"""""""""" of utilizing non-standard forms of movement. Green's stage with the minecarts and this whole shooter section, while being very fun to play casually, end up being kind of a nightmare to TAS. You find that you quickly run out of ideas, and even if you manage to find a good rhythm for a few minutes, you still have more to do after that.
This is compounded by bosses taking far longer, especially on Expert difficulty, as the only really quick way to kill a boss is to throw your partner at it repeatedly, a luxury which can't be done underground or in space. This makes these autoscrollers seem even slower after long periods of bosses dying within a few seconds of appearing on-screen. You need to shoot, and that also presents the problem of lag (especially when bosses have shots of their own), so that's a third level of slowness on top of everything else.
After I discovered drop-chaining and started implementing it into the parts of the run I felt like redoing, my first time watching back progress felt... weird. Partially a good kind of weird and partially bad. It puts the "speed" of the run into perspective, where you're cruising along at max speed and then there's this jarring STOP in the action whenever I had to slow down to deal with a boss or some other obstacle. And that's how the autoscrollers feel in terms of the run as a whole: Pink's stage, despite not using drop-chaining because I am a lazy jerk who didn't want to redo 2 months of work, is a super fast-paced start to the run. There's a lot going on, it's all taken care of super quickly, bosses are destroyed in seconds... And then you get to Green's stage, which is 3 minutes of not much happening followed by 3 more minutes of slowly plinking away at bosses.
If I ever do an improvement to this run, the main thing I want to do is change the level order to make the pacing better and, more importantly, spread out the autoscrollers. My tentative order would be Green > Orange > Black > Pink. Green first to get the autoscrolling out of the way, Orange next because it starts with another 2 minutes of autoscrolling, Black third since there's a lot of tricky movement at the beginning, and Pink bringing up the rear because it's the fastest, most technical stage, and it leads nicely into the drop-chain madness that is Save Yellow.
I may not be a fan of TASing autoscrollers or watching other people play them, but I don't think they're a bad thing if they're done right, and this game does them right. They're exciting, they're JUST hard enough to be intimidating, and they're unique to the rest of the game. They have the right sort of "feel" as well, tight controls and fun mechanics and all those nice things that good games should have, plus I feel they're about the right length for casual play. Green's stage may not have a lot of variety, but it ends with what I would honestly call an iconic boss battle. Despite it being the longest, slowest fight in the game by a mile, it's super intense. Even watching back my own dumb TAS sorta puts me in awe at how great Seven Force is. On the other hand, the Shooter stage switches things up, giving you new obstacles constantly, keeping the whole experience fresh... And it ends with Seven Force again! It's not nearly as good of a fight this time around, but hey, Seven Force is awesome. Like, legitimately so.
But, again, this is for casual play. TASing it sucks.
1000mm Gun
Same as Timeron, pretty much no improvement. Boring as hell, who cares, move on. There's still like 2 minutes left of the level.
I wish this wasn't such a weak part of the TAS. The second form of Smash Daisaku earlier, this whole shooter section and the boss fight coming up after this are kind of a long slog with a lot of forced waits. It's rough, but the ending boss rush probably makes up for it. I don't know, I haven't TASed it yet at the time of writing this, but I'm sure it's going to be a doozy of quick kills if the previous 24ish minutes are anything to go by.
I finally pull out the "big guns" at the end of the level and write a message since I finally have the opportunity to without adding an extra year or so of lag. I made absolutely sure to try to make it readable, because it accurately sums up what I think about TASing this stage. Thankfully, my message in the sky is quickly answered and I can finally move on to the one thing I'm actually good at: Not autoscrollers.
I take damage once at the end just so I can do that final circle-sweep that takes out the rest of the bullets. It took a little bit of interesting movement to pull off. That's... That's it. That's pretty much all I can do at this point. This stage sucks. Game, redeem yourself immediately.
Seven Force (2)
...Okay, come on.
Seven Force returns in a single-phase fight as opposed to the nightmare seven-phase fight that we had to endure last time we saw him. This time, he changes forms multiple times in the middle of the fight.
This is... This is a tricky fight. It's a long fight, as you can see by how long it is, but there's also the issue of just how laggy Seven Force is as a boss, as you can probably tell by the first seven times we fought him, so I use my recently-found knowledge of Fire being twice as powerful when directly next to a boss and cut down the number of players shooting to 1 while still mostly keeping up the same rate of damage.
There are problems with this plan, however: Eagle Force is still the laggiest boss in existence even when only one player is shooting. It's not AS laggy as two players firing, but it still lags a good 40% of the time. Like I said at the beginning of the stage, there's no RNG or manipulation to be done, so if Eagle Force comes up at all (and, naturally, it does) then I have to deal with the lag fallout. Urchin Force and Blaster Force are the forms I want to come up the most, but I can't have everything I want, now can I?
There are times where I need to briefly break off firing to switch directions with Blue, but these short sections of no damage make up for everything I would have had to do if Red was in control of the ship, or if Red was firing instead of Blue. Red is mostly used to catapult Blue around through boosts while Blue keeps firing.
Through a combination of decent luck with forms, lag reduction, and more careful shot control, I save almost 20 seconds on this fight alone, making it the second most improved boss fight in the entire run. It's a shame that it's not the most interesting fight, but I'm super glad I managed that much of a time save on it.
As much as I dislike Eagle Force showing up so many times, it does actually "save" 5 seconds to have it follow me down to the bottom left corner of the screen. Seven Force needs to be offscreen before the fadeout occurs, and it moves download and leftward as it explodes, so naturally having it die down there is the best course of action. This was also done in arki's run, so it's not actually a time save, but... Hey. It's still there.
From here, the stage transitions into the interior of the battleship.
The Interior of the Battleship
Told you.
This isn't really a stage in and of itself, as it's still technically part of the previous stage, but we're back on foot so I'm treating it as a new stage. Shame that it's still the same sort of waiting around that we were just doing in the previous stage.
Not this first part, though. This is just a few less seconds of moving to the right.
Guard Device - Unit of the Hammer
NOW we're at the same sort of waiting around that we were just doing in the previous stage. Unit of the Hammer, which doesn't really do a whole lot of hammering, is taken out a bit faster with some better throw placement and shots in-between throws. You know, like most of the other previous bosses.
If I may vamp again, because I feel my writing motivation waning and I'd like for Notepad++ to show a length of 80000 before I finish everything up: This kind of stuff just feels like another autoscroller to me. Black's stage was the first horrible example of this, where I had a lot of waiting to do and not a lot of room to play around, but this is just another bad moment. Despite technically having more to do than the published run, I still feel extremely limited by having only one static room to dick around in for a while, with only minor "breaks" every now and then to actually, y'know, TAS something. The bosses are killed quickly, because this is a Gunstar Heroes TAS, but again that just makes the forced waits feel so much longer. Waiting for each boss to die, waiting for the screen to scroll, waiting for the easily-dodged bombs to slowly fly at the screen and harmlessly explode, waiting to stop sliding/minecarting/flying...
Remember when I brought up Splatterhouse like 10 paragraphs ago? Well, I'm bringing up a different Splatterhouse this time. Wanpaku Graffiti, y'know, the one that just kinda exists and is a little weird, but in a way I think it's the perfect game to explore playarounds in. Rick's controls just have that right sort of "feel" that allow him to express character and personality through his movement, something that I've tried to copy in all of my TASes since then. It's been kind of like a trail mix of results since then, if the trail mix was just replaced with a bunch of notes that said "YOU DIDN'T DO GREAT, SAMSARA", and actually it's just all the feedback I'd gotten on my time as site staff and it's not trail mix at all.
Wow, that got dark quick.
My point here is that even with two characters and, theoretically, more things I can do, Gunstar Heroes just doesn't allow for a whole lot of "character" to be displayed. The movement, while polished as hell, doesn't have the amount of control I really want for a playaround, and even if I did have the right set of controls (which would, admittedly, ruin Gunstar Heroes in the process), there just aren't enough good moments to take advantage of the style of playing-around that I enjoy. Not that the playaround stuff in this run is necessarily bad, but this last 10-12 minutes is mostly just me thinking "Yeah, it's been a while since I did that, I can probably get away with doing it again. Please just let me get to a boss so I can have fun again."
Okay, I'm past 80000 length now. I think I can move on.
Guard Device - Unit of the Dragon
Someone out there is going to take that name the wrong way. Or the right way. This has been an advertisement for Bad Dragon. I'm awaiting my $100 and my free... uh... well... Hmm...
Like Bravoo Man, Unit of the Dragon can take damage from multiple sources at the same time, and a surprising amount of damage at that. Chaser Fireball wrecks its HP when throws don't, and I manage to kill it before it fades back into the background. Dem one-cycles, though.
Do you miss the good ol' days of the run where nothing happens for 20 to 30 seconds, and were you pining for another one of those moments in the 5 seconds it took for me to kill this boss? Well pine no more, because we're back to awkward playarounds!
I've probably watched the published run like 10 or 20 or 1500 times at this point and it's clear that arki was feeling the same way I am right now: Bored out of my skull with these long waits. The end of the published run is a lot of just... throws. Upward throws. The throws of defeat, really. When you're so far out of ideas that you just give up and do whatever it takes to keep moving around while allowing the run to actually progress forward to the next boss.
As much as I hated TASing the Seven Force fight, every time I look back at it I actually get amped up at how good it turned out, and how good the fight itself is in general. The pacing is perfect, and even though it's over 3 minutes in length (and that's when it's TASed) it's a ridiculously fun watch. This stuff just... isn't.
I'm, like, way past my length goal, I don't need to keep whining like this. I don't need more length. Please stop giving me those ads on Por- Google. Google is what I meant. Definitely Google. Google has ads, right? Yeah. Google.
...Of course, a phase of a boss is named Unit of the Dragon and I reference two highly NSFW sites within a few lines of text. Don't listen to me if you're at work. How the hell did you even read this far while you're at work, anyway? Your job's probably boring enough as it is, I'm surprised you didn't fall asleep around the fifth time I made the same joke about lengthening this submission text, let alone here at the 15th time.
...So it's like 2 seconds faster to one-cycle this thing!
Red and Blue have finally come to a breaking point. After all the throws, all the pain, all the zips, they silently decide to have a gun duel just like back in the Ollllllllld West. Five paces, turn and fire. One, two, three, four, five, aaaaaaaand... Aaaaaaaaaaaand... Okay, maybe Chasers weren't the best choice. The ensuing firefight doesn't go much better. They agree to disagree, but the ending has a shocking twist. This was a segment I like to call "Yeah, I'm officially out of ideas." It's a long segment name.
Hey, is Runner here yet?
No
Oh. Well, uh, I guess Blue gets the upper hand in this little war and Red decides it's better to just lay down his gun and wait for a better moment to atta
Guard Device - Unit of the Runner
Oh, there you are! Finally! Get your Seven Force music stealing booty over he- Hey, where are you going?
...Christ.
Okay, you're back, good. I guess I got bad luck in this battle. Still saved time kinda. Can we move on to the boss rush now?
Okay fine
Thank you.
Final Stage
the nutshack theme but all instances of nutshack are replaced with the words boss rush
We're into the first bosses almost immediately after clipping through some boxes. You like boxes? I do. That's why I prevent them from being destroyed.
Duck Battalion
Pink's boys are back and boring to fight. The mech is only "solid" to throws in certain cases, so all I can really do is chop and screw the old strategy into a more consistent, faster one. It's not a whole lot of improvement, but it's still a nice couple of seconds, and I'll take anything I can get at this point.
Except for a desync. I've gotten enough of those already.
The taller of the Pink Boys decides it's time to take matters into his own hands, so I take his matter into my hands and oh. Oh that came out wrong. Oh, Jesus. Lord have mercy. I throw him three times. He takes like some weird arbitrary number of damage and three throws are all you need to take him out, so that's what I do.
Gosh. I'm going to be thinking about that goof-em-up all day now. Which means that the next time I write I'm going to have forgotten about it.
This movement section, like my ability to write innocent-sounding phrases, sucks a mean load of OH CHRIST I'M DOING IT AGAIN. Lemme just take a cold shower right quick.
Okay. Hi, I'm back. This movement section is garbage and is the only time in the run where I can't just quick-drop my way through. And I mean literally can't, as opposed to being too unmotivated to do so. Those energy orbs are a pain, there are pits and slopes that are equal amounts of pain, and finding a good path through it wasn't exactly a fun prospect. I did manage to find something that looked decent and saved a good amount of time, though, so I'm pretty happy with how it turned out.
Pink Lobster
WHY DOES THIS KEEP HAPPENoh wait, that's actually the name of the boss. Gross. Slash Nipper. Nipple? This needs to be nipped in the bud.
Where was I? Oh right, this boss. This is an interesting boss, to say the least, because it's actually somewhat effective in preventing throw damage. That is, of course, unless you do what I do and... Actually, I don't even know what I did on that one throw. It was a quick drop that, for some reason, displaced Pink Lobster and counted as a proper throw of Red. I was completely unable to replicate it, but I did find an alternate, just-as-good strategy that saved a nice amount of time on the fight. Since Pink is displaced in that particular way, throwing Red up and to the right against the wall means I can get a full throw's worth of damage each time.
The way Pink attacks here, as I said, is surprisingly effective in actually damaging me, and I do need to do a couple of weird things in order to keep up the throws and avoid losing too much time. Taking damage, jump attacks, normal shots at times. It's all good.
Drop chaining happens.
Orange (2)
Orange is another pain, but it was also a fun fight in a way. It's more or less the exact same fight as the one on the plane earlier, except instead of having an easy way of manipulating him, I actually have to move around with both characters in order to keep him doing The Best Moves.
At the beginning of the fight, he's once again flexing his steroid-driven muscles and won't be knocked invulnerable by anything. Can't be thrown, can't be knocked out of that state until he stops, so I give him a good partner throw and skid him down until I'm able to throw him. I still need to be a good distance away to avoid the suplexing and to avoid any other moves where he's unable to be thrown.
From there, it's like I said in the first paragraph of this section: Nothing but quick drops for a while. I take one particularly good moment to whittle him down to 1259 health (since he, once again, takes throw damage in multiples of 420, nice, cool), which saves maybe 40-50 frames over throwing him an extra time.
The movement section after that was a potential huge problem area, but I found a way to make everything work in the end and not have to slow down. As such, it's probably my favorite section of quick drop movement in the entire run.
Black Fly
I had two thoughts going into this battle: Either I had to find a way to do enough damage to take him out before he does a 20-second long attack where I can't do any damage, or I had to find a way to get him to not do that attack. With some initial tests, I couldn't really get either thing to work, but then I found a really good strategy that involves some careful jump and throw control, and I figured hey, if I had to take that 20 second attack, I'll still save a good amount of time with the new strategy.
And then the new strategy caused him to not do the attack. Sometimes I love this game a whole lot.
One of the best things about TASing is that sometimes your expectations about how difficult something is are completely shattered by getting the least expected result on the first try, before you even start trying for it. Call it serendipity, because that's what it is, and serendipity is just a great word. Serendipity doo dah, serendipity ay. My, oh, my, what a wonderful save.
Speaking of wonderful saves...
Green
Our former ally sheds his giant mechanical transformer frame (transframer, if you will) and decides to just jump around a bunch and throw stars sometimes. He's like an easily manipulated ninja with an emphasis on the first two words.
Much like most human Boss Boys (like Toss Boys, except alliterative) in this game, Green can take a set amount of damage before being knocked invulnerable, and this set amount is dependant on like thirty different variables so I just new strategy my way into another gigantic improvement.
Green's a bit like Orange, in that Orange has some attacks where he's unable to be thrown, and Green... has some attacks where he's unable to be thrown. Maybe they're a lot alike after all. Point being, Green will always throw stars upon rising. Sometimes he will jump to the top level first, but after that he will start throwing stars just the same. He can't be thrown during this, otherwise I feel like this fight would have ended up more or less the same as Orange. Green takes less damage from being thrown, only 240, but it's still a fast amount of damage to do before he goes invulnerable. Naturally, minimizing invulnerability times is the name of the game here, and this new strategy works pretty darn well for doing that.
Much like most human Boss Boys (like two paragraphs ago, except exactly the same), Green's next attack is based on where the Gunstars are in relation to him. Further Boss Boys similarity comes from Green having an "attack" where he is vulnerable to throw damage, in this case coming down from a jump. The jump itself is an attack, but on the way down, he'll just take the throw damage like it's nobody's business.
So the new strategy revolves around keeping him pressed up against the wall and jumping into it, allowing for an up-right throw that tracks him as he comes down, doing a large amount of damage in the process, then finishing the pattern off with a throw the frame he lands. Otherwise, he'd be hit by another tick of throw damage and instantly be knocked invulnerable, and that's 220 less damage than we can get in the same amount of time. Homie don't play that.
Sometimes, Green just doesn't cooperate with this pattern. Manipulating him into using the right moves sometimes just doesn't work if the same pattern is kept up all throughout, so there are times where I have to substitute a quick drop for a normal throw. Green takes an extra 80 damage if he collides with a wall while being thrown, which takes about 15 extra frames from a normal downward throw. This does allow 80 more damage per cycle (760 as opposed to 680)... But it's not enough to save a cycle, so doing it is just a waste of 15 frames each time... Except for the last time, where I needed to do it to properly manipulate Green into doing the jump.
I do apologize for the battle being a lot of standing around, but moving around too much affects Green's next attack, so I have to stay still. I do as much as I can to try to make it a little more entertaining but there's not a WHOLE lot.
So now we're into the final battle.
Final Battle - Golden Silver
Golden Silver takes the bronze in this fight.
Welcome to the only battle in the game where throws are almost completely ineffective! The gems we've been collecting over the first four stages... Y'know, the ones we gave up in the 5th stage because plot point? Yeah. Those are the targets here, and hitting them with throws is just not really feasible. They don't take a lot of damage, maybe only 100-200 per throw when it should be a lot more, quite frankly. So...
It's time for the ultimate weapon: Double Chaser Fireball.
Having used it extensively throughout the course of the game, though only to save a couple of frames here and there, the Chaser Fireball finally gets its brightest, most shining moment: Destroying the hell outta some gems, much to the chagrin of Steven Universe fans worldwide, in order to save more time than most of the other fights in the game combined.
That is the power of the Chaser Fireball.
The battle shifts between the gems rotating in place, where I do ridiculous amounts of damage by rotating two Chaser Fireball shots in the opposite direction. It's about 15-16 damage per frame on average, which is less than a throw but as I said earlier, throws don't work too well on the gems. For an example of this, watch the published run.
The gems don't stay in place the whole time, though, and will start moving around and following Golden Silver in a segment I like to call "damn near impossible to optimize". Once this is over, three of the gems will return to their rotation and the last one starts attacking on its own. Golden Silver itself can't be damaged, only momentarily disabled, which is done a few times to prevent it from attacking the Gunstars.
Honestly, despite being the most improved battle in the run, there's not a whole lot else to say about it. I avoid Golden Silver's attacks, I keep up a barrage of flames on the gems, and I end input a little early by letting go of the Chaser Fireballs when they're guaranteed to finish the battle off.
Whoof.
Writing List
Just kidding. Learn to read. B)
NOTE FROM THE FUTURE: Hi, 2020 Samsara here. One of these pieces of writing has aged incredibly poorly in the time since this run was published, so now I have an actual reason to not give the full writing list.
Known Improvements
- Drop chaining in Pink's stage should save about 10-20 seconds
- Some of the early fights could have a little more time shaved off of them in general
- Utilizing Fire effectively (and only with a single character) should save a few seconds overall on the first Seven Force fight
- Figuring out how to manipulate the second Seven Force fight would save another few seconds in lag alone
- Movement in general can be optimized
- The Phantom in Black's stage can be killed ~a second faster with better luck
- The "Destroy!" section in the dice maze can be done at least 3 frames faster if the other player starts the battle
Possible Improvements
- Choosing Free Fire for both players could potentially save time during drop chaining sections by reducing the number of shots on-screen (thus reducing lag), at the expense of a couple of marginally slower boss fights
- Experimenting more with quick drop clips could lead to major skips, though I doubt anything huge would come of it, if anything at all
Special Thanks
If you think you deserve thanks of some sort but your name's not on here, first off you're a narcissist, second off you're probably mentioned in the afterword of the submission text, third off you're a narcissist. Perhaps stay away from your own reflection unless you're really into kissin' that pretty thang.
First off, I'd like to thank anyone that followed the progress of this run, anyone who watched the WIP videos or posted in the thread or even anyone who looked at the submission and thought "Oh, friggin' sweet, a new Gunstar Heroes TAS!" Even the tiniest bits of motivation help, whether it be a couple of views or likes on a YouTube video or a helpful comment or even just taking 5 seconds to watch a dumb Gfycat I posted. In particular: GoddessMaria, Derakon, Dooty, WST, grassini, and Objectorbit (I don't know if you have a forum account but that's your name on YouTube so, eff it) for leaving positive thread/YouTube comments, and the usual IRC crew for your usual comments. I'll be damned if I'm going to go through my chatlogs to figure out who commented on what. You all get The Same Shoutout. Deal with it.
A strange, somewhat hesitant thanks to Sonikkustar for cluing me in to the fact that there might be a weird alternate movement method in the game. Strange because I had completely dismissed his comment/input file before starting the TAS as it didn't actually show anything worthwhile, hesitant because I stumbled upon drop chaining on my own while experimenting with playaround stuff, but still thanks because the comment was always on the back of my mind.
A non-strange, completely worthwhile, and instant thanks to arkiandruski for the published run, which was one of my all-time favorites when I first started really getting into the site. It was one of the runs that made me think that TASing was something that I really, really wanted to do, and it almost feels surreal to go and destroy it in this way.
And, as always, thank you for watching. Even if I thanked you before, thank you again for watching.
Screenshot Suggestions
Frame 56116:
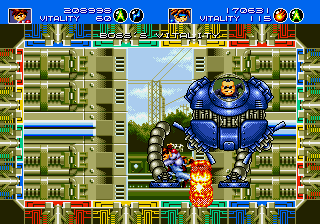
Frame 60245:
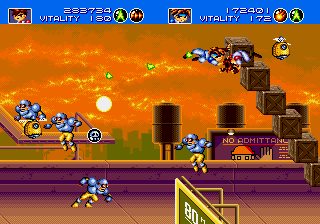
Frame 61822:
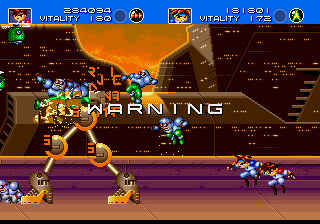
Before the Afterword
For those of you who are just interested in the run and not any of my weird site-related or people-related ramblings about super personal thanks or my departure from staff, you can safely stop reading here. Everything from here on out is going to be kinda saccharine and sentimental and awkward, like to the point where I'm expecting to hit at least three cringe compilations within the week this goes live.
If you're ducking out now, first off I don't blame you, second off thank you for watching the run and, presumably, spending way too much of your time reading everything up to this point.
Now let the awkward sentimentality begin.
Special Thanks 2: Thank Harder
Shoutouts, thanks, kudos, and props to... Uh... Well, to anyone who ever took me even somewhat seriously as a staff member. Good and bad, arguments and understandings, it doesn't matter. Anyone who would ask me for advice on their submissions, anyone who spoke up to me when they thought I was doing something wrong, it doesn't matter. Part of what made my time as a Judge so worthwhile was just being able to help the site in some way or another, even if part of it had to come through taking some heat in the process. Perhaps one could take me stepping down as my ultimate act of helping the site out. I just hope that "one" isn't prefixed by "every".
Extra special thanks to arandomgameTASer and Invariel for being just the best bros a person could ask for, like holy hell. Just... Y'all kept me goin' on this mad journey, and even if things in my life have kept me from being anywhere close to as good of a friend in return, let it be known to the public that I am just so gosh darn grateful and blessed to be someone you consider a "cool person", let alone a "friend", let alone someone you would chill with in the real world.
NOTE FROM THE FAR FUTURE: Hi, 2020 Samsara here. Due to, uh, c i r c u m s t a n c e s, I'm editing this section.
Finally, last and certainly most, because that's how weird submission text sentimentality works... As much as I feel weird talking about a significant other in any context, let alone on a site that centers around a niche subhobby that stems from a niche hobby that in itself stems from a culture that is, if you'll pardon my French, le fucking awful, I don't think I can thank my better half enough for everything he's done for me over the past three years.
If you've so much as heard of me within the last two months, you may have surmised that things in my recent life have been nothing short of a nightmare. I don't talk about it because, let's face it, nobody really cares about it. Everyone has their own stuff to deal with, some have great lives, some have horrible, broken lives, and I'm somewhere in-between horrible and broken right now, so there's really not a whole lot of point to me bitching about the fifth awful thing that's happened to me this week.
So I offload a ridiculous amount of that bitching on my almost impossibly understanding and caring boyfriend, and he listens to every word and he tells me how happy I make him even if I'm kind of a huge jackass a lot of the time and he supports me when I deserve to be supported and talks me down from doing stupid things when I don't deserve to be supported.
He doesn't really understand what TASing is or why I enjoy it so much (...at times), he doesn't really associate with the site at all nor does he want to, but he's still there whenever I need to vent about what's happening with the site and what's happening with whatever run I'm working on. He watches the WIPs and enjoys them and encourages me to keep going, even though he's never heard of any of the games I've ever done and doesn't really have any interest in retro gaming in general.
He's done more for me than anyone else in my life has. I only wish I had so much more to give him in return.
Super Final Thoughts
I suppose given recent events I should just go all in with a postmortem for everything, because if there's one thing I know people on this site want, it's for me to wax poetic about something nobody cares about.
I always had a plan for when I wanted to complete this run, though "having a plan" and "having the same plan" are two entirely different things. Around September, when I picked the run back up for realsies and started tearing through it like a bull in a candy store, which I think is the right phrase if it isn't a kid in a china shop, my plan was to have it done by the end of October. Then Green's stage happened, and it was mostly a lot of sitting around, TASing maybe a second or two per day, then wondering why I ever decided to work on the run. My plan then became "before the end of the year", because at the rate I was going, October just wasn't looking any likely.
I did make it past Green's stage with relative ease after that, pushing through Orange and most of Black before stumbling upon that wacky drop chaining. Cue a break until earlier this month, then deciding it wasn't worth redoing the motivation hell that was Green's stage for a few seconds of movement improvement in Pink's stage, then dropping away from the site and redoing everything from Orange onward. "Before December" was the new goal.
And then, if you'll pardon my English, shit got real fucking bad from that point onward.
If you've spoken with me in private more than once or twice, you'll probably have realized that I hate talking about my personal life. Not just because it's a huge sob story and I can't stand people taking pity on me, but because my life's not a matter that pertains to the site in any way. It affects my mood, sure, and it affects how I act, and in this case it affected me to the point where I felt it necessary to step down from site staff. But it's still not worth talking about.
Why? Because for me in particular, my personal life is no excuse for my behavior. It's the "completely preventable" kind of awful where the only reason I'm in the situation I'm in is because I don't have the motivation to bring myself out of it. Pretending that it's uncontrollable and life-destroying is the easy way out, and it's only going to keep breaking the ground underneath me and plummeting me deeper and deeper into this hole.
And that is ultimately why I stepped down, because it's the first, and admittedly easiest, step for me to take in order to, if you'll pardon my Rule of Three usage of this joke, get my act together... piss. hell. It's something I worried about that I no longer have to worry about, and it's much easier than giving up drinking or chain-smoking or my crippling addiction to peanut butter and LSD sandwiches. I'm thousands of dollars in debt after buying all the LSD I could get my grubby little mitts on, but damn if it isn't the best tasting PSX game.
I know what you're thinking: "You actually worried about being a Judge?" Yes. Yes I did. You probably had the same kind of worries at your first job, or your first day at a new school, or your first time getting close to someone you think is cute. I worried that I'd make the "wrong decision" and have to deal with weeks of fallout, which has happened more than once over all the decisions I made and usually over the weirdest friggin' things, like the time Gummy Bears lead to staff meetings/arguments and an actual site rule change, because when anyone thinks about staging an uprising, a coup, or a mutiny, their first thought is Gummy Bears.
I worried that I was doing too much at times, to the point where I started worrying that I was actively demotivating the other Judges with my nonstop activity, and thus I would worry about stepping back from the site because I was convinced we'd have another month like February on our hands, where I watched and analyzed 5 submissions in a single day, only to see 6 more submissions come in within a few hours of each other.
Are these major worries? No, not at all, not in any way, shape or form. Perhaps "frustrations" would've been a better word. Annoyances, grievances, normal parts of a job, whatever you want to call them. They're just the barbed wire star on top of the Christmas tree of broken glass that is the rest of my worries. They're fairly painless to remove as long as it's done right, and I'd like to think that stepping down is "doing it right", as opposed to my usual method of climbing on a Segway, tossing a molotov cocktail onto the bridge behind me, and riding off into the sunset flipping the double bird. And then flipping the Segway and hitting two birds with it. My own birds. Now my hands are all broken.
This metaphor got Seg-way out of hand. Let's just Segway into something more actually focused on, y'know, the TAS I have just submitted, perhaps.
It's much too early for me to finalize my thoughts about the run, though I feel like out of everything I've worked on, this has been the most intense in several ways. If I were more egotistical and self-centered, I would call it my magnum opus. However, my feelings can change in the future. I want to look back on this magnum opus in a month or three and think "Yeah, this was pretty sweet. I'm proud of this." Will I? Maybe, maybe not.
It kinda really is a shockingly fitting metaphor for being a Judge though. Ah, geez, I brought that up again. Aw, beans.
Like judging, I started the run off with a good amount of motivation. Like judging, the midpoint was pretty weird and I took a couple breaks that ended up being shorter than I would have liked. Like judging, everything just went south at the end and there were at least 2 or 3 moments per session where I felt like my time wasn't going to be worth it. Like judging, I'd look back on what I did on a daily basis and see things I did wrong, knowing that I can't fix them. Like judging, I need a friggin' break.
But there's a flipside to it all. Like judging, I'd look back on what I did on a daily basis and see things I did really well. Like judging, I put my all into everything even up until the end. Like judging, I settled into a really nice optimized pattern that allowed super-efficient work without sacrificing any quality. Like judging, I truly enjoyed my time doing it from start to finish. Like judging, I feel like what I'm doing is helpful to people in some way. Like judging, I'd like to come back and try everything again someday, when I'm much better off as a person.
And most importantly of all, like judging, I know that even if it's too early for me to reflect on everything I've done, I'm almost positive that when that time comes, I'll feel as though it was 100% worth the time and effort. Even if I made mistakes, even if I couldn't motivate myself to perfect absolutely everything the first time around, I can't see myself looking back on my work and despairing.
But, at this point, I think I'm just glad to be done. Glad to be done with the run and glad to be done with my staff positions and everything attached to them. I can close the metaphorical door on this chapter of my life and open the literal door to the world outside where my PC sits, especially since I spent a long while repairing said literal door after I literally shoulder-bashed it off the hinges a week and a half ago.
But as for the metaphorical door, I'm just going to wave to everyone, step through, and leave it slightly ajar so as to not lock myself out forever. Then, maybe some time down the line, when things are better for me, I can come right back and shoulder-bash that door off the hinges. My poor shoulder weeps for that day. Or maybe it doesn't. Would a metaphorical door hurt me if I body-checked it?
I'll figure that out someday.
Thank you all.
<3
NOTE FROM THE FUTURE: oh hi i'm back
GoddessMaria: Judging.
GoddessMaria: This is a truly magnificent movie! Considering that the previous movie had set such an extremely high standard for all future submissions for Gunstar Heroes, it's truly impressive. This new movie takes the greatness and entertainment that made the previous so great and adds even more to it whilst improving the movie by over 4 minutes at the same time! The audience also responded very positively overall on this submission.
Accepting as an improvement to the previous movie!
Spikestuff: Publishing!