 THIS AREA UNDER CONSTRUCTION
Table of contents
Creating the configurations
Windows XP
ROMs
You will need the following ROM files: (THESE ARE CASE-SENSITIVE!)
Filename                      MD5
6BX.F2a                       8ea65e0c1c4934e9a0105bb3fe33a9e9
Put this in the folder
~/.pcem/roms/ga686bx/. If there is a file called flash.bin in this folder, then delete it.
The GPU also needs a ROM file:
Filename                      MD5
3k12sd.rom                    ecc400ecd2fd7e5e4efd11f4bf837afd
Put this in the folder
~/.pcem/roms/voodoo3_3000/.
Finally, the sound card needs a ROM file:
Filename                      MD5
awe32.raw                     30b76c45ca0712418239d2b15c65881a
Put this in the folder
~/.pcem/roms/.
Windows XP CD
You will need this specific CD for Windows XP SP3 Home Edition.
File:  en_windows_xp_home_with_service_pack_3_x86_cd_x14-92413.iso
MD5:   a22030df1988445436f300bc29c32dd2
SHA1:  5a6b959ad24d15dc7ebd85e501b83d105d1b37c6
Utilities CD
TODO
Will have:
- Amigasport 3.0 XP driver (for the Voodoo 3 card)
- Adobe Flash Player Standalone 29.0.0.171
- Java Runtime Environment 8u372 from OpenJDK (mirror)
Created via
mkisofs -J -o ../windowsxp-utilities.iso .
Will probably need more but we can release a version later with more stuff if people need something.
Config
Make a new config with the following specs. If something is not specified, leave it at default. You may not get some of the options when you make a new config; if this happens, click "OK" to save it and then try editing it again.
Motherboard:
- Machine: [Slot 1] Gigabyte GA-686BX
- CPU: Intel Pentium II/450
- Memory: 256 MB
- Synchronize time to host clock: Checked
Graphics:
- Device: 3DFX Voodoo 3 3000
- Click on the button with the tools and set Render threads to 1
- Speed: Fast VLB/PCI
- Voodoo Graphics: Unchecked
Sound:
- Device: Sound Blaster AWE32
- Click the tools button and set OPL to NukedOPL
- All options unchecked
- LPT Device: None
Drives:
- HDD: [IDE] Standard IDE
- FDD1: 3.5" 2.88M
- FDD2: 5.25" 1.2M
- CD Model: PCemCD
- CD Speed: 72x
- Drive 0 Primary Master (C:): Hard drive
- Make a new hard drive with Custom type: Sectors 63, Heads 16, Cylinders 8374 (will result in 4121 MB)
- Drive 1 Primary Slave (D:): CD-ROM
Mouse:
- Mouse: 2-button mouse (PS/2)
Once this is made, find the config that you just named in
~/.pcem/configs/ and open it in a text editor. Set cdrom_drive = 200 and set cdrom_path = /path/to/en_windows_xp_home_with_service_pack_3_x86_cd_x14-92413.iso;/path/to/utilitiesv1.iso, substituting in the proper paths for the XP and utilities CDs.
NVR
This chipset does not pull the default NVR from a file - just make sure that in
~/.pcem/nvr/ there is no NVR named after your config file (e.g. if your config is named winxpv1, delete any file called winxpv1.ga686bx.nvr.)
Setting up BIOS
Now you can boot up your configuration. On the bootup screen, press the Del key to go to the BIOS menu. Select BIOS Features Setup and press Enter, and you will see this screen:
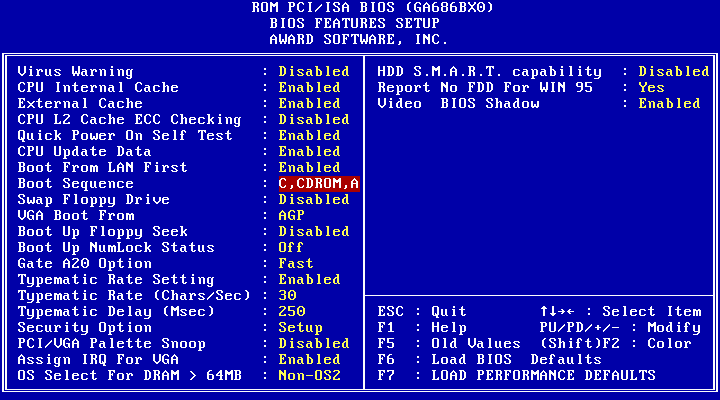
Go down to Boot Sequence and use PageUp/PageDown to select
C,CDROM,A. This will allow you to boot from the XP CD at first because the hard drive is blank, and then when the hard drive becomes bootable it will use that instead. Press Escape and then select Save & Exit Setup on the main menu. Press Y and then Enter at the prompt.
Formatting hard drive
When the PC reboots, just wait and it will automatically boot from the XP CD. Once it's done loading you will see this screen:
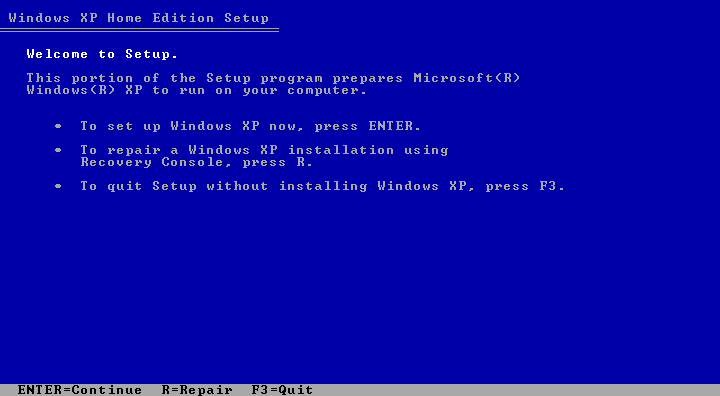
Press Enter to continue, and press F8 to agree to the license agreement.
The setup will now partition and format the hard drive for you.

Press Enter to partition the unpartitioned space.
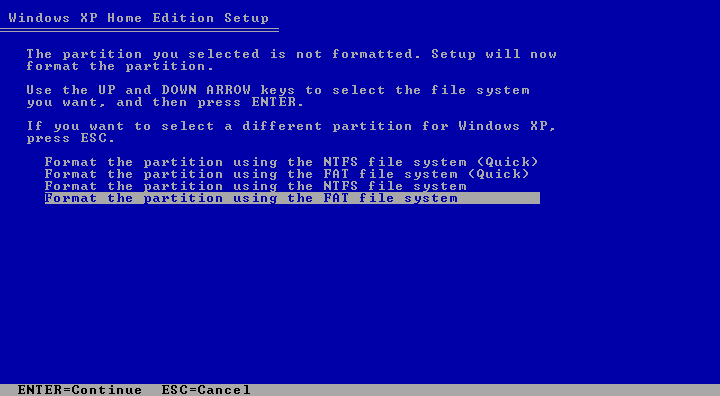
Select Format the partition using the FAT file system, press Enter, and then press Enter again to format the partition.
XP installation
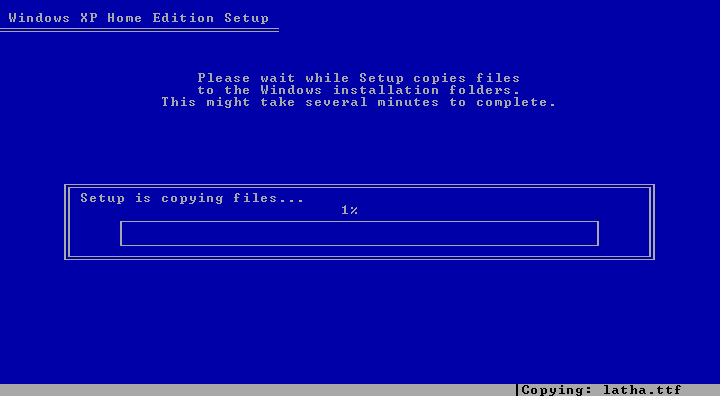
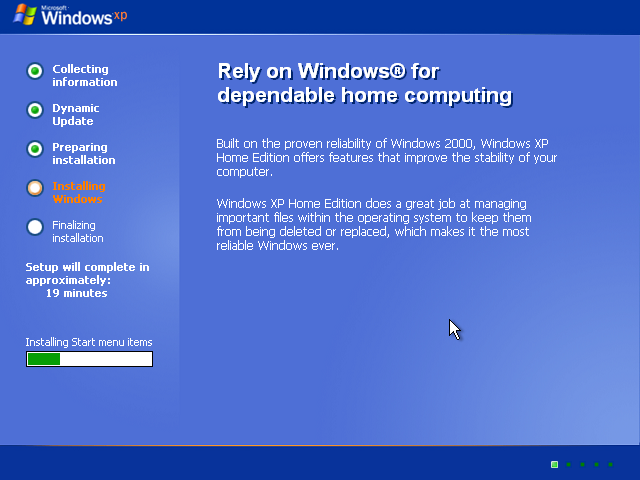
Once the formatting is done, it will start copying files over. This will take a while.
When it's done copying files, the PC will reboot and put you into the proper installer. It will install some more things, and then put you on this screen.
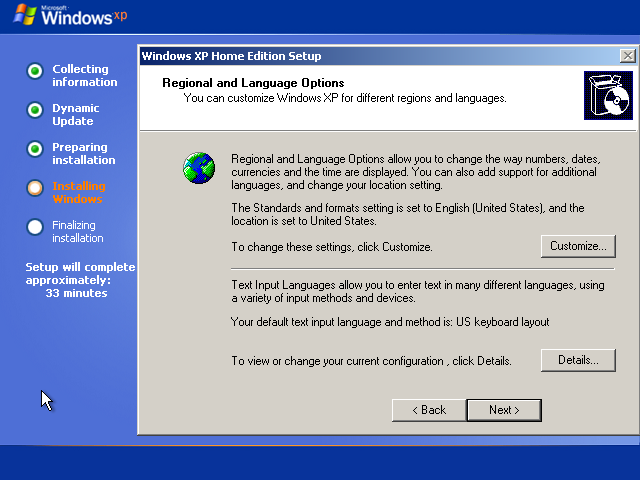
We will be installing language packs so languages like Japanese will appear correctly. Click Customize... and go to the Languages tab.
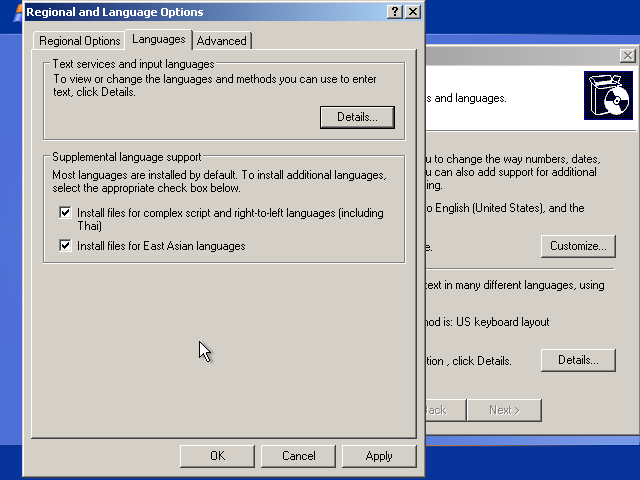
Check both options in this window. When it pops up a message about hard drive space, just click OK. Once both of these options are checked, click OK. Wait for it to install the packs. Once it's done, you can click Next.
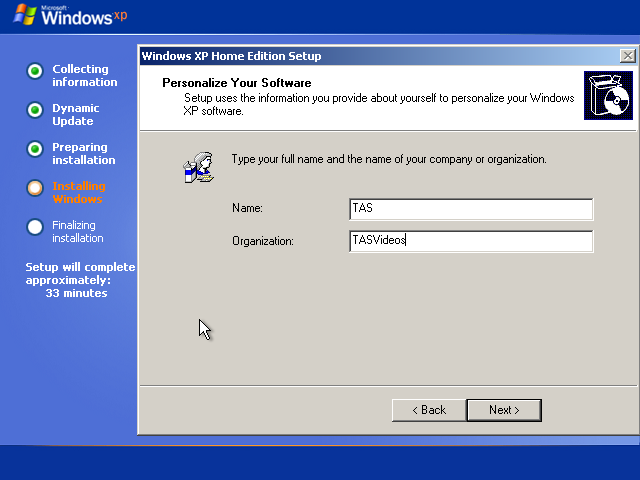
Put
TAS and TASVideos for Name and Organization respectively, and click Next.

On the product key screen, do not put in a key! Click Next and it will pop up a window asking you if you want to enter your product key now. Click No on this. This will allow you to have a 30 day trial before you need to enter one. On the Computer Name screen, just click Next.
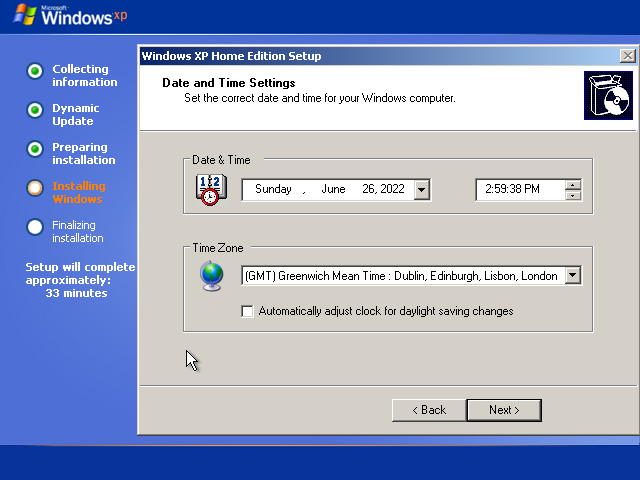
On the time screen, select (GMT) Greenwich Mean Time for the time zone and uncheck the daylight savings box. Don't worry about the time and date, libTAS will inject its own time. Click Next.
The installer will now take a while to finish up the installation. Enjoy the Windows XP fun facts!
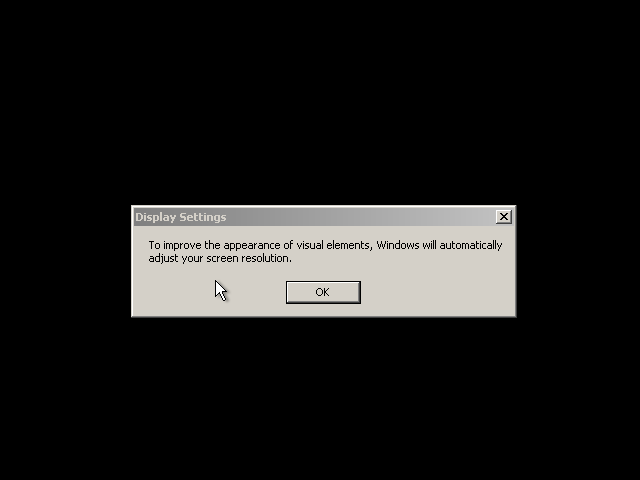
Once it's done installing, it will reboot again. Press OK to adjust the screen resolution and it will go up to 800 x 600. Press OK again after it's changed.
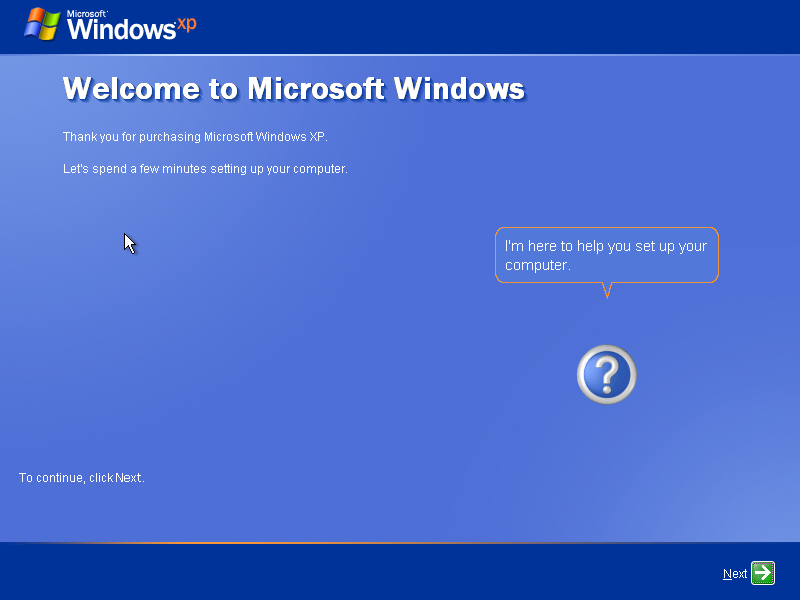
It will then play a little video and put you on this screen. Click Next.
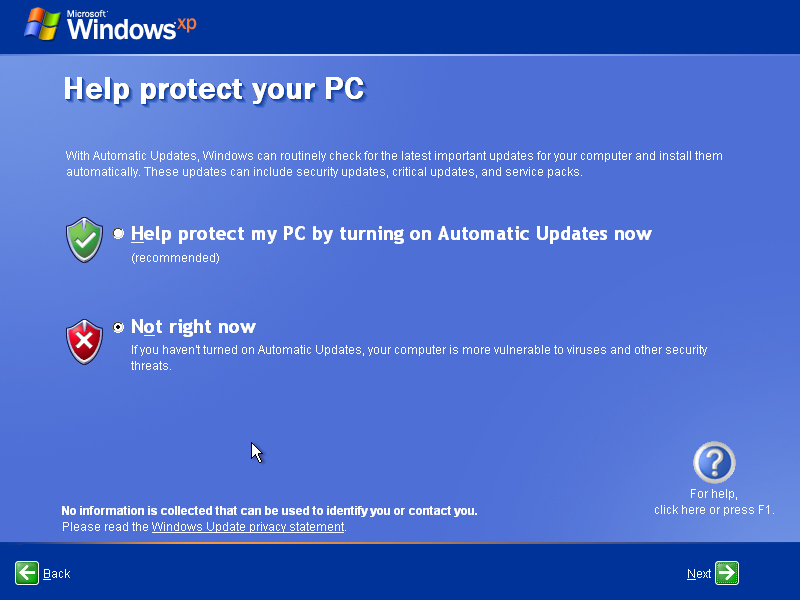
Click Not right now for automatic updates and click Next.
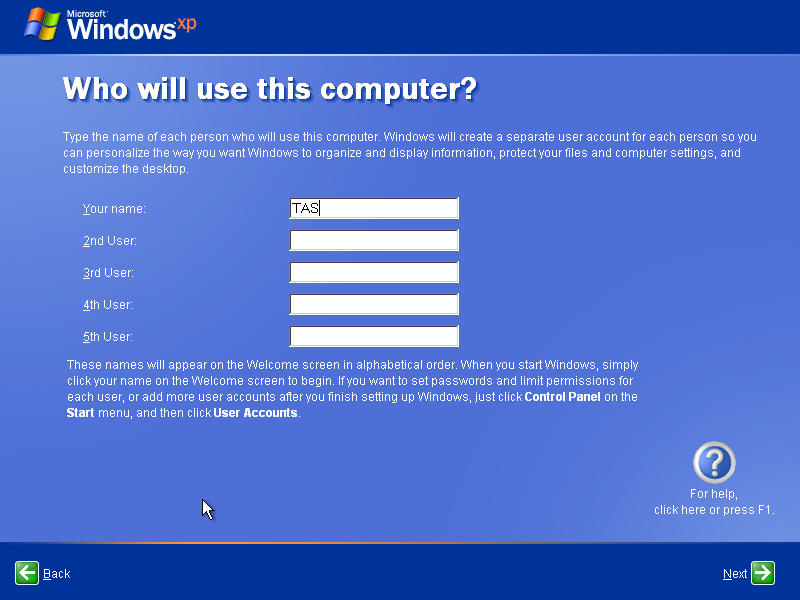
Enter TAS for your name and click Next. Click Finish on the next screen.
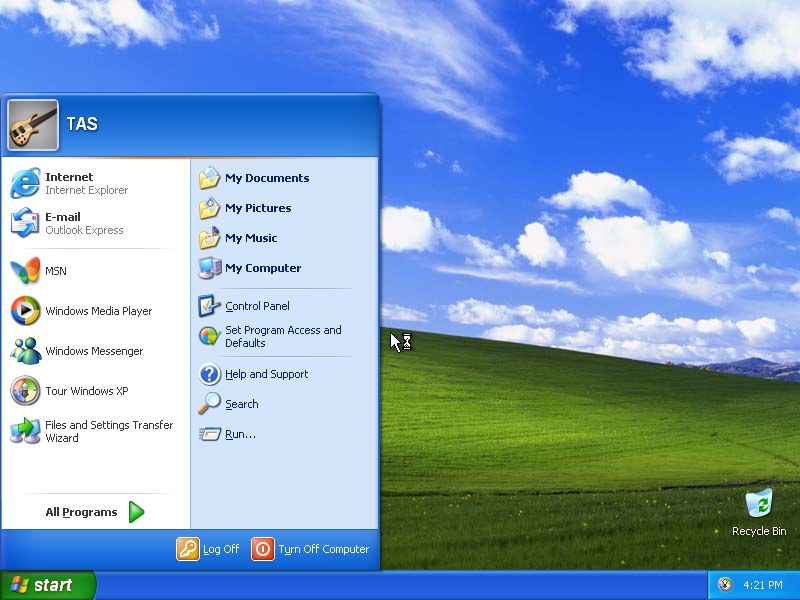
Once it's done loading everything, you'll be booted out to this familiar desktop.
Sound Blaster installation
Windows XP does not automatically install the sound card, so we have to do it manually.
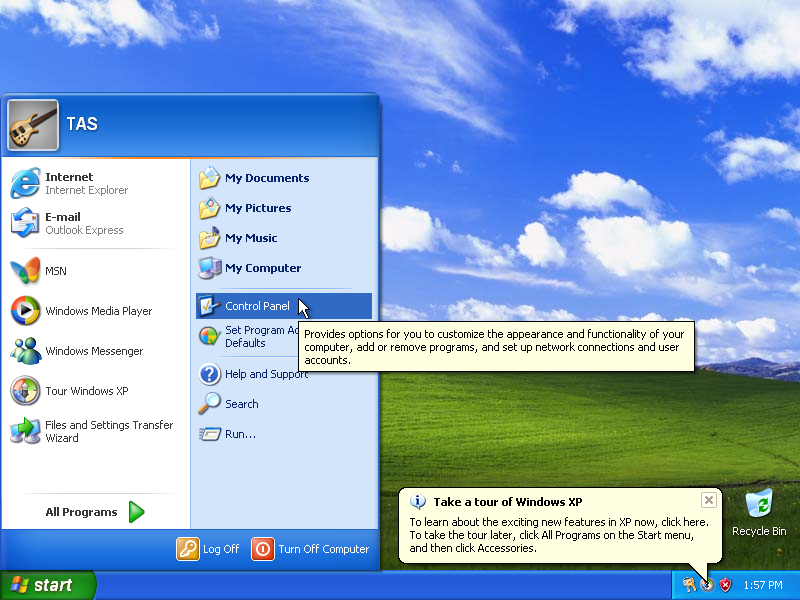
Click the Start button and then click Control Panel.
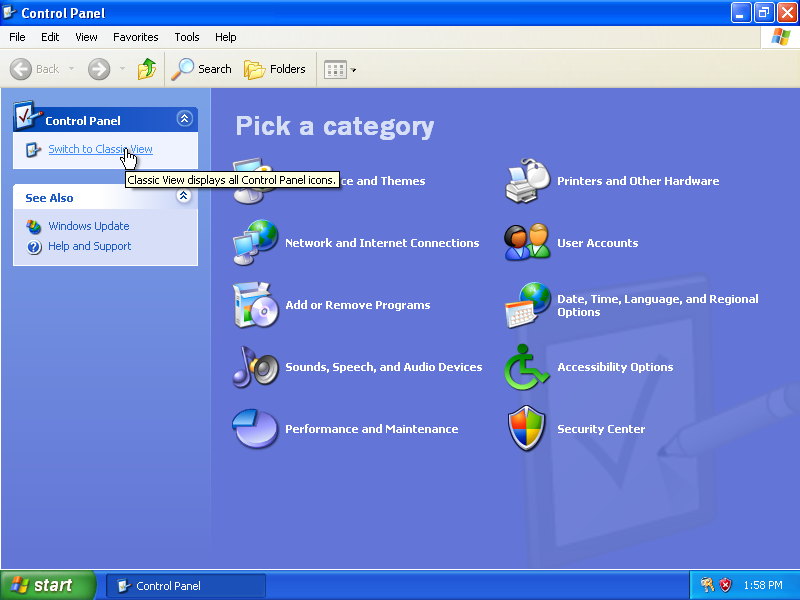
In the Control Panel, click Switch to Classic View.
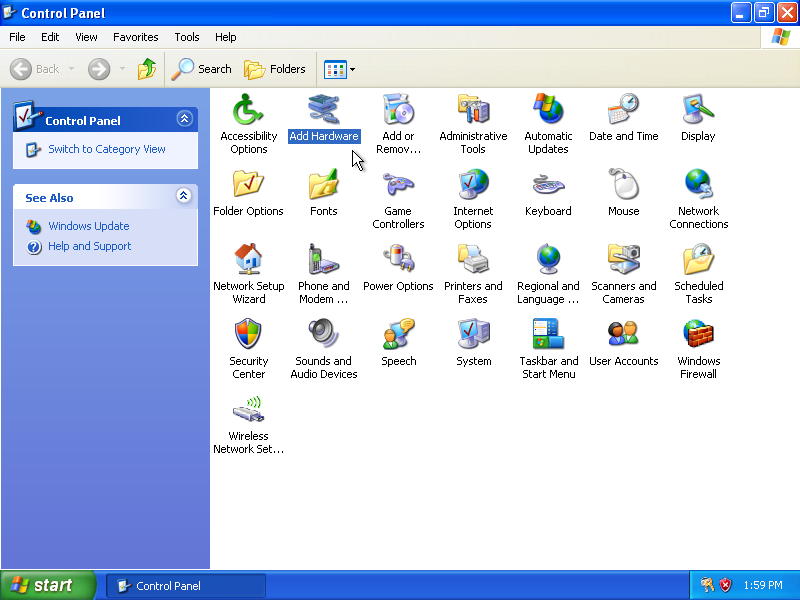
Now double-click Add Hardware. This will open the Add Hardware Wizard. Click Next on the first screen.
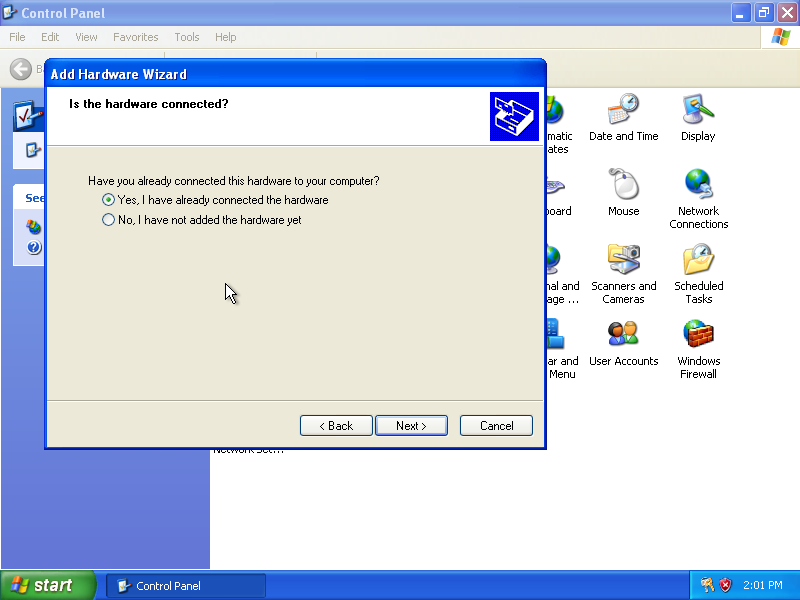
The wizard will start looking for hardware. Choose Yes and click Next.
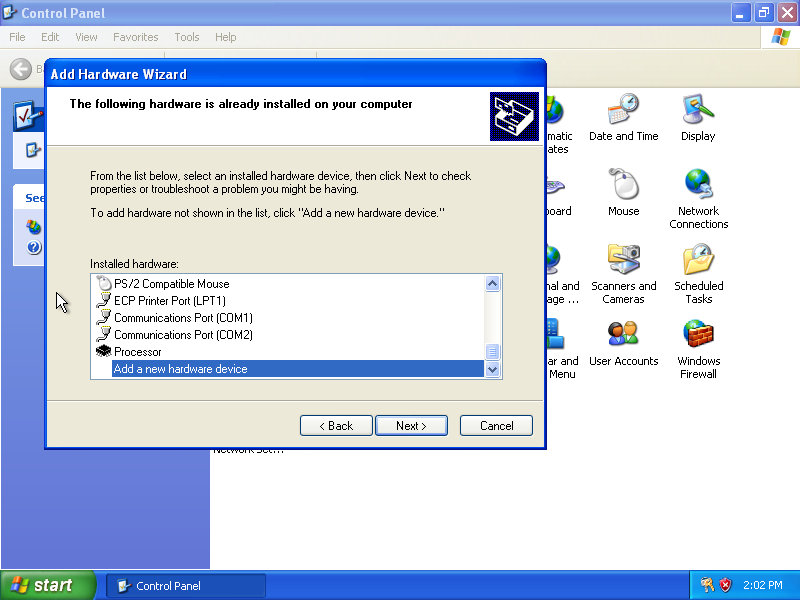
On the next screen, scroll down to the bottom of the list and select Add a new hardware device. Click Next.

Choose Install the hardware that I manually select from a list and click Next.
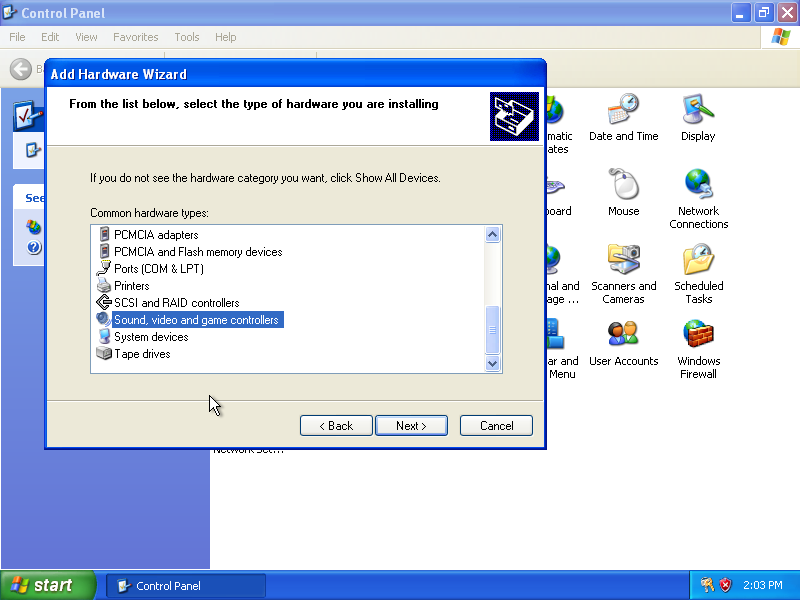
Scroll down the list, pick Sound, video and game controllers and click Next.
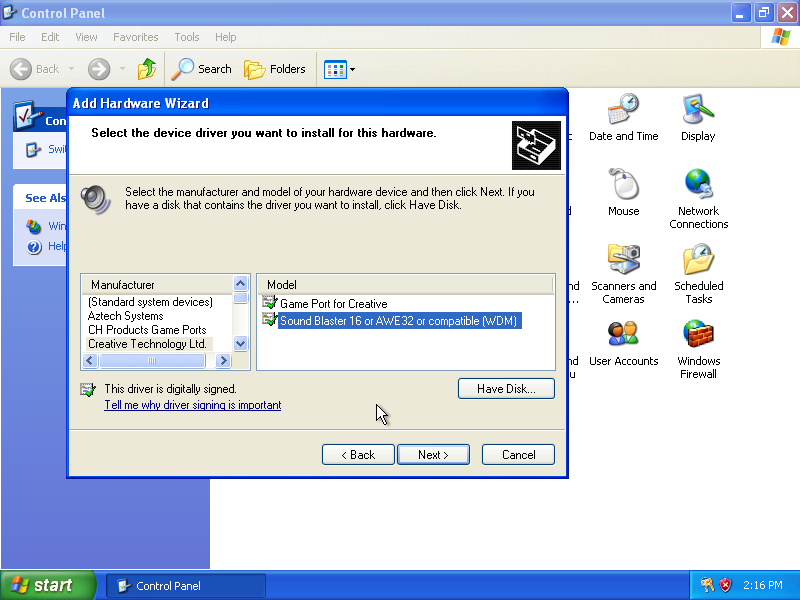
Now pick Creative Technology Ltd on the Manufacturer list and then pick Sound Blaster 16 or AWE32 on the Model list. Click Next and then Next again. Windows will now install the drivers for the Sound Blaster AWE32 card.
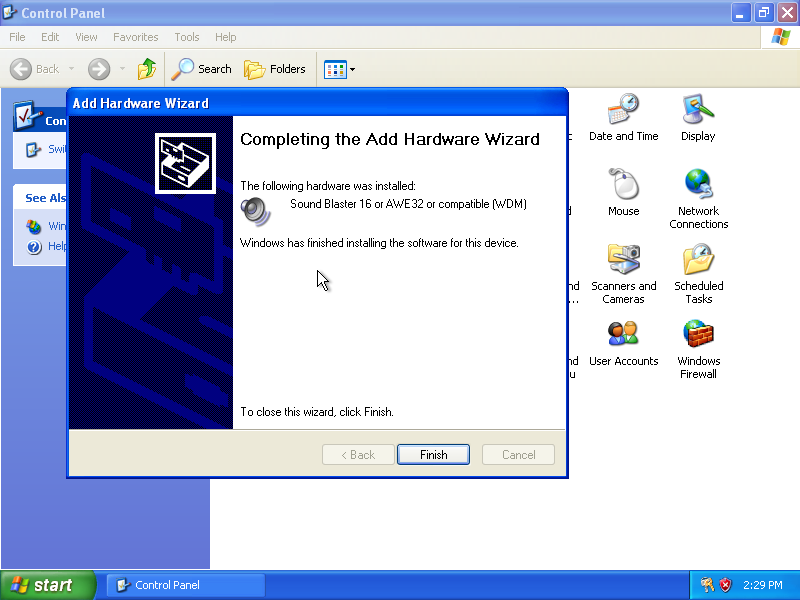
You should see this screen at the end. Click Finish.
Disabling sticky keys
Double-click Accessibility Options and click the Settings button for StickyKeys.
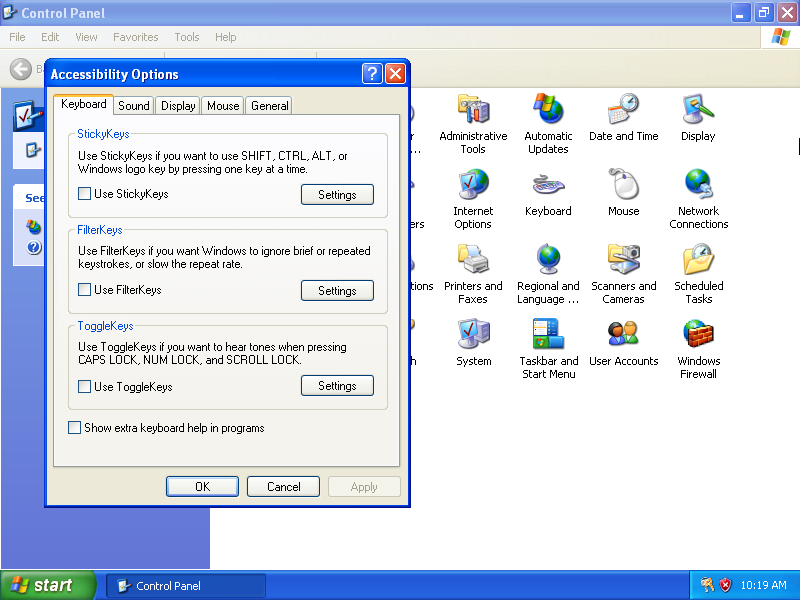
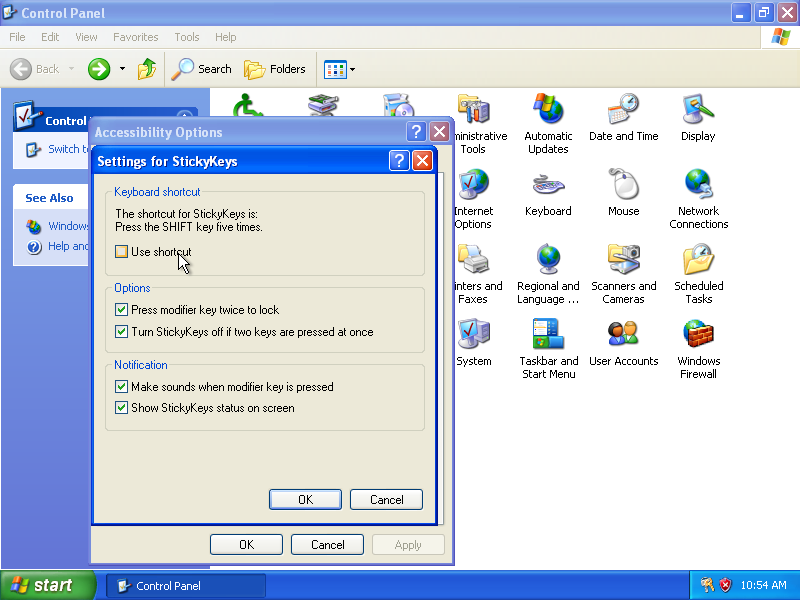
Uncheck Use shortcut and hit OK twice to exit back to the Control Panel.
Disabling firewall
Double-click Windows Firewall.
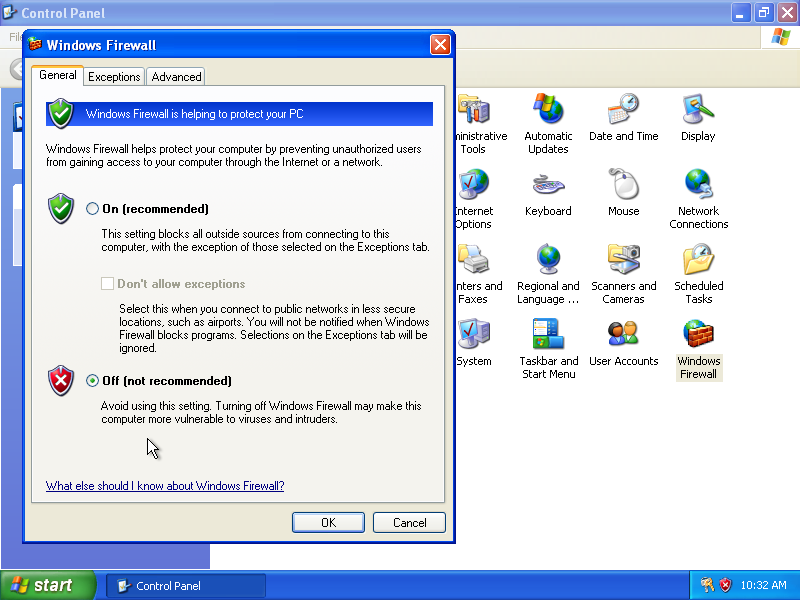
Select Off (not recommended) and click OK.
Disabling screensaver
Double-click Display and go to the Screen Saver tab.
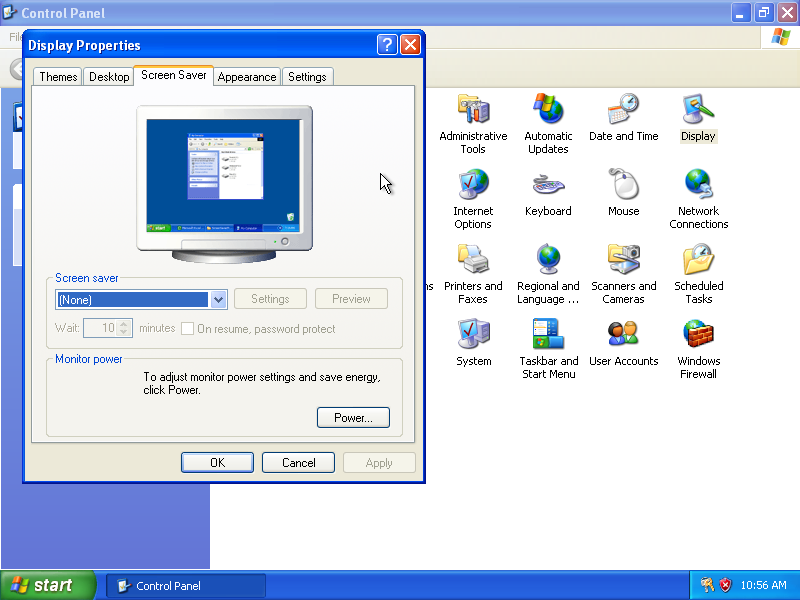
Change the Screen saver dropdown selection from Windows XP to (None) and click OK. Close Control Panel.
Voodoo driver installation
TODO
Other stuff probably needed:
- Disable popup balloons?