Post subject: Fantastic Dizzy
Joined: 6/8/2005
Posts: 4
I am not sure, but it looks like my previous post didn't come through :( So once again. I am trying to do a time attack for Genesis version of Fantastic Dizzy. It mainly features (apart from quick completion) taking no damage, which is not too easy in this game. So far I've logged about 6:30, not really sure how far in the game I am. Is anyone interested in time attack for this game, please?
nesrocks
He/Him
Player (241)
Joined: 5/1/2004
Posts: 4096
Location: Rio, Brazil
it was discussed a bit here http://tasvideos.org/forum/viewtopic.php?t=1682 If the genesis one is an enhanced graphics version of the second nes version, then its better to do on genesis. Because on that one he walks much faster than on the first release of the game. I think you will need to map everything you actually need to grab / use and then plan a route. I'm interested on this game, i just find it a bit hard to plan for a timeattack, thats not my type of thing.
Joined: 6/20/2004
Posts: 292
Location: United Kingdom
It's not just graphically enhanced, some of the puzzles are slightly different. I don't know how but I managed to get hold of the script that they used on their telephone lines that people would call when they were in trouble, that has some useful tips but it's not exactly a walkthrough. In case anybody didn't know, It's possible to go through the mine and get all the stars in one go, and if I remember correctly doing that gets you to the exit behind the irishman or something... I used to have the directions written down but I somehow lost them. I think this game could be quite interesting, especially when finding the fastest path. Collecting all the stars would be quite a task to get an order. I remember going around the game quite a few times trying to find the stars I'd missed, and also wishing they'd put a save system in. And not to mention all those mini-games the had like bubble dizzy (although I don't think you actually need to do that as you can jump to the island with the thing that makes you breath underwater, which could save some time)
Joined: 6/8/2005
Posts: 4
Well, for the first run, I downloaded a walkthrough which is already very much optimized for speed - it won't be as much a time attack completely of my own as a "visual adaptation" of the walkthrough. The later versions (if there will be later versions) will attempt to improve. I hope that's not much a strike against me. I even considered writing a program that would try to determine the best route, but this was faster :) Oh yes - and this is my first time attack, so I'm still learning my way about the interface. You can check the walkthrough on http://www.gamefaqs.com/console/genesis/game/586175.html - I have contacted the author and I hope to get a permission to use his walkthrough. Now, I decided to do this run in the best takes-no-damage way, since it's so darn easy for Dizzy to get hurt. The strange thing is that there is SOUND of getting hurt sometimes, but the "damage" bar never appears, and when I grab a fruit afterwards, no health restoration is shown. I decided to count this as "no damage" :) The bad part of this are spiders. Often, a spider is on the inclined path in such a way that it's impossible to jump over it when you are lower without being damaged. Dizzy has to wait a substantial fraction of second, in most cases, before he can safely pass. (similar problem is with some of the rats, especially on pirate ship.) Right now, the time attack has logged 15 minutes. I would like to upload it somewhere, but I don't have a site. What's in so far: After getting through the start screen, Dizzy clears his hut and makes a quick side-trip to the countryside and mines in order to obtain Mushroom (for Grand Dizzy's medicine) and Grand Dizzy's Elevator Key. He gets back to the village with about 2 minutes on the clock. Next six minutes are spent in the village, gathering and using items. He manages to unlock almost all huts (with exception of Dozy's), he saves Grand Dizzy and gives caged Pogie to Dylan, and finally he takes a big plunge left with Dora transformed in frog, and gives her to the prince in exchange for a crossbow. All the time gathering stars like mad. In next part, he moves over to the city with its maze of streets, gets winch handle and winch wheel from the pirate ship (VERY ANNOYING part), and moves onto the castle. I managed to clear the "castle siege" minigame in about 4 seconds by shooting the first four soldiers to appear and avoiding all the rocks. Then Dizzy clears the castle, grabbing all the stars and the important Bridge Kit, gets out of the city and uses the Bridge Kit in the graveyard. That's 15 minutes, I will continue. In the 15 minutes, Dizzy grabbed 102 magic stars, so if he keeps up the speed, the whole run might be around 36-40 minutes, since there are 250 stars.
Player (67)
Joined: 3/11/2004
Posts: 1058
Location: Reykjaví­k, Ísland
Hmm, I was never awarea you needed a permission to use a walkthrough, but anyway, I hope this game gets a timeattack done. If only beacause of how huge and mysterious it is. (The cave "theme" on the NES version gives me this "mystery" feeling I can't describe...)
Editor, Reviewer, Experienced player (969)
Joined: 4/17/2004
Posts: 3109
Location: Sweden
If people didn't want other people to read and use their FAQs, it would be stupid of them to put them on the internet. So I'd say you can just go ahead. You can use filespace for storing WIP files and such stuff. Or pilif has an FTP up which anyone here can use for those things. Use either of those and you'll probably get more reactions as to if this is a good choice for a run or not.
Joined: 6/20/2004
Posts: 292
Location: United Kingdom
All that in 15 minutes? I never thought it possible. I wish I could see this, coincidently my email address is admiraljonb@aol.com, oh and i also have web space if you want me to put it on there. Edit: Post 150, must be my record for a forum. Not much I know, but I don't usually talk very much or find a good community.
Joined: 6/8/2005
Posts: 236
Location: Madison, Wisconsin
I remember playing through this once. It was *very* frustrating.
Joined: 6/20/2004
Posts: 292
Location: United Kingdom
So far, Marek14's movie is on my site at http://www.freewebs.com/gamemoviefiles/genesis/genesis.html, i can't link directly but it's the bottom of the page. I'm thinking i might try a run of this... Oh, and i think version [c][!] works if it boots in US, mine loads as Europe on auto detect, but works perfectly in US
Player (67)
Joined: 3/11/2004
Posts: 1058
Location: Reykjaví­k, Ísland
Argh, why did they have to change the music so much? The music in the Genesis version is COMPLETELY different from the NES version. :( Now I think I would prefer a NES run. Not that it's up to me...
Joined: 6/8/2005
Posts: 236
Location: Madison, Wisconsin
Not to mention, the aforementioned run is nonexistant :\
Joined: 6/20/2004
Posts: 292
Location: United Kingdom
That's weird, worked before. Use http://www.freewebs.com/gamemoviefiles/ and go to the genesis page from there. It's working for me at the moment.
Joined: 1/1/2022
Posts: 1716
I just saw the in-progress run, and I gotta say it looked pretty damn awesome! This was my first time seeing this game in years, and it definitely brings back memories... with the insane difficulty of the game, they're not necessarily good ones, to be honest, but it's still great to see this game again. I'd completely forgotten how impressive it looks and sounds, so even if the gameplay is horribly frustrating, it makes for great watching. Again, I love the run so far, and it'd be a shame if it wasn't finished.
Joined: 6/20/2004
Posts: 292
Location: United Kingdom
Well, after all this time, I'm continuing this run. I just have one query... Damage or No Damage. Damage does save a lot of time (saved 54 frames on the first two screens) from not having to wait but it still doesn't feel right to me to do a damage run for some reason, although it will eleviate a lot of stress. What do you guys think? I'll post examples of both in a moment, once i figure out my password for my website to upload them. Edit: You can get them at my site http://www.freewebs.com/gamemoviefiles on the genesis page.
Player (67)
Joined: 3/11/2004
Posts: 1058
Location: Reykjaví­k, Ísland
Definitely take damage if it saves time. But ... am I the only one who thinks the NES version should be done instead of the Genesis version? Although the graphics aren't as good, the music in the NES version is superb, much better than in the Genesis version. Oh well. I will make this my only post about this subject, I don't think I really have a right to argue this since I'm not involved in making the movie. I wanted to throw my opinion out there anyway.
Active player (278)
Joined: 5/29/2004
Posts: 5712
AdmiralJonB, if you're really still interested in this, I should direct your attention to this speedrun. You might learn a trick or two you didn't think of before! Like now I know you can just jump to the island with the aqualung in the Genesis version to start exploring the water early. Don't forget that VGMaps.com now has a complete of maps for Fantastic Dizzy, so that should make planning your route a lot easier. Remember that you don't always have to grab stars at your first opportunity; if you cross an area more than once, it may be faster to wait to grab a star there on a later trip.
put yourself in my rocketpack if that poochie is one outrageous dude
Active player (278)
Joined: 5/29/2004
Posts: 5712
I was looking over your movie again, and I was wondering, where exactly were you planning to go next? I just wondered if there was a way to avoid that unnecessary elevator ride. Of course if you just use the board, grab the weed killer, and come back, you use your elevator key and kill the weed with your very next items, but I suppose you want to visit the mine area first to pick up Grand Dizzy's elevator key and the mushroom for his medicine. And since you're going for that key, you're probably also going for the wrench to start the mine elevators, right? I guess that's why you don't want the weed killer or the ground elevator key in the way when you're over there. I was thinking you could just leave the key next to the elevator and use it later, but if you're coming back with two items, then you'd waste more time getting that key back to the front. But then I think you're going to have similar problems with the weed killer or the mushroom anyway, so I'm not sure what to recommend at this point. And yeah, stick with the damage-taking run, especially if it somehow relieves stress for you. Avoiding all damage would be impressive in real-time, but in a TAS you know you're never going to mess up, so it just results in a bunch of boring waits (or possibly still some mysterious luck manipulation to get enemies out of the way faster, ooooooh!). Whereas planning the optimal way to take damage and heal enough that you don't die from more damage later, or intending to die at a certain point to backtrack through one area faster, would seem to be the more exciting plans and a bigger challenge for the TASer.
put yourself in my rocketpack if that poochie is one outrageous dude
Active player (278)
Joined: 5/29/2004
Posts: 5712
Today I discovered that, just as you can avoid using Denzil's elevator if you bring the rope, you can also skip GrandDizzy's elevator. What you do is unlock Dylan's elevator, go over and rope-swing to where Dylan's house key is, drop down to the right while the elevator's raised, and quickly drop through the hole underneath the elevator to the left, and you should land at GrandDizzy's house. This might save a trip somewhere.
AdmiralJonB wrote:
In case anybody didn't know, It's possible to go through the mine and get all the stars in one go, and if I remember correctly doing that gets you to the exit behind the irishman or something...
Yes you can get all the stars in one go, but then you end up at the final exit... which is where you need to be, as it contains a key item, the grave-digging spade. The exit just before that does take you to the right side of the leprechaun and is also the only way to reach the extra life game, but unless you're playing casually and need the extra life or its 1750 points, then I think it's not so useful because you won't get all the stars on the track anyway. The ride takes long enough that I don't think it's efficient to ride it a second time, but who knows? Maybe the second or third exit would be useful for transporting a lot of items up the beanstalk without having to venture through town or bring flippers! (While I'm thinking about the flippers, I want to say they are necessary for reaching some stars in Carber Bay, and helpful for crossing it without the aqualung, but they're not necessary for the pool under the bridge at the top of the mine; in this version everything's in reach of jumping there.)
AdmiralJonB wrote:
And not to mention all those mini-games the had like bubble dizzy (although I don't think you actually need to do that as you can jump to the island with the thing that makes you breath underwater, which could save some time)
Whoops, I guess you did already point this out. Then I'll just remind everyone that unless you're playing the first NES version, you still eventually need to enter the bubble trench to collect all its stars, so... Do that whenever you need to make another trip to Carber Bay. What might work is to take the dynamite and/or the handle to Zaks' castle off the pirate ship that way, drop the winch handle off at the beanstalk after you open the way there from the left, and go back to the left with the dynamite, match, and aqualung, possibly entering the mine through the second railway exit. Well, whatever works, I get the feeling it won't be worth carrying the umbrella when we've got all these objects to transport. I also wanted to mention a rumor I read somewhere that "it's only possible to jump onto the island when Dizzy's near death because damage makes him jump slightly higher." I did a quick check on Dizzy's jump height with frame advance, and it doesn't appear to be true at all. I confirmed that you can even jump to the island at full health before the water starts to damage Dizzy if you're quick enough. But you have to be careful to organize your items before you explore underwater, because in this version you don't get the grace period before drowning damage if you take the aqualung off in water. Ah, one final experiment tonight: I decided to see what would happen if I took the beach exit into the mine before using the machine wrench. It turns out that the second, third, and fourth elevators already work, and the machine really only runs the first elevator. This means that Dizzy can still explore the rest of the mine below that, although the first elevator won't give him a ride up, so he is forced to take the cart to leave. If this would make any sense for a speedrun route, then the wrench is skippable! And, huh, I can't get this to work in the second NES version. I'll have to spend some time figuring out exactly when that game lets you use the second mine exit as an entrance. Also I discovered in this Genesis version, if I leave Keldor Town to the right without having fed the charging beast, the barrels don't appear on the river for me to jump on, as if they didn't want me to even approach that thing from the left. So it appears the second money bag is only to give you access to Blackheart so you can escape via his ship.
put yourself in my rocketpack if that poochie is one outrageous dude
Active player (278)
Joined: 5/29/2004
Posts: 5712
All right, on a couple of sleepless nights I started mulling over possibilities for a speedrun route, and I think I've got at least parts of a good route worked out. At first I was thinking about going to the bay early to get the match, and about how to manage a trip in and out of the mine. And I tried to keep in mind some things: There are 7 objects to be taken to the site of Zaks' cloud castle, which means at least 3 trips to that site are required as well as at least 2 trips to the castle proper. In order of use, these items are the shamrock to move the leprechaun, the bean to grow the giant stalk, the winch handle to open the portcullis, the bucket of water to put out the fire, the skull elevator key, the carpet for the nail bed, and the rope to swing to the last corner of the castle. Now, that same rope has 3 required uses altogether: Once to get Dylan's house key, once to get to the trolls' castle's portcullis winch wheel on the pirate ship, and finally in Zaks' castle. Yes, you need to get into Dylan's house even if you don't want to pay for the bean with his cow, because the house contains 2 stars you need. You also need to get kicked off the pirate ship by Captain Blackheart at least once to collect the stars in the pit, and you need to ride the mine cart at least once to collect the stars on the tracks plus the grave-digging spade at the end--so don't ride the cart with 3 items if you intend to collect that spade. The ride is long enough I think it should only be ridden once anyway. I also came up with a few techniques or tips for speeding up play. For one thing, carrying 3 items can be helpful when you're ready to pick up one item and drop another that you no longer need, because Dizzy will grab and drop in the same action in this situation. Sometimes I worry about something like "But this aqualung isn't close enough to where I need to use it again," but then I remember that if I'm doubling back over that same path anyway, I'll be able to pick up that object in the same amount of time no matter where I dropped it. I'm also looking into ways to optimize the treehouse complex, because that's the roughest part of my plans right now, being so complicated and full of key-juggling. I used to think "Oh, the rope saves me from having to use that elevator key!", but the thing is, an elevator key gets used up, while the rope will stay in my inventory using up space that could have been used to transport a third object. That's also why I think it's a bad idea to get Dylan's cow, because it means running around with that cage and trying to get Pogie to show up on your path at the right time, whereas collecting the coin is easily done while just crossing the bay or collecting its stars. It's also important to know the quickest ways to get back down from the village after you've collected everything you want from it. In some places you want to step down from floor to floor to keep Dizzy from getting stunned by the fall height; in others you may want to jump as far as you can so that you bypass the remaining floors completely and only get stunned once at the end rather than at stops in between. Oh yeah, and transitions to new areas are kinda long in this version, so look for ways you can avoid unnecessarily bumping into the next room when it would waste time, using trick jumps or whatever. So as I apparently posted three months ago, I decided it would be a good idea to go straight for Blackheart's ship first. Well, maybe some preliminary work is needed before leaving the village, since I plan to re-enter it from the right with a full load of items. So maybe bring Denzil's elevator key to the junction near the carnivorous plant along with the plank, grab the ground elevator key, use the plank, grab the weedkiller, turn on the ground elevator, and kill the plant--possibly with Denzil's elevator key in hand again to place it further along, because I was thinking you could open up Daisy's and/or Denzil's houses then, and then leave the village to the left as you pass Denzil's house or the meeting hall, so that you collect a star in the area where you can use a rope but I may not use it there. (It's just a shame it appears to be impossible to drop directly from Denzil's floor to Daisy's house in this version because of Dizzy's constant high speed, as that would have been a nice shortcut after grabbing Daisy's door key.) Now we're heading for the ship with an empty inventory. I don't want to bring the rope just yet because the items on the way get used right after they're picked up, so bringing anything would cause a lot more inventory cycling. So we use the meat, use the bag of coins, pick up the rum barrel and crowbar and use the barrel to get onto the ship. Raid the decks of the ship, collecting all their stars, the dynamite, and the cloud castle winch handle with the use of the crowbar. Then do the bubble pit, whatever it takes to manipulate the right bubbles to get you to all the stars and to the top quickly, and end up on the little island at Carber Bay with the dynamite and winch handle in hand. Exchange the dynamite for the pickaxe on the nearby beach, grab the aqualung, and take a leap into the bay. Use the pickaxe and grab the treasure chest; if you have the items arranged a certain way I imagined, you could swap the winch handle for the chest in a single move, use the pickaxe, jump onto the ship again to reclaim the handle, and ride the next bubble up. Then you should be all ready to exchange the aqualung for the bag of salt, use the chest, use the salt (but have to cycle the handle an extra time, sorry), and exchange the winch handle for the matchstick. Not only does this get us what we need to save Denzil, it also leaves the cloud castle's winch handle almost exactly where we'll need to grab it from next, near the leprechaun! So that's going to make this a 1/3/3 delivery of the 7 items rather than a 3/2/2 distribution as I had expected before. So grab the aqualung again to take the match back across the bay. (How does it stay dry?) Take the dynamite, exchange the aqualung for the machine wrench, exchange the dynamite for the mushroom, use the wrench on the elevator control machine, and grab GrandDizzy's elevator key. And that's everything we need to take back to the village except for Dozy's cymbals! And again I'm hazy on the exact order to do the next steps in the village. I know we're here to get the dragon egg from GrandDizzy and the flippers from Denzil, but we have to stop by the meeting hall sometime for GrandDizzy's door key, which means setting down the match so that we can unlock GrandDizzy's elevator and house and bring the first medicine ingredient in one trip, so we'll have to backtrack down one floor to grab the match again to free Denzil. Or we could do it vice-versa, drop the stuff for GrandDizzy in front of the meeting hall, free Denzil, then come back for GrandDizzy's stuff as we drop off the flippers. Also, I'm thinking I want to do something like bring Dora's door key up the path as I'm working on delivering the stuff to GrandDizzy's house, because I want to leave Dylan's, Dora's, and Dozy's floors for the final trip since I've got enough stuff to cart around on this trip already, but I realized rather late that my plan for that trip involves carrying 4 objects up to that part of the treehouse complex: The rope, Dozy's door key, Dora's door key, and the cymbals. So what I thought I might do is, since I need to backtrack for one last GrandDizzy item after activating the elevator anyway, I would drop down from that elevator to land on Dora's door key, carry it over and swap it with the magical star plant so that it's a little closer when I need to go back for it. Heck, I might not even activate the elevator the first time I stand on it; I could drop the mushroom on it, and use the 3-for-1 swaps to get the elevator key in while hanging onto the 3 other items I bring there. However it's done, the end result is that we leave the treehouse village to the right with the golden dragon egg and flippers for swimming in hand, and we're shortly getting to the part I thought was inspired enough that I decided to try to figure the rest of the plan out. Drop the dragon egg at the mine entrance, pick up the aqualung, and do a circular sweep of Carber Bay, collecting the rest of the stars and the large gold coin. Go back and exchange the flippers and the aqualung for the dynamite and the dragon egg and enter the diamond mine. Drop the coin at the junction where the mine cart is to the left. Pick up the bridge-builder's axe, use the dynamite and egg to get the gold shamrock, come back and exchange the axe for the coin. Now you'll enter the mine's railway with the shamrock and coin in your possession, collecting all the stars and reaching the final exit to receive the grave-digger's spade. Drop the shamrock, take the coin to the first tunnel to the right, and give it to the shopkeeper for the magic bean. I didn't see any stars in the far tunnel or to the right of that tunnel on either street in this version, so you should be able to use the near tunnel every time. Go back for your shamrock and into the graveyard. Dig up the hole and come out with a bucket filled with water; you could drop your bean and shamrock outside first, but the "3-for-1 swap" might be faster. If you grab the trampette first to minimize item cycling, then you have to drop off the bucket's platform an extra time to fill it, so I'm not really sure what's fastest yet. One nice thing is that you can see when the water has entered the bucket immediately because your score increases for doing it. 
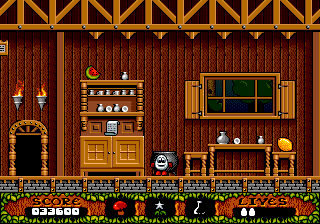
Make your way through the graveyard to see Shamus the leprechaun, drop the bucket of water for a moment, give him the shamrock, and plant the bean. Now go a little to the left for the portcullis winch handle we left, grab the bucket again, and now we're ready to enter Zaks' castle for the first time! The order of objects works out too: Open the door with the handle, use the bucket on the fireplace, grab all the stars in that region of the castle, and then it's time to backtrack out of there until we collect some more items. Since I plan to go to the left from here, you can save the far-left clouds with stars on them until you're ready to fall back down. I think we'll have to just double-back from the far-right cloud with a star at some point, though. See, you can use the mine exit on the right beach to re-enter the mine now, and that puts us right near that axe we left. Take it out the top of the mine, grab the aqualung, and go down that bridge to get that pair of cymbals. Then comes the treehouse village item-juggling that I'm still not sure about... The current idea is that I would end up with Dora the frog, the thick rug, the rope, and all the remaining stars in the village, including the ones in Dylan's house. This might even be the first time we grab the rope. Ah, but it's starting to come together as I type this. See, I discovered that not only can I drop beneath the bottom of Dylan's elevator if I'm quick enough, but I could even manage to turn around and start falling to the right from there. That would be a fairly quick way to get back to Dora's house key, which I had planned to leave in the original location of the star plant. So let's say we start by going up past that part with the pair of cymbals, the rope, and Dozy's door key. Swap one of the non-rope items with Dylan's elevator key and start the elevator (so it won't be stuck at the bottom later, for one thing). While we're here, we might as well go to the right to drop down and collect the one-ton weight. Drop everything but the rope in front of Dylan's house, go to the left, and swing over to get his house key. Fall through the elevator with that special technique I mentioned, go back for Dora's door key, go back up and collect whatever you left in place of Dylan's elevator key. Take the stuff for Dozy--weight, door key, and cymbals--up to his house to get his carpet, then come back for Dora's door key and the rope and grab Dora. I think we want to leave to the left to kiss the prince and re-enter the town, so you could probably walk off from Dora's floor and collect the star above GrandDizzy's house so you're not backtracking from it when you get Dylan's door key, then jump the rest of the way down from there. But as I think about it, there are other ways you could arrange that scenario. You could swap something for Dora's door key when you first pass it on your way to Dylan's floor, so that you could take it to Dora's house first thing, and later drop from Dozy's floor to the left side of Dora's floor for a quicker exit. Someone will have to play around with this to find out the best way. Anyway, after meeting with Prince Clumsy, we'll have a rug, a rope, and a crossbow. For a while I was thinking the rug could be taken across the bay on another trip with the flippers, but then I decided it could be weaseled into this next procedure. Take everything to the left into Keldor Town, but leave the carpet beside the first tunnel to Bridge Street. Enter the first tunnel to Dock Street instead so you can board the pirate ship again. Use the rope to swing across the rigging to reach the portcullis winch wheel. Now, we've added another item, but we still need the rope for later, so that's why I left an item behind. We'll have to continue to leave it there until we use the winch wheel and the crossbow to get into the Keldor castle and come out with the bridge kit. Yeah, so that means doubling back across two streets and tunnels to pick up the rug again. In practice the backtracking turned out to be a little longer than I had hoped, but hey, other plans have had worse! The idea is that we take these three items to the graveyard, use the bridge to get the elevator key, and then we finally have our key, rug, and rope we need to complete Zaks' castle, if after a bit of unavoidable item cycling. So you see where including the rug can mess up the plan a little, but it's still not bad, right? I watched Ununoctium's speedrun again today, only to find that it followed a completely different route than I had dreamed up. Two minecart trips? Really? Well, maybe working on this TAS route will also be beneficial for someone looking for a new unassisted run route. I am starting to think the Genesis version may make for the nicest run after all, just because you can get through it so quickly. Please speak up if you have any new ideas or can fix any flaws in my ideas, maybe help me flesh out the treehouse routes a little better.
put yourself in my rocketpack if that poochie is one outrageous dude
Active player (278)
Joined: 5/29/2004
Posts: 5712
Well, I kept thinking about ways to work in the trip to Daisy's house, where basically you have to go in some kind of circle: You could walk down the path like normal and collect Denzil's door key and then up to Daisy's house for Dozy's door key and step off to the left onto the higher path, only backtracking for that star behind the spider on your right then. Or you could start with that star, jump down from there and turn back just a moment to grab Denzil's door key and the star before going up to Daisy's. Or you could even go for just Denzil's door key once and turn back, making it a separate trip from Daisy's house. But while working on this I discovered it is possible to drop from Denzil's floor onto Daisy's house! It's the same trick as with Dylan's elevator, only it takes a bit longer to set up. What you do is start the elevator so it goes to the top, then run to the left so it stays there. Keep running to the left for a while so that you descend across two floors. Run back to the right, pass the meeting hall, and continue up the next ramp. Jump at just the right spot before you hit the screen transition, and you can hit the gap before the elevator gets there and fall through onto the floor of Daisy's house! You actually land on a spider, but no biggie. So, if we go with the route where we not only kill the plant before leaving the village, but also carry Denzil's elevator key further up the path, we could go all the way and use it in the elevator, then run all the way to the left past Denzil's house to exit the village. When we come back with the match, GrandDizzy elevator key, and mushroom, we could drop those while grabbing Daisy's door key, and the elevator will be all set up for Dizzy to fall through. Then we basically do the circle with grabbing Dozy's and Denzil's door keys, but in reverse of normal. I'm still not sure how much time that would save, though, and I keep going back and forth on whether I want to help Denzil or GrandDizzy first. If I help Denzil first, I could leave Dozy's door key and the flippers near his house to pick up later; the golden egg would be the first thing to drop if I pick up the flippers after. But it does mean taking a little detour past the house to grab the straw. If I head for GrandDizzy first, then I guess I don't have as many items to swap out as I just have to go for his house key, or if Daisy's house is saved until this second trip, then when I swap things out the match will be near Denzil's elevator when I come back to help him, and I could carry the straw toward Denzil's house while returning with the egg. But I think with the Daisy's house trick it could mess up the item swaps for GrandDizzy's house I was planning, and if I originally left the village by passing Denzil's house and pass Denzil's house again after GrandDizzy's to bring back the straw or to get to the match more easily, then that means that I never pass through the area to the left of the meeting hall, which means that I never get the star to the left of the meeting hall except by a detour after grabbing GrandDizzy's door key. Another weakness in the whole idea that I only exit the village by jumping off is that I never cross the path between Prince Clumsy and the ground elevator key, so I would have to collect the stars between them with a little detour after each. I don't know, I'm confusing myself again. Maybe mixing the trips to Denzil's and GrandDizzy's houses would work better, like carry 1 or 2 items to each on one trip, then come back for the rest. Or maybe we could even move the stop at GrandDizzy's for a different trip through the village altogether. I mean I'm still willing to consider the alternative opener of going to the right for GrandDizzy's stuff and getting the dragon egg right away that way, then maybe the egg, dynamite, and winch handle could all be taken off the pirate ship together? Or maybe hopping off from GrandDizzy's house to the right would flow better into working on the top floors, except I would have to figure out how to avoid the problem of having 4 objects to bring down then, maybe use the rope to pull Dylan's house key down early or something. I also briefly entertained the idea of grabbing the large coin on the first trip to Carber Bay, since there's room in the inventory for that, but there's not really any point when you'll just have to revisit that area with the flippers later, and it messes up the item swaps I had planned. At least I'm starting to see that the best way to collect the stars in the bay is the go for the ones in the alcoves when you're carrying the match across, then with the flippers go for the stars underneath the islands, then with the coin go for the stars above the islands and on the water's surface. But while practicing these routes, I lucked out into something cool. See, if you stand in this exact spot in front of the cauldron when you put in the ingredients: Then the ingredients will pop in immediately, without Dizzy having to toss them first, and the full bottle will pop into Dizzy's inventory instantly too! I suppose this has a similar basis to that "MegaMan 4 power absorption" trick, where the game wants to arc the objects over to some center location, but gets confused and skips something when the objects are already centered. I started thinking about where else this idea could be used to skip a throwing animation, but most of the times Dizzy throws something it's to a character who would knock him back before he could get centered inside them, except... The shopkeeper! Yeahhh, immediate bean! One thing to consider with these tricks is that they may require "subpixel" placement to work--well, since Dizzy moves at 2 pixels per frame most of the time, it's probably just pixel placement. See, there appears to be an element of luck involved in certain maneuvers, like when Dizzy walks off a step, he may or may not grab the star hanging in front of him, and when Dizzy steps off onto an elevator-width gap, he may fall through or he may step across to the other side, so I'm guessing it has to do with whether Dizzy was standing on "even" or "odd" pixels beforehand. Occasionally you could use a wall-bump to switch Dizzy from odd frames to even frames, but with frame advance you can see there's the briefest period of acceleration where Dizzy only gains 1 pixel per frame, so I think some kind of start-and-stop trick would probably be the best way to fix your position. Yeah, this'll take some more study, figuring out how Dizzy's speed works and the minimum number pixels he will travel with one step.
put yourself in my rocketpack if that poochie is one outrageous dude
Active player (278)
Joined: 5/29/2004
Posts: 5712
I think I'm closer to having the treehouse routes worked out, or at least I've gotten a few more ideas. I was thinking about how starting the second trip into the village with a full load of 3 items is rather limiting because I can't also grab the rope to carry it up to work on Dylan's floor early or go in for GrandDizzy's door key first because I would have to leave something behind and go all the way back for it. So at some point I thought, well, why not go into the meeting hall on the first trip, when I'm not carrying so much? If I've also got Denzil's elevator key, I could start that elevator, then lay GrandDizzy's door key on the path beside the bundle of straw for later. I also thought about splitting up the Daisy's house circle route so that I grab Denzil's door key right away after killing the plant and turn back to continue up the path to the meeting hall. Then I could start Denzil's elevator, open Denzil's house, and drop GrandDizzy's door key beside the straw, all on that first trip. This means that when I come back with that load of 3 items, I can swap the match for GrandDizzy's door key, go up and get the dragon egg, grab the straw and match, enter Denzil's house and drop the egg for just a moment to free Denzil, then pick up the egg and the flippers. This means that I would never have to backtrack to another stop at the meeting hall area for anything! Although I think I did mention that if I never cross that path a little to the left of the meeting hall, then I would have to make a slight detour for the star beside it, just like the two between Prince Clumsy and the ground elevator key. And a tip for speedrunners: Make sure you memorize which areas have a star hanging out beyond the point where you would stop and turn around, or with tool assistance, just remember to check if there's such a star and then load before you move on with recording. Now, that route idea leads me to something else I discovered you can do with Denzil's elevator. If you're coming over there from Denzil's house and jump off the very edge of that top ledge to the right, the elevator will start to drop as you fall, but once it's scrolled off the screen, it will freeze in place. This means that once you re-enter Denzil's floor from just to the left of the elevator, it will still be in mid-fall, and you have just barely enough time to squeeze under it and fall onto Daisy's house, if your pixel positioning was correct beforehand. So that's another way to start the Daisy's house circle right from Daisy's house that's already set up by how I want to exit the treehouse village with the dragon egg and flippers. Only, if you already went for Denzil's house key and the star beside it earlier, then you might just backtrack up the same ramp you went down to get that one star on the edge. Or, maybe just scratch that whole idea, take Daisy's door key down the regular way at some point, and jump for the star on the far right on that top ledge on Dizzy's floor to enter the circle. Although it seems you always get fall-stunned by this, you would no longer have to backtrack for Denzil's door key and that star beside it. I used to think it was no good to end a village route at Daisy's house because the idea is to leave Denzil's and Dozy's door keys on the main path, but if we're only picking up Dozy's door key while only carrying the two items, flippers and egg, then it might be feasible to drop Dozy's door key somewhere above the mine, so that after collecting the cymbals, we could grab Dozy's door key again on the way back to the village. (Really there's a lot of viable ways to do the Daisy's house segment, so someone may just have to try them all and sort out the fastest times.) But if that doesn't work out, then with this new plan we could still save the visit to Daisy's house until the third visit, carrying the aqualung and rope to do a four-way swap three times to get Daisy's key at the ready quickly, and I think either way the final order for the start of the trip up the trees would be cymbals, Dozy's door key, and rope (or as I will now state using all-caps and arrows, ROPE->DOZY'S_DOOR_KEY->CYMBALS), and I think I'm forming a decent plan for this next part. Do another triple four-way swap on Dylan's elevator key to get DOZY'S_DOOR_KEY->CYMBALS->DYLAN'S_ELEVATOR_KEY, leaving the rope behind. Use the elevator key, drop the cymbals and Dozy's door key underneath the hook, and drop down to collect the stars and the heavy weight. Now drop down to the right to recollect the rope, then run back up to the left and drop the weight in front of Dylan's door. Continue to the left and up around to collect Dylan's door key and do that fall-through-the-elevator trick I described to fall past GrandDizzy's floor and get Dora's door key, after which your inventory should be DORA'S_DOOR_KEY->DYLAN'S_DOOR_KEY->ROPE. (Actually I'm starting to doubt the efficiency of dropping floors twice; we should check if just backtracking for Dora's door key after collecting the rope with the weight would be faster.) If we continue on from there, we'll rotate the inventory a couple of times to insert Dylan's key into his door, ending with ROPE->WEIGHT->DORA'S_DOOR_KEY. After raiding Dylan's house of its stars, we take everything up to Dora's house, use the door key, set the weight off to the right of the door, and set the rope off to the left of the door. Grab Dora, then the weight, then go back to the right and grab Dozy's door key from under the hook. Then back up a bit and rotate over the cymbals twice so the weight gets used and we have DORA->CYMBALS->DOZY'S_DOOR_KEY. Awaken Dozy to receive his rug, get the stars inside and outside his house, and from the star to the left of the house, drop down to Dora's house. Actually if you step back down to the right from the ledge with the star, then when you fall down to the left you won't get stunned, and you should end up close enough to the rope too, so that might be the way to go. (A slight variant of the preceding two paragraphs I was going to propose was to drop and pick up the rope after grabbing Dora's door key, so that when you open Dylan's house, you have the rope before the weight and can set the rope outside Dora's house without having to drop the weight first. However, you would then have to drop Dora beside Dozy's door to use his key in it, then pick up Dora again before going in so that she's at the front of the line before you pick up the rug, so once again I'm not at all sure what the difference would be, good or bad.) So now we have ROPE->RUG->DORA. Continue to fall to the left, collecting the star directly above GrandDizzy's elevator, and then kissing the prince will give us CROSSBOW->ROPE->RUG. Since the rug isn't immediately useful in Keldor Town, set that outside the entrance to Bridge Street when we get to the right side of Castle Street. Go to the pirate ship and get WHEEL->CROSSBOW->ROPE. We need both those latest two items at the castle, but we can at least rotate once on the way there to get RUG->WHEEL->CROSSBOW. Then set the crossbow down in front of the castle entrance, use the winch wheel, and pick the crossbow back up while the gate's opening. Inside we'll get the bridge kit, which gives us BRIDGE_KIT->CROSSBOW->RUG. Make that little trip back to the rope we left behind, and two swaps gives RUG->ROPE->BRIDGE_KIT. So the bridge kit is all ready to use in the graveyard, but since we'll want to use the prize at the end of the bridge first thing next, I would set down the rope and rug while crossing the bridge, then pick up everything in reverse order while turning back, leaving us with ROPE->RUG->SKULL_ELEVATOR_KEY. Otherwise, not only would it take 4 extra grabs to get the elevator key in while standing on the elevator, but it would take another 2 extra grabs to use the rug because the rope would be in front of it again. Anyway you do want to think about how to minimize item grabs, as each such action costs 45 frames. As Dizzy mainly walks at 2 pixels per frame, he could have covered 90 pixels in that time. Maybe it's a few pixels less because of the acceleration frames... or, would it be more? Eh, whatever, let's just say it's approximately 11 log-lengths. 
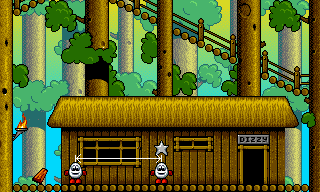
As I write this post I'm testing out the frame-by-frame movement basics. Something I noticed while positioning Dizzy is that pushing Left for just one frame from a standstill will cause Dizzy to move a total of 4 pixels to the left, but pushing Right for just one frame will cause him to move only 3 pixels to the right. So alternating taps of both directions with time in between for Dizzy to stop will cause him to travel a net distance of 1 pixel to the left. I think what's going on is that Dizzy must move for 3 frames in a row, and starting a leftward walk from a standstill has a different start-up pattern: 1, 2, 1, 1, 2, 1, then 2 pixels every frame until you stop again, whereas if you push Right from a standstill, the start-up pattern is 1, 1, 1, 1, 2, 1, then all 2s. If you press Left while already walking to the right, the start-up pattern becomes 1, 1, 1, 2, 1, then all 2s, or that last pattern minus the first 1, I think. What "Dizzy must move for 3 frames" really seems to mean is that once Dizzy starts walking, the game will only detect D-pad input--or the lack thereof--on every 3rd frame until Dizzy stops moving again. So you could tap the direction button at 20 Hz, and it would have the same effect as holding it continuously. The game also only accepts the C (jump) button on those same 3rd frames, but accepts the B (grab) button 2 frames after those frames--that is, the frame before the one on which you could control Dizzy's next move.
put yourself in my rocketpack if that poochie is one outrageous dude
Active player (278)
Joined: 5/29/2004
Posts: 5712
All right, okay, since I've made all these long posts in a row without anyone popping in to discuss, I figured what I was missing was a video showing how all this was going to work. So since I wanted to make a video of the Big 6 collection anyway, I recorded the speedrun route on that! Part 1 Part 2 Part 3 It's not savestate-assisted, and the Amiga version does have a few minor differences like removing a few spiders and placing a few stars a little closer in reach, but this should give you a rough idea of how the game flows with the route I pictured. Even if I did run the game 20% too fast, a TAS should finish in less than 42 minutes for sure! Now does anyone have any thoughts on what part of the game plan still needs work?
put yourself in my rocketpack if that poochie is one outrageous dude