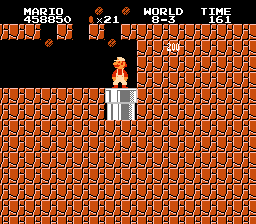
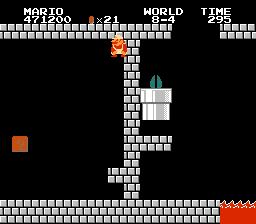
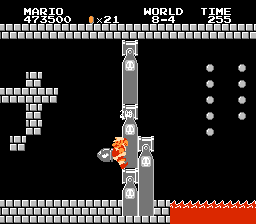
World 1-1
Scenery: Overworld (with bushes and clouds), daytime.
This is a mostly straightforward level.
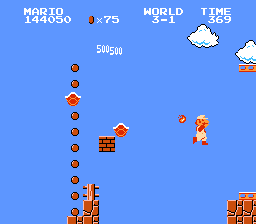
Near the fifth screen (according to hex address 006D; I usually take about 100 frames to make it from one screen to another, given that my X speed 0057 is 40 the entire time), I clip through the sole question block to move slightly further to the right of the screen whilst preventing the camera from moving with me; my on-screen X position 03AD is now at 131. That would help me near the end.
At the seventh screen, I latch onto the vertical "balls" (they otherwise operate as vines) and immediately warp to the rightward edge of the screen by pressing the left and right arrow keys at the same time. I also pressed Down to fall faster to the ground, so I could build up my running speed faster.
At this point, I was able to perform the FPG (flagpole glitch) just before the in-game timer would count down to 366; the FPG allowed me to move slightly closer to the edge without moving the camera, therefore, preventing a softlock.
This does not save any time over the trio's run, as they too had found out about the FPG (I was most likely the first to find out about it, however).
World 1-2
Scenery: Underground (and with clouds for the "autowalk" cutscene). + Overworld (with fences and green trees), daytime.
This is most likely the fastest possible level to get the Super Mushroom, as there isn't one on World 1-1 and World 1-3.
This is a mostly straightforward level, but I run below the airborne brick pile and get the fastest possible ? Block with a power-up in it on the fourth screen. I make a mad dash forward, but I wait three frames before entering the first reverse L pipe on the sixth screen for an optimal Cheep Cheep pattern for the next area.
The next area features a Brick Block that contains a 1UP Mushroom. The next screen features a flagpole with jumping Cheep Cheeps, making it possible for a full flagpole glitch (FFPG) that would eventually be found by Periwinkle.
I followed suit with them and nailed it in. There is no time difference here.
World 1-3
Scenery: Overworld (with clouds), daytime.
You'll need to wait a lot to grab a hold of several platforms; most of the level contains one giant pit.
I must delay here for the first platform to rise, allowing me to reach for the left platform (higher than the right one) of the first Scale Lift. I then need to stand on it to allow the right platform to rise, allowing me to reach for the next stationary platform; I was able to do so two frames faster.
After crossing a few more platforms, there is one more I need to take; the sooner I touch it, the sooner it starts moving right. And I need to stay on it for a few seconds before I'm close enough to make it across the lengthy gap. While the trio did a walljump, I decided to cross the entire gap without one.
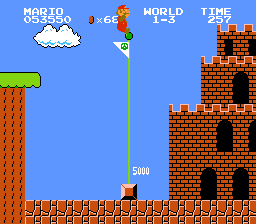
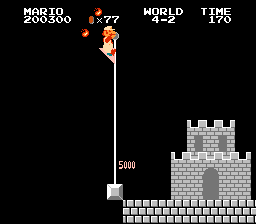
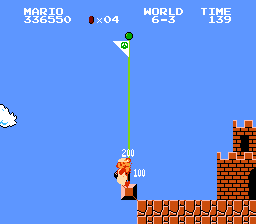
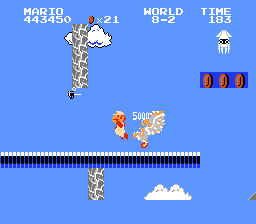
All this allowed me to finish by grabbing the top of the flagpole, earning 5000 points. While I was faster than the trio's efforts, I was not fast enough to perform a FPG and still finish with an in-game time of 257; I was a few frames shy of doing so.
This unfortunately ended with me being slower than the trio, but fortunately, it wasn't enough to lose a framerule.
World 1-4
Scenery: Castle.
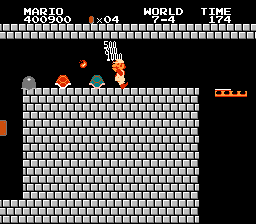
Now on this level, we have a row of ? Blocks, the first of which containing a power-up, which is what I need. This is the fastest possible level to get the Fire Flower. In a Super Mario Bros. run, it's usually faster to kill Bowser with fireballs instead of avoiding the Fire Flower and watching the "bridge collapse" and "Bowser falling" animations seven times. (The Fire Flower may also come in handy for other situations, mostly killing enemies to clear the way.)
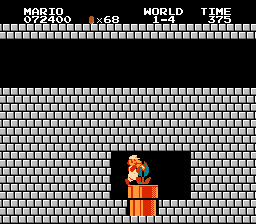
Up next are sets of platforms that sink whenever you're on them, even through blocks. I use this to my advantage and make my way through the wall and into the enclosed warp pipe (on the fifth screen) to the next room (which has an area ID 0750 of C5); I take the sixth platform (or the third middle platform, on the second screen), same as the trio.
However, I found it to be faster to run into the wall earlier (one tile higher than the trio) while I duck under the final four platforms (the last one being invisible for a moment because of NES sprite limitations). The tricky part about it was having to maneuver around the Piranha Plant that I had to slow down to kill, but besides that, this improved strat helped me save five frames.
- I also tried going down the first platform to save a little more time, but this made for a slower result.
There is another warp pipe at the top (on the sixth screen) that you can take; however, this will lead you back to World 1-3 (area ID 43), and you'll have to beat it again.
The second room would be World 1-5 if you had to beat World 1-3 twice. You go up in the castle's ground; you can stay in it, but you'll be moved to a lava pit after a few seconds.
Afterward, you meet with a Hammer Bro in front of a hiding spot for you to catch your breath before the first Bowser battle that comes last for this level.
Overall a straightforward room (and level if you're playing casually), not much to optimize here. It's still faster to perform the usual Left + Right acceleration startup instead of just pressing Left on the first frame, despite not moving forward a pixel in the ground because I've gained X speed; regardless, we had the same strategy going.
Because of the timesave I found in the first room, I saved a framerule, or 21 frames, over the trio's efforts.
World 2-1
Scenery: Overworld (with fences and green trees), daytime.
Several enemies swarming about, but this is merely straightforward. The second screen features a set of vertical balls; the vine warp glitch will not work here, as I will warp to the left side of the screen.
At the tenth screen would be where the first Cheep Cheep spawns, and here, the Cheep Cheep generator would be active. After Frame 9331, I slow down to manipulate the RNG so that I get a favorable Cheep Cheep pattern, that is, the next Cheep Cheep leaps up and slowly moves horizontally, close to the flagpole. Then I go and fool around a bit before making a run for it. No major reroutes were needed; I ended up hitting and/or killing almost every enemy, and just a slowdown was needed to get a favorable Cheep Cheep pattern and nail another FFPG. (The trio, unfortunately, wasn't as lucky.)
This FFPG helped save two framerules over the previous run; overall, I was now ahead by 63 frames (three framerules).
World 2-2
Scenery: Underwater (and with clouds for the "autowalk" cutscene).
There are a few Bloopers and a Cheep Cheep, but not much else besides a wall of seaweed with one-tile wide holes (on the first screen); overall, this is another straightforward level.
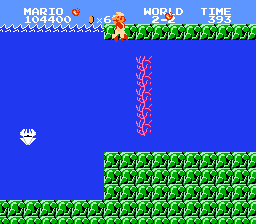
Instead of ducking under the seaweed, I clip the top blocks, allowing me to kill the first Blooper and make it past the seaweed without slowing down; this is merely for entertainment purposes for now, not a strategy to save time.
- Blocks that are 12 tiles above the bottom edge of the screen have wonky side physics; if Mario is rising or dropping as he hits the side, he'll simply go through them. Once in, he can freely move around as long as he doesn't get too high or too low.
- This glitch "fixes" itself if Mario is high or low enough. If he is in the ceiling when the glitch "fixes" itself, his X speed drops to zero, and he moves along it.
- For proper execution, Mario's Y pixel 00CE must be between 16 and 37; it doesn't matter if he's going up or down, as he simply needs to clip into the highest block/blocks (12 tiles above the bottom edge of the screen) in the level as Big Mario. Go too high, his X speed drops; go too low, he'll hit his head on the ceiling.
We have a flagpole on the sixth screen; an underwater flagpole makes for the perfect FFPG since Mario doesn't rise as quickly as he would from jumping after standing. You can slowly hover up as you move towards the flagpole, and if you're able to catch it low enough, you'll have performed the FFPG.
And in the nick of time too; there weren't many timer ticks 0787 left before the in-game timer would hit "356", and fortunately, I didn't have to slow down so much to get it in.
It didn't matter much, though, because the trio had already gotten the trick down in the first place. I simply followed suit; it was still a 63-frame improvement, no time lost or gained.
World 2-3
Scenery: Underwater. + Overworld (with fences and green trees), daytime.
We're traveling around pipes, seaweed, coin blocks, and a couple of springs here and there. A Lakitu proceeds to follow us as we traverse. Not much to say; certainly something that looks possible to complete as if you were walking and jumping like normal.
None of the warp pipes are enterable except for the last one on the seventh screen, which takes you to an overworld version of the level (area ID 48). Normally, in the overworld version, you'd need to hit a Vine Block on the sixth screen and climb up it to reach the next area (area ID 46).
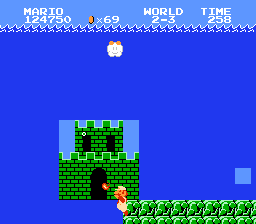
But here, the trio has uncovered a major time save by clipping in the ground (with help from a castle on the fifth screen) and moving further to the right side of the screen without letting the camera scroll; this allows for a wrong warp to take place. However, we also needed to bring the Lakitu with us so that the warp pipe's destination wouldn't change early, hence why we didn't kill it.
And that's what the trio and I did; they found out, and I followed along. I swam out of the ground with an on-screen X position 03AD of 181 and proceeded to the pipe.
- For entering the pipe, the X subpixel 0400 had to roll back past 0 and into 240 or 224, and my X speed had to be below 16 for that to happen. The cause of this was for Mario to not move another pixel to the right and for the camera to not scroll further, preventing the warp pipe's destination from changing.
Miraculously, I was four frames faster than the trio's efforts.
The second area, like the one in World 1-2, had jumping Cheep Cheeps and a flagpole on the next screen, making another FFPG possible.
Because of earlier improvements, I got a better Cheep Cheep pattern by default, making for a faster FFPG than the trio could; no RNG manipulation was needed. I saved another 13 frames in that area and 17 frames overall in the level, enough to save another framerule! I was now ahead by 84 frames (four framerules).
World 2-4
Scenery: Castle.
This level goes beyond the norm compared to others as you need to make your way literally through tiles: go down with a platform, go up with a springboard, and go through with a platform. After this is a Lost Levels snippet (possibly from World 4-4) and another tussle with Bowser.
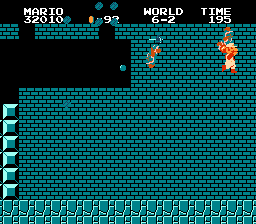
Blatantly so, the fastest way around this is a Big Mario crouch clip jump up and through the ceiling. We shared the same wavelength here, but my "coming out" party went by five frames slower. Luckily, it wasn't enough to lose a framerule, and thus, the 84-frame improvement lives on.
World 3-1
Scenery: Overworld (with fences and green trees), daytime.
We start here with three Hammer Bros blocking our path. It's nearly impossible to kill them and not slow down without lagging, but I was able to get the job done quite easily.
Afterward, there isn't much going on besides three warp pipes on the fourth screen, the middle one you can enter. Due to sprite limitations, only one of the three Piranha Plants spawned.
I saved six frames here by avoiding the side of the first pipe and not bonking into it, which allowed me to build up my X speed faster.
Here, I was sent to a new area despite it having the same overworld background and scenery. You could say my method of fast acceleration out of the pipe was so-so, but the in-game timer was going to end with a 6, and I wasn't exactly focusing on perfecting it here.
The beginning part of it was straightforward, up until the next set of vertical balls on this area's second screen. I backwards-jump into it, turn left, and vine warp again to the edge of the screen; my on-screen X position was now at 193. (Any further than 210 would have led to either a softlock (if too far) or Mario bonking the side of the screen before proceeding.)
I had to slow down to avoid bumping into the platforms and to have the in-game timer end with a 5, but nevertheless, I ended this level with another FPG as well as a couple of Koopa Troopas kicked around.
It came as a shock to me that the trio never thought of letting the camera scroll far enough to prevent Mario from bonking the right side of the screen, which of course is what I did. Most likely, this allowed for another framerule to be saved; I was now ahead by 105 frames (five framerules).
World 3-2
Scenery: Overworld (with fences and orange trees), nighttime.
Vertical balls and Cheep Cheeps was how this level was going to go. Cheep Cheep RNG plays a big role here in terms of optimization.
Here, we start with five sets over a giant pit.
- On the first and second sets, Mario will be warped to the right, but because Left and Right were the last directional keys pressed while not airborne, touching another set of vertical balls would have sent Mario back.
- On every other set in the first screen, Mario will be warped to the left.
- So, unfortunately, it's faster not to perform the vine warp glitch... for now.
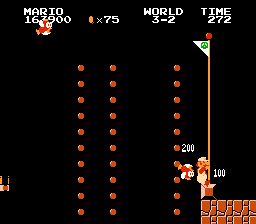
On the bridge side, a Cheep Cheep spawns on Frame 18482, so I manipulate the pattern so that the Cheep Cheep jumps up to the third set of vertical balls, and I pounce on it to make it across. Of course, I could've done without it, but here, bouncing on the Cheep Cheep allows me to climb up faster.
Then I cross a short bridge onto the next set of vertical balls on the edge of the second screen, this one allowing for the vine warp glitch to be effective. And yes... I do just that.
Another Cheep Cheep leapt up on Frame 18802, and wouldn't you believe it, but it was right where I wanted it: hurdling towards the flagpole that came next (on the fourth screen).
- I initially planned on killing it and going for the FPG, but unfortunately, my last vine warp glitch for this level, coming from the third-to-last set of vertical balls, couldn't quite make it. I tried walljumping on the ground below, hoping that I would clip slightly into the base to catch the flag, but to no avail. (The other two sets wouldn't have changed anything.)
- I had to be mindful of the timer as well; the earliest it would've stopped on was 273.
So I used the Cheep Cheep for my FPG instead. I avoided performing the FFPG because there was no ground to the left of the base; the edge was where it resided. Had I performed the FFPG here, I would've had to wait for two minutes after Mario supposedly fell into the pit to proceed to the next level.
Nevertheless, this FPG helped save two more framerules over the trio's run, and I was now ahead by 147 frames (seven framerules).
Pixel_ noted that with good Cheep Cheep patterns, it would be possible to finish with 274 in-game seconds remaining. I think, though, even with that, the FPG would still be faster.
World 3-3
Scenery: Castle. No lava.
Surprisingly, this would be the last level for World 3, as it has an axe at the end. You start inside a brick pile; you can stay in it, but you'll be moved to a pit after a few seconds.
To start with, you have three grounded firebars that are quite difficult to dodge if you were to stay in the corridor. Luckily, there is a vertical ball you can take three tiles above them, and that's what I take in my run. I backwards-jump into it and perform the vine warp glitch to skip past the firebars; no more tedious dodging from here.
Afterward is a simple run with a few enemies to face, and I'm back on the bridge, although oddly, Bowser isn't. It would appear as though, by default, I have despawned him, but by normal means, it's still possible not to.
Bowser or not, I still headed for the axe to beat the level. This new timesave got me further ahead of the trio by another two framerules, which now puts me with a 189-frame (nine framerules) improvement overall.
I also found out later that it's possible to finish the level even faster by grabbing the vertical ball while facing right, although I needed to climb up for a frame before pressing Left and Right, or the glitch wouldn't work. This, however, did not save me another framerule.
World 4-1
Scenery: Overworld (with fences and green trees), daytime.
On the first screen, the second warp pipe is enterable, but you can skip past it and move to the fourth screen, where two other warpable pipes exist, each of them taking you to a new area where you face an abundance of enemies as you make your way around (area ID 62)... which is slower.
Like pretty much every existing run so far (including my "any%" run and the trio's "warpless" run), the second pipe is the fastest shortcut through the level. It had a Piranha Plant occupying it, but I was able to shoot it down without slowing down.
The next area (area ID 61) was pretty much the same as the one in World 3-1: straightforward beginning, backwards jump and vine warp glitch, then slow down to avoid bumping into the platforms, though with no delay this time around because I didn't have to worry about the timer (ending at 378). While not worth mentioning, my on-screen X position was at a perfect 210 after this vine warp glitch.
Speaking of 210, that's how much I'm ahead now of the trio: 210 frames (ten framerules), again thanks to me having the camera scroll far enough to prevent Mario from hitting the right side of the screen; that helped to save another framerule.
World 4-2
Scenery: Castle. No lava.
Contrary to the original Super Mario Bros.'s World 4-2, there is no "autowalk" cutscene before starting. Mario starts at Y pixel 0, meaning he starts at the very top of the screen. I can gain control of him once his Y pixel is at 50 (this takes 27 frames).
Near the first screen is a vine block placed on the very left of a horizontal row of brick blocks. What comes in front is a wall; one tile above it is a ceiling, and two tiles below it is a platform.
This being a "warpless" run, of course, I duck under the gap and into the tight corridor. No warp pipes exist, so no quick shortcuts for this level. Just a run-through of the level while hopping through some skipping stones and maneuvering around enemies.
I'm able to save a frame by slowing down to stay on the first ledge for one more frame, thus allowing me to stand on the moving platform for one less frame.
- I slow down to not move another X pixel 0086 forward, meaning I can stay on the ledge for another frame. Then, I manipulate the X speed sub 0705 so that I don't slow down while on the ledge. Once I duck-jump onto the platform, I immediately jump after; I don't get pushed back so much because I only stand on it for one frame.
All of this, however, was completely negated because I couldn't catch up to save the next framerule; I tried what I could for the ending flagpole, but since I couldn't save that framerule, I delayed touching the flagpole for entertainment. The base does not have a platform to stand on, so I cannot perform a FPG, meaning the trio and I still retained the 210-frame difference.
Pixel_ assumed it'd be possible to save another framerule in the level if more frames could be saved here. As mentioned, I saved one, but it wasn't enough to put the run a framerule ahead. Through further experimentation by editing Mario's X speed at the end (via FCEUX's hex editor), it turns out that I'm only one frame away from saving that framerule; I'd have to touch the flagpole on Frame 23196 to save it.
World 4-3
Scenery: Overworld (with clouds and giant tree platforms), daytime.
The first screen requires that you take a springboard to reach the out-of-reach platforms and make it across the lengthy gap, and it's impossible to do so without it.
Afterward, it's just some bouncing around the platforms and trees to advance through the level. Bullet Bills start spawning on Frame 24409, and then three warp pipes that can't be entered.
One last Bullet Bill spawned a tile above the base, which also didn't have anything to stand on. Much to my dismay, I couldn't work the Bullet Bill FPG like I could with the Cheep Cheep FPG on World 3-2. I tried manipulating the RNG on this level a ton to either get the Bullet Bill to either go one tile lower or delay its spawn, but to no avail; I even tried dropping the improvement on World 4-1 or not getting the 77th coin on World 4-2 but not even those worked. I had to take the flagpole like normal. (Such a pity how I couldn't even reach the "5000" mark.)
Because of this, we still retained the 210-frame difference.
World 4-4
Scenery: Castle.
You might be surprised to see that barely any of it is modified from the original, likely because the loops would ruin the level design.
- Here, there are two three-tile gaps on the top path of the first half of the level, eliminating four of the usual one-tile gaps. Other than that, there are no additional modifications to be found. So for the most part, it's just like the original Super Mario Bros.'s World 4-4: jump straight up, then clip straight down, then brawl with Bowser.
Since playing this level felt immensely familiar, I played through it like I normally would, but after finishing, I quickly looked back at HappyLee and Mars608's "warpless" run of the original Super Mario Bros. for it. Seeing as though I lost a framerule compared to them, I tried to mimic their run to the best of my ability to match their time. I apologize if some parts match or are similar, but I only hope this doesn't majorly count as plagiarism.
- As mentioned, I first completely ignored it and went on my own, only being slower by four frames.
- Then came the optimization, which mostly had to do with gathering running speed after the clip. I was first able to end one frame faster, then another, and another, until finally...
- ...I was able to catch up to HappyLee and Mars608 on their efforts. Tons of time and effort to save those frames, but I got the job done.
- I would also like to point out that I did not copy any of their inputs. I only looked at them myself and recreated the hex values that they used: X speed sub, X subpixel, on-screen X position, X pixel, everything regarding the horizontal positions and speeds. A struggle to do so, but this helped to save that next framerule and put me ahead of Bacon_Hurricane_, Periwinkle, and Pixel_'s run by, yes, 21 more frames. I was now ahead by 231 frames (11 framerules) overall.
I only hope that my input is unique enough for me to not require HappyLee and/or Mars608 to be credited. If I am required to add them as co-authors, I will do that.
I'd like to point out that if sprites disappear before they make it to the left edge of the screen, even when you're jumping in the correct path, that's when the loop activates. It's honestly annoying that you need to be standing before touching the looping point, but that's how these loops are supposed to be.
World 5-1
Scenery: Overworld (with fences and white trees), daytime. + Overworld (with fences and orange trees), nighttime.
World 5-1 starts with a short, two-screen "struggle" against a few Bullet Bill Blasters. What comes at the end are two warpable pipes; both of them lead you back to the start of this area (area ID 51), but scrolling far enough allows them to take you to the second area (area ID 4B), which is...
...a repeat of World 3-2. Same jumping Cheep Cheeps, same vertical balls, same layout. I was fortunate enough to save time by bouncing on Cheep Cheeps thanks to the still-favorable pattern going around.
- First Cheep Cheep (appears on Frame 27710): Killed to further manipulate the pattern.
- Second Cheep Cheep (27743): Bounced on between the first and second sets of vertical balls to climb less.
- Third Cheep Cheep (27815): Let go because it can't be killed as it was spawned near the right edge of the screen.
- Fourth Cheep Cheep (27887): First manipulated by staying on the second set, then bounced on between the third and fourth sets to climb less.
- Fifth Cheep Cheep (27967): Stomped for entertainment.
- Sixth Cheep Cheep (28063): Killed for entertainment.
- Seventh Cheep Cheep (28159): Bounced on to perform the FPG.
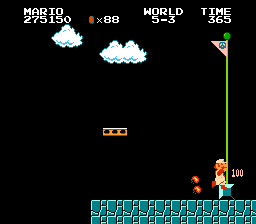
Not only did I finish two in-game seconds faster compared to the trio's in-game time of 362, I got a FPG out of it too! This helped save 84 frames (four framerules) over their run and put me ahead by 315 frames (15 framerules) overall.
World 5-2
Scenery: (First area) Overworld (with fences and clouds), nighttime. + (Rest of the level) Depends.
Starting here, you need to bounce on five Bullet Bills to make it across a giant lake and into one of two warp pipes (on the edge of the second screen). There is another at the very beginning of that area, but it will lead you back to World 5-1.
Take the first warp pipe of the two you are presented with (area ID 67), and you'll be taken to where a giant wall blocks you from entering the reverse L pipe that also leads to World 5-1, only with underground palettes in the daytime (area ID 91). There are two hidden coin blocks you need to hit to make it over.
Take the second warp pipe in the first area (area ID A1), and you'll be sent to the same final area from World 3-1 and World 4-1, except it's underground instead.
The fastest route here would be to take the very last warp pipe, leading to the underground World 3-1 area. The same strategy from World 3-1 and World 4-1 applies here; same improvement as well; I let the camera scroll far enough to prevent Mario from bonking the right edge of the screen. This again saves another 21 frames, now putting me ahead of the trio by 336 frames (16 framerules) overall.
World 5-3
Scenery: (First area (and second area in this run)) Overworld (with fences and clouds), nighttime. + (Rest of the level) Depends.
It's another starting area where you need to make it across a giant lake and into one of two warp pipes, just like in World 5-2. Only this time, there are three red Paratroopas instead of five Bullet Bills, and the beginning warp pipe leads you back to the version with five Bullet Bills (World 5-2; area ID 52).
The first of the two ending warp pipes takes you back to the starting area, only with a small platform just above the lake that sways left and right (area ID 63). Every pipe in there, however, leads you to World 5-1.
The second of the two ending warp pipes takes you back to World 1-2 (area ID 82).
It's only fair that the fastest route here is the same as the previous level: beginning pipe, last pipe, and underground World 3-1. Just like the previous level, the same strategy applies here; I intentionally perform the "skating" glitch to delay at the start of the final area to prevent fireworks, but I otherwise save yet another 21 frames with the same improvement by letting the camera scroll far enough to prevent Mario from bonking the right edge of the screen. This further pushes my improvement over the trio's 2022 run to 357 frames (17 framerules).
World 5-4
Scenery: (First area) Castle. No lava. + (Rest of the level) Depends.
We start here by crossing a two-screen pit filled with railed, upward-moving platforms. The second-highest platform on the first screen may look impossible to reach, but a very precise duck jump can allow for crossing over the vertical balls that come later; it's impossible to make it under, unfortunately.
The beginning warp pipe leads you back to World 5-1, and the two warp pipes at the end both lead to a firebar minicourse (area ID E4), reminiscent of the Lost Levels, which is where we're headed. If you're unlucky enough to have scrolled even farther than normal, the two warp pipes will lead you back to the start of this level (area ID D4).
The second area, the firebar minicourse, may remind players of the firebars hanging from pillars in the Lost Levels' World 7-4. The fortunate part here, though, is that these pillars do not exist, so you're free to run over them.
Three warp pipes exist; the first one (before the first screen) leads back to the first area, except it's underground (area ID 94). The second leads to a lava-filled World 2-2 with castle palettes (area ID C7), and since you can't swim, you'll be facing a nearly impossible gap in it very soon. The last pipe is what we're looking for, this one leading to the final area of... World 1-4. But it's the final area anyway for this level too, so no use in arguing about that.
Likewise, World 5-5 would be the last level of World 5 if World 5-4 was completed with a touch of the flagpole instead of the axe. Just like World 1-4, this is overall straightforward; just run for the axe, taking down a Hammer Bro and Bowser while we're at it.
No time saved or lost here, so the 357-frame improvement stays put as both runs were in sync. On another note, I coincidentally nailed the 300k-point mark after finishing.
World 6-1
Scenery: Overworld (with fences and white trees), nighttime. + Underground (with bushes and clouds).
For casual players, this is a stumper in that you need to enter the bottom warp pipe on the first screen. Normally, by the time you make it across the block platform to the second screen, the camera has scrolled far enough to where you can no longer reach it. There is another warp pipe on the third screen that takes you to the underground version of this area (area ID 95).
The solution here would be to nudge far enough to the right side of the screen without moving the camera, whether it's jumping up to the edge of a hanging block or ducking under one-tile high ceilings. There are two unenterable warp pipes and a few hidden blocks to help you out. Only then will you be able to reach the next pipe and enter the next area (area ID 80).
From a TASer's perspective, the camera's X position 071D cannot go beyond 123 when getting to the second screen, and your on-screen X position cannot be under 162; otherwise, the pipe will become inaccessible.
How the trio did it was by ducking under the two pipes. How I did it was corner clip into the first one, then duck under the second. The corner clip slid Mario closer to the right side of the screen (on-screen X 112 to 159), and I didn't have to slow him down myself, both factors meaning I could run more and move less into the wall a second time; this helped save 17 frames.
The last area for this level is World 1-1, except it's underground, and you start on the fourth screen.
I was faster there by one frame, being 18 frames faster in the level overall. However, this was negated by the framerule; I couldn't catch up to save it, and this was the fastest effort that I've made. The 357-frame improvement remains as is.
Further experimentation with the hex editor (editing the in-game timer) shows that I'm only two frames away from saving it; I'd need to touch the flagpole on Frame 35322 to do so.
World 6-2
Scenery: (First area) Underground. + (Second area) Overworld (with fences and clouds), nighttime. + (Rest of the level) Depends.
Unless you're Big Mario, you'll need to take the vertical ball into the brickpile on the first screen; Hammer Bros pop up inside, so watch out. Afterward, there are two warp pipes you can take, although they lead to the same giant lake area with the three red Paratroopas (area ID 53). The fastest strat I could think of was it being seven frames faster due to me entering the right pipe instead of the left, since I could kill a Piranha Plant faster that way. However, I dropped a frame later because I had to adjust the Cheep Cheep RNG in the second area.
The beginning warp pipe of the second area leads back to its start. Of the two warp pipes to choose from at the end of this area, the first leads to a repeat of World 3-2, and the second leads to the giant wall blocking the reverse L pipe (with that pipe leading to World 3-1; area ID 4A).
- That reverse L pipe leads to World 3-1 (area ID 4A), and the warp pipe in that area leads to World 1-2 and World 2-3's final area.
- It's much faster to warp to World 3-2 than to take multiple warps to World 1-2's final area.
There isn't much to optimize, but I had to delay another frame, entering on Frame 36802, to manipulate the Cheep Cheep pattern for the last area.
RNG was a bit of a struggle here. I had to get another FPG in while avoiding the fireworks, the latest being 146 in-game seconds left. At least it came out as planned, though I had to run through it normally first. I couldn't put some aspects of entertainment in (I had to let go of a few Cheep Cheeps and not kill them) because they ruined the pattern.
- Third Cheep Cheep (37004): Bounced on between the first and second sets of vertical balls to climb less.
- Fifth Cheep Cheep (37068): Bounced on between the third and fourth sets of vertical balls to climb less.
- Sixth Cheep Cheep (37141): Bounced on between the fourth and fifth sets of vertical balls to climb less.
- 12th Cheep Cheep (37501): Manipulated by slowing down before catching the fourth-to-last set of vertical balls, then bounced on to perform the FPG.
Same case as World 5-1: not only did I finish with 147 in-game seconds left compared to the trio, I got a FPG out of it as well. This helped save 63 frames (three framerules) over their run and put me ahead by 420 (blazit) frames (20 framerules) overall!
World 6-3
Scenery: (First area) Underground (with clouds and giant tree platforms). + (Second area) Castle (with fences and clouds). + (Rest of the level) Depends.
You need to bounce off of two springboards to make it to the giant tree platform with two enterable warp pipes. The second springboard is out of reach should you spring off of the first from a running jump (X speed >24), so you'll need to walk (X speed between 15 and 25), then jump; this helps to decrease gravity (making you fall slower).
Or you can spring up to a ceiling on your starting screen, then take off for that second springboard there. In a TAS, however, the walk-jump is ideal here.
Both warp pipes lead to the same second area, so there's no use in deciding here (area ID E3). When Mario's Y pixel is above 255, he can't shoot fireballs when you press B, so you can't simply kill the Piranha Plant when you're even one tile above the HUD; that fact aside, I enter the first pipe two frames faster than the trio could.
The second area features the same starting area as World 5-2, except instead of Bullet Bills or Paratroopas, there is a small platform just above the lake that sways left and right. The area also features castle palettes.
- The beginning pipe leads to World 4-3 (area ID 50). The last two pipes lead to the starting area for World 5-3 (the one with three Red Paratroopas).
- From there, it's the same destinations as in World 6-2.
Upon further research, it's faster to finish in World 4-3 than in World 3-2. However, if you were to take the World 5-3 exit, the beginning pipe would lead you back to the start of that area; the first of the two end warp pipes would lead to World 3-2; and the second would lead to the giant wall blocking the reverse L pipe.
This time here, though, I was able to get the Bullet Bill pattern under control. Bullet Bills here begin to spawn on Frame 39355, and I killed every one except the second (39446) and fourth ones (39643), the last one (39796) allowing me to perform the FPG that I needed; this helped save another 21 frames and raises my overall improvement to 441 frames (21 framerules).
World 6-4
Scenery: (First area) Castle (with one cloud). + (Rest of the level) Depends.
This one is sort of a mind-boggler to the naked eye, so I took the liberty of researching what areas the level contains and what destinations they have.
You start on area ID D8, a four-screen firebar minicourse like the one we saw on World 5-4; only this time, it has the pillars intact. There are three warp pipes you can enter.
The mind-boggling part is that it seems like wherever you go, you end up in the same firebar minicourse that shares similar traits with the Lost Levels' World 7-4. But each area has a tell, and I'd like to go over all of that with you.
Here's where the pipes in area ID D8 will take you.
- The first pipe will take you to area ID E4, which is the firebar minicourse without the pillars.
- The second pipe will take you to area ID E8, which is the firebar minicourse with pillars and extra enemies (specifically a Goomba and a Green Paratroopa).
- The third pipe will take you to area ID E5, which is an arena-like area with two firebars together.
Here's where the pipes in area ID E4 will take you.
- The first pipe will take you back to the start of that area.
- The second and third pipes will take you to area ID 68, which is the nighttime overworld version of area ID E8.
And here's where the pipes in area IDs E8 and 68 will take you.
- The first pipe will take you to area ID E4.
- The second pipe will take you back to area ID D8, which is otherwise known as the start of the level.
- The third pipe will take you to area ID E5.
E5 is the only area that is noticeably different from the other areas that I have listed above; that area lasts for only three screens, and its final pipe will take you to World 2-4 (area ID C9), thus meaning it's the only route to take to progress in the game. There are two more pipes that come before it, but they will take you back to area ID D8.
Therefore, the fastest route here would be to this area order: D8 → E5 → C9. All that being said, let's see how my run does.
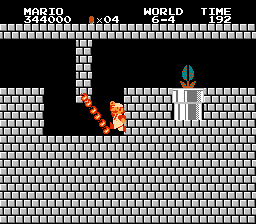
There is a wrong warp here that the trio uses; after making it to the second screen, the camera's X position must be at 208 to trigger the destination change. Nothing fancy here, but it's eight frames faster to clip over the firebar instead of ducking under it.
I decided to duck anyway, hoping it would save me some time. It didn't, but I didn't lose a framerule either. Everything else afterward went like normal, no major optimization that I found.
I was able to save one frame in the first area; however, this did not help me save the next framerule, so I undid that improvement.
World 7-1
Scenery: Overworld (with clouds and white trees), daytime.
Just like World 4-4, this is barely modified from the original game; although there are no loops here, the reason why is quite unknown to me.
- The only enemy out there is a Lakitu hovering over you.
- The item block is now the rightmost brick on the first airborne brick row.
- The first pipe is now enterable, and the second one isn't. Entering this pipe will take you back to World 7-1, but you start on the third screen (before the multi-coin block).
- The hidden 1UP is nowhere to be found.
For the most part, the level is familiar to me, so I run through it like normal.
Pixel_ commented that the earliest shot of the last Bullet Bill Blaster may help to save a framerule with an FFPG, but the earliest that I could get it to fire was on Frame 44279; the resulting FFPG turned out to be two framerules slower. In my eyes, it wouldn't have saved any time; not to mention that there wasn't much RNG that I could manipulate.
World 7-2
Scenery: Castle (with clouds and white trees). + Overworld (with clouds and white trees), daytime.
Contrary to the original Super Mario Bros.'s World 7-2, there is no "autowalk" cutscene before starting.
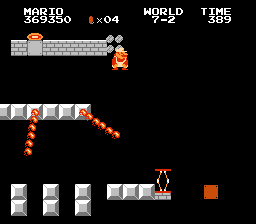
This is an oddly short level compared to the previous. There aren't many enemies for you to face; you cross a few bridges and make your way around a block row with firebars, only to find one warp pipe at the third and final screen (the camera stops scrolling from here). That pipe leads to the end of World 7-1 (area ID 71). You even have a generous 400 in-game seconds to spend.
Not much else to say, really; this is merely straightforward as I run through it. Miraculously, I was able to perform the FPG two frames faster than the trio could, but that wasn't enough to save a framerule; the improvement remains at 441 frames.
World 7-3
Scenery: Castle. No lava. + Overworld (with clouds and white trees), daytime.
Another short level, and possibly the shortest level yet. There are steps leading to a wide corridor that has a Goomba and a Red Paratroopa over a one-tile pit. At the end is a six-tile wall blocking the reverse L pipe; players can still scale over it by walljumping, but for the sake of difficulty, there is a hidden block on the top of the gap intersecting the two edges. Through it all, you have 200 in-game seconds.
And once again, the lone pipe leads to the end of World 7-1.
Again, I run through the level like normal, nothing fancy. I initially had to aim for the top of the flagpole because an FPG here would've resulted in fireworks (thus resulting in a tie against the trio), but I decided to delay until the in-game timer hit "191" and perform a FPG there. To my surprise, it actually helped me save another 21 frames there, putting me now at a 462-frame improvement overall!
World 7-4
Scenery: Castle (with clouds and white trees).
After a break with the two short levels, the difficulty starts to curve up sharply, mostly because of the first area.
This first area starts you off behind an arcing wall with no hidden block in sight; no other option but to clip through it. For a two-screen area, it can bring nightmares for casual players.
There are three ? Blocks, all containing a powerup. One is under a ceiling five tiles above the ground, sharing a one-tile-wide gap; another is accompanied by a firebar, around the same level as the ceiling; and the third is closer to the end of the area.
- The easiest solution for getting around this would be to jump on the under-the-ceiling ? Block and make a running jump up and through.
- Another would be performing a similar setup to accessing the Minus World in the original Super Mario Bros.; duck jump two tiles away from the bricks and pray that you catch it. Subpixels are key.
- All as Big Mario or Fire Mario and under a 200-in-game-second limit.
Your reward? A warp pipe that leads to an area similar to the Lost Levels' World 4-4 (area ID F5). But it's worth it to progress into the level; it gets easier afterward.
In the second area, you first face a corridor with three Goombas and a grounded firebar. Then, you need to watch your step for a couple more on shorter platforms above a pit before facing another corridor; high above it is another corridor with a Buzzy Beetle and two Koopa Troopas of different colors falling from it. Between them is a firebar-occupied block that you need to jump on to make it up. The area finishes off with a falling platform and a warp pipe that leads to World 5-3 with castle palettes (area ID D3).
Should you go above it all and run across the ceiling, you'll be greeted with a second warp pipe that leads to the same repeat.
The third area, oddly enough, is a castle version of World 5-3, in which you need to cross a giant lake with the assistance of three red Paratroopas. Or do you?
All pipes lead to the same destination: another repeat of World 1-4's final area. No extra benefits for making it across the coat of lava other than a few bonus points.
For the first area, I was able to enter the pipe four frames faster than the trio.
The second area had carried a bit of something to worry about because of the first six enemies; fortunately, avoiding the lag was trivial here. The challenge here, though, was to finish at the same time they did and to retain that four-frame lead, having to do with that wall.
The last two areas from here went like normal. Amazingly, I was able to save another frame on the third area, but that five-frame improvement meant nothing because I couldn't save the framerule. So I decided to take the top route in the second area (which is slower than clipping the wall by at least four frames) and kick some shells instead for entertainment; I changed nothing else and still matched the trio's overall time for the level. The 462-frame improvement lives on.
World 8-1
Scenery: Overworld (with fences and white trees), nighttime.
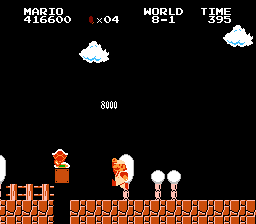
For entertainment purposes, I flipped a red Koopa Troopa at the first screen and knocked it in midair, netting 8,000 points. After killing Bowser, who came next in this level, the level was straightforward.
- By the way, here is another thing I wish to point out: once Bowser drops to the bottom of the screen, most on-screen sprites (including Bowser) will disappear as well. In this run, the only exception is the flag sprite.
The fifth screen contained a flagpole but no castle, which I had to promptly jump over. Reasoning here was that the first castle to appear resided on the 11th screen, thus making for a lengthy wait should I have grabbed that first flagpole. (Mario walks to the castle with an X speed of 24.)
Skipping past that castle was a second flagpole on the 14th screen; this one had a second castle that was much closer to it. Unlike the previous run, the flag sprite still exists, so I still had to perform a FPG.
Because the two castles were nearby, the timer depleted twice as fast, and a second mini-flag appeared. The cut to black for the next level occurred a bit more quickly; the cut-to-black here ignores the 21 Frame Rule variable 077F but is fixed when the next level loads, similar to warping down a pipe in a Warp Zone.
The flag sprite can be despawned, but I failed to manipulate the game into doing so. The hidden block containing a 1UP did not appear either, but when I tried not hitting it in the previous run, the flag sprite still despawned, which led me to believe that this couldn't be the cause of the failure to despawn the flag sprite. I tried not killing Bowser too, but that didn't work either, which leads me to believe that it came naturally.
This would've otherwise saved another framerule had it been possible; for now, it's not.
- Another thing I would like to point out is that this certain hidden 1UP is determined by how many coins you collected in World 7-3; if you have enough, the hidden 1UP is available. But since there aren't any coins on World 7-3 in this hack, it's impossible to toggle it on besides via the World 4 warp zone (or with the "continue glitch"). I doubt this could be why I couldn't despawn the flag sprite, but it's a possibility.
World 8-2
Scenery: Underwater (with white bushes and clouds). No water. + (Last area) Overworld (with fences and clouds), daytime.
This is a somewhat straightforward level.
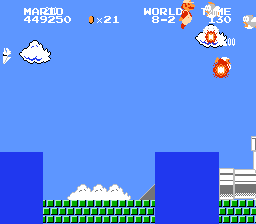
At the start, there are two columns of seaweed, each standing four blocks tall. One is two tiles above the pit but about seven tiles to the right of Mario's starting position; the other is four tiles higher but two tiles closer to said position. It's impossible to make it over without slowing down, so the best option would be to go under the seaweed.
Even then, though, I still need to slow down slightly to go under; the easier way out of this would be to duck "jump" at the start, but Down and every other directional key will make it act completely useless. I wanted to see if I could get ahead of that method.
On the first screen, you see three pipes that you can enter; however, they all send you back to the start of the level (which has an area ID of 1A). I'm able to swim over them and kill a Blooper and two Piranha Plants; while I'm over there, I was able to kill the Bowser clone as well.
One section on the third screen requires that you go down between the two dropping platforms (even though they later disappeared) to make it through; this can be skipped by swimming under it, but as Big Mario, you need to be ducking under.
On the next screen afterward, you meet several sets of vertical balls (most of them in rows) along with a few dropping platforms. As there is a high chance you will end up hitting a set inside a row while facing right (thus sending you back to the first set of a row), you are better off going under them.
A majority of this section is skipped by performing the vine warp glitch on the first set, leaving me with an on-screen X position of 222.
When approaching the fifth screen, you will stumble upon another warp pipe that you can enter; however, like the three in the beginning, this one will send you back to the start.
Above it is a springboard, required to scale over the giant wall that comes next. Upon contact with it, I hold A for 17 frames to make it over without going too far up.
- An interesting yet unknown mechanism: when swimming up, holding A will have Mario decelerate up faster, thus leading to a faster descent.
- Unsigned, Mario's Y pixel will roll over to 255 upon making it to where the HUD is; you cannot control him afterward. If he makes it high enough up (another backward rollover from 0 to 255), the game will seemingly be confused as to where Mario is, thus prematurely stopping the in-game timer from ticking down until Mario makes it back down (to one screen above the HUD); only then will the in-game timer function again. Once he drops back on screen, you regain control.
The manipulation of the X speed sub allows me to not slow down so much while on the spring. If at any point I were to press Right while walking forward, my X speed would have dropped to 16. Luckily, I made it so that it would only drop to 17, allowing me to pick it back up to max speed.
This time, I didn't need to manipulate the X speed sub again because I didn't land on the wall for one frame.
By the tenth screen, I had arrived at the small reverse L pipe and warped down. There were two Bloopers and three Cheep Cheeps (of different colors) in front of it on-screen, and I was able to kill all but the last one in the back. I was impressed knowing that I didn't have to manipulate Mario's position and the enemies to prevent lag frames since I killed the Bowser clone, at least not this time.
- Even when Bowser himself is far off-screen, he still takes up a slot in the loaded enemy variables 000F to 0012 because the game has loaded him. That is, unless he is killed.
- If not, the game struggles to keep up with even four enemies and any extra objects that should appear.
So I decided to kill all the enemies on that last screen before warping on Frame 53981. From here, I had to make a mad dash for the flagpole in the final area, which was yet another repeat of World 7-1's final screen.
No framerule saved or lost, but I got close to losing one; it was under the wire. And just like that, I've successfully finished World 8-2 with no lag frames! This saves 14 frames over the trio's efforts, now putting me 476 frames ahead overall.
World 8-3
Scenery: (Autowalk cutscene) Overworld (with clouds), daytime. + Underground (with fences and white trees). + (Second and third area) Overworld (with fences and clouds), nighttime. + (Last area) Either overworld or underground.
Contrary to the original Super Mario Bros.'s World 8-3, there is an "autowalk" cutscene before starting. Mario starts at Y pixel 0, just like in World 4-2.
There is a bit of difficulty here at the start compared to last time; now that I'm Fire Mario, I can't go under the first ? Block without slowing down. Later on the first screen, I need to break an earlier brick to not break another after I jump on the Bullet Bill.
- After hitting a hittable block (? Blocks, ground tiles, and bricks), they stop becoming hittable for 15 frames.
- If I were to break another brick here, my X speed would stop at 0 because I've hit the bottom-left corner of that brick and am still moving up for one extra frame.
Then comes the warp pipe on the second screen. The first pipe warp is seemingly random, but it depends on your X position in the level. If you enter the pipe when you are closer to the right edge of the screen, the game crashes (the area ID you will warp to is 9C). Should your X position be somewhere else, the game will continue like normal.
I was able to warp to the correct destination one frame faster than the trio could, just like in my previous run.
The second area will always be where you need to make it across a giant lake and into one of two warp pipes. There is another at the very beginning, but it will most likely lead you back to the start of that area. Sprites present above the lake depend on what X position you land in as you enter the first warp pipe.
I'll go by the camera's X position for these destinations.
- ID 52 (X 48): Five Bullet Bills are present. The beginning pipe leads to area ID 53. The second-to-last pipe leads to area ID 58. The last pipe may lead to area ID 68.
- ID 53 (X 112): Three Red Paratroopas are present. The beginning pipe leads back to the start of this area. The second-to-last pipe leads to area ID 52. The last pipe leads to area ID 63.
- ID 63 (X 128): There is a small platform just above the lake that sways left and right. The beginning pipe leads to area ID 53. The last two pipes lead to area ID 65.
The third area may either be a firebar mini-course (similar to The Lost Levels), with or without extra enemies, or an arena-like area with two firebars together. There is always a ceiling above every pipe.
- Area ID 58 is the nighttime overworld version of area ID D8, the firebar minicourse with pillars (and the starting area for World 6-4). The first two pipes take you back to the start of this area. The last pipe may also take you back to the start of this area, but scrolling far enough will have it take you to area ID AA instead. There will always be a ceiling throughout the mini-course.
- Area ID 65 is the arena-like area; this lasts for only three screens. The first two pipes take you back to the start of this area. The last pipe takes you to area ID 6A.
- Area ID 68 is the firebar minicourse with pillars and extra enemies (specifically a Goomba and a Green Paratroopa) that you may have seen in World 6-4 (not in this run, of course). The first two pipes take you back to the start of this area. The last pipe may also take you back to the start of this area, but scrolling far enough will have it take you to area ID AA instead.
The fourth area will always be a mini-arena where you face off against Bowser and two firebars. There is another warp pipe in the beginning, but you can't enter it. Like the original World 8-3, there are stepping stones that come afterward, and then the flagpole. The base does not have a platform to stand on, so I cannot perform a FPG. Whether it is overworld or underground depends on what X position you land in as you enter the correct warp pipe.
- ID AA: Underground.
- ID 6A: Overworld, nighttime.
In the end, we came to the conclusion that the fastest route for this level was to warp in the following order: 63 → 65 → 6A.
Once again, the last area is a lag frame nightmare; you have yet another Bowser clone to deal with, along with two firebars. Preventing lag frames was going to be a struggle here; not only that, I needed to manipulate the Bowser pattern so that this clone didn't move back and block me. The first thing I did when acceleration delays weren't enough was to look at the third area and delay 17 frames before entering the pipe.
In the final area, I hit the ? Block to reveal a Fire Flower with a nine-frame duck-jump, then I had to concentrate on my jumps to prevent lag frames and still end without fireworks. (These are going to be extremely precise numbers, but they're worth it to completely prevent all lag frames!)
- Frame 56419: 18-frame normal jump facing right; I adjust the X speed sub for the next jump.
- Frame 56452: Three-frame duck jump facing left (because a normal jump facing left would create lag frames)
- Frame 56476: One-frame duck jump; I adjust the X speed sub for the ledge.
- Frame 56493: Two-frame duck (no jump), then press Left for one frame to slow down; this was to avoid hitting the second firebar. Three frames later, I press Right for a frame, delay a frame, then hold Right for two more frames to bring myself back to max X speed.
- Frame 56504: Four-frame duck jump; duck jumps produce fewer lag frames.
After that last duck jump, I was all set to run for the flagpole, and I was able to do so three frames before the in-game timer could hit "146". But I have done it again; I beat World 8-3 without lag frames and with 147 in-game seconds remaining.
The lag reduction leaves me with another four frames saved over the trio, but the waiting for the optimal Bowser pattern resulted in me losing a framerule and dropping back down to a 459-frame improvement.
World 8-4
Scenery: Castle. + (third area) Castle (with fences and white trees).
This last level is all about speed here; don't hold back!
The first screen contains a wall in front of a pipe that you can enter, but it will take you back to that same screen (area ID ED). Luckily, the pipe is placed high enough to allow for going through a gap in the ceiling, so you can make it around the lava and onto the next pipe, which leads to area ID EE.
The fastest route in this area would be to clip through the wall; no hidden block exists.
On my first attempt, I was a single frame slower than the trio in this area. However, I conceived faster and faster strategies overtime until I ended up using only 341 frames of input—28 less.
- First, I duck jump onto the ? Block because it's slower to jump from the ground. Before landing, I slow down to stay on that block for another frame and be closer to the edge.
- I duck jump backwards for 29 frames; 30 frames would've led to me bonking the ceiling and falling faster. Here, though, I was able to reach for the highest point of the wall and jump up through the ceiling.
All this put me 27 frames ahead.
The second area features stairs that lead to a corridor down to seven warp pipes forming stairs going down, then up again. The first three pipes and the last three pipes are not enterable; the fourth one is, leading to the next area with an ID of EF.
There aren't any real means of optimizing here, as this is a straightforward area. However, it's faster to jump from the corridor instead of one of the pipes just to fall faster.
The third area has you levitating above lava, so it is advisable that you jump onto the platform next to you to proceed. Accompanying it are three Bullet Bill Blasters and a platform ride to the next pipe. This normally leads to area ID DF, but if you scroll too far, you will be led back to the start of this area; there is another warp pipe at the end that will also send you back to the start of this area.
However, there is a trick to prevent the camera from moving as you warp down that pipe, which is what I used.
- The X subpixel had to roll back past 0 and into 240 or 224, and my X speed had to be below 16 for that to happen. The cause of this was for Mario to not move another pixel to the right and for the camera to not scroll further, preventing the warp pipe's destination from changing.
I was able to save two frames at the cost of an awfully slow run in the final area.
The fourth area displays Japanese text: 入ルナ (meaning "DON'T ENTER", possibly referencing the warp pipe that resides here). There is a warp pipe in the beginning that leads you back to the start of the level (area ID DE).
Stopping you is a wall of Bullet Bill Blasters, and a hidden block is on the side, three tiles above the ground. Then, you need to climb across the last set of vertical balls over the lava. Afterward, there is one last warp pipe leading you back to the start of this area, and finally, a tussle with Bowser.
The trio was able to bounce off of two Bullet Bills to climb less on the last four sets of vertical balls, and I couldn't even get one in. The vine warp glitch would not work properly if done on any set but the last.
- On the first set, he will be warped to the right, but because Left and Right were the last directional keys pressed while not airborne, touching another set of vertical balls would have sent Mario back.
- On the second and third sets, Mario will be warped to the left edge of the screen.
- Therefore, performing the vine glitch on the fourth and final set of vertical balls is the fastest option.
The bad news here was that manipulating Bullet Bills would only slow me down, as I couldn't find a good, optimal pattern to manipulate into at all. The good news? I didn't have to manipulate anything to begin with. Regardless, I still lost 40 frames (almost two framerules) in the final area.
The other good news was that I was able to kill the final Bowser for entertainment, even though it is not required to finish faster.
Input ends on the frame I touch the axe.
I initially finished with 62 frames lost, but I kept finding improvements over time until I couldn't find any more.
- It first began with me manipulating the X subpixel before the fourth set of vertical balls, which allowed me to move another pixel to the right more quickly after performing the vine warp glitch.
- I then performed a walking jump to the first set of vertical balls instead of a running jump, since (as mentioned before) gravity is decreased, meaning I fall slower.
- Finally, I jumped off the top of the Bullet Bill Blaster to jump higher and, as a result, climb less.
All this helped to save 22 frames and lessen the overall timeloss for this area.
In total, I lost 11 frames compared to the trio's run for the entire level.

