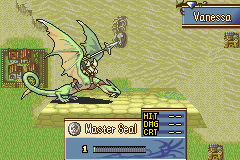
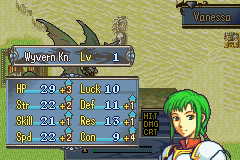
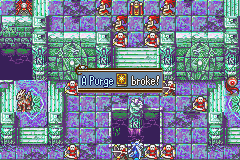
This run completes Fire Emblem: The Sacred Stones 7336 frames slower than the
currently published run by Cheetah7071, but does so on a higher difficulty setting. It also manages to shave off 1 turn from the final turn count, beating the game in 93 turns.
Game Objectives
- Emulator: EmulatorResources/VBA
- Aims for lowest frame count (as opposed to lowest turn count)
- Uses hardest difficulty
- Heavy luck manipulation
- Takes damage to save time
I have to commend Cheetah on making an excellent run. Most of my optimizations only saved a few hundred frames here and there, and with the exception of the final chapter, I couldn’t find any groundbreaking strategic improvements.
Some Suggestions Before Watching the Run
I suggest that you turbo through long enemy phases, as this increases the entertainment factor of the run tremendously. I’m also interested in having a script that automatically turbos through enemy phase, but unfortunately I'm not sure how to design a lua script to do that. In addition, I strongly recommend you run the “rngdisplay” lua script that can be found
here. It is the first script listed, simply download the script into a lua folder that VBA 23.5 should automatically create, go to tools -> lua scripting -> new lua script window -> browse -> run, and enjoy.
Hard Mode Differences
Every enemy in the game gets a slight stat boost on hard mode, even bosses. While enemy stats are random to some extent (the game controls stat deviations from set growth rates), generally you can expect unpromoted enemies to have 1-2 extra points in str/skl/spd/def/res/luck and 3-5 extra points in hp.
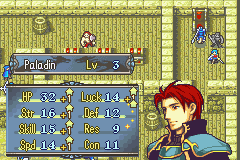
Comparison of a Chapter 9 mercenary
Promoted enemies get a considerably larger stat boost. On normal mode they are so weak that they are sometimes inferior to their unpromoted counterparts. However, hard mode is a completely different story.
Comparison of a Chapter 15 nomad
Often these enemy buffs have a fairly trivial effect on my strategy. Seth is such an overpowered unit that increased enemy stats usually mean he 2HKOes an enemy with a relatively common weapon instead of 1HKO, and extra attacks cost around 40 frames. But occasionally tougher enemies have such an impact on my strategy that I have to take an altogether different approach from Cheetah’s run. This is most apparent in Chapter 9 where I have to handle a large portion of a rout map with weak unpromoted units. See my chapter-by-chapter comments for more on that.
Hard mode also introduces more enemies to contend with. I count 46 extra enemies that attack my units, but there’s bound to be more that use time just by moving on enemy phase. As enemy encounters cost around 300 frames, this accounts for approximately 13800 frames of time lost compared to normal mode. Thus, I estimate I would’ve saved at least 6464 frames (about 2 minutes) from the currently published run had I chosen normal mode, and that’s a very conservative estimate. I wouldn’t be surprised if the actual amount is closer to double that, but I have no way to be sure.
Commonly Used Terms/Abbreviations
- RNG = Random number generator
- Crit = critical hit. These do 3 times the amount of damage of a normal hit.
- 1HKO = One hit KO
- 1RKO = One round KO, meaning an enemy is killed after one round of combat.
- Rout map = These are maps that are completed by demolishing all the enemies (yes, I enjoy gratuitous adjectives).
- Pre-promotes = Units that start the game as a promoted class.
For Viewers Unfamiliar With The Game
If you want to follow my submission notes properly, I highly recommend you familiarize yourself with the following 3 characters:
Seth- He’s indisputably the best character in the game, even in normal playthroughs. He dominates the first half of the game, but as the game progresses Vanessa gradually takes over due to her flying advantage.
Vanessa- She’s the first flier to join your team, and despite poor base stats, she is raised to become a powerhouse because her amazing mobility is important for achieving low turn counts.
Eirika- She’s the main character in the game’s storyline, but her usefulness in combat is very limited since raising her would cost more frames than it would save. When I mention her, it usually has to do with dropping her near a throne and seizing, which is how most chapters in the game are beaten.
Here are some other characters to familiarize yourself with, though it’s not nearly as important as the 3 characters mentioned above.
Garcia- His main use is in Chapters 4 and 9, which are rout maps. He doesn’t have particularly good bases for use in a TAS, but until chapters 11-12 I don’t have any pre-promotes to use other than Seth.
Colm- What a name for a thief. I suppose he wants to style your hair before he picks your pockets. Anyway, he opens a few doors in the run, something non-thief units cannot do without a door key.
Orson- He is basically Seth in Chapter 5x. He disappears once the chapter ends, because obviously he’s batman masquerading as a sprite in a Japanese RPG.
Ephraim- Strangely enough this game has 2 lords, and Ephraim is the unit who must seize the throne in 5x. At the end of chapter 8 you have the option of selecting 2 routes: Eirika’s route and Ephraim’s route. Had I chosen the other route you’d be seeing a lot more of him.
Tana- Her combat contributions involve having blue hair, blowing kisses towards the enemies and having Disney™ eyes. Seriously though, all she does is carry units around like a flying taxi service. The world needs more of those.
Tethys- She stripteases… err… dances for your units, which has the effect of allowing a unit to move again after being grayed out.
Saleh- Imagine Caesar shooting thunderbolts while chanting lines from an archaic tome and you have Saleh. He is probably the 3rd most valuable combat unit in the run, with a highlight performance in Chapter 15 (the desert chapter).
Innes- He’s a sniper, and he has this awful habit of launching wooden projectiles with steel tips into the air. Someone should sue him for negligence.
Dozla- I love this guy to bits. I mean just look at him. He makes you want to quiver in fear and laugh hysterically with the same sheepish glance. He boats excessive and strangely coloured facial hair, which is complimented with equally quirky armour. One has to wonder if his thoughts are barely above base instincts, or appeal to the heights of sophisticated reasoning. Anyway, Dozla’s surprisingly useful throughout the run thanks to his berserker class giving him a 15 crit bonus. Normally his 9 base speed is a crippling issue, but by manipulating crits I circumvent this problem entirely.
Techniques/Tricks
Luck Manipulation
Luck is manipulated in the run by abusing the game’s path drawing algorithm. When there are multiple ways to reach the same location (eg/ by pressing a diagonal input), the game’s random number generator determines which path to take.
In fact, the path drawing algorithm is quite straightforward. For a simple diagonal path, random numbers between 0-49 will force the path to end horizontally, whereas RNs between 50-99 will force the path to end vertically.
As you can clearly see, there are 2 different paths for a simple diagonal input
It should come as no surprise that the most efficient way to burn RNs is to draw a diagonal path as far as a character can move, then “wobble” the cursor back and forth between 2 spots, forcing the RNG to make as many decisions about the path drawn as possible.
Just to give a quick idea how efficiently RNs can be burned, a 7-move unit can use about 4.3 RNs/frame on average, assuming there are no obstructions in their path such as enemies, walls or special terrain. When performing calculations I generally assume 5 RNs per frame can be burned.
There are two ways I track what I like to call the game’s RNG state. From a cleared SRAM, the initial 3 values of the RNG are 8, 56 and 21, and every subsequent RN is determined by applying some formula to the previous 3 RNs. Thus, I would say the RNG’s state is 53/21/12 if those are the last 3 RNs the game used.
Thanks to Nitrodon, I am able to use an RNG table as an invaluable tool for planning RN manipulations. Not only can I track the game’s RNs for any RNG state I want, I can also run simple tests to determine the points at which complex conditions are satisfied.
For instance, if I want Vanessa to gain str/skl/spd (35/55/60 % growths, respectively) on her level-up, I would find a blank column in my spreadsheet, write =AND(C2<35;C3<55;C4<60), hit enter, and drag the right corner of said cell down until I get a “true” result, at which point I highlight the row yellow and verify that the outcome carries out in practice, as it’s easy to make input errors in these type of tests.
Example of what my RNG spreadsheet generally looks like
Another way I keep tabs on the RNG is by using a script called “rngdisplay” provided by amaurea. This script is useful for easy manipulations such as dodging a 50% hit or landing a double digit crit chance, whereas the RNG spreadsheet is more practical for intense manipulations like double crits.
Demonstration of the rngdisplay script
In the above picture I manipulate a 3% critical for Vanessa. The average of the first 2 RNs determine Vanessa’s hit rate, while the third determines her crit rate. Notice where I conveniently have a 1 located :)
Here’s a
link to the 3 lua scripts I found the most useful. I highly recommend you watch my run while running the rngdisplay script, as it’s cool to see numbers rapidly scrolling down the screen when I wobble the cursor, and it makes the RNG abuse in this run easier to appreciate.
Moving 2 Units on the Same Square
This is the only glitch used in the run, but it’s surprisingly easy to execute, at least with tools assistance. Basically, when you draw a path for one unit that’s 1 space away from another unit, you can move the cursor towards the impeding unit for one frame, then move the cursor away from said unit while pressing A. This results in both units occupying the same square.
Saleh manages to attack an archer through the wall by occupying the same space as Seth
In the above scenario, the input I use to land Saleh on Seth’s square is Up+B the frame that the cursor is directly below Seth, and Down+A+B the frame after. Note that holding B has no effect on this glitch, it simply makes the cursor keep up with the arrow path being drawn.
Creative Cursor Movement
When I manually switch the cursor from one character to another (as opposed to pressing L), I have the freedom to show off a little creativity. Let’s suppose I need to move the cursor right 8 spaces. If I move the cursor diagonally up-right 4 spaces then diagonally down-right the remaining 4, the cursor will reach the desired spot in the same number of frames as if I had taken the more straightforward path. I take advantage of this fact almost every opportunity that I get. As the run progresses I try and take at least 3 frames in the same direction before changing to a new direction because otherwise the cursor movement seems erratic, if not largely imperceptible to the viewer, and I was worried this would be more annoying to watch than anything.
Another opportunity for creative input is on fog of war maps. After every player action there’s 22 frames of lag, which is plenty of time to do silly things with the cursor such as tracing octagons. I must say I am pretty proud of my cursor playaround in the fog of war maps, particularly in Chapter 11.
Improvements/Optimizations
Major Improvements
Strategic Improvements
Pretty self-explanatory. The main strategic improvement in the run comes from shaving a turn in the final chapter, which saves 5658 frames (~1.5 minutes). In addition, I save considerable time on a few occasions by disarming characters who don’t need to kill the enemies they face to complete a chapter’s objectives (usually seize). For more details, see my chapter-by-chapter comments.
Trade Optimizations
One of the biggest time-savers in my run compared to Cheetah’s is making the majority of my trades in-chapter instead of in the battle preparation menu. In fact, I only use the battle prep menu once in the entire run. For more details on that, see my chapter 16 comments.
Here’s some frame data to consider:
In the battle prep menu:
- Enter/exiting item menu ~= 23 frames
- Trading 1 item in-base ~=60 frames
- Trading 1 item in-chapter ~= 17 frames
Note: The variation is due to lag
The data above suggests that you can save ~43 frames (almost 1 second) per trade, and 46 frames from preventing 2 screen transitions. This adds up quickly as sometimes you need to perform as many as a half dozen in chapter (up to ~304 frames saved).
These improvements do come at a cost, though. One of the huge advantages of trading in -base is that you can have anyone trade with anyone, whereas in-chapter you have all sorts of limitations, such as if the character is deployed, or if one character’s within the movement range of another. Another problem is that I cannot access the convoy since that also costs a considerable amount of time, so any item I send away might as well not exist anymore. Basically, having to trade in-chapter is a planning nightmare, and I had to hex edit trades dozens of times to compensate for not having access to the base.
Selecting Units Early
While making this run I discovered a way to save 1 frame after almost any action that involves a character ending their move and “graying out”. For some reason there’s a 1-frame window 4 to 5 frames before when you’re normally allowed to input commands, and by using this window, the command you input will come out 1 frame earlier than it’s supposed to. This probably sounds confusing, so let me provide an example.
Let’s say I want to press right + B on frame 150. Under normal circumstances the effect of this right + B input will come out 1 frame later, at frame 151. However, if I press right + B on frame 145, the effect of the input will come out on frame 150, hence the saved frame.
It certainly doesn’t sound like much, and on a move-by-move basis the savings are basically imperceptible without watching with slowdown/savestates. However, over the course of an hour-long run the savings accumulate pretty quickly.
I’ll admit I really don’t like this trick because lag determines whether the 1-frame window is 4 or 5 frames early, which makes it a guessing game to actually find the window. Nonetheless, I go through the irritation of implementing this trick wherever possible, including a considerable amount of hex editing upon the discovery of the trick.
Controlling Level-ups
First, let me explain what each statistic is responsible for.
- Hp- Obvious
- Str- Obvious
- Skl- Every point of skill gives a character 2 points of hit and half a point of crit.
- Spd- When the speed of your character is at least 4 points higher than the speed of the enemy, your character will double attack. In addition, every point of speed gives a character 2 avoid. This is easily the most important stat in the entire FE series.
- Def- Obvious
- Res- Basically acts as magic defence
- Luck- This is a strange stat that serves 3 purposes. 1 point of luck = 1 point of hit, avoid, and crit evade.
For the purposes of TASing, defensive stats like Hp/def/res are not very important because it’s usually pretty trivial to manipulate a dodge, resulting in the character receiving 0 damage. In almost all cases I am looking to force Seth and Vanessa to gain str/skl/spd on their level-up so that I can quickly turn them into offensive powerhouses. Even once these units become overkill I still push to manipulate these stats for a few reasons. First, a unit can never have enough strength, as a 1HKO is very hard to achieve with a common weapon like a steel lance, and 1HKOing saves 40 frames compared to 2HKOing, which is extremely significant over the course of long enemy phases. Second, a unit can never have enough skill because crits are manipulated constantly, and having a higher crit rate reduces manipulations in the long run. Moreover, some bosses have very high luck stats, so it’s important that my characters can even manage a crit rate on them. Speed isn’t such an important stat once you have enough of it, but it is helpful for a unit to be able to double while rescuing a unit. In case you didn’t know, when one character is carrying another, they suffer a stat penalty such that their spd and skl stat are halved until the unit they’re carrying is dropped.
Now there are some cases where I deliberately force my units to get as crappy level-ups as possible. Why? Because stat-ups waste time, as shown below:
- No-stat level-up = 226 frames
- Perfect 7 stat level-up = 373 frames
- Stat gain = 21 frames
One such case is when a unit begins to cap stats. All unpromoted units cap str/skl/spd/def/res at 20, while promotion caps vary slightly based on class, though are usually values in the mid 20s. For the purposes of the run, Vanessa caps str/skl/spd around the end of Chapter 12. At this point I have no reason to give her high-quality level-ups, so I put some effort into minimizing her stat gains. Another case where level-ups are minimized are for characters that see short-term usage. People like Garcia, Dozla and Innes are deliberately given poor level-ups to save those 21 frames/stat-up. Finally, I minimize level-ups from C14 onwards because I reason that Seth, Vanessa and Saleh have become such powerful units that str/skl/spd increases would not have any appreciable benefits. The most obvious application of me minimizing level-ups is in Chapter 18 (which I enjoy referring to as the “egg” chapter). Each gorgon egg kill gives a unit half a level-up, regardless of what their current level is, which means I have units levelling at a furious pace. This doesn’t stop me from limiting almost all egg kill level-ups to 1 stat-up (there is an exception when Tana kills an egg because she has to land a critical hit).
More Efficient RN Burning
I put a lot of effort into using the least amount of frames possible when manipulating a desirable outcome such as a critical hit. At times this can be very tricky because at an average of ~5 RNs/frame burned, it’s very easy to skip over the desired RNG state, and you have to experiment a lot with possible cursor movements before you can get lucky. In some cases you’re forced to burn a few extra RNs in the slowest way possible, which is to undo the last diagonal movement in the drawn path, then re-do it, which burns 1 RN every 2 frames.
More Thorough Enemy Phase Testing
Below is an example of a calculation I performed to decide what to manipulate on turn 2 enemy phase of Chapter 7. It is mostly just math, so I suggest you skip reading it if that doesn’t interest you.
Probability breakdown:
- Vanessa lands both hits ~ 73.43%
- Vanessa dodges at least 1 hit ~ 18.03%
- Vanessa gets at least str/skl/spd on her level-up = 11.55%
- Vanessa crits ½ enemies = 3.92%
- Vanessa crits both enemies = 0.04%
The cumulative chance of satisfying the first 4 conditions is approximately 0.06%, which is still higher than the chances of Vanessa critting both enemies. If we tack on the first 3 conditions to the double crit scenario, the probability of success falls to a paltry 0.0006%, making it about 100 times less likely.
Now here’s a breakdown of the estimated time taken to manipulate these scenarios:
- Single crit scenario, no level-up condition ~193 RNs (~39 frames)
- Single crit scenario ~1668 RNs (~334 frames)
- Double crit scenario, no level-up condition ~18883 RNs (~3777 frames)
- Double crit scenario ~163489 RNs (~32698 frames)
The time lost having to attack one of the archers again is only ~217 frames, or ~1085 RNs of manipulation. It should be obvious from the data that manipulating a double crit isn’t even close to worth it.
I perform these types of calculations a lot to determine the best course of action for enemy phase manipulations. Another way I save time is by forcing at least 1 enemy phase critical whenever I don’t have to do any other significant manipulations. While this can get unbelievably tedious, saving ~40 frames for every enemy critted is worthwhile.
Minor improvements
Cutscene Skipping
This may seem trivial, but Cheetah routinely fails to end cutscenes on the earliest possible input. This saves me a decent amount of frames throughout the run.
Lag Reduction
At the beginning of the game I turn off the terrain, unit, combat and show objective options, which reduces lag throughout the run.
Manipulating Enemy Stats
By burning RNs before seizing (or whatever action completes the map), you can manipulate enemy stats to some extent. As was stated earlier, the game uses a formula to prevent large deviations in stats from an enemy’s growth rates. However, this doesn’t mean you can’t get enemies to have lower-end stats in key statistics such as hp/spd/def. I take advantage of this on several occasions. This is also true of reinforcements, though their stats are determined at the end of the enemy phase they show up on.
Minimizing Screen Transitions
Occasionally if you move the cursor an extra space or two past an enemy and return it to where you originally wanted to put it, you can attack the enemy without having the screen shift towards the enemy for a few frames. This doesn’t save much time since it can rarely be used and only saves something like 8 frames per application, but it’s a nice touch that adds polish to the run.
| | Vykan12 | Cheetah7071 | Frame Advantage |
|---|
| Prologue | 2666 | 2753 | 87 |
| Chapter 1 | 3152 | 3788 | 636 |
| Chapter 2 | 4808 | 5278 | 470 |
| Chapter 3 | 6498 | 6801 | 303 |
| Chapter 4 | 8770 | 8749 | -21 |
| Chapter 5 | 4315 | 3909 | -406 |
| Chapter 5x | 8591 | 9110 | 519 |
| Chapter 6 | 4543 | 6626 | 2083 |
| Chapter 7 | 4625 | 4347 | -278 |
| Chapter 8 | 9886 | 8392 | -1494 |
| Chapter 9 | 27128 | 19635 | -7493 |
| Chapter 10 | 8228 | 8299 | 71 |
| Chapter 11 | 21839 | 19889 | -1950 |
| Chapter 12 | 24042 | 23281 | -761 |
| Chapter 13 | 2615 | 2875 | 260 |
| Chapter 14 | 14907 | 14957 | 50 |
| Chapter 15 | 25550 | 25366 | -184 |
| Chapter 16 | 10353 | 107413 | 88 |
| Chapter 17 | 3986 | 4262 | 276 |
| Chapter 18 | 22979 | 16644 | -6335 |
| Chapter 19 | 63147 | 66613 | 52 |
| Chapter 20 | 8096 | 7529 | -567 |
| Final + credits | 13982 | 19640 | 5658 |
| Totals | 247873 | 240537 | -7336 |
Prologue
I save some time by having Eirika land an unmanipulated critical hit, and lose some time by turning off those additional menus mentioned earlier. Not much else to say, really.
Chapter 1
I save an enormous amount of time by having Seth take away Eirika’s rapier, preventing her from countering enemies once dropped near the throne.
Chapter 2
By having Garcia crit the 1st enemy he faces, Vanessa no longer has to fight at all in this map. Note that I don’t manipulate another crit for Garcia because it would’ve lost more frames in RN burning than it would’ve saved in killing the archer faster.
Chapter 3
On turn 1 Vanessa trades for the iron lance before attacking the brigand because she needs a stronger weapon than the slim lance to 1HKO. Another change is having Garcia attack the 2nd wall early, which results in him landing an enemy phase critical, but more importantly weakening an archer for Vanessa to 1HKO the next turn without a crit. At this point in the run Vanessa is struggling so much offensively that she needs to be fed experience, even if it costs some time.
The reason Seth trades with Vanessa is to get the door key out of her inventory, and also force her to equip a slim lance. If she keeps the door key the thief will steal it from her instead of attacking. Note that the slim lance is an invaluable weapon because it gives Vanessa +5 crit, doesn’t reduce her attack speed whatsoever, and has a high hitrate. Ironically, this weapon lasts the remainder of the game, and gets used for an important critical in the final chapter, but I’ll get to that later.
Chapter 4
A tiny improvement here is to not remove any units from my line-up. The only unit who needs to be moved out of the way is Ross, and by 2 measly spaces. The other notable difference is to have Garcia assist Artur with the eastern reinforcements, as Artur can’t 1RKO without a crit.
I end up losing frames overall because there’s much more luck manipulation involved here. Artur needs to crit both mogalls (eyeball enemies) he faces on turn 1 enemy phase, and Vanessa requires a turn 3 enemy phase crit as well.
Chapter 5
The strategy used is identical to Cheetah’s run. I lose frames because Seth is incapable of 1HKOing the enemies he faces with a steel sword on hard mode.
Chapter 5x
On turn 2 I have Orson give Ephraim to Forde so that he can land an enemy phase critical on the archer. If Orson were carrying Ephraim, his skl penalty would cause him to have 0 crit on the archer, making a 1HKO impossible. Later on I drop Ephraim and re-rescue him. Again, this is a matter of improving Orson’s offence by removing those pesky rescue penalties. On the final turn I have Ephraim trade with Orson for a silver sword and javelin, which get used from Chapter 15 onwards.
Similar to chapter 1, I save considerable frames by disarming Ephraim before he gets dropped near the throne.
Chapter 6
On turn 2 I position Seth in such a way that he faces as few enemies as possible on enemy phase while still being in range of the boss for the upcoming turn. This slight adjustment saves over half a minute.
The reason Seth doesn’t crit the boss is because he can’t (he has 8 luck). I don’t even manipulate a miss because I was more concerned about manipulating the enemy stats for the enemies in the following chapter.
Chapter 7
Identical strategy, except now Vanessa can’t ORKO archers without a crit on hard mode, so I have to compensate for this fact with a long RN manipulation. Since Vanessa can only take ½ hits, has accuracy issues and is forced to level-up, it ends up taking less time to have her crit only one archer and finish off the other the next turn.
Chapter 8
The only reason Vanessa’s deployed is to take out a mercenary that would otherwise follow Seth throughout the level without attacking, as he’d never be in range. This has the added advantage of getting her some much needed exp.
A lot of time is lost due to the addition of 5 enemies, plus having to see Vanessa level-up.
Chapter 9
This is the chapter from hell. The time lost and luck manipulation required for this chapter is so outrageous that I put a lot of energy looking at the merits of Ephraim’s route, but after a long and thorough analysis I’m convinced that Eirika’s route is still faster.
The major problem with this chapter is that the hard mode enemy buffs make a huge difference. Whereas in most chapters the stronger enemies mean Seth kills an enemy in 2 hits instead of one, here it utterly incapacitates the unit(s) responsible for handling the westward enemies. You’ll see in Cheetah’s run he has no trouble having Kyle handle the enemies to the west. On hard mode, he takes an extra attack to kill enemies, fails to double all of them, and doesn’t even have a crit rate. For this reason I’m forced to have Vanessa handle the enemies Kyle was supposed to, and she even needs an extra attacker in Garcia to assist her. If that weren’t enough, the map has 6 extra starting enemies, which results in a 4 turn being impossible. This means having to face 8 additional reinforcements, for a total of 14 extra enemies. It’s no mystery how I lost so much time here.
The biggest headache of this chapter is turn 2 enemy phase. Vanessa has to crit at least one of the 3 mercenaries she faces, make an improbable dodge against a sniper hit, and get a level-up that includes str/skl/spd. The mercenary reinforcement that shows up at the end of the turn must also have 3 luck, otherwise Garcia can’t crit him. Surprisingly, it is realistically possible to have Vanessa crit 2 or even all 3 mercenaries, but this is at the
cost of the quality of her level-up, which I deemed more important at the time.
Chapter 10
My strategy is basically identical to Cheetah’s, except for a subtle difference. Based on how I position my fliers on turn 1, I am able to drop Eirika such that she can’t get attacked at 1 range (there’s an archer to her right), which saves me from having to see her level-up. The downside is that the archer must be taken out the next turn, but it’s still a decent net gain of 71 frames.
Chapter 11
On hard mode there are reinforcements that show up on turn 8, which motivates me to lower my turn count, if possible. I end up 6 turning this map by sending Vanessa south instead of Kyle, and using a door key I got in chapter 3 to get her to the enemies near Dozla. However, I still ending up losing time because of 6 revenant reinforcements that Gerik dispatches.
I do make a slight error in this map. Instead of forcing Vanessa to break her javelin on the bonewalker archer she attacks, I could’ve had her crit the archer and force an enemy phase crit on the first enemy she faces.
Note that Vanessa doesn’t crit the entombed enemy she faces because she can’t (he has 13 luck). It’s not a big deal anyway as Dozla steals her kill, and spares her from gaining 100 exp and levelling up.
Chapter 12
I make 3 minor changes compared to Cheetah’s strategy. First, I have Seth and Saleh swap roles. This is beneficial because Seth gets to take advantage of his higher movement, and also conserves javelin uses because he’s only attacked by 1-range enemies in the path he takes. Second, I have Tana drop Seth 1 square lower than where Cheetah dropped Saleh, as this puts him in the range of a bael (the spider creatures in the mountains). Finally, I add Innes to the strategy and kill all 3 mauthe dog reinforcements on player phase, which saves time compared to moving vulnerable units out of the way and killing the mauthe dogs on enemy phase.
Despite these strategic improvements, time is still lost because of 6 additional starting enemies. In addition, there is a bit of extra manipulation to get Dozla to critkill the gargoyles he faces.
Chapter 13
On hard mode Saleh cannot double the boss, and doesn’t do enough damage with a crit to 1HKO. For this reason my only option to kill the boss is to have Seth land a javelin double crit. Surprisingly, I gain 260 frames despite the slightly longer bosskill manipulation. You might notice the cursor has trouble keeping up with Seth’s move after he’s been danced. This was done for entertainment purposes, and doesn’t cost any frames.
Chapter 14
The only real modification here is having Vanessa ferry Colm to a door so that Seth can continue moving towards the throne. I have to do this because the door key that’s normally used here was used in chapter 11 to save 2 turns. Once Colm opens said door, I have to rescue him with Vanessa, otherwise an enemy priest will attempt to berserk him.
Moreover, on turn 6 enemy phase I have to manipulate a crit against the enemy sniper. In case you didn’t notice, it’s important for Seth to break the 1-range weapon he’s using so that he can automatically switch to a javelin to counter the sniper. The next turn, it’s possible to get both armors to attack Eirika, which would save some time, but I need Seth to kill the armor he faces to get an extra heavy spear. Yes, he’s that desperate for an extra 1-range weapon.
Despite having to move an extra character for 4 turns, I manage to save 50 frames.
Chapter 15
This chapter could’ve been as bad as chapter 9 if it weren’t for the Excalibur tome. Thanks to this amazing weapon, I only have to manipulate 1 crit on turn 2 enemy phase instead of 3. Furthermore, the weapon’s so powerful that Saleh 1HKOes all the unpromoted enemies he faces, which saves a considerable amount of time. Miraculously, Saleh gets a required weapon rank increase on the last possible attack he can. I didn’t even plan for this.
Another slight change is in Saleh’s positioning on the first 2 turns. I move him farther on turn 1 so that he can move onto a forest and critkill an enemy nomad on turn 2. This is incredibly important for 2 reasons. First, he cannot 1RKO that nomad without a crit, so if he doesn’t kill him on player phase, he’ll have to do it on enemy phase, which is much harder to manipulate. More importantly, though, he faces a whopping 12 enemies on turn 2 enemy phase, and can only take 1 hit, 2 if he’s lucky (depends which enemy hits). Thus, the 20 avo boost from the forest is crucial.
In Cheetah’s run he had Tana kill 2 mercenaries here. Unfortunately, Tana cannot pull this off on hard mode because she has no crit rate with any weapon she uses except for a slim lance, but with that weapon she doesn’t do enough damage with a crit. However, I manage to find an elegant solution. I increase Vanessa’s role by having her take care of some enemies that Saleh doesn’t due to him moving too far South. The path she takes is beneficial because it allows me to promote her in-chapter instead of in the chapter 16 base. This still leaves 2 mercenaries on turn 1 and some pegasi reinforcements to take care of, but Dozla and Innes are up for the challenge. It’s unfortunate that I had to move Innes on the final turn, but I had no choice. Note that Dozla cannot critkill the berserker with the hatchet, and I only have a 1-use hand axe left, so using that would involve seeing a long “hand axe broken” message. This means I cannot remove Innes from the strategy.
On the last turn, Seth moves up to Caellach but doesn’t attack. I do this because there’s no way to 1RKO Caellach without stealing his hoplon guard (an item that prevents crits), and if you attack him on player phase, he will recover hp, which wastes a lot of frames.
While I lose 184 frames, it costs around 1000 frames to promote Vanessa, so in the long run I’m actually saving about 816 frames, most of which I attribute to Saleh 1HKOing more often by using the Excalibur.
Chapter 16
This is the only time in the run that I make a trade in-base. I have to give Vanessa the boots before the chapter starts because she’s busy with other actions the first 3 turns, and I can’t afford to have her 6 spaces behind where she’s supposed to be.
On turn 1 I have Vanessa rescue Eirika instead of Seth, and Seth takes her back the first chance he gets on turn 3. I do this because Seth will fail to 1RKO the enemies he faces on turn 1 if he’s carrying Eirika. Vanessa can pull it off because she can 1HKO the mercenary besides her thanks to the silver lance, and no other enemies are in range of her. Another change is taking advantage of Dozla’s starting position to critkill some extra enemies on the first 2 turns.
A lot of effort went into figuring out which spot to drop Eirika. I basically have 2 options: drop her above Seth, or to his right (as done in the run). The advantage of dropping her above Seth is that an extra enemy will attack her, meaning 1 less enemy will die on enemy phase. However, the heroes that attack her have such high hitrates that it takes too long to manipulate Eirika’s survival.
While I do save 388 frames, it’s more realistic to say I lose about 612 frames because Cheetah promotes Vanessa here whereas I did it a chapter earlier. This loss is easily attributed to having to face 3 extra armors near the throne on hard mode.
Chapter 17
I’m surprised I saved 276 frames here because my strategy is a carbon copy of Cheetah’s. The only places I could’ve saved time are in reducing the number of stat-ups Vanessa got in her level-up, and extremely minor things like cutscene skipping earlier.
Chapter 18
I love this chapter, as it’s delightfully challenging to plan. Hard mode introduces 6 additional gorgon eggs, and 10 extra reinforcements, but I only trigger 8 of the 10 reinforcements thanks to clever use of Saleh’s purge (more on that later). Despite the additional enemies, particularly the eggs, I manage to match Cheetah’s turncount by adding Tana, Ephraim and Duessel to the mix. I would’ve preferred using Dozla instead of Duessel since he has much higher crit, but he’s so heavy (and awesome) that nobody can carry him.
On turn 1 I make Saleh wait instead of obliterating an egg with a purge use because he needs to save some purging for later turns. The egg he normally dispatches is instead taken out by Syrene on turn 2.
On turn 3 I have Vanessa reposition herself in the range of both mogalls (eyeball enemies) after dropping Ephraim. This is important because I want Vanessa to stick to 1-range for the remainder of the map.
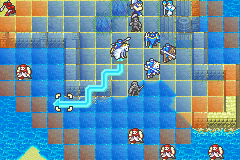
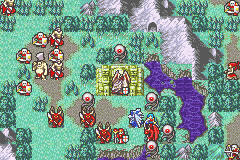
Now let me talk about Saleh’s activity on turns 4-7. Consider the image below:
bNote: This isn’t a snapshot from the movie. I turned off the movie and made Saleh move without attacking with purge.
The white line you see is a reinforcement trigger point. The only way I can cross the trigger point without the reinforcements showing up is to beat the map the same turn the trigger is crossed. Therefore, in order to avoid these reinforcements, Saleh must kill 2 eggs without crossing the trigger point and must wait a turn before killing the final egg.
It is very important that Saleh kills egg 3 using purge instead of egg 1 because otherwise an egg will hatch. Egg 2 can be taken out at range without crossing the trigger point. All to say, the egg dispatch order has to be 3-2-1.
On turn 4 enemy phase a gargoyle attacks Duessel at range, and he doesn’t counter. There’s nothing I can do about this, as he can’t ORKO the baels he faces with a hatchet equipped, and he can’t critkill the gargoyle with a hatchet anyway.
Again, the significant frame loss in this chapter is unsurprising due to facing 14 additional enemies, and moving 3 extra characters. I’d reckon a huge amount of time was saved from minimizing level-ups, at any rate.
Chapter 19
I save a lot of time by removing Tethys from the strategy. This means Vanessa is forced to attack Riev at 2-range, but this is fine because she can kill him with a javelin pierce critical. I didn’t even know you could land pierce at range until I planned this chapter.
The other significant savings are actually due to the higher difficulty setting I chose. On hard mode Vanessa can’t kill the general she faces without a crit, but she doesn’t need to either, so sparing him saves some time. I was lucky enough to have the general activate greatshield and negate one of Vanessa’s attacks, even though it wasn’t necessary. Another stroke of luck is that one of the enemy mercenaries critkills an NPC armor, which saves some time in combat animations. More generally, the stronger enemies kill almost all the NPC armors, which considerably shortens the length of the “other phase”.
Chapter 20
Ironically, it’s crucial that Vanessa gets hit a lot on turn 1 because Riev will attack her instead of Eirika if he can 1HKO her. This hardly makes sense since he can also 1HKO Eirika, who has lower avoid and causes a game-over by dying. That’s some brilliant AI for you.
I’m sure this will be a monumental shocker, but I lose frames here because there’s an arch mogall (promoted eyeball enemy) that gets an opportunity to attack Vanessa twice at range. It’s also possible that more enemies moved on turn 2 enemy phase, though I didn’t check.
Final Chapter
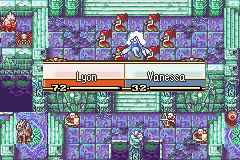
I find it poetic and heart warming that my biggest improvement to the run comes at the very end. By having Saleh purge the wight (promoted skeleton enemy) in front of Lyon, I can get Vanessa to annihilate Lyon 1 turn earlier, which spares the viewer from a painfully long enemy phase. In addition, I have Saleh and Vanessa trade weapons with each other so they can’t counter enemies on turn 1 enemy phase, which also saves an enormous amount of time.
Acknowledgments
Cheetah7071- This goes without saying. Without your run I would’ve had to TAS this game from scratch, which would’ve taken many times longer and probably wouldn’t have reached the same level of optimization. I found myself constantly watching your run for the framework to plan a chapter, and often I couldn’t improve chapter strategies despite my most diligent efforts.
Rolanmen1- He’s supported me since I first got involved in Fire Emblem speedrunning, and he helped me a lot with scripts. I will always be grateful for your friendship and contribution over the years.
Nitrodon- His contribution to the Fire Emblem TASing community has been invaluable. Unless I’m mistaken, he’s the first person to have deciphered the game’s RNG, and holds a lot of valuable technical information about the game, such as the code for disabling fog of war (helpful for planning purposes). Without him you probably wouldn’t have the cursor wobbling madness you see in these runs.
Toothache42- I enjoyed helping with the test run of FE6, even if it was short lived. Also, watching your latest WIP taught me a lot of subtle tricks I had missed, such as minimizing screen transition frames on a player phase attack. And, like Roland, you were very helpful on MSN when I ran into trouble.
DarkKobold, FatRatKnight and amaurea- Your scripts were a great help to me, and played a large part in how I could produce this run so quickly.
Serenes Forest and
Fire Emblem WOD for being valuable sources of information on the game. You’ll notice the 2nd website is in Spanish, but it has reinforcement data, and also shows the trigger points for reinforcements.
The TASVideos community - for maintaining this awesome site.
Feel free to ask me to explain anything about the run or my submission comments that are unclear to you. I’m putting a lot of effort into making this run more interesting and accessible to viewers who’ve never played the game, but with the amount of experience I have with the series, it’s hard for me to relate to how a person would view such a run with no Fire Emblem knowledge whatsoever.
And, it goes without saying that I hope you enjoy this run. I suppose I could’ve made my submission notes a little more lighthearted, but it was more important for me to communicate the effort I put into this run. Still, I can’t resist concluding my notes with a bit of humour. For anyone whose ever watched Lord of the Rings:
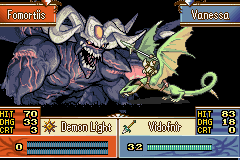
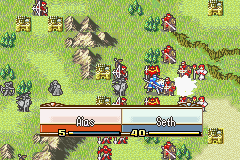
P.S. Here are my suggested screenshots. Of course there are interesting screenshots that do not involve Fomortiis, but I want to see what screenshots other users would suggest.
DarkKobold: Accepting as an improvement to the currently published run. The pub text should note the increase in difficulty.


