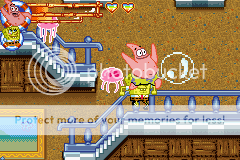
This is a TAS of SpongeBob's Atlantis SquarePantis in which our hero's only use is to fix a problem he and his friend accidentally caused. Hijinks would've ensued, but our heros bravely skips most of it with the help of some glitches.
Game objectives
- Emulator used: vba-v24m-svn480
- Beats the game
- Manipulates Luck
- Lets Plankton cause havok
Well, this TAS indirectly started out when zwataketa made his post about it on TASVideos for the NDS version. We had a discussion on what hard mode actually contributes to a TAS, and since I've actually made videos of the GBA port of this game before, I thought it was only for the minigames. I went ahead and made a quick TAS of it, before accidentally discovering that a fully charged bubble could potentially hit the same foe multiple times. This prompt me to create a lua script that displays all/most of the information, and I started to seriously TAS this game. This is the result.
Glitches & Tricks
Falling off a ledge faster
When you walk of a ledge, there's sometimes a short moment where the game still counts as "walking". While this is useful for clipping with Sandy, it wastes quite a bit of frames if your goal is to reach the bottom of the stage.
Via Jumping
The easiest way to fall off a ledge faster is simply jumping from a distance to bypass the temporary walking status that occurs. Although you must be careful, since jumping at the wrong frame and height may cause lag (from the game pushing you out of the floor).
Via Walking
Oddly enough, the temporary walking status sometimes gets cut in half, which makes it detrimental when trying to clip, but useful if trying to get to the bottom of the screen. The exact mechanics of this eludes me, but from testing, it seems it swaps back and forth between "temp walk" and "1/2 temp walk" every time you land from a fall.
Jumping and Landing
Jumping after bouncing from a ground pound results in a higher height if you hold the A button all the way. However, you cannot use ground pound again until you land. Landing prevents you from jumping until your partner does a crouching animation. Since it often takes quite a while framewise for it to happen, this makes ground pounding usually the preferred method to scale up platforms. That crouching animation doesn't seem to happen at all in moving platforms, which means you can jump as soon as you land on one.
Character Swapping Oddities
Using the "L" button, one can swap between 2 characters of the 4 available. Each time you swap, whatever momentum and walk status is carried over to your next character. With the right timing and circumstance, you can cause some glitches to appear.
Quick Swap
If you look at the memory addresses, you can see that each time you swap, you won't move until your partner is in the same X position as you and vice versa. This makes it so that the closer your partner is to you, the shorter it takes to swap between them. One way to do this is by jumping or falling, which drags your partner near you.
Forcing your partner away from you
When you move, your partner also moves, but after ~7 frames. By moving for 1 frame, then swap right before your partner moves, you can preserve your partner's momentum so that the partner character will move an extra bit. However, its use is limited, since as mentioned before, the further away your partner is, the longer it takes to swap.
Walking in midair
Not only is momentum preserved, but your walk status is also preserved, so by swapping while walking off an ledge can allow you to walk again. However, this cannot be used to cross very large gaps, since you cannot gain upward momentum at all; you'll still continue to fall, but keep the walking state. Also note that moveable platforms pause during the swap, but enemies on screen don't. This limits most of it's use to clipping and saving time from using Mr. Krab's/Sandy's team move.
Bubble Blowing with anyone
Have Spongebob and press "B" + "L" simultaneously. As long as "B" is held, the swapped character will continue to charge the bubble. It's only useful if you needed an character's moves while also planning to use the bubble.
Faster Screen transitions
The screen only begins to fade away after your partner has reached a certain point pass the force walk region. You can jump or fall to bring your partner closer to you, and in some screens, even clip into the floor to quickly get both of you to the next screen.
Clipping
The game itself is very easy to clip through objects temporary. In fact, each time you jump, you occasionally cause a frame of lag upon landing as the game ejects you out of the floor. But sometimes, the game fails to clip you out correctly, and you end up getting pushed very far away, sometimes even breaking the game.
Clip with Sandy/Mr. Krabs team move
By using the walk in mid air trick to get yourself slightly below a ledge, you can get yourself into the floor by simply using the team move and going back to the ledge. The downside is that the move takes quit a while to setup, and there's no way to force yourself back to where your partner is in case you get stuck.
Clip with Sandy/Spongebob team move
Similar to the above, but with the main difference in that not only is it faster, but if you play as Spongebob, using the team move can force you back to Sandy's location. A warning is that using the team move while too far away from the screen softlocks the game, which means you may have to scroll the camera a bit by walking towards a wall for a while before you can use the move again. Also, due to the force move behavior of the move, this can allow you to go off screen if Sandy is also offscreen.
Clip with Kelp
The Kelp plants have a small opening at the top that allows slightly clip into it from above. Using Sandy/Mr.Krabs team move while within the kelp oddly enough, pushes you to the left rather than the right like the other clips. This unfortunately makes it unused in the run.
Clip with cutscene
A cutscene occurs when an event is triggered, such as collecting all medallion parts, pushing a button, having plankton step on a pin, etc. When the cutscene is triggered, whatever momentum you had will be preserved, so that you are able to move immediately afterwards, instead of stopping for ~3 frames. While normally impossible to abuse (the medallion cutscene is triggered immediately, the button's delay is too short), the last one is caused by a walking NPC instead. This allows me to quickly die by clipping through the floor; allowing Plankton takeover Alantis and start his business dealing with Alantian fast food. But hey, the credits still roll regardless, so it's alright.
Clip with force move
Everytime you get to the end of the screen, you are forced to walk right as the screen fades away. Once again, your momentum is temporary conserved; although why it does I have no clue. Normally, this doesn't have any effect on the run other than wasting time. There are 2 areas however, that has a ceiling close enough to the ground so that the preserved momentum would push you slightly into it. That often doesn't matter, since the game would usually proceed to push you to the far lower right of the platform (if exists). But since you initiated the stage transition sequence, you get forced the game to push you alot further down. This drastically cuts the time it takes to fade the screen away.
Sprites
The sprite's absolute position is a 4 bytes signed value that includes the subpixel while a 1 byte signed value gives it's relative position to the camera. There are Projectiles, Objects, NPCs, and Pickups. They all follow the golden rule in which if it isn't on screen, it doesn't exist. However, Objects are quite different, in that while they cannot be interacted with off screen, they still move (unlike the rest, which simply stand still). To interact with them again, the camera must scroll so that the object becomes visible again.
Limits
Due having a very low limit on how much sprites the screen can contain, you may notice things start replacing one another, or sometimes even disappear. In fact, using the lua overlay script, you'll see that every now and then, something get's pushed to the edge of the camera for a single frame during lag.
While this is usually unnoticeable (due to not even going to where ever the enemy was supposed to be), it is prominently abused in World 2 while freeing Sandy, where an Alantian guard gets glitched out of existence to save time.
OffScreen Actions
Going off screen can have a variety of unintended effects on gameplay. Here's what's been noticed:
- Using Sandy/Mr.Krabs team move softlocks the game
- Same applies to Sandy/Spongebob
- Spongebob/Patrick team move works
- Character Swapping works
- Same for switching with a booth
- Position of the partner is preserved if using a booth
- Using "L" to swap characters may take a long time
- The pin doesn't work on Plankton
- Projectiles such as bubbles don't have any effect while done offscreen
- If a cutscene made it offscreen, the projectile will remain once on screen. Otherwise, it cease to exist
- Barrier objects such as automated doors and kelp can be bypassed
- Barriers such as breakable floors still block your path and can be broken. Steel walls on the other hand cannot be broken due to Sandy/Spongebob's team move softlocking the game offscreen
- Spiked walls/floors can hurt you
- Pickups retain their frame of animation and speed
- They don't "exist" offscreen, so they cannot be interacted with
- Moving platforms will continue to move regardless of being offscreen, but cannot be interacted with
- Enemies don't "exist" offscreen
- Buttons can be pressed; Will only activate once on screen
- Can make you get stuck to the button however
- Enemies can potentially be hit multiple times with the same fully charged bubble
- Screen transitions work
- Taking damage is fine
- Falling to an abyss still works
Lag
Lag can be caused by too many sprites on screen, the game pushing you out of a block, or loading an area/interface. Lag reduction in this run is mainly used to avoid slowing down a moving platform, or simply saving a frame or so. Most lag can be eliminated/reduced by simply jumping at the right time and height, said jump could also cause lag as the player's Y position causes the game to push you out of the floor/platform.
Going inside a character swap booth can also cause reducible lag. Staying still/entering at different frame may reduce it, but sometimes it does nothing or the frames saved is not enough to balance the delay. The most blatant example of me doing so is at world 3, since I needed to swap to other characters and I failed to make it to the moving platform and had to wait anyways.
A way to check whether or not an extra lag frame has appeared is to always make sure your input for character movement is at the last possible frame upon the start of a screen. That way, all you need to do is remove 1 frame using VBA's delete 1 frame option, and see if your character is moving on spot. If it isn't, then it's probably desynced.
Difficulty Differences
This game contains 3 different difficulty settings; the default being Easy. Screen layout and enemy placement is the same, with differences being how much health they have and certain aspects of minigames.
Health
| Enemy | Easy | Normal | Hard | Invincible |
|---|
| Jellyfish | 2 | 2 | 4 | 6 |
| Purple Jellyfish | 4 | 4 | 6 | 8 |
| Big Clam | 6 | 6 | 8 | 10 |
| Squid | 6 | 6 | 8 | 10 |
| Purple Thug | 6 | 6 | 8 | 10 |
| Brown Thug | 6 | 6 | 8 | 10 |
| Giant Jellyfish | 6 | 6 | 8 | 10 |
| Royal Guard (Melee) | 6 | 6 | 8 | 10 |
| Royal Guard (Range) | 6 | 6 | 8 | 10 |
| Royal Guard (Tank) | 6 | 6 | 8 | 10 |
| Royal Guard Commander | 10 | 10 | 14 | 18 |
| Royal Guard Commander v2 | 14 | 14 | 18 | 22 |
| Plankton (Tank) | 20 | 20 | 20 | 20 |
| Plankton (Giant) | 10 | 10 | 14 | 18 |
Minigames
While Invincible setting normally is unaccessable until one has beaten the game, by using the password system and setting the 2nd symbol from the left to Mr. Krabs, one is given the option to chose at that difficulty on a new game.
- Underwater Mozart - Different music, along with order and number of notes:
- Easy - 178 notes
- Normal - 210 notes
- Hard - 264 notes
- Invincible - 0 notes; Softlocks the game
- Gold Rush
- Bubble Catcher
- Easy: balance: 18432; minutes: 5
- Normal: balance: 10240; minutes: 4
- Hard: balance: 6144; minutes: 3
- Invincible: balance: 18432; minutes: 5
- Alantis Fighter
- Easy: 2 Full Medallions
- Normal: 3 Full Medallions
- Hard: 4 Full Medallions
- Invincible: 2 Full Medallions
An interesting aspect for this game is that there's no definite "levels" for this game. Instead, it's 3 large worlds, with screens that lead from one screen to another until the boss. To replace the level aspect, instead, each world has a bunch of goals that you must complete to progress more of the game. Everytime a goal ends, you get a password screen, which is used to continue at that point in a similar fashion to Spongebob Squarepants Movie: The Game.
World 1
Overworld
Frames: 1230 - 1930
Now, you maybe wondering why I didn't just used the password system and enter the default code (8 Spongebobs) to skip the first 2 cutscenes and simply change the difficulty level. That's because technically, it's skipping parts of the game. If you entered Spongebob's pineapple home and pressed "A" next to the bed, you'll get a password screen that corresponds to how much progress you have done so far. The 8 Spongebob's is the code you start with, so it won't exactly be a new game since that would be equivilant to me starting a game, creating a savefile, then reset and start a TAS from that point. Skips creating the savefile, but not exactly starting a "new" game.
With that out of the way, the only other thing I would like to note is that this is pretty much the only part of the run where the dialogue boxes can't be skipped with "Start". Holding "A" until the dialogue appears and letting go is apparently enough to make the text go faster so that's what I did.
Tutorial #1
Frames: 2198 - 2377
It's completely pointless and wastes a whole bunch of frames. The only thing to note is that health lost over here is carried over to the 1st screen. Luckily, this tutorial is completely optional, so it doesn't apply to the run.
Screen #1
Frames: 2398 - 5856
This screen is very lag prone; you can gain a lag frame by just idling. To make it worse, there's 2 moveable platforms right above where I start. This required me to manipulate my jumps and bubble blowing so that I would land and kill off the jellyfishes lag-free. Although I did ended up getting 2 lag frames trying to get madallion parts 2&3; both of which may possibly be avoidable. The only other way to improve this is to somehow make it to the platforms in time, but that would mean at least 100 frames must be saved to do so., which seems highly implausible. Lag 148 doesn't seem avoidable though.
Since I'm forced to wait for the platforms anyway, I deliberately took a longer time to get the first 6 pieces. This wastes no time as mentioned above. During the waiting periods, I continuously pressed "Left", "Right" so that I won't lose momentum. Any time you stop pressing a Left/Right on the DPad, you lose your "walk status" and will take at least 3 frames to start walking again. The only thing left to note about this is that your horizontal speed is constant, and corner boosts only work for vertical positon.
Oh, and this is the first section where I use a fully charge bubble to damage the purple jellyfish 3 times quickly. I believe it has something to do with it being offscreen affecting it's invulnerabilty period, but I'm not certain.
Screen #2
Frames: 5879 - 7193
The falling rocks here all run on a seperate timer that stops randomly before the rock drops. The main way to manipulate the falling rock's timer is by having it appear on screen while being at a different distance (Both vertical and horizontal). Delaying it's appearance also work, but that tends to waste more time (like in this case). Unfortunately, it seems that jumping while the screen is filled with sprites inevitably creates lag on landing. That, and since I'm going to land on the 2nd open clam shell to drop off the ledge faster anyways, so taking the top path is faster.
A final comment is that the jellyfish I landed on frame 6647 was annoying to bounce and land without causing lag. The bell dropped by the last jellyfish was ignored since jumping would've caused a frame of lag.
Screen #3
Frames 7216 - 8254
After I broke the first platform, you may notice that I briefly went off the cliff and turned back. That's to cut the time it takes for me to lose the "walk status" I mentioned above, since it seems using groudpound a frame before it happens causes the jump animation to be skipped. I managed to avoid landing on the purple jellyfish by being on the ledge before quickpounding the platform below so it appears later (and subsequently moves later too).
You may also see me deliberately bumping onto ceilings. That's to land faster, which allows my partner to do that crouching animation so I could use groundpound again. Said groundpound landed me on the clam, which I couldn't seem to manipulate to move away, nor skip it without losing too much time, so if anyone can, that's another way to possibly improve the run.
At frame, 8016, I sadly had to waste a frame since it seemed I made my walking time halved for the final ledge, and if I forgone jumping, it would take a lot longer to get the screen to fadeout.
Minigame: Underwater Mozart
Frames: 8893 - 19184
This is pretty much like your typical DDR-esque game, except with 3 buttons and it's varient of rules. For the sake of this TAS, it's also the first obvious difference between difficulties. Hard Mode contains 264 notes that appear in a deterministic pattern, so I abstain from getting a perfect score to do something....different. ;)
This by the way, is also the reason why I didn't use the password screen to allow starting with the "Invincible" difficulty setting instead of hard; this minigame is simply unbeatable because the notes never appear.
Screen #4
Frames: 19403 - 20775
This screen is where I showcase upgrading health, much more visible corner boosting, and that sprite limit property I mentioned a while back. In a TAS, it seems only the corner boosting gets used often; health upgrades are pretty much ignored and I believe the sprite limit mostly had a visual effect except for that 1 screen with rescueing Sandy in world 2.
Why are health upgrades ignored? That's because of this:
| Level | Health | XP |
|---|
| 1 | 64 | 0 |
| 2 | 72 | 100 |
| 3 | 80 | 300 |
| 4 | 88 | 600 |
| 5 | 96 | 1000 |
| 6 | 104 | 1500 |
| 7 | 112 | 2100 |
| 8 | 120 | 3000 |
| 9 | 128 | 4000* |
[*]Caps at 4096xp with 128 hp
Since each bell gives 5 "XP" to the upgrade bar (10 if from an enemy), this makes it impossible to gather all those bells without wasting far too much time. Although if anyone really wants to have maxed health, change the first 2 icons in the password screen from Patrick to Spongebob. :P
Screen #5
Frames: 20799 - 23828
The goals of this screen in a TAS is as follows:
- Activate the moving platform ASAP; Lag is ok as long as the frames saved outnumbers the ones lost from doing so.
- Get to the moving platform in the least amount of lag frames. Just like the first screen, you won't be able to make it to the platform in time, so it's better to use a longer, but less laggier (preferably lagless) way of traverse.
- Groundpound in midair and hold "A" to get to Mr.Krabs faster than by simply jumping.
Now, there's something important about Mr. Krab's cutscene (and yes, I know it's not exactly a "cutscene", but that's what the game refers it as). Depending on when you talk to him, you can potentially manipulate enemies in the next screen without losing time! I'll elaborate the next room events more later, but in the case of this section, it seems the path I took is either lagless after Lag No.397, or will continue to lag depending on when I talk to Mr. Krabs.
Unfortunately, you can't talk to Mr. Krabs too far away, so you are limited in what you can affect. Luckily, that didn't have much of an impact for me except for relinquishing a chance to show off the sprite limit again at the next screen.
Screen #6
Frames: 23851 - 25509
This was tricky to get through. I needed the following to occur:
- The Brown Thug to either miss, or have it's attack miss
- The first squid to attack at a point where I can bounce to X: 87040 and still be able to groundpound
- The second squid to either not attack, or attack early/late enough to miss
If the first squid is left alive, then after breaking the platform, there's a high chance of massive lag along with landing on the first squid. The sprite limit I mentioned last screen occurs when the brown thug throws a projectile at you just as first squid dies. The shell appears, but the projectile's sprite gets replaced by the shell's. I wasn't able to pull that off, but it doesn't really matter since it has no effect speedwise.
For the purple thug, it is faster to use glitch the bubbles than to wait/jump on/groundpound him. Waiting only delays the problem since after you press the button, the thug continues to move during the cutscene. The unfortunate side effect of this is that he'll appear below you after the scene is done, so you are forced to kill him regardless. Jumping takes too long due to the bounces, and even if you swap characters to bounce on him several times, it still takes a bit of time. Groundpound's case is the same as jumping's first flaw.
Now, you may be wondering why I took the time to activate the platforms instead of simply partner swapping my way there. That's because the platforms WON'T appear until you press the button. Since the midair trick doesn't allow you to gain any height, that means I would be stuck there. Oh, and dying respawns you at the last entrance which means the museum entrance.
Screen #7
Frames: 25532 - 27161
The first groundpound was there simply to wait for the purple jellyfish to be at a bounceable height. Landing instead would've took too long due to being unable to jump again until Patrick's crouch animation is played.
The purple jellyfish I landed on frame 26180 was very prone to causing lag simply by bouncing on it at different heights. It was tricky trying to not only avoid lag, but also bounce high enough so that I would land on the normal jellyfish afterwards.
I had to waste ~2 frames just to be able to have both the jellyfish and the giant clam get hit by the same fully charged bubble. If I didn't, the clam would still have 1 health remaining and hurt me before I can kill it.
This entire screen only lagged once due to careful timing of both jumps and bubble blowing. The only downside to this is that it makes it somewhat unhexeditable due to different timing needed.
The final thing to note here is that during the enemy's invulnerablity period, you can move past it safely. That's how I went past the jellyfish at frame 26908.
Screen #8
Frames: 27183 - 31322
The groundpound done at frame 27365 was done because jumping alone doesn't give enough height to reach the stairs. The next two however, were done to substitute the inability to jump immediately afterwards.
If you're wondering why I didn't simply land on the furthest button then quickly land on the other one, it's because buttons don't trigger until it's onscreen. I needed the brief moment to switch to Spongebob since this is the closest he is with Patrick.
I gave Patrick a bubble using one of the character switch glitches I mentioned and used it to kill the jellyfish. The bubble I blew at frame 29011 is to stop the jellyfish from hitting me on the way back to the golden spatula.
A possible improvement for this screen would be at lag frame 466. No matter what I did, it seemed unavoidable, but I have a feeling that it can be eliminated.
The purple thug at frame 30455 must be moving to the right, or else you'll either be forced to kill him causing lag) or ignore him and end up having him block the way down.
After grabbing the golden kitchen tool, I was able to start blowing another bubble while retaining the one I had. I used this to decimate the 3 purple jellyfish in my path down.
By the way, the landing on frame 31265 has no effect on speed. It was done on purpose to throw viewers off a bit. The screen still fades away as fast as possible.
Screen #7 2nd
Frames: 31345 - 31930
This was one of the instances where early input is detrimental to the run since it caused lag if the DPad wasn't pressed at the last possible frame. It doesn't seem to be the case in this version of the run, but it's something future TASers should be aware of.
The ground pound at frame 31480 was done for the same reason the first groundpound was done in this screen before. Oh, and bouncing on the jellyfish afterwards is faster than simply killing it and drop down, even if it doesn't seem like it.
The last thing to say is that the brief turn in frame 31789 was done so that the force move area wouldn't clip me into the ground (causing a lag frame if it did). Again, this saves time despite not appearing so.
Screen #6 2nd
Frames: 31953 - 32874
As you can tell by now, there's no actual "stage" in this game; hence the need to describe the run by screens instead.
Since bouncing after a groundpound achieves greater height, it is used instead of a jump to get to the platform. This saves 1 frame compared to said jump.
I tried to kill those jellyfish ahead using only 1 bubble, but I wasn't able to find the right frame and direction to blow the bubble to do so. It has no effect on the run, but it would've been a bit more entertaining to do so. :P
Screen #5 2nd & Tutorial #2
Frames: 32898 - 36495
The first 3 jellyfish was a pain to get through since shooting too much bubbles causes lag and so does revealing too much of the section above. While I managed to pull it off without losing frames, I wasn't able to KO the next jellyfish with a single bubble (Again, no effect on the run speedwise).
This time, I don't waste as much frames getting to the top since I'm able to make it to the platform earlier. One thing I would note is that while scaling up the platforms via groundpounding, you can actually do so 1 frame earlier. It creates 1 lag frame while making you land at the same frame as the current run, but with the added effect of pushing you slightly higher relative to the camera. It has no use in this run, so it wasn't used.
For the tutorial, an interesting note is that entering the change booth and back out would change the value I used to determine when the lua script display should appear. I'm not sure what good this would lead to, but when the heck would I ever mention it otherwise?
I used 2 bubbles to kill 2 jellyfish. I had to move the screen a bit for the 2nd jellyfish to die, but it doesn't really matter since I can't enter the booth any faster.
For the character booth, you can move the select arrow 1 frame earlier than selecting your 2nd character, but for this case, I selected Mr. Krabs first instead of Patrick simply because he can attack higher. Patrick's tongue sweeps from bottom to top while Mr. Krab's claw is at the middle, so the jellyfish right after could be dealt with faster. Oh, and in case you're wondering, the team special move used to cut kelp is equally fast regardless if Patrick is first or second; Both would take 93 frames to chop down.
The minor wait at frame 36020 looks kinda bad, so I hope the glitch at the end of this screen makes up for it. :P
Screen #6 3rd
Frames: 36518 - 38457
The tunnel I just came out from doesn't seem to allow me to glitch in like earlier. Once again, this has no use in the run, but there's no other place I would actually mention that, so....
For the first purple jellyfish that appears, timing when to attack is very important. The enemy invulnerability period I mentioned a while back comes in play once more; this time it causes any ongoing attack started before it became vulnerable again to have no effect whatsoever. In other words, attacking early on with the tip of your claw would make no difference whatsoever since you'll still have to wait a bit before you can attack again. Oh, and when I start moving again, the walking sound was sped up for some reason. :o
Killing the purple jellyfish before Sandy was another annoying section to do since bubbles cause lag depending on when it was blown. I ended up with 1 frame of lag much to my annoyance, so that's something future TASers can try to improve on.
Screen #7 3rd
Frames: 38480 - 40306
From the beginning all to way to the change booth, it's basically the same input as the first time I was here except when the bubbles are shot. Any possible improvements should apply to here as well.
I shoot the purple thug to stay away a bit so that I can bounce on him instead (due to the lack of groundpound). Also, the jellyfish is killed this time with Mr. Krabs.
Screen #8 2nd
Frames: 40328 - 40855
As you could tell, this shares the exact screen as the golden spatula, which means if a clipping glitch could be found, then the Giant jellyfish could possibly be defeated earlier.
Boss: Giant Jellyfish
Frames: 40873 - 43683
I delayed my first attack since doing so at the earliest frame possible would cause it to hover in the middle for another 100 frames. When it's moving towards you though, it won't pause even after being hit.
The boss's attack can be manipulated by standing at a different X value, and I made it use a rather long bolt attack to respawn the lamps with the lever at the bottom.
I drop the 3rd lamp this time as soon as possible to buy myself some time to get away. I then manipulated it to do a longer groundpound (as opposed to the one that causes it to simply bounce back up) and use that time to respawn the lamps once more.
At the last hit, the jellyfish would always float towards the middle, so a possible improvement would be having said boss be closer towards the center. Oh, and if Mr. Krabs landed on the platform afterwards as opposed to the floor immediately, it would cause a frame of lag.
Screen #8 3rd
Frames: 43705 - 44031
Remember when I said "possibly be defeated earlier" as opposed to "certainly"? Well, that's because the kelp here would not go away by itself unless it's cut. So unless I find a way to bypass this too, then after the Jellyfish boss is defeated early, I would be stuck here.
Screen #7 4th
Frames: 44054 - 44640
Better timing and attack allowed me to go through the purple jellyfish without delay this time. I killed the normal jellyfish to add variety to the run but still needed to jump off the ledge anyways.
Screen #6 4th
Frames: 44663 - 46032
I can't groundpound this time, so I had to wait a bit before jumping to the platform. I was also unable to kill all of the jellyfish ahead. Finally I had to wait for the purple thug to move away due to the lack of a downwards attack. That is still faster than jumping, however.
Before you ask why I didn't simply swapped away Patrick with Spongebob to jump very high with him and Mr.Krabs, that's because it's not high enough to skip the brown thug. Changing also too long for it to be helpful here.
Minigame: Gold Rush
Frames: 46394 - 50884
This....is an interesting minigame. By interesting I mean there's technically no end to it whatsoever; as long as you keep grabbing gold tokens, you can play forever. The only way to end it is to run out of time determined by 0x03004998 and 0x030049B2; the former being a counter that loops to 0 after 31, and the later that counts down from 160 everytime 31 is reached. Any coin missed (including plankton coins) will immediately lower 0x030049B2 by 8 (without affecting 0x03004998). The reverse only occurs when a gold coin is grabbed, however.
Plankton coins contribute nothing at all; not even a penalty (except if you miss it). For some reason, the first coin always seems to be the plankton one, so I had to quickly turn it gold by blowing bubbles at it. That gives me points, but it's not important towards passing this minigame.
What is important are the number of coins. It seems all difficulty settings need at least one of the following requirements fulfilled in order to get a "B" rank (minimum rank to pass):
- 25 bronze
- 17 silver
- 10 gold
Oh, and since the coins won't fall again until the ones on screen are gone, I had to manipulate all of them to gold. Luckily, pausing at different frames changes what you get (so does delay grabbing the coin, but that slows the appearance of the next coin). Even after getting 10 gold coins, I still needed them to appear since they fall the fastest. Unfortunately, it seems the first coin that appears when 2 coins fall at once is yet another unavoidable plankton coin.
Tutorial #3
Frames: 51147 - 51326
The final tutorial you'll see in this TAS; the only reason I'm making a section for this is because I would like to point out if not for this area, the run would technically have 2 minigames in a row back to back without ever going to the field. With the tutorial over, world 1 is done.
World 2
Overworld
Frames: 51339 - 51604
World 2's overworld section is very.....underwhelming. The only 2 NPC's here allow you to replay the tutorials, and the bubble gives the password screen. Immediately after this is another minigame, so let's talk about that instead.
Minigame: Bubble Catcher
Frames: 51965 - 57330
Contrary to what the name implies, the bubble doesn't fall (it's gameover if it does fall), and there's nothing to catch. A more correct name would be "Bubble Balancer" or Stablizer, but hey, I'm not the one making this game. This minigame runs at a fixed length, but with the added bonus of being able to lose time.
The game works like this: The orange bar at the top must be filled up all the way before time runs out. 0x030038F8 controls the top value and the game ends once it reaches 35840. The value increases every 80 frames, dtermined by 0x03003932. There are 3 "regions" per side; the extreme ends being the parts where 0x030038F8 decreases and the section in between the middle and the ends being the sections that doesn't affect 0x030038F8. Everytime you enter a different region, the timer resets, so I'm limited to the middle of the screen. Since this is boring as heck to watch, I tried to add some entertainment by having the characters move their arms to the music. It doesn't help much however.
Oh, and due to the rank being determined by how much time remains at the end, it's impossible to achieve rank S in Hard mode. However, rank S is possible in Invincible mode. I have no idea why they came up with this.
Screen #1
Frames: 57718 - 61118
The order I chose is Spongebob and Sandy for 2 reasons: The first being that due to somewhat different mechanics regarding the 2 characters (or maybe some other reason), using Sandy would actually force me to either move back slightly to extend my temporary walk, or swap twice. The 2nd reason is because I need to give the bubble to Sandy to kill the Jellyfish. Swapping twice (and by extension, using Sandy first) would lose time in this case since I need to be using Spongebob to give the bubble to my partner.
You might be wondering why I didn't simply glitched at around frame 59083 instead of the long detour displayed in the run. That's because if you go to frame 60999, you can see that there's a small hole above that would block my way if I'd glitched into a wall.
One more note is that the switch at frame 60411 is necessary to move me even further offscreen so that the barrier at 60580 would not impede my progress.
Screen #2 (Spongebob/Patrick Event)
Frames: 61142 - 64013
This is the first team event of the game - a pretty straight forward obstacle course. I would point out that since world 2 is the only world to have these events; it takes longer to complete compared to the other 2 worlds.
With that out of the way, this event is quite simple to pass; in fact, it's actually possible to finish it with the minimum amount of air. Given that this is a TAS, the problem is instead to exit the bubble as soon as possible. That's achieved by moving to the right at around frame 63369 to get the bubble to reach it's destination and pop sooner.
One more thing, before you ask, it's not possible to take advantage of damage/corner boost here since that would require something to push me upwards, which doesn't exist (everything here seems to push me either to the side or downwards). As a result, the damage done at frame 62825 was an entirely aesthetic choice for the sake of variety.
Screen #3
Frames: 64037 - 66474
I switched to Mr Krabs first rather than Sandy for pretty much the same reason as before, and because Mr. Krabs can damage the jellyfish at frame 64810 without losing time. Why not Sandy? Well, that's because Sandy's karate chop only has no effect on speed when done in midair. Otherwise it makes you stop for a bit at the end of the attack. Since jumping would cause me to stop a bit (so I wouldn't fall to the pit) Mr. Krabs was chosen over Sandy.
I'm forced to move back a bit starting at frame 65267 so that I could land on the silver platforms seen from frame 65700 onwards.
The only tibit to add is that while using Spongebob/Sandy could potentially be faster, since the next room is a team event for Mr. Krabs and Sandy, unless the improvement is over 200 frames, then I would be wasting frames.
Screen #4 (Mr.Krabs/Sandy Event)
Frames: 66498 - 69894
Swtiching to Mr. Krabs at the beginning rather than having the game force you later is faster due to the close proximity of your partner.
About this team event, you are forced to do it since even if you glitched past the firewall, you'll find a 2nd firewall on the otherside blocking your path to the button. Unless a clip with Patrick/Sandy is found, then there's no way to reach the button whatsoever.
This course was a pain to optimize, and despite my efforts, I have a feeling it could still be improved. One thing I noticed was that there are specific frames that when you break the barriers, you don't lose as much horizontal/vertical position compared to other frames. Also, there might be a way to manipulate Mr.Krabs closer to the button at the end of the course without costing time, but I'm not certain.
Oh, and the slight delay at frame 69692 doesn't waste any frames due to the inability to jump again until my partner crouches.
Boss: Royal Guard Commander
Frames: 70033 - 71673
All NPC's have the exact same defence, and this battle pretty much demonstrates the flaw behind it. While the commander is neigh invincible during standby and while he attacks, he could be damaged for a brief period of time after he strikes. I simply used the strongest move available to Mr.Krabs/Sandy, and kill him in 3 hits.
I do give credit to the developers though; The commander could only be damaged once before becoming invincible again, so tricks like hitting him multiple times with a bubble doesn't work during this battle. Not that it really matters as you can tell. :P
Minigame: Alantis Fighter
Frames: 71907 - 79187
Ok, this is the last minigame you'll see in this TAS! Don't worry though, there are several more team events to make up for this fact.
Sarcasm aside, the goal here is to get all the medallion pieces by killing guards. The pieces are always dropped at the 3rd kill, so all luck manipulation here is for the enemy attack patterns instead. The spawning is also deterministic based on some kind of timer, so the only thing you can affect is how close to you in relation to the camera they spawn (all of them spawn at the same distance away from you, just that if you are to the sides, it'll take a while for them to walk back onscreen).
All your normal attacks do 2 damage, with the flying kick at the end doing 3. Using your special attack increases all your damage done by 1 (along with your run speed, but not attack speed). Since all guards have exactly 20 HP each, it's tempting to just activate your special as soon as possible. However, you are bound to 3 limitations: The first is that the special runs on a timer, the 2nd is that it takes 100 frames to activate, and finally you also need to recharge fast enough so that you can activate the special at the very end.
While the first 2 reasons are self-explanatory, the third one is related to a glitch with the boss; as you can see at frame 77848, the transition to the boss is poorly implemented. All the fadeout does is remove the guards from the screen while keeping whatever you were doing. By taking advantage of this and forcing myself past the boss's spawn point, I could attack said boss before it completes it's arrival.
Since your special meter (and health) doesn't deplete during this period, this battle becomes quite one sided. A consequence of this glitch is that you cannot activate it during this time, so it must be done before the boss fadeout.
The first hit to the commander was purposely delayed so that all my subsequent attacks would reach it. Before you ask, while I can attack even earlier to stop the bar from going up, note that the boss's health still starts at 126 regardless, so it's only a visual oddity.
I move him to the side of the screen at frame 78514 to bring him back down so that he could die correctly. If his health reaches 0 whilst in midair, he becomes invincible, and the battle would never end.
Oh, and using the specials during the medallion collection phase saves 100 frames as opposed to using only at the end.
Screen #5 (Mr.Krabs/Patrick)
Frames: 79526 - 87155
The jump at frame 79991 reduces lag for some reason. Also, starting with Patrick is faster due to removing the need for the game to force swap you.
This event is a breakout-esque course with the addition of the Alantian guards arriving every once in a while to spawn a brick starting at the far left hand corner of the first available empty spot. Attacking the guard cost 10 frames, but since I couldn't seem to utilize said guard's brick spawns, I had to kill them. The pattern of the bricks, along with the guard's appearances seem to be set, so there's no possible manipulation for them.
Oh, and there's no way of speeding up the bouncing animation, only the bounce itself. Most of the frames saved is due to moving a bit to the right as the last block is smashed, allowing me to reach the next sections faster.
Screen #6 (Mr.Krabs/Spongebob)
Frames: 87178 - 87737
I can't do the event without Spongebob, so I'm forced to move to the next room to switch. One thing to note is that this screen is incredibly lag prone, so without those jumps, I would end up wasting quite a bit of frames. The frustrating thing is that the jumps are very specific, which means this room is usually unhexedit-able.
Screen #7
Frames: 87764 - 88509
Changing to Mr.Krabs first is faster due to the same reasons as screen #5. While I would love to find a way to noclip to Sandy, unfortunately, there's a barrier to the right of her, so I'd be stuck if I did (Kinda like how an early Giant Jellyfish battle seems unlikely).
Screen #6 (Mr.Krabs/Spongebob) 2nd
Frames: 88532 - 91027
Autofiring "A" is not beneficial here. The optimal solution is to press "A" 2 frames before the "A" button appears above their heads. Also be sure to constantly move after the end of the sections, or it won't carry over to the next. You also need to take account of your partner's position so that the section events can start ASAP.
As a sidenote, staying in the middle is the fastest. Who would've known, eh?
Screen #7 2nd
Frames: 91054 - 98888
Jumping at frame 92153 before doing a special is faster than the other way around. Also, I delayed a frame after said special so that I wouldn't get hurt by the axe. If I did the special further back, it would cause lag from the guard's attack.
On frame 92617, even though I'm at a moving platform, I could abuse the temp walk status to use a special move as long as I'm not on said platforms. I had to shift around a bit so that I don't need to walk to my partner.
Since you can jump off moving platforms without delay, I landed on the guard at 93043 to get on the platform earlier (rather than waiting a bit before doing the special).
That first jump with Patrick is very frame specific, as I had to not only avoid landing on both the platform and the guard, but also land without lag. The same applies to the jump at frame 94558.
I hit the tank seen in frame 94970 to move it back a bit so that I could groundpound. I abstain from killing the tank due to lag.
As you can see at frame 95137, this screen has a lot of sprites to the point of graphical glitches occuring. The bubble I let go on frame 95309 seems to have caused the guard that should've appeared next to the red button to vanish for the rest of my time here.
Jumping before groundpounding on my way up to Sandy gets you closer to the floor, so itis faster than simply groundpounding.
Changing into Spongebob/Sandy at 97832 is faster than changing on the booth above. I then break the steel wall with a special before moving offscreen with the clip glitch to bypass the automated door in frame 98676. I had to jump several times to draw Spongebob closer to me to lower the time before fadeout.
Screen #8 (Patrick/Sandy)
Frames: 98914 - 102153
Starting with Patrick is faster since the event starts once Sandy throws him offscreen. The guard here shoots bullets and cannot be killed, so I simply shoot his plane to get him offscreen.
There's nothing much to say, except that you could become invisible if you got damaged right before the event ends. Oh, and the jump at the very end is still faster than walking to the end.
Screen #9
Frames: 102178 - 103557
Switching to Spongebob first for pretty much the same reason as screen #1. This also manages to save enough frames that the force switch in the next screen won't effect me as much as compared to starting with Sandy. The only downside with the clip glitch in this room is that it pushes me far away from my partner, hence the long wait starting from 103058 just to get the screen to fadeout.
Screen #10 (Spongebob/Sandy)
Frames: 103579 - 107394
The last team event of the game, this has the notable trait in that it's possible to achieve the same time seen in the TAS in a real time playthrough simply because all you need to do is hold the buttons for the next wall as soon as it appears and Spongebob/Sandy would immediately karate chop it. Heck, the only reason why I didn't do that was because it makes it harder for me to check for desyncs if I had to hexedit anything in.
With this screen over, everything later on is your basic platforming sections and boss fights.
Screen #11
Frames: 107421 - 112166
Starting with Patrick is faster since it allows you to hit the switch a bit earlier. An interesting note is that despite appearing slower to take damage, avoid the darts, and walk all the way back to the booth, it's actually faster than falling to the pit and respawning at the beginning. If I respawned, the platform would reset back to it's default position, and I would not be able to change to Mr.Krabs/Spongebob quick enough to make it.
I had to move the camera slightly to the left after switching to Spongebob/Sandy so that the clip would push me far enough away offscreen to bypass the door in the end. I took damage from the jellyfish to bring Spongebob close to me without getting off the platform.
If you wondered why I didn't instead use Sandy/Mr.Krabs to fly past the spikes before swapping to Patrick/Sandy, before swapping back to Sandy/Spongebob, that's because switching via boothes takes time.
Oh, and there's no way to get up the platform from the left, so I had to take the longer detour up.
Boss: Royal Guard Commander v2
Frames: 112306 - 113549
It's very fortunate of me that you are forced to use Spongebob/Patrick, since the groundpound move exclusive to them inflicts 10 damage to foes. You can manipulate the commander by distancing yourself from him. For some reason, since his rollout move doesn't seem to stun him as early as before, I made him do a stabbing hi-jump before smashing his brains. How is he still alive I have no clue.
The stage (and by extension, this world) immediately ends as soon as I land on the key.
World 3
Overworld
Frames: 113686 - 113951
Without even giving you a password screen, you are immediately dropped off to the 3rd overworld of this game. Unlike the 2nd world though, after you beat the game and entered the password shown at the end, there would be some changes. Squidward and Patrick would appear in the middle and let you view the credits and listen to the game's music respectively, while the fountain at the far left is changed so that after displaying the password, it takes you to the title screen.
There's nothing really much to say other than that, so onwards to the final 4 screens!
Screen #1
Frames: 114097 - 116460
Since there's an automated door immediate to my right, I switched to Spongebob/Mr.Krabs to get myself up towards the next swap booth.
Hopping on the guards is faster than doing the special solely due to the long setup period, so the first Spongebob/Mr.Krabs special is also the last special for this team in this screen (and incidentally, the TAS).
I dropped off the platform before jumping back on in frame 115575 not to draw Spongebob closer, but so that the next time I drop off, I would be in the temp walk state. The jumps afterwards however, were for bringing Spongebob closer though.
Note that walking to a wall only moves the screen to the right, not bring your partner to you, so you still have to jump around to do so. The only reason I had to get my partner with me is because otherwise, the swap would take a while to do.
Screen #2
Frames: 116485 - 117540
The platform right above the jellyfish here can actually be reached if you bounced off a groundpound and got hit at the very top of the jump. Of course, that doesn't really matter here, since I simply clipped with Sandy/Spongebob and skipped most of the screen.
The falling glass/crystal orbs forced me to delay a frame or so since there doesn't seem to be a way to manipulate them without getting hurt by the jellyfishes or causing too much lag. So there's yet another potential improvement for anyone interested...
Oh, and a password screen shows up at the end of this screen. I guess they thought putting one here instead of the end of the 2nd world would make more sense. But hey, I'm not the one programming this game.
Screen #3
Frames: 117638 - 126469
First of all, if you went back to the previous room, you'll get stuck. The funny thing is, if you entered that password shown a second ago and did the same thing, you would get stuck as well. Rather odd that noone found that out, but hey, who would actaully ever need to use that password anyways?
Since I had to wait for the moving platform, I purposely messed around for a while. I stood there at frame 118071 for 2 reasons. One is that the ranged guards don't attack you at close combat, and two being that it's to reduce lag upon entering the booth.
Jumping over both the darts and cannonballs while simultaneously avoiding lag and the glass/crystal/whatever balls was somehow easier than it sounded.
After pressing the buttons with Spongebob/Patrick, I chosed to switch back to Patrick/Mr.Krabs now because I couldn't make it to the platform if I didn't, might as well use the time to switch rather than wait. I used their special move to kill the jellies to avoid lag; It doesn't waste time as the platform isn't reachable yet. The same applies to frame 125073.
The last platform moves noticeably quicker than the rest, which means groundpounding off it is equally fast as jumping to the top. Towards the end of the screen, I display the only other force move clip possible in the game; making that the only clip done in this screen.
If you haven't noticed by now, this screen is pretty much the only one in this world that isn't simply glitched away. I blame that on it being a vertical platformer unlike the rest.
Screen #4 (Last Screen)
Frames: 126493 - 127998
While I could jump on the silver platforms to the right of the booth, it seems the top route is slower than the bottom one since it doesn't push me as far offscreen as the latter. By taking the bottom route, it allows me to skip both the kelp and the door without clipping again (which would waste time since I'd be forced to scroll the screen so that I could clip once more).
I clipped at the end since that causes the screen to fade away sooner, despite all the lag it causes. A password screen is then shoved into my face before a new challenger Plankton appears!
Boss: Plankton (Tank)
Frames: 128213 - 131348
Plankton isn't an NPC in this form. He instead has a different address away from the NPC's that dictate his health. I assume it's done so that players couldn't simply 5 hit KO him using specials, but it doesn't really matter given how generous the timer is before he hops back into his tank.
For a TASer, you must manipulate Plankton to popup at the far right to reduce walking time at the end. Also, he can be attacked once every 64 frames exact; you'll know you've done right since after your first attack, all subsequent strikes must be inflicted without ever having his timer go up.
I had a lot of fun doing this battle, since it was quite an interesting challenge to smack him in different ways. I also found out that the tank only explodes once both you and your partner has landed, so the last hit should be done from a lower height than Plankton's.
Boss: Giant Plankton
Frames: 131367 - 132566
Despite Giant Plankton being an NPC, the programmers made it similar to the Giant Jellyfish battle in which only falling objects could hurt it. While that's a smart thing for them to do, they unfortunately didn't seem to take account of what would occur if you fell off a pit in this screen.
When Plankton steps on the pin, a cutscene appears that shows Squidward pushing a heavy stand. Like I mentioned before, this is abused to push me down enough with a groundpound to get out of bounds and die in a hole. This triggers the final cutscene and the credits roll. Interestingly, since the post game doesn't have cutscenes, that means if you were to do this glitch again after you start from the password at the end, you would respawn at the beginning of the battle instead. It doesn't really matter though, since that's not part of the TAS.
After Patrick and Spongebob dies, the rest of the gang bravely drives away from the scene, with Plankton still inflicting hundreds of millions of dollars worth of property damage. The Alatians are seen screaming in the distance, no doubt in saddness at the deaths of our favourite comedic duo after they've brought nothing but joy and happiness to their society as a whole.
RAM Addresses
Projectiles
While I lack sufficient info on this, I do know that they do have a sprite limit, and enemy projectiles usually end up overflowing into the NPC sprites, causing graphical glitches.
NPC
While OnScreen:
Start Address: 0x03005608
End Address: x03005928
Length: 0xA0
| Offset | Size | Use |
|---|
| 0x0 | 1 byte signed | On Screen Bool |
| 0x4 | 1 byte signed | Action |
| 0x7 | 1 byte signed | Health |
| 0x24 | 4 bytes signed | X Absolute |
| 0x28 | 4 bytes signed | Y Absolute |
| 0x58 | 2 bytes unsigned | X Relative to Cam |
| 0x5C | 2 bytes unsigned | Y Relative to Cam |
While offscreen:
Start Address: 0x030052C4
End Address: 0x03005510
Length: 0x1C
Includes the following:
Jellyfish, Purple Jellyfish, Big Clam, Squid, Purple Thug, Brown Thug, Giant Jellyfish, Mr. Krabs, Sandy, Royal Guard (Melee), Royal Guard (Range), Royal Guard (Tank), Royal Guard Commander, Giant Plankton
Objects
Start Address: 0x030038D0
End Address: 0x030042C8 (Not exactly correct, since some objects ended up not appearing in the overlay script)
Length: 0x74
| Offset | Size | Use |
|---|
| 0x0 | 1 byte signed | Y Relative to Cam |
| 0x2 | 1 byte signed | X Relative to Cam |
| 0xC | 4 bytes signed | X Relative to Cam |
| 0x10 | 4 bytes signed | Y Relative to Cam |
| 0x54 | 4 bytes signed | X Absolute |
| 0x58 | 4 bytes signed | Y Absolute |
| 0x6A | 1 byte signed | Timer |
| 0x6F | 1 byte signed | ID |
Includes the following:
Moving platforms, Kelp, Automated doors, Team minigame icons, Character Swap booths, Falling rocks/lava/bubbles, Interactable platforms, Buttons, Pin, Platform that Squidward pushes, Lanterns
Pickups
Start Address: 0x03006094
End Address: 0x030062D8
Length: 0x74
| Offset | Size | Use |
|---|
| 0x0 | 4 bytes signed | X Absolute |
| 0x4 | 4 bytes signed | Y Absolute |
| 0x18 | 1 byte signed | On Screen Bool |
| 0x1A | 1 byte signed | ID |
| 0x2C | 4 bytes signed | Y Relative to Cam |
| 0x30 | 4 bytes signed | X Relative to Cam |
Includes the following:
Bells, Hamburgers, Madalllion parts, Key, Golden Spatula, Alantian Technology
Lua Script
Since there's a lot of addresses to watch, I used a lua script which you can find
here. It's mostly based on MUGG's Wario land 2 one, so thanks MUGG! :)
Noxxa: While the run is technically sound, the game just moves too slow. Accepting for the Vault.