Operation Extreme (Mission Extreme, Destruction X) was released November 8, 2000 on PlayStation and in 2001 UK , 2004 [Australia, New Zealand] for PC. The game featured Action Man, Dr. X, Gangrene and Maxx.
Speedrun comparison
Game Objectives
- Emulator used: Bizhawk 2.8
- BIOS used: SCPH-5501.bin (U)
- Heavy luck manipulation
- Aims for fastest time
- Takes damage to save time
- Abuses programming errors
- Glitch abuse
- Speed/Entertainment tradeoff
- Genre: Action/Shooter
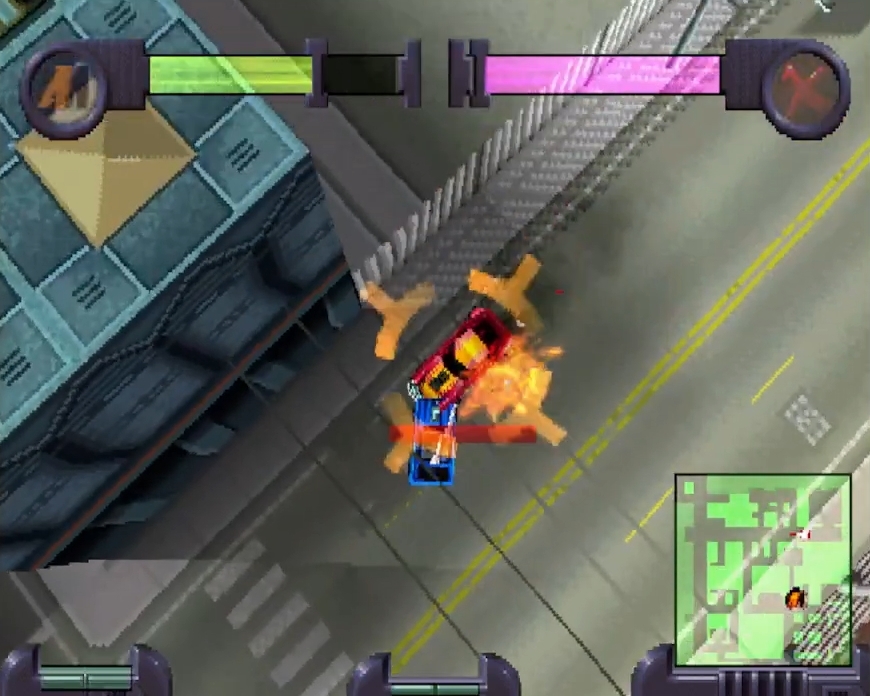
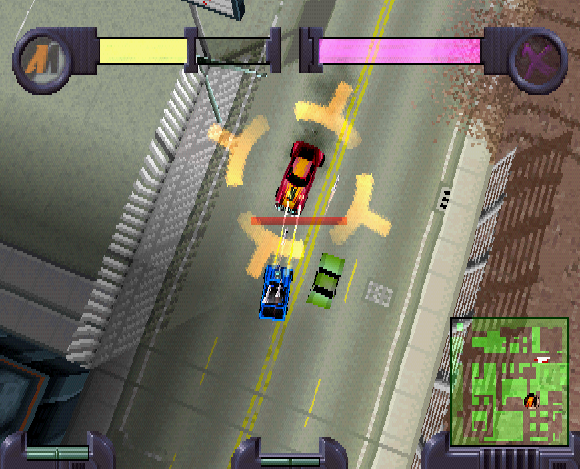
Action Man: Operation Extreme features two different gameplay modes that you switch back and forth from during the course of play. The first is a top-down vehicular portion, where the perspective and controls are quite similar to the Grand Theft Auto series.
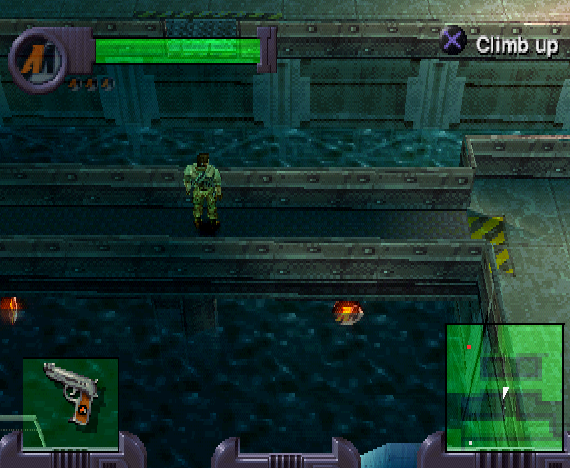
You'll need to chase down the enemy vehicles with your own trusty assortment of cars, motorbikes, and the like, blasting them until they slow down for good. After this, it's on to the third-person action levels, where you control Action Man from behind the back as he makes his way through enemy territory, and must occasionally solve puzzles to get out of whatever predicament he's found himself in this time.
The game's levels feature a myriad of locales, from evil villains' bases to the burning sands of the desert to the arctic chill of the North Pole.
You'll face many of Action Man's most notorious fiends during the adventure. You have a host of weapons, from your trusty hand-gun to automatic weapons and even a sniping rifle.
How i started tasing this game
So Action Man... this game turned out to be much harder to tas than expected. Back in 2022 i started making WIPs of City Streets, the first level of the game. This level needed some major luck manipulation and routing which i initally was able to deal with.
But then after making a new route which would save a few seconds i just dropped it immediately, because of lag appearing in the middle of the level. I know it's weird to drop a tas for that reason and that was just the 1st level, but who knows if lag may appear in the later 2 levels like City Skies and Iceflow? (which it did).
In the middle of 2024 i picked the game back up and decided to just ignore the lag, no way around it. The new route saved 3-4s on City Streets and i was quite happy, but enough of the game for now. The reason i actually wanted to make a tas for this game was to challenge myself.
This game has a bunch of levels where Action Man just goes from point a to point b, uses an item, and then jumps into the next screen. This was easy looking to me and it is somewhat easy to optimize, but the real challenge lied in 3 major levels that are absolutely brutal with optimization and luck manipulation:
- City Streets - The very first level
- City Skies - After ~22 minutes into the tas
- Iceflow - After ~ 48 minutes into the tas
Level Overview:
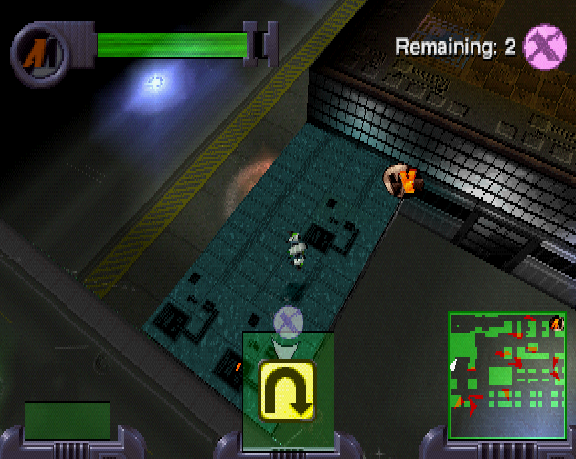
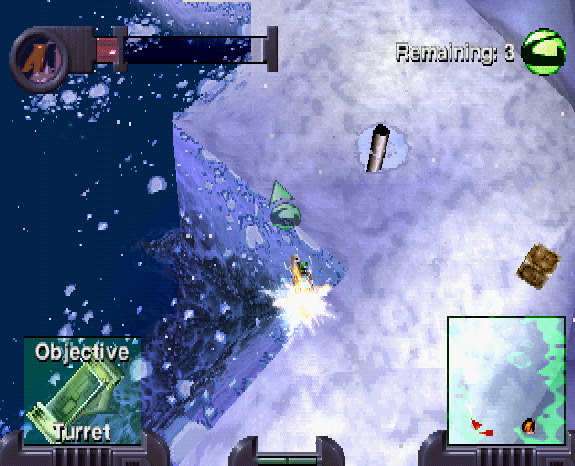
1. City Streets : Action Man's objective is to take out 8 of Gangrene's enemies, collect 20 power points and defeat the Boss Toxica.
2. Desert Base: Investigating Gangrene's secret desert laboratory, Action Man's mission is to neutralize the creation of toxin and create an antidote for already produced toxin.
3. City Skies: Just like City Streets but in the sky, 4 of Gangrene's forces need to be eliminated whilst collecting 20 power points. Speedster is the Boss in this level.
4. Island Base: Dr.X is creating Skullbots for the sake of world domination. Whilst investigating his private island, Action Man gets caught and needs to find a way off the ship.
5. Iceflow: The first task is to collect 20 power points this time, then go underwater to collect homing devices. The Technician needs to be taken care of in order to find Dr.X base.
6. Island Base: Dr.X's base, Action Man must stop his army of skullbots and destroy the power supply to the skullbot central computer.
Controls:
D-Pad: Up, Down, Left, Right, in Overworld levels for normal movement. In Vehicle levels you can hold up to accelerate and down to go backwards.
Cross : Fire weapon , Accelerate in vehicle levels
Square : Inventory , go backwards in vehicle levels
Circle : Jump on the spot, long jump by pressing a directional key, double jump by pressing a directional key and pressing circle twice, brake in vehicle levels
Triangle: Equip weapon, Shoot in vehicle levels
L2: Walk
R2: Change Action Man's perspective and look in front of you, shooting in vehicle levels
R1: Shooting in vehicle levels
Tricks
Movement Tricks
Running
Action Man's movement speed address: 1C12DC in MainRAM only works in Desert Base because of his Uniform.
His full movement speed is 16, 32 if he is long jumping and 48 if he does a double jump. Still, most of the time just running to a location is the fastest method, because after Action Man finished
his long or double jump he will pause for a bit.
In certain scenarios long jumping may be a few ingame-ticks faster than running.
Pulling your handgun
When Action Man is holding his handgun his stationary speed becomes 59, 65 if he is running. That does not mean he actually moves at that speed, its just slightly faster than running, so its important to always have your handgun pulled before starting the screen.
Stuttering or Gliding
Sometimes, Action Man may move a few frames faster after exiting a cutscene while stationary if you let go of a directional button for 1 frame. This also works if he is holding his handgun and after recovering from a jump.
This trick is rare and does not work everywhere, i don't know the reason for this.
Turning around
Action Man does not turn around instantly, instead, he moves in an arch. If he faces for example north and wants to turn around and go south, the best inputs to make are to hold Down + left or either right and after finishing 90 degree of the turn you can start holding
just left or right to turn around faster. This sometimes saves an ingame-tick.
Cutscene
Very often when Action Man enters a new screen the camera will zoom around the level and then snap back to Action Man. A task is then most of the time given by the computer lady.
You can not move during all of this, but there are a few things you can do:
- Before the task is given to you, you may be able to move in any direction for 1 frame
- Pull your weapon and shoot
Accessing your inventory is the most important thing, as it lets you switch weapons during cutscenes without wasting any time. You also have a longbow/crossbow in your inventory which you can use to turn Action Man into any direction you want while he cannot physically move.
This is only rarely used however.
Long jumping and double jumping
The use of long and double jumps are to cross gaps. Long jumps are sometimes used to get somewhere faster. Double jumps are very rarely used, as Action Man will gain some height midair, which makes it quite slow.
Double jump isn't totally useless though, by double jumping into the corner of a box you can both gain distance and height at the same time, which is faster than just running up to a box and then climb.
This is incredibly precise and cannot be done in a speedrun.
Ledgeboost
When Action Man is about to fall off a box or platform etc. he may temporarily gain a lot of speed. There are only 3 locations where i was able to use this.
Does not work everytime.
Soldier Boost
If Action Man takes damage midair, it will extend his jump massively.
Corner Boost
By walking into the corner of an object, Action Man will be slightly pushed forward or to the side. Can be used to go through walls with nothing behind them.
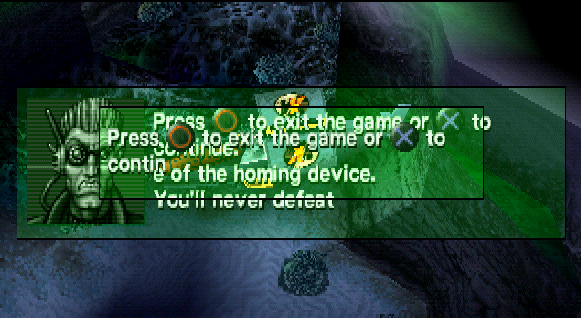
Text cancelling
Whenever text appears on screen there are two options for you: Hold x to advance the text or press triangle to exit the game.
After advancing the text you will have to press x again at the end. Pressing triangle will make another text appear which will tell you to either press x to continue or circle to leave the game. Pressing x to continue the game will make the text that appeared before simply vanish.
If the mission text is small enough you can just advance through it, if its long you can cancel it with triangle and continue with x again (useful for bossfights).
If both advancing the text and cancelling it tie, its faster to cancel it, as you get back to the overworld a few frames faster.
Slippery wall
Some walls in this game are slippery... ???, if Action Man goes along them he will get a small speedboost.
Invisible Walls
Some level walls and objects have invisible walls you can jump into, which makes Action Man get stuck in them if he runs into them while in there.
Out of bounds (Glitch)
Action Man can climb up walls, platforms or crates if he stands next to them during a cutscene. If he were to ready his gun in this unique scenario, his movement restriction during cutscenes will be lifted, allowing him to move freely through everything.
You must hold any directional key at all times, otherwise he will be sent back to where the glitch started.
Power points
Action Man has 1000 HP, picking up power points restore his health by 150 and if his health goes to 300, shooting soldiers will drop a health pack which restores 500 HP
Glitches
Fake use item (Desert Base only...)
Whenever Action Man goes up to where he would need to use an item, the inventory will have him always start on the left where the weapons are. This is a problem because i need to use an item, not a weapon, and items are on the right.
So this is timeloss apparently, because i need to switch to the right inventory which loses 3 frames (1 ingame tick). But this is not really timeloss, as "Fake use item" can only happen if you are 1 frame away from your objective and you are just barely reaching it in the fastest way.
If you were not fast enough, you would lose 3 frames and start on the right side of the inventory.
So you can do both:
-Reach your objective in the fastest way possible and press square to use item and start on the left side of the inventory, which loses 3 frames to switching to the right side of the inventory
-Reach your objective 3 frames slower, which makes you start on the right side.
Speedstorage, Speed increase in vehicle levels
By driving full speed back in your hideout you can keep the speed for the next vehicle.
For example: Go back with the helicopter in City Skies into the hideout with 960 speed and switch to the jetpack, this lets you start with 960 speed from the get-go, rather than 0.
An example of speed increase is found in City Streets. The motorcycle has a speed of 1280 and after collecting 20 power points and going back into the base, you can keep almost all of the 1280 speed for the 4x4 Truck.
The 4x4 Truck only has a speed of 1001, but is increased to 1025 thanks to the motorcycle.
The button is pressed but nothing happens, only happens if Action Man stands somewhat sideways.
The unused strategy
Almost all of Action Man's animations can be cancelled by pressing R2 to change his perspective. So theoretically, this Tas could be faster by a few minutes through chain jumping and cancelling the recovery animation. I decided against that, because pressing R2 will always show a black screen for a few frames, making it not enjoyable to watch.
How i optimized the TAS
Optimizing the tas was both easy and difficult. I have speedran this game before so i already knew what to expect, where i had to take damage and what skips i could perform.
I found new tricks and skips through tas that i could implement but still, the routing stayed the same.
So to optimize the tas i did the following:
1. Look at my speedrun and what i did, do the same in the tas but more precise.
2. Look for potential improvements i could make, maybe add a longjump here and it should be 3 frames faster..
3. Finish the screen by jumping into the loading zone which is almost always faster.
4. Look at the stage a dozen more times to try and squeeze out every possible in-game tick.
The game only updates every 3 frames or 1 ingame tick.
Luck Manipulation
There is extremely heavy luck manipulation in these levels:
- City Streets
- City Skies
- Iceflow
- Robo Insects
Luck Manipulation in City Streets and Skies is easy. Firing ammunition and changing your movement will result in different enemy movement and spawns.
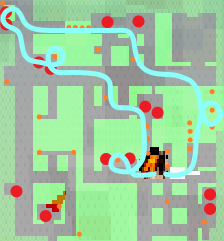
City Streets
Starting with a hard level, City Streets requires a route before you start tasing it. So the route is:
The blue line is the path, the power point in the middle is the base, the big red dots are the enemies and the small orange dots are the power points.
30 power points are located in this level, 20 of which you need to finish the 2nd mission.
First things first, the level spawns you with a silver car, which i immediately switch out to the motorcycle. The motorcycle is faster and can go through small passages, which is required.
The first mission is to eliminate 8 of gangrenes forces, but what comes after the mission is more important; the 20 power points mission.
After defeating the 8 enemies the game will give you the task to switch out your vehicle from the silver car to the motorcycle and then tell you to collect 20 power points. Luckily for me, i already switched to the faster vehicle and im both defeating the enemies and collecting power points at the same time.
- Motorcycle: 1280 Speed, Address 11695A, every few frames a meteorite will be shot which deals ~130 damage.
Enemies in this level:
Every type of enemy has 500 HP
- Roadster: Fat green vehicle, will shoot and sometimes try to ram you
- Slammer: Red vehicle with yellow stripe in the middle, will ram you, aggressive
- Rammer: Fat yellow vehicle, will ram you, aggressive
- Slicker: Slim lime vehicle, throws acid on the ground and runs away
- Slicker?: Slim light blue vehicle, throws acid on the ground and runs away
All 8 enemies manipulated with rng manipulation:
1. Roadster, spawns right next to the base, manipulated by delaying inputs before starting the City Streets mission.
2. Slammer, spawns behind the base near the bridge, he doesnt run away.
Enemies now spawn in 2:
3-4. Double Slammer, i decided to go with these 2 because they dont run away, every other vehicle just rams or runs away.
5-6. Slammer and Slicker, Careful, you can not enter the spawning zone of enemies, otherwise they will spawn somewhere else.
7-8. Double Slicker, they just take every hit without running away.
We collect the rest of the power points and go back and enter the base with 1174 speed. When selecting the 4x4 Truck, Toxica spawns in 1 of 5 places around the map, so i have to delay the 4x4 truck key press for a few frames to get her where i want her to be.
Do not forget to hold x during the cutscene, as you may lose some speed and speedstorage. By driving with full speed into the base i can store the speed for the next vehicle that comes out, however, there is a very small chance that you will lose all speed
when coming out of the base, for unknown reasons.
Now with the 1025 (instead of 1001) Speed of the 4x4 Truck, i can get to Toxica a little faster.
Boss: Toxica
HP: 1000
Toxica spawns into the map either on the bottom right of the map, to the right of the base, top of the map, bottom left of the map or the one i manipulated, behind the base.
What's important to know is that Toxica will retreat to the top right of the map into an arena if her HP should go to 666. She will produce a barrier around her vehicle, making her invincible.
This is where the manipulation comes into play, i spawn her behind the base so her path somewhat aligns with the top right of the map, where she will eventually have to go once i get her to 666 HP.
This is my favorite moment in the tas, i make my way to Toxica and she roams to the top right of the map and turns around, thats when i arrive and start dealing damage. I simultaneously push her vehicle into the arena, so she doesnt have to, which saves a lot of time.
I only had to let go of firing for 1 frame and shes in the arena. Now that we are both in the arena i push her to the side, so she doesnt get to the middle of the arena, because the pink acid will heal her.
Not everything is done yet, because defeating Toxica will make her vehicle explode randomly. If her HP reaches 0 the address 0B09E0 will underflow to 65535 and gradually go down. I managed to get her to 65503, the maximum i could manipulate for.
You could also get quite unlucky and get a value of 65430, which loses more than a second to her vehicle just bouncing up and down before exploding. The manipulation is done by stopping my firing.
Without speedstorage
With speedstorage
Desert Base
Settlement
The 4 codes that need to be collected are made visible by equipping the metal detector. The Guards need to be avoided because getting too close to them will trigger a text box. Small cornerboosts are done on this screen, one of them has me clip through an entire wall.
I use the camera perspective to make it look smoother.
Main entrance (Sniper Guards 1)
The first sniper guards minigame. In this minigame we have to take out sniper guards with our longbow. On the 3rd kill i move from right to left so i can build up speed to hit the sniper guard that appears on the left 3 frames earlier.
After collecting the 1st Code key i jump onto the railing and avoid going around the guard which saves a few frames.
Plant Lab
The sliding door timer 10B3CC and the sliding door itself 10B39C may come in handy when optimizing the stage. The 2 shots fired after the bio sample manipulate the gardener robot. We also need to collect the pass badge from one of the assistants.
Slippery wall is useful here.
There is another slippery wall right next to the door at the end, but i dont use it in tas.
Main entrance
Jumping at the start here is faster because Action Man hasn't built up speed yet.
Water processing plant
It's time for some skips. The first skip you can do is this one:
You can climb up on the bridge and just jump across instead of having to turn the bridge. We need to turn the valves first and collect the gas mask though, so after collecting the gas mask i do the same skip but near the water. This skip can also be performed if you were to climb on
the machine and try to jump over, which is what i do in a speedrun.
After jumping over there is another button you could press, but not done in the tas because the next minor skip is coming up.
You are supposed to press the button to stop the current from pushing you back while swimming through, but if you position yourself close to the corner you can just drop into the water and Action Man will grab the platform, clipping through.
This is something you can do in a speedrun, in the tas however, i do a double jump over and through the fence, very convenient and slightly faster.
Turning the last valve, i jump ontop of it and over the railing instead of going around and using the sloped stairs. I need to switch my handgun to the longbow for the next screen, which loses a massive 12 frames because of running speed.
Plant greenhouse
During the cutscene, i ready my longbow and shoot the Gardener Robot (Address 116FA8, 500 HP), which deals 400 HP of damage. The cutscene ends and i shoot again to destroy him.
The gardener robot drops the "arm key", which is required to progress. It's faster to destroy the robot with the longbow instead of the handgun because i can do it from a distance and during the cutscene.
Equipping the gas mask is required too, even though the gas does almost nothing to Action Man, its an objective i will have to complete. If collecting the arm key wasn't an objective, then i would just clip through the platform where you would insert the arm key, and climb up to hack the system.
So after inserting the arm key the bridge is lowered, which i double jump up to instead of going around. The system is hacked with frame perfect inputs and i jump into the Queen Plants Room. Careful, there is a very low chance to get stuck inside of the inner wall while jumping into the loading zone.
This softlocks the game.
Boss Queen Plant
Seedlings HP: 1000
Arms HP: 1000
Head HP: 1000
Queen Plant is an easy boss. We damage the boss by using the torchlight. The torchlight deals 60 HP per charge. The torchlight can deal damage to a neighboring seedling, but the position required for this is inhumanely precise.
The arms are next, other than shooting the torchlight and optimizing the button presses there isnt much to do except for one thing: When going from one arm to the other we still have energy left in the torchlight, so instead of recharging the torchlight anew we need to both defeat one of the arms and not waste any of the torchlights
energy when going to the other arm. This is difficult to do. We will always have to start with the right arm too, because we need to go to the left in the end to open the roof later.
The arms can shoot projectiles which can knock Action Man to the ground, we dont want that of course. After defeating the arms the head is next, again, we need to not waste any of the torchlights energy when transitioning to that body part, this time it was more difficult. We stay on the left here because the head can use attacks to knock us down.
The boss is defeated and we can move behind the boss to the system to open the hatch on the first frame.
I can switch from the longbow to the handgun during the cutscene. There is a bug where you can't ready your handgun after the cutscene for some reason, so even if you had the handgun equipped before the bossfight, you would have to go in your inventory to reset it.
The weapon at the end is skipped, it is useless to me as it only stuns enemies. I forgot to add something, we need to collect the medkit during the bossfight for some damageboosting in a later stage. This Boss can desync your tas if you found improvements in earlier stages and want to copy inputs.
Plant greenhouse
Nothing to say here, double jump up and long jump into the corner of the door for a 3 frame timesave.
Plant lab
Use the complete code and glide into the loading zone.
Toxic refinery
What a thorn in my eye... We need to hack two systems with our electronic kit but there are two guards in the way. The first electronic kit use goes without incident, i use the camera perspective to get Action Man to stand up faster so he can shoot the guard slightly faster. The second guard is a major pain in the butt, i can either turn around and take him out with the
handgun, or i hack the 2nd system with my electronic kit with him in the way. What's annoying about this guard is that if you dont shoot him, he will just follow you and eventually punch you.
Before some hexing in earlier stages i had him move slight more to the left while i was hacking but now... he is just completely in the way. I will have to go around him now which loses major time. It is still just as fast as turning around after the first electronic kit hack and shooting him. 3 button presses need to be done now to get the toxin out of the machine.
Fortunately the guard leaves us alone and does not want to punch us after pressing the 2nd button, but it can happen.
We collect the toxic and the power point which is a must for the next screen.
Toxin storage
Damage boosting. You must know of this screen before defeating Queen Plant. I entered the screen with 740 HP and it's just barely enough. When Action Man walks over the electrified floor for too long he will get very very briefly stunned, resulting in him being stuck in place. Before this happens though, i do a longjump over the rest of the electrified floor.
The screen is finished with just 5 HP.
Helicopter Pad
Not much to say on this screen, i collect the drill before putting the explosive on the wall. On the last explosive, sometimes, lag frames may appear.
Helicopter Pad 2
Walk over to the debris and use the drill.
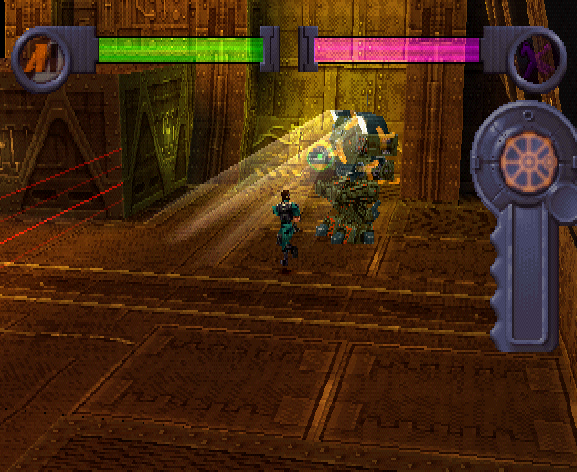
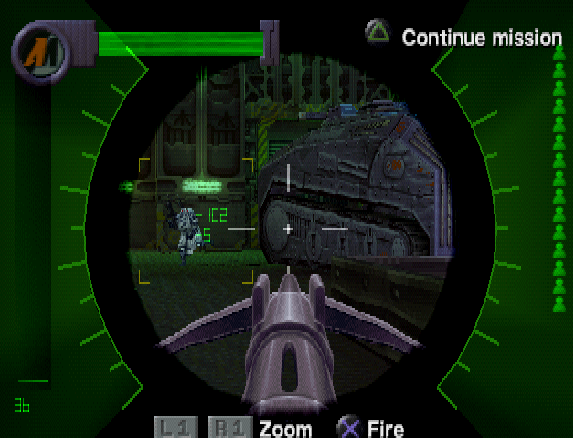
Boss Spider Tank
HP: 1000
Spider Tank is the easiest boss in the game. All you have to do is shoot the spider tank with your machine gun until it goes down, then place an explosive on its body and finally use the remote to detonate the explosive.
This is done 3 times.
An RNG factor is also present here, but not for this boss. The spawning place of the 1st truck in City Skies is determined by where Action Man stands on this screen.
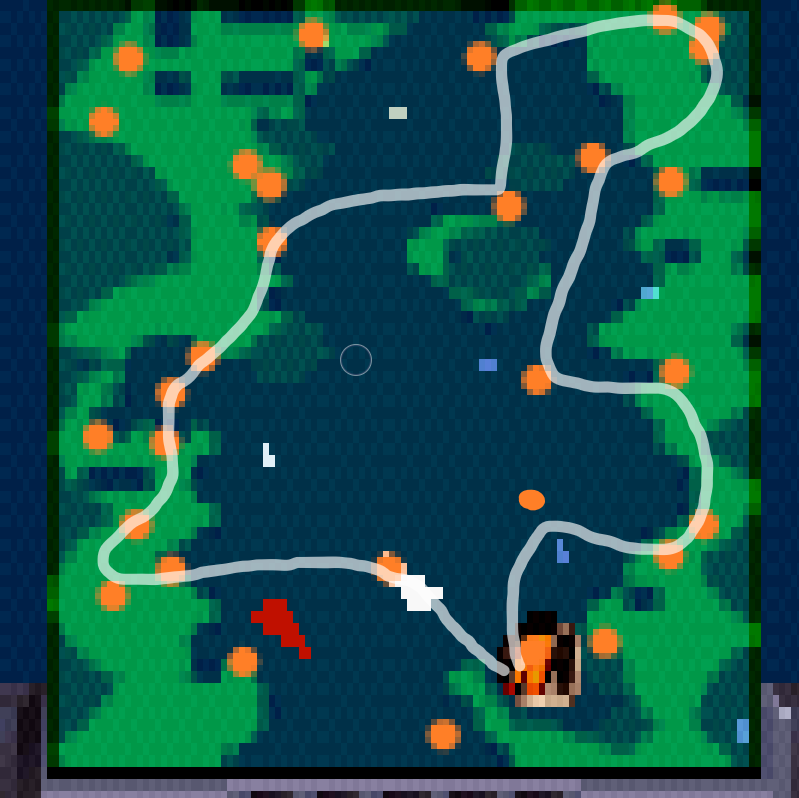
City Skies
From the easiest boss in the game to the hardest level in the game, City Skies requires incredibly heavy optimization and routing. Again, your positioning on the Spider Tank boss determines where the 1st truck in this level spawns and in this tas, i let him spawn near the base.
The objective of this level is very similar to City Streets, but instead of 8 random enemies, it will be 4 of the same enemies. 20 Power points need to be collected again.
The helicopter we spawn into the level with is switched out with the jetpack, because it can go through narrow passages faster and kills the enemies without being near them.
- Jetpack: 960 Speed, Address 10251E, every ~50 frames a stick of dynamite? will be dropped from either the left or right side of the jetpack, which deals splash damage and a total of ~400 HP
The route:
The white line is the route the tas takes. The screenshot is a little too cropped but it should still be fine to read. The only thing it does not show is the truck locations. They are near the path though.
The 4 trucks that need to be defeated in this level all have 1400 HP, so they are a little tanky. No problem for the jetpack, because i only have to drop 4 dynamite on top of their vehicles or near them for splash damage. Once the trucks have been spawned in and discovered by the player, they will
attempt to go to the top left of the screen, where they will be waiting for a big aircraft to pick them up. If that happens then they will be very hard to damage. Not happening in this tas though, i manage to defeat all of them before they even get close to that area.
We spawn into the level with the helicopter and switch out to the jetpack while keeping speedstorage of 960 and going back into the base the fastest possible way. I know this looks somewhat unoptimized, but i could not find a faster way to do this.
Out of all 4 trucks, the 2nd one that i spawned in was difficult to optimize, because the trucks are not the only enemies that are spawned in. One helicopter and car are spawned alongside the trucks to protect them. This makes the level a major desync spot, because as you may remember, shooting or moving will result in different RNG.
The enemy helicopter is not stationary, so spawning him in at different times will desync the tas. I actually used the enemy helicopter for a little optimization, having it push me where i want to be.
Before getting to the 3rd truck, i made a little optimization in this spot where i used the wall to push myself into the power point faster, i believe this saved 9 frames.
The 3rd truck is spawned in and easily defeated, i used to collect the line of 4 power points after defeating it, which was slow. Collecting them first and then dropping the last dynamite on top of it is much faster. Now we have to go inbetween some tall buildings to collect a few more power points. The optimization i made here is good because instead
of slowing down and trying to avoid hitting the buildings, i actually used the bounce back you get from them to go much faster.
The last truck is gotten rid of but wait... we managed to skip a textbox?
Remember in City Streets, after defeating all of the 8 enemies a text box would appear and tell us to collect 20 power points. Well, as it turns out we collected the last power point while defeating the last truck, the textbox never appears and a bunch of time was saved. Im so happy with this.
We go back to the base and set up speedstorage for the gyrocopter. A notable bug on this level is that sometimes when you drop dynamite onto a truck, theres a chance it will deal no damage.
Boss The Speedster
HP: 1000
Speedster is the hardest boss in the game. Speedster is invulnerable if he is not dazzled by the gyrocopters spotlight. By aiming the spotlight through the front shield of Speedsters jet car he will become vulnerable. This is shown by 3 ??? appearing above his vehicle.
Speedsters spawn location is different because of RNG and whats worse, i dont know how to manipulate his spawn to be more favorable. It must be related to either the truck kills or the menu screen before the level...
Even though his spawn is less favorable, the battle itself is faster because he becomes more often vulnerable.
The level starts with my gyrocopters speed being 960 thanks to the jetpack speedstorage, then i make my way to Speedster. You can bounce off of the tall building and get through the small gap between the buildings. This is just as fast as going slowly between them.
The bossfight itself is a little tricky, because you need to do constant adjustments to the gyrocopter and blind Speedster in the fastest possible way.
Every few frames the gyrocopter shoots out rockets which deal 19 damage. Whenever Speedster recovers from being blinded, he will have a few i-frames. The developers didnt want you to just stunlock him. They also made it so that the Speedster sometimes turns hit car around,
making it very hard to blind him.
Before Speedster becomes vulnerable, you need to shoot and have rockets come out of the gyrocopter and hit him on the 1st possible frame with them. This saves a little bit of time.
There are 2 obvious misses with the rockets near the end, they dont connect with the Speedster at all. It is possible to hit him with the rockets, but then he would not become vulnerable that early.
Just like Toxica, Speedster car bounces up and down before exploding, which is RNG. The underflowed Address shows 65515, which is the fastest possible RNG you can get.
Another thing to add is that the Speedster may decide to go out of bounds for a few seconds if you do not manage to stun him often enough. He will then come back and start driving into the city.
Island Base
Jetty
Jetty has a very minor optimization near the bridge. If Action Man gets too close to the bridge a cutscene will start where the bridge explodes and he will be thrown back. If you press start on the 1st frame the cutscene begins you can skip the explosion, which saves a few frames.
After crossing the bridge i will collect the sewer key by jumping into it rather than running into it, because jumping into it will play a small cutscene where Action Man recovers from the jump.
The guard is avoided by shooting him a few times, otherwise he will approach you during the sewer key use, which will display a text box.
Base entrance
Just use the electronic kit and done.
Laboratory area
I have tried jumping up to the upper area but it is obscured by invisible walls, so i have to go the usual way. The last picture is taken and i jump down from the area and position Action Man in such a way that he can jump onto the crate with the golden handgun on it.
I hexed in a ledgeboost after collecting the new handgun, but you cannot get too close to the box, as it will explode and reveal a skullbot inside of it.
The skullbot has 800 HP and is defeated by 2 gunshots. If you get too close to the skullbot, Action Man will start punching it. The description text is skipped by shooting the skullbot very quickly.
I collect a power point for extra health before the cutscene plays.
Harbor Sniper guards 2
These sniper guards can not be skipped too and i have tested a few things before being able to confirm this. The fastest way to trigger the sniper guard minigame is to jump to the right instead of going down between the containers.
If Action Man jumps into a sniper guard minigame he will be temporarily stuck midair and then fall down after some time.
I tried to skip this minigame by doing a bunch of frameprecise inputs with savestates:
1. Jump into the walls invisible corner next to the forklift.
2. Jump into the forklift.
3. Jump into the wall again.
4. Jump onto the container.
This does not skip the minigame, because the sniper guards are already spawned into the map. Action Man will get teleported down if he triggers the minigame.
The sniper guards are all defeated, but they can not be hit through the wall like the first sniper guards in Desert Base. The machine gun at the end is skipped, the handgun is much stronger and doesnt have to be reloaded.
Skullbot Warehouse
More damageboosting on this screen. I still have the sniper rifle equipped so i use it to take down the turret during the cutscene in order to not take as much damage. I turn to the right as well, to make the jump over the railing a little easier, but it doesnt save time.
I dont switch to the gun yet, because switching to the gun without cutscene takes too long.
Factory entrance
I switch to the gun yes and apparently shooting it makes me skip the text 2 frames faster (because of the sprite?). The box cornerboost was put in later after i failed to implement it in.
Warehouse roof
This is actually a difficult screen to optimize, because the dogs that spawn in are tied to RNG. I believe if you trigger the spotlights on different frames then they may appear in different spots. The jump onto the platform only works with slightly elevated ground, so i use the vent on the ground for that.
The satellite dish is hacked and there is a chance for all of the dogs to run up to where Action Man is. This results in non visible lag and it makes the textbox appear much slower.
The explosive is collected and i jump into the corner of the platform which slightly pushes me forward.
Factory entrance
I use the sniper rifle during the cutscene to move Action Man to the right. Before entering the box you can ready your sniper rifle and the cutscene looks like as if you were looking through the scope. You can shoot the mech, but you cannot damage him.
Skullbot refinery
We need to manage our HP on this screen for some damageboosting in the screen that comes after. The first explosive we place is the one on the right, because we can jump into the hole in the ground and only have 1 of Action Man's fall animation. I want to set up the out of bounds glitch this way too.
By placing the 2nd explosive and being near the wall, Action Man is allowed to grab the wall during the cutscene and if he were to ready his handgun during the climb which usually does not work, he will be midair. In this state, Action Man is allowed to go through everything, even go out of the map.
There is nothing outside of the map, so we just abuse this state and go straight to the 3rd explosive instead of going to the left and having to take damage. The last explosive is placed and we go near the door to detonate all 4 of them. We leave the screen with 175 HP. Some of the turret damage can be negated by long jumping, it also allows me to
do a rare stutterglide.
Skullbot assembly
Another put explosives on machinery screen. We are very short on HP but its just enough to survive this screen. After placing the 2nd explosive we go for a soldierboost, its called soldierboost because this is the place where i found this trick in a speedrun.
We are left with 25 HP and luckily we dont have to take any more damage. There is a soldier at the end that could have damaged us if we werent quick enough to use the sewer key.
Hold
It is time to retrieve our stuff after being captured. These spotlights will oneshot you once you make contact with them.
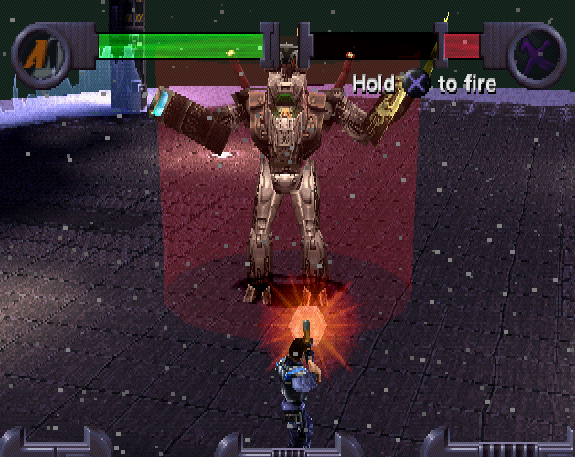
Boss Mech
HP: 1000
Mech is another easy boss to defeat. In order to defeat the Mech you will have to knock him out with gunfire, then run up to the valve behind him and turn it. If the valve is fully turned, the room will be flooded, short circuiting the Mech.
In a speedrun, i dont take the Mech out with gunfire and go straight to the valve and mash as fast as i can. I will be taking a lot of damage from this but its really fast.
Tas does the same thing, the only exception to the speedrun is that i go much closer to the Mech when approaching the valve, which cancels his startup. This means that i will take a lot more damage.
The room is flooded with water and there is no way to speed up the process of the Mech being defeated.
Missile deck
On missile deck we have to collect 2 of the code keys for later. The first code key is located at the top of the screen on a crate, which i jump on. Turning around and jumping onto another crate, a guard will spot us and shoot, the perfect opportunity to jump and get another soldierboost over the gap.
Upon landing, we do jump onto the crate rather than climbing up, its 3 frames faster.
After collecting the 2nd code key we push the button on the left first to open one of the hatches, its faster than pushing the button on the right first because when we climb up the crate again we will get a small corner boost. The next jump inbetween the next crates is quite precise.
We hack the missiles and jump down into the new opened exit.
Silo
Simple level, we use the auto-winch to get up and hack the safety clamps of the missiles. The 3rd code key is collected here.
There are a lot of soldiers coming towards Action Man at the end, but they pose no threat.
Bridge
No textbox at the start of this level but the task is quite easy: Collect the last code key and push buttons in a specific order. The last code key is collected by jumping over the map in the middle. Once the code key is collected, a textbox will trigger which causes lag when cancelled, but its still faster.
Once the buttons are pressed in order, we need to go back to the panel in the middle to complete everything.
Soldiers will rush into the room and try to stop Action Man. When Action Man pulls his gun, he can not fire it immediately. So what i do is take another soldierboost. This is much faster than just running around them.
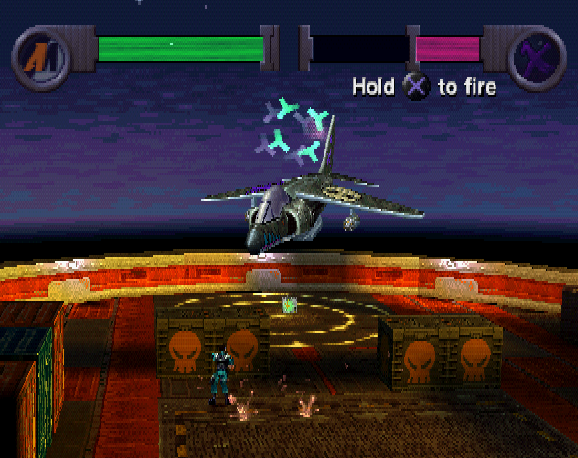
Boss Maxx
HP: 1000
Maxx textbox cannot be skipped for unknown reasons, so we have to advance through it. He takes 28 damage from each railgun shot. Maxx does not deal a whole lot of damage should he hit you with his machine gun and explosives.
If you get too close to his jet he will produce wind to push you back, knocking you down.
Should Maxx HP reach a certain point, he will become invulnerable and cast an attack where he throws 2 explosives on the ship which can only be avoided by going to the north. He will drop a medkit when he comes back from the attack.
The major optimization on this bossfight is to stand in specific spots on the screen, so Maxx jet will try to follow Action Man in a specific attack pattern.
The last railgun charge and hit must hit Maxx and have him immediately launch his special attack. It is quite bad if you were to charge your railgun and just before you are able to shoot, Maxx would become invulnerable.
The bossfight is damageless.
Iceflow
Iceflow is the 2nd hardest level to optimize, it is quite lenghty and requires a route beforehand, which looks like:
The white line represents the path we will take, we start with the left side and go clockwise. This time, we only have to collect 20 Power points before going back to the base.
The Scuba ski we spawn in with is kept, because the Hovercraft is slower.
Scuba ski: Speed 750, Address 13386A
Know that the speed of 750 does not really resemble the actual speed of the vehicle, sometimes i would slow down and it would still show the top speed.
I figured by starting with the left side instead of going right first is faster because of the set locations of the crates, which hold some of the power points. The crates can be destroyed by firing at them or ramming them.
Unfortunately, there is RNG at play, the same RNG all of the enemies in City Streets, Toxica and Speedster have. Once the boxes are destroyed, they will bounce up and down before exploding. This RNG is determined by when you destroy them.
The power points inside of the boxes will always be the same.
The first box i destroy and collect the power point from looks very awkward, but i could not find a faster way to do it. The rest of the boxes and power points look very good in optimization.
Underwater
Simple screen, we need to collect 5 out of the 6 homing devices. The 6th homing device is with the Technician Boss which you can't know about yet, unless you finish collecting the 5th homing device. You must know of this before tasing this screen.
Only noteworthy things on this screen are the 3rd homing device pickup where i take damage from the underwater mine instead of going around, which is faster. I take damageboosts from them too, to get pushed forward near the end.
Surface forces
Back to the surface, we need to defeat 15 enemies and then go back to the base. This time we start on the right side and go counter clockwise for a manipulation and set up later on. Both turrets and water vehicles need to be destroyed.
The turrets can be destroyed before the mission, when you collect the 20 power points. But i believe that destroying the turrets along with the water vehicles is much faster, because i need to go around the map anyway.
After defeating the 11th enemy Hydrofoil, we get to a turret that needs to be destroyed fast. The optimization here is to destroy the turret and drive into the corner of the turret, so it bounces us back a great deal. The 4th enemy turret is destroyed quickly too and it
fires a rocket at our scuba ski which pushes us forward quite a lot.
The last enemy is very very important, the hovercraft. Once we defeat the hovercraft, the explosion RNG will happen.
Last enemy address: 134696
Once the address underflows to the maximum of 65515, we must enter the base on the same exact frame. This will skip a cutscene that would last a few seconds.
Our HP is 14 but thankfully we get a small HP refill.
Boss The Technician
HP: 1000
Technician is another easy boss. His submarine can only be damaged from the back. Each shot we fire at his back will deal 50 damage. Again, i found a way to skip another cutscene after his submarine explodes.
His submarine will always finish exploding on the number 65486. (Address 0B09E0)
We use this explosion time to get back to the base. If we enter the base on the same frame the explosion timer finishes, we can skip a dialogue from Action Man which saves a few seconds. You get to see a choice of 3 vehicles too.
Island Base
Submarine Bay, Sniper Guards 3
Haha... finally. I managed to skip one of the sniper guards minigame by jumping into the collision of the submarine i came with. By jumping into the collision of the submarine, Action Man will have a brief moment to turn around and do a double jump over the railing.
This railing has an invisible wall too, but i managed to completely jump over it instead of on it.
The first code key is collected now.
This is what the sniper guard minigame would look like:
~40 seconds have been saved by skipping this minigame.
Warehouse
We need to thread the needle between 2 skullbots in order to not trigger their textboxes, then we jump into the left habitat.
Habitation a
Useless room, we need to enter this room because we need the pass key from one of the guards in the other room, but those guards will only appear if you went into this room first.
I switch to the sniper and turn around which is ~9 frames faster. I keep the sniper equipped until Habitation b for a quick takedown.
Warehouse
Going to Habitation b
Habitation b
Both of the guards can be shot with the sniper and drop the pass key, but i chose the guard on the left as he is much closer to me.
Warehouse
Collect the 2nd code key behind the crates and finish the screen.
Entrance corridor
Finally a cutscene where we can switch to the handgun. We take damage from one of the guards for a soldierboost.
Power generator
On this screen we need to hack 2 devices to unlock the power generator. Both ways have the same distance but the difference is that the guards are in slightly different spots. I dont shoot
the guards too, because i want them to shoot me later for soldierboosts.
Small cornerboosts are done on the railing and after hacking the 2nd device, i go to the power generator and place an explosive. I collect the 3rd code key to the left and have the guard shoot me
for a soldierboost and upon landing, i activate the remote. I figured this would be the best time to use it because Action Man is still in somewhat of his recovery animation.
I take another soldierboost at the end.
Entrance corridor
Thats a lot of damage we are taking, only 22 HP left after the soldierboost. Before you went into the power generator room, lasers would block the way. If you would try to somehow clip into this room by
walking into the left side of the wall, you could softlock the game, because Action Man may get stuck in his falling animation.
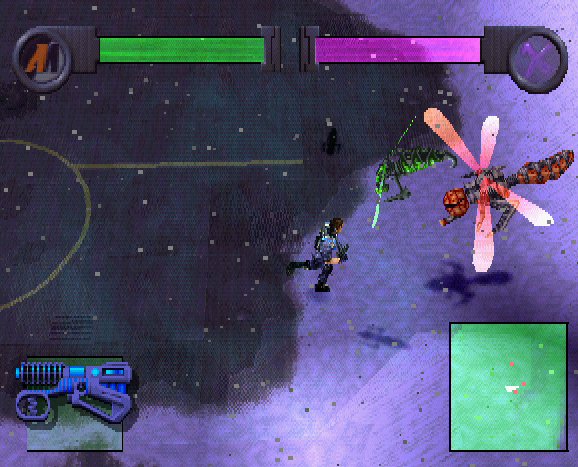
Boss Robo Insects
HP: 1000
This is the last hard screen of the game. Robo Insects are flying through the sky. We use the freeze gun to freeze the insects once they descend to the ground and then punch/kick to destroy them.
The amount of time it takes for the insects to descend to the ground depends on where you position yourself on the screen. If there is 1 insect then that is not a problem, but only the 1st wave has 1 insect, every wave that comes
after has 2 or 3.
1st Wave : 1 Insect, 1 green - No problem
2nd Wave : 2 Insects, 2 green - I have the 1st insect descend slower, but the 2nd insect comes down much faster in return
3rd Wave : 3 Insects, 3 green - I position myself in such a way that the last 2 insects merge into each other, making it able to hit both at the same time
4th Wave : 3 Insects, 2 green 1 purple - The purple insect is new and cant be immediately frozen once it descends to the ground. The last 2 insects are both hit again
5th Wave : 1 Insect Boss - This boss shoots ice projectiles which could knock Action Man down if it connects. The boss needs to be hit 3 times
6th Wave : 3 Insects, 1 green 2 purple - Last 2 are hit again at the same time
7th Wave : 3 Insects, 3 purple - It seems slower, but i freeze and hit all of them one after the other instead of freezing the last 2 at the same time. I tested this, its faster to do it like this.
8th Wave : 3 Insects, 2 green 1 Boss - Very very tough to optimize. The main focus is the Insect Boss because we need to hit him 3 times. The 2 small ones do not pose much of a threat.
The last thing we do before destroying the Insect Boss is get as close to the elevator as possible, because i want to jump into it before the cutscene plays. The Insect boss drops the infra-red goggles which need
to be picked up in order to progress.
You may have noticed that before i picked up the freeze gun i readied my handgun, and i still have my handgun equipped. Bug?
Skullbot storage
It is very dark in here but dont worry, this is the only screen with darkness. You have the option to use the infra-red googles to make it brighter, but it loses time. We jump from crate to crate instead of going
around which saves half a second. The last jump from the crate to the platform is frame precise.
Skullbot lab
The floor is electrified, meaning a lot of damageboosting. In a casual playthrough, you will have to wait for spots on the floor to become walkable. But no waiting here, we take the damage and push all of the buttons in order.
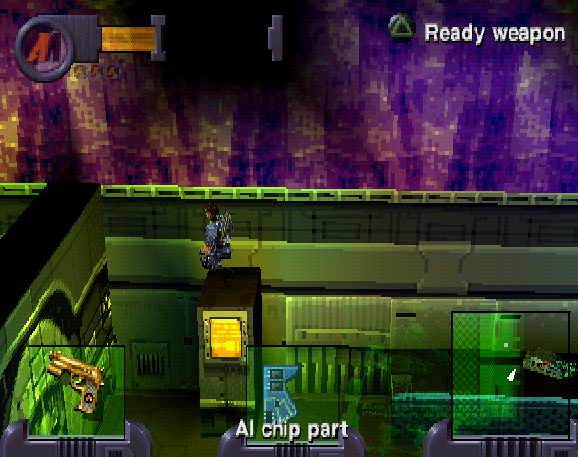
The last skip in the game is found:
By jumping very carefully on the switch, we can skip going onto the electrified floor, which both saves time and HP.
The AI chip parts need to collected too for later.
The last button press will free 2 of the skullbots which we have to defeat for the last code key. Only the 2nd skullbot will drop the code key, the 1st skullbot will drop a health pack.
Skullbot storage
This time we equip the infra-red goggles, because we must. By the way, equipping them in the first skullbot storage screen is useless, this screen will still be dark and you would have to equip them a second time.
Map room
Running to the next room.
Skullbot control
This screen is a little difficult to optimize. Instead of going up to the platform and climbing up, we use the sloped stairs to gain some height and do a double jump onto the platform. 3 buttons need to be pressed to unlock the defense field and to
access the computer core.
Before and after the 2nd button press you need to be careful to not get stuck on the floor. The electrified floor needs to be avoided by mostly jumping over it.
The computer core is hacked and we jump over the railing for some extra distance.
Map room
Running to the next room.
Satellite dish
Simple screen, nothing to add.
Map room
Running to the next room.
Dome elevator
Button pressing simulator. BUT, we can take damage from the electricity that surrounds the middle of the room, which means - soldierboosting. I only found this later and hexed it in.
Boss - Dr.X
HP: 1000
The final boss. We need to use the energy gun to stun Dr.X and then attack the power pack located in the back of his exo-armor.
Dr.X needs to be shot 8 times in each phase to reduce his HP to 200, where he becomes vulnerable.
A few things to consider on this bossfight are:
- Dr.X will always walk towards you and try to attack you with his electrified claw, knocking you down.
- You can slightly walk towards Dr.X while firing at him and once close enough, trigger his claw attack and turn around to avoid it.
- Dodging or getting hit by the claw will have Dr.X immediately start his next attack where he fires a green laser at you. In the 2nd phase (after a few hits in the back this attack changes to him shooting plasma balls).
- After being hit in the back, he will fly into the air and then come down after some time, which can be slightly manipulated by positioning yourself on the screen - saves a few frames each time.
The strategy is the same everytime:
-Shoot Dr.X 3 times before he gets too close to you, then trigger his claw attack by walking towards him for 1 frame
-Dr.X will start his next attack, enough time to get his HP down to 200
-While he prepares his attack, Action Man needs to get as close to his back as possible so he can hit it on the first possible frame after getting Dr.X to 200 HP
In total: Dr.X needs to be hit in the back 8 times. It takes 525 frames to get him to 200 HP almost everytime. I was able to get him to 200 HP in just 523 frames on one phase, but this is extremely hard to do because Action Man needs to trigger
Dr.X claw attack and turn around very fast while also shooting him in the side of the exo-armor. The hitbox needs to be manipulated somehow...
We get Dr.X to 200 HP for the last time and shoot him with the sniper, ending the game.
Known Improvements and final thoughts
It hurts me to write this, but i have to be honest. The Tas is not 100% perfect and to my absolute liking. There were 2 major mistakes i have made that are more or less noticeable:
Main entrance:
After jumping onto the railing and passing one of the guards, i can take a soldierboost which would save ~9-12 frames. I only figured this out when i was somewhere around mid-game.
Plant lab:
I can use the plant sample a few frames earlier + the text box i initially cancelled with triangle can be advanced through which saves 3 frames. You can save ~35 frames on this screen.
Plant greenhouse 1:
2 Frames can be saved by facing right two frames earlier because the textbox will appear faster, this was something i could not really know.
Toxin refinery:
Manipulate the guard to not be in your way as much, i dont know how to. You must enter this screen at a different frame? Would save a few frames.
Speedster
12 Frames can be saved with the different spawn location, RNG.
Skullbot assembly
When i was writing the submission notes i noticed that i wasnt jumping onto the crate which would save ~50 frames, this is a major blunder by me. I thought that i have implemented it into the tas but apparently not...
I was using a lot of different tasprojects because i kept finding a lot of timesave in earlier levels, a lot of hex editing had to be done and i must have saved onto a wrong tasproject.
Dr.X
Get the last 14 frame saves after triggering his claw attack and shoot him as fast as possible.
So a total of ~136 frames could be saved to my knowledge. Do know that RNG throughout the tas could change and you could get worse enemy spawns or patterns in Iceflow for example. Just because you saved those frames does not mean
it is guaranteed.
It took me a total of 9 months to finish this tas and it felt like forever, i hope you can look past those 2 seconds of timeloss. See you hopefully in the next tas i submit in the future. Thank you a lot.
Suggested Screenshot: One of the bosses (but not Robo Insect)
Darkman425: Input file replaced again with the restored rerecord count as well as (hopefully) having the correct cycle count.
The optimization looks good, the routing looks well planned, and the RNG manipulation seems on point. Nice work!
Accepting to Standard.