Emulator used: Gens 9.5 RKA_HitboxDisplayHack (Gens 9* compatible)
Emulator settings:
- Controller 1: 6 button
- Controller 2: 6 button
- Allow Up+Down: Yes
- Sound: Enabled, 44100KhZ Stereo, YM2612 High Quality enabled
Categories
- Does not use warps or passwords
- Abuses programming errors in the game
- Manipulates luck
- Takes no damage
- Plays on hardest difficulty
- Ignores time lost to bonus effects
About the Game
Rocket Knight Adventures is one of the better platformers on Sega Genesis. In it, you control Sparkster, an opossum with a sword and a jetpack, in his quest to defeat the evil pig empire.
About the Movie
This movie uses the US version of Rocket Knight Adventures.
This movie makes extensive use of a few programming glitches to maintain full speed as much as possible. This movie manipulates luck to prevent bosses from using their longer attacks. This movie takes no damage. This movie ignores time loss due to bonus effects. This movie plays on the hardest difficulty.
This movie is on a different ROM version from the previous run due to the following reasons:
- Previous movie was on a PAL version, but was not PAL optimized, so is slower and less entertaining
- US Version has a more difficult Hard Mode.
- The US Version is the most likely version to be familiar to viewers.
- Deep Loner began an improvement run on the US version, and I wanted to be able to make direct comparisons.
This movie aims for fastest time.
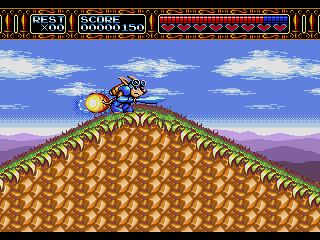
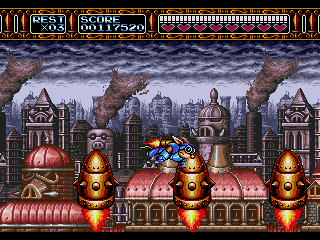
Suggested Screenshot
Improvement Explanations
Velocity control
- Sparkster cannot maintain maximum speed when on the ground, instead, if you hold right, his speed will alternate between 3px/frame and 2.75px/frame
- In the air, Sparkster accelerates at the same rate as on, ground and his maximum speed when holding right is the higher of 3px/frame and the speed you had when you jumped.
- Sparkster is able to jump immediately at the start of a new room or new level if the jump button is pressed at the right frame beforehand.
- If Sparkster starts a horizontal rocket boost in mid-air, half of his speed will be lost immediately when it ends.
- Half of Sparkster's speed will always be lost immediately when diagonal boosts end.
- Better optimized diagonal boosts used in wall climbing, and navigating bumpy terrain.
- Better optimized use of horizontal boosts.
- Made use of jumping before ledges to save time on long falls.
- Optimized swimming for least wasted movement, and best possible boost locations.
- In normal levels, directional controls are disabled during sword swipes
Combat optimizations
- Hitbox display allows better optimization of timing and placement of sword-swings
- The damage box on a sword swipes moves from top-rear of the player to mid-low forward of the player -- in order to connect with a single target for the full length of the swipe, you or the target must be moving.
- Sword swipes last 8 frames, and do 4 damage each frame to enemies within the area.
- The crescent slash produced by a sword swing causes 12 damage when it impacts a target, and can damage multiple targets if it connects on the same frame
- Orthogonal (up/down/left/right) boost charges cause 32 damage upon impact, and initiate a circular boost for the remainder of the boost time.
- Diagonal (up-left/up-right/down-left/down-right) boost charges cause 16 damage upon impact, and initiate a circular boost for the remainder of the boost time
- Circular (no-direction held) boost charges cause 1 damage per frame.
- The jetpack can be charged for a charge boost while slashing continuously by releasing the attack button only for one frame between swipes.
- With one exception, enemies that flash cause lag each time they take damage
- Enemies with HP will continue to take damage, even while flashing
- Enemies that are Hit-based will not take damage while flashing, but will still cause lag when hit.
- Unlike the prior movie, I do not attack any lag-causing before they become vulnerable
Luck improvements
- Manipulated the starting position of the Tank Turret to a most optimal one.
- Manipulated Axle Gear And His Giant Pig Mech to walk backwards as little as possible
- Manipulated Pig Heads in stage 6 to always drop a row of apples
- Manipulated Axle Gear to use only the attack pattern that causes him to be vulnerable.
Level specific notes
Stage 1-1
- This level was really amenable to bunny hopping - only one obstacle that can't be jumped over, and no ceilings limiting when and how you can jump to do so.
- The trucks were kind of a pain, after they pass by in the background, they always reappear in the foreground a specific number of pixels off screen, so hitting them as early as possible requires travelling the same way as them, and then immediately changing direction. I think I did a pretty good job optimizing their destruction, though. Each of the two trucks has 8 hit points more than they did in the prior published version, by the way.
- You're not supposed to be able to jump over the wall after the trucks, but if you have enough speed at the top of the rise before it, you can just barely make it.
- Keeping speed was a challenge in the area where the pigs parachute in, because I'm actually travelling faster than the crescent slice the sword shoots out. But it's important not to have to rocketboost too early on the hills after, because otherwise I'll hit the hill sideways while jumping and loose all my speed.
- The downward sloping branches provide a nice speed boost.
- Unfortunately I have to lose all my built up speed to deal with the four unskippable walkers. Each of these walkers has 8 more hitpoints than they did in the prior published version, by the way.
- The walkers were also a challenge to optimize, as they appear in different places depending on the player's location, and the third and fourth will only appear after the defeat of the first two.
- The four unskippable pigs are defeated much more quickly than in the prior version, by swinging the sword just before they become vulnerable, so the projectile passes through the near left one (which catches the tail end of the swipe) and hits the far left one. The sword swipe ends just as I have enough charge built up to boost and catch the two pigs on the right.
- The tank is defeated as quickly as possible here. Each time it recieves damage on the first frame that its invulnerability wears off.
- After the bridge goes out, the tank turret's x and y position depend on sparkster's position at the time it appears. I use rocket boosts to damage it while it's still offscreen, but I had to be very careful to hit it on the trailing edge, as I did not want to change its direction because the top right corner was the most desirable place for it to come on camera.
Stage 1-2
- Slight timesaver by boosting downward as soon as I'm lined up with the rocket item.
- The positions of the balloons can be manipulated by changing the timing of my sword swipes, but there's enough of a delay in between that they can appear at any point and I would still be able to kill them on the first frame.
- These balloons will all appear with the same delay in between them no matter what, but the dragon won't appear until the last balloon is offscreen. The balloons travel much faster offscreen when they are crashing after being hit.
- The ending sequence won't happen until its head is offscreen, this can be expedited by delaying the last hit for a couple of frames so that it explodes in a different pattern.
Stage 1-3
- I wait a bit before moving right so that my boost ends before I reach the flames on the floor, so I don't die in a fire, and can clear the first bump in the floor.
- I boost diagonally the first moment that doing so allows me to reach the higher floor
- Only a small part of these flame bursts can damage sparkster, and sparkster is invincible during rocket boosts
- By boosting at the proper frame, I am able to save a frame in reaching the doorway.
- This is the first place where the "start by jumping" trick comes in handy. It allows me to reach a good height for rocket boosting even before the screen fades back in.
- I fall a bit before starting the third rocket boost, so that the boost ends before I overshoot the door. I still begin the boost at the first possible frame.
- The next room is not very noteworthy. a slight bit of hopping, and slightly better boosts than the prior version.
- I save several frames in the last room before the boss by boosting left before falling down. The boost bounces off the walls and flings me towards the door at high speed, while not significantly impacting my rate of fall.
- This boss is the first place I lose any gameplay frames to the prior version. I have to hit the boss three extra times compared to the previous run, and it has a significant invulnerability period between hits.
Stage 2-1
- The "start by jumping" trick saves quite a bit of time, as it actually allows me to reach the mini boss before I hit the water.
- I'm not sure if this is the optimal boss strategy, but I do maximize sword contact on the swipes.
- I save a great deal of time in the swimming portion by diagonally boosting as high as possible.
This is faster than boosting horizontally, because I maintain a speed of 4 pixels per frame for much longer than it is possible to maintain the horizontal boost falling speed of 5 pixels per frame.
- The diagonal boost strategy also allows me to reach the tree vine much sooner than the previous run does.
- I try to maximize speed gain from the sloping vines.
- The rotating platforms that bring me behind the waterfall are always in the same position when you reach them.
- I touch the platform which switches me in front of the water fall because I need the next platform to take me behind when I land on it.
- At some point during the fight with the water snake, I somehow trigger a bug which allows me to hit it from the other side of the waterfall. I don't know what causes this, but I do know it saves quite a bit of time, as I need to be in front of the waterfall after the boss is destroyed.
Stage 2-2
- In NTSC versions of the game, this first room lags for the entire time I'm underwater, because there are so many moving spiked things to keep track of.
- Boosting upward as soon as possible, after swimming past the downward column saves more time than it takes to recharge the pack to boost diagonally past the next upward column.
- The second room is slightly tricky to time the boost so I don't hit any of the spikes balls that make up the ceiling
Stage 2-3
- This stage is primarily an autoscroller, but it can be prolonged by not defeating the last pig in the first set as soon as possible.
- When hopping between mine carts, momentum preservation techniques are important to make sure you get to the next fast cart as soon as possible.
- The second set of pigs takes the same amount of time no matter what, so I chose to let the last four pigs survive until the game kills them, as it looks funny that way.
- Although the prior version also attacked the train non-stop, I improve this by getting as close to it as possible, in order to maximize sword contact. This saves a large amount of time. Also, the left+right glitch allows me to swing the sword left, while I'm moving right. Which saves quite a bit of time as I have to be constantly moving a little to the right so the train doesn't hit me and kill me.
- It is possible to do one or two damage to the hand during the first stage of the boss, but it doesn't carry over to the second phase, and even if it did, it would cause more lag than it's worth.
- The second phase is defeated as soon as (hand 1 HP + hand 2 HP) < 0. Discovering this saved me quite a bit of time as I could just boost into Hand 1 to lower its hp more, rather than going back to Hand 2 to finish it off.
- The third phase is a little different from the first. I have to be moving left constantly to keep from getting hit, but I can't move left and swing right unless I'm in the air, so I have to keep jumping. Unfortunately even the lowest jump I can make takes me to a height where I won't hit it with the crescent projectile if I swing. Fortunately, though, by hitting jump and attack at the same time, I can shoot the projectile without having to swipe, which lets me get an extra 12 damage in, quickly.
Stage 3-1
- I start by moving left so that I'll be able to clear the first bump when I jump after the boost ends. This lets me carry high speed quite far into the level.
- The lava won't hurt me while I'm boosting, and I can jump the first frame I finish boosting to take no damage. This helps save time as I don't have to wait for the lava to rise and fall to get through a section with low platforms. (Note: This is not true of the fires in stage 1-3, the lava in later levels, or the large spikes in stage 5-6)
- I did my best at carrying speed through the platforms hidden behind crystals, but I have to boost in midair on my way down in order to get past low platforms during a high lava tide faster
Stage 3-2
- I make some much better diagonal and horizontal boosts compared to the previous version, so I never have to stop moving right.
- The crab boss' HP is reduced to 1/4 of its current value when the large claw is defeated. The HP is reduced to 1/2 of its current value when the small claw is defeated. Its HP begins at 50. After defeating the large claw, it becomes 12. After defeating both claws it becomes 6. But it is faster to go through 6 invulnerability periods than to destroy both claws.
- Also, the prior run wasted time damaging the boss before destroying either claw, and at least two damage must be done for the total HP after a claw is destroyed to be lowered
Stage 3-3
- This is basically an autoscroller, but the game lags by 8 frames each time a bat is hit. So I don't hit any of the bats.
Stage 3-4
- NTSC versions of the game lag by increasingly high amounts during the part of the fish boss where it sucks in platforms. PAL versions do not.
- My strategy of attacking the piloting pig is slightly more optimal than the prior run's. I suspect that it is not totally optimal, but brute forcing it isn't viable, and I suspect that properly figuring out the most optimal strategy involves calculus that I haven't learned yet.
Stage 4-1
- Because the only way to damage Captain Fleagle is to bounce his own cannon-balls back at him, and he stops throwing them for a moment whenever he is hit, I have attempted to minimize the time between the cannonballs impacting him on each cycle.
- I also have made sure that no cannonball he throws at me does not hit him.
Stage 4-2
- The first part of this stage was quite frustrating to improve, as the wind makes it impossible to keep speed from a rocket boost, but I saved a little bit of time by boosting through Captain Fleagle in such a way that I land on the nose of the battle ship afterward
- Going back to the left underneath was much easier to improve, as I could make use of momentum preservation, and came up with a much faster strategy for the mini-boss
Stage 4-3
- I preserve speed here as much as possible, but the forcefields are confounding. It is possible to manipulate them, but I am not sure what the mechanism for determining when they turn off is. There is more than likely a possible improvement here.
Stage 4-4
- Not a whole lot to say. I attack the giant slinky pig, and Captain Fleagle much more optimally than the previous version.
Stage 5-1
- The missiles appear only after the last pig is defeated (or otherwise offscreen), but as in stage 1-2, the pigs appear at set intervals from each other. Also as in stage 1-2 their positions can be manipulated, but also as in Stage 1-2, the manipulation is unnecessary.
- It's the boss from gradius!! I lose a lot of time here, though, because attacking it optimally requires taking damage, which I can't do.
Stage 5-2
- Momentum preservation wins the day once more.
- Momentum preservation, but vertically this time.
Stage 5-3
- Better timing of diagonal boosts allows me to get through the bumps and dips faster
Stage 5-4
- I take out the supporting pillar a couple frames sooner
- I start the diagonal boost at the first frame where I'll actually be let in between the ceiling and the top floor from it.
Stage 5-5
- I stop the platform's downward motion at the highest point where ducking will let me pass under the wall.
- I jump at the first point where the wall ejects me rightward, but not down. This saves 44 frames.
- A few more frames are saved by boosting sooner, and jumping from a higher platform
Stage 5-6
- I start the diagonal boost sooner, and carry momentum to the exit by hopping.
Stage 5-7
- I get to the giant robot boxing match faster, but it doesn't matter because I have to make 3 more hits on the Axle Gear's giant pig robot, and there's a significant delay between hits being possible to land
- I also cannot take the damage necessary to land the final hit at the first possible frame, so I have to get in to make him start swinging, dodge out to avoid being hit, and then dodge back in so that he's within punching distance.
Stage 6
- Wave 1: I'm able to defeat each set of 5 pig heads in a single swipe, by killing the master head before it generates the rest. I also collect the apple as soon as possible so the next set appears sooner.
- Wave 2: I defeat this set of 8 pigheads quickly by making sure each swipe kills two. I then collect the apples as quickly as possible so that wave 3 will appear.
- Wave 3: I am not sure if the number of asteroids onscreen influences anything, but I made it a minor goal to hit every asteroid in this wave at least once.
- Wave 3: What does matter, though, is killing the false asteroids as soon as possible, as the next one won't appear until a certain time after the current one is defeated. Similarly, the next wave only appears once the last false asteroid is blown up.
- Wave 4: You can't see it, but this wave consists of a bunch of pig heads moving in a circle. Only one needs to be killed for the wave to end, but killing the wrong head (or the right head at the wrong time?) causes a repeat of Wave 2 before the next wave comes, whereas killing the right head causes 6 apples to appear.
- Wave 4: The next wave won't appear until all the apples are cleared. I collect all 6 apples before they reach the center of the screen, the prior run was only able to collect 4, and had to wait for the rest to move off the screen of their own accord
- Wave 5: This weird guy can't be damages while he's holding his shield out to the left of him. But once he's dropped it I make quick work of him by maximizing each swing's connect time. The prior run didn't defeat him until in his third cycle, despite him having less HP in that version.
- Wave 6: This is a repeat of wave 4.
- Wave 7: Most of the pig astronauts don't even make it onto the screen before dying.
- Wave 7: Axle Gear isn't vulnerable until after he's left the screen after firing the huge energe beam. The previous run just caused a whole bunch of avoidable lag by attacking him while he's firing the beam.
- Wave 7: When Axle Gear does become vulnerable, I reduce his HP by 84 before he even makes it on screen. Unfortunately this delays killing the last two pig astronauts a bit, and there may be a possible improvement along those lines.
- Wave 8: This is a repeat of wave 4 again.
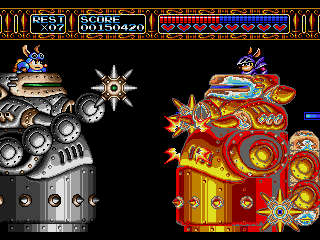
- Boss 1: This boss is composed of a whole bunch of separate objects with at least 120 HP each. All four turrets must be destroyed before the hatch becomes vulnerable. The hatch must be destroyed before the nose becomes vulnerable.
- Boss 1: The nose's underbelly is the only multihit-enemy in the game that does not cause lag when it takes damage.
- Boss 1: I have to hit the front of the nose once so that I can get in and hit the separation point without dying. This may look like a wasted swing, but if not for that, I would die upon entering that hitbox.
- Boss 2: This is the most annoying boss in the entire game. He has a 19.5 second cycle between becoming vulnerable, and I have to get one more hit in on him than the prior run did.
Stage 7-1
- Arrive at Emperor Devligus Devotindos earlier than the prior run, thanks to momentum preservation.
- Emperor Devotindos is only vulnerable to rocket boosts, but I still manage a faster battle due to using straight boosts, rather than diagonal ones.
Stage 7-2
- I get through this area full of Emperor Devotindos prototypes faster by better momentum control.
Stage 7-3
- I enjoy totally outclassing Axle Gear
- If Sparkster is facing Axle Gear when he stops flashing from taking damage, he'll perform a different attack which significantly prolongs his invulnerability. In order to hit him the first possible frame each time, I must jump, shoot the crescent projectile on the way down, and change facing direction for 2 frames as soon as I land.
- Axle Gear also backs up by 1 or 2 pixels each time he is hit, I have to creep forward or eventually my crescent projectile will only be able tohit his crescent projectile, and not him as well.
- I defeat Axle Gear's second stage much more quickly through better use of boosting, maximizing sword contact, and using two tricks that allow me to fire a projectile without making a full swipe (when I jump, and when I land).
Stage 7-4
- I lose time here because I have wait to hit one of the emperor prototypes and boost through it, rather than taking damage.
Stage 7-5
- I saved a few frames by timing my boosts and jumps better.
Final Boss
- I lose time here because each of this boss's stages has 1 extra hit point, there's no quicker vulnerability cycle to manipulate, and the prior run never allowed the boss to be vulnerable for more than 2 frames before hitting it.
- I like to think I was at least more entertaining during the wait time than the prior run, though.
Escape Pod
- Saved a couple frames over the prior run by momentum preservation after boost
Reentry
- I can't take damage, and I can't attack the Pig Star core in any way, so I tried to mock it by mimicking it's movements. It didn't work as well as I hoped, but better than just dodging for a couple minutes with minimum movement.
Comparison Table
| Level | Start | End | Old Start | Old End | Input Length | Old Input Length | Lag Length | Old Lag Length | Level Savings | Level Loss | Total Savings | Total Loss |
|---|
| Menu | 0 | 589 | 0 | 574 | 339 | 369 | 250 | 205 | 30 | 45 | 30 | 45 |
|---|
| Stage 1 Cutscene | 589 | 793 | 574 | 767 | 102 | 104 | 102 | 89 | 2 | 33 | 32 | 78 |
|---|
| Stage 1-1 | 793 | 4347 | 767 | 5415 | 3246 | 4354 | 308 | 279 | 1125 | *45 | 1157 | 123 |
|---|
| Stage 1-2 | 4347 | 6776 | 5415 | 7869 | 2279 | 2313 | 150 | 141 | 34 | 9 | 1191 | 132 |
|---|
| Stage 1-3 | 6776 | 11493 | 7869 | 12756 | 4393 | 4707 | 324 | 180 | +458 | +321 | 1963 | 453 |
|---|
| Score Tally 1 | 11493 | 12532 | 12757 | 13783 | 962 | 962 | 77 | 64 | 0 | 13 | 1963 | 466 |
|---|
| Stage 2 Cutscene | 12532 | 12688 | 13783 | 13929 | 51 | 146 | 105 | 93 | 95 | 12 | 2058 | 478 |
|---|
| Stage 2-1 | 12688 | 15113 | 13929 | 17249 | 2167 | 3072 | 258 | 248 | *921 | *26 | 2979 | 504 |
|---|
| Stage 2-2 | 15113 | 16007 | 17249 | 18300 | 538 | 960 | 356 | 91 | 422 | 265 | 3401 | 769 |
|---|
| Stage 2-3 | 16007 | 24753 | 18300 | 27315 | 8091 | 8320 | 655 | 695 | *149 | *40 | 3550 | 809 |
|---|
| Score Tally 2 | 24753 | 25743 | 27315 | 28304 | 962 | 962 | 28 | 27 | 0 | 1 | 3550 | 810 |
|---|
| Stage 3 Cutscene | 25743 | 25823 | 28304 | 28375 | 17 | 18 | 63 | 53 | 1 | 10 | 3551 | 820 |
|---|
| Stage 3-1 | 25823 | 26487 | 28375 | 29186 | 589 | 749 | 75 | 62 | 160 | 13 | 3711 | 833 |
|---|
| Stage 3-2 | 26487 | 29114 | 29186 | 33007 | 2178 | 3264 | 449 | 557 | 1086 | -108 | 4797 | 725 |
|---|
| Stage 3-3 | 29114 | 31473 | 33007 | 35393 | 2269 | 2295 | 90 | 91 | 26 | -1 | 4823 | 724 |
|---|
| Stage 3-4 | 31473 | 33800 | 35393 | 37619 | 2055 | 2145 | 272 | 81 | *98 | *199 | 4511 | 923 |
|---|
| Score Tally 3 | 33800 | 34816 | 37619 | 38630 | 963 | 965 | 53 | 46 | 2 | 9 | 4513 | 932 |
|---|
| Stage 4 Cutscene | 34816 | 35181 | 38630 | 38970 | 184 | 187 | 181 | 153 | 3 | 28 | 4516 | 960 |
|---|
| Stage 4-1 | 35181 | 36642 | 38970 | 40463 | 1374 | 1418 | 87 | 75 | 44 | 12 | 4560 | 972 |
|---|
| Stage 4-2 | 36642 | 39061 | 40463 | 43375 | 2225 | 2766 | 194 | 146 | 541 | 56 | 5101 | 1028 |
|---|
| Stage 4-3 | 39061 | 39698 | 43375 | 44029 | 562 | 590 | 75 | 64 | *36 | *19 | 5137 | 1064 |
|---|
| Stage 4-4 | 39698 | 42078 | 44029 | 46674 | 2231 | 2480 | 149 | 165 | 257 | *-8 | 5394 | 1056 |
|---|
| Score Tally 4 | 42078 | 43121 | 46674 | 47708 | 963 | 966 | 80 | 68 | 3 | 12 | 5397 | 1068 |
|---|
| Stage 5 Cutscene | 43121 | 43378 | 47708 | 47953 | 153 | 154 | 104 | 91 | 1 | 13 | 5398 | 1081 |
|---|
| Stage 5-1 | 43378 | 49138 | 47953 | 53500 | 5211 | 4952 | 549 | 395 | *@-218 | *195 | 5180 | 1276 |
|---|
| Stage 5-2 | 49138 | 50033 | 53500 | 54516 | 802 | 939 | 93 | 77 | 137 | 16 | 5317 | 1292 |
|---|
| Stage 5-3 | 50033 | 50685 | 54516 | 55178 | 575 | 599 | 77 | 63 | 24 | 14 | 5341 | 1306 |
|---|
| Stage 5-4 | 50685 | 52960 | 55178 | 57450 | 2198 | 2207 | 77 | 65 | 9 | 12 | 5350 | 1318 |
|---|
| Stage 5-5 | 52960 | 53629 | 57450 | 58163 | 590 | 647 | 79 | 66 | 57 | 13 | 5407 | 1331 |
|---|
| Stage 5-6 | 53629 | 57224 | 58163 | 61800 | 3519 | 3572 | 76 | 65 | 53 | 11 | 5460 | 1342 |
|---|
| Stage 5-7 | 57224 | 60390 | 61800 | 64924 | 3034 | 3019 | 132 | 105 | +125 | +167 | 5585 | 1509 |
|---|
| Score Tally 5 | 60390 | 61427 | 64924 | 65797 | 964 | 811 | 73 | 62 | -153 | 11 | 5432 | 1520 |
|---|
| Stage 6 Cutscene | 61427 | 61703 | 65797 | 66056 | 171 | 154 | 105 | 87 | 17 | 18 | 5449 | 1538 |
|---|
| Stage 6 Wave 1 | 61703 | 62137 | 66056 | 66614 | 430 | 555 | 4 | 3 | 125 | 1 | 5574 | 1539 |
|---|
| Stage 6 Wave 2 | 62137 | 62370 | 66614 | 66954 | 233 | 340 | 0 | 0 | 107 | 0 | 5681 | 1539 |
|---|
| Stage 6 Wave 3 | 62370 | 63713 | 66954 | 68472 | 1343 | 1518 | 0 | 0 | 175 | 0 | 5856 | 1539 |
|---|
| Stage 6 Wave 4 | 63713 | 63832 | 68472 | 68693 | 119 | 221 | 0 | 0 | 102 | 0 | 5958 | 1539 |
|---|
| Stage 6 Wave 5 | 63832 | 64462 | 68693 | 69829 | 630 | 951 | 78 | 185 | *337 | *-91 | 6295 | 1448 |
|---|
| Stage 6 Wave 6 | 64462 | 64621 | 69829 | 70072 | 159 | 243 | 0 | 0 | 84 | 0 | 6379 | 1448 |
|---|
| Stage 6 Wave 7 | 64621 | 65910 | 70072 | 71743 | 1062 | 1125 | 227 | 546 | 63 | -319 | 6358 | 1129 |
|---|
| Stage 6 Wave 8 | 65910 | 66221 | 71743 | 72155 | 305 | 408 | 6 | 4 | 103 | 2 | 6461 | 1131 |
|---|
| Stage 6 Boss 1 | 66221 | 70627 | 72155 | 76740 | 3896 | 4117 | 510 | 468 | *273 | *-10 | 6734 | 1121 |
|---|
| Stage 6 Boss 2 | 70627 | 76547 | 76740 | 81530 | 5889 | 4763 | 31 | 27 | +0 | +1130 | 6734 | 2251 |
|---|
| Score Tally 6 | 76547 | 77578 | 81530 | 82399 | 965 | 813 | 65 | 56 | -153 | 9 | 6581 | 2260 |
|---|
| Stage 7 Cutscene | 77578 | 77841 | 82399 | 82648 | 165 | 167 | 98 | 82 | 2 | 16 | 6583 | 2276 |
|---|
| Stage 7-1 | 77841 | 79847 | 82648 | 84859 | 1704 | 1897 | 302 | 314 | *314 | *109 | 6897 | 2385 |
|---|
| Stage 7-2 | 79847 | 80442 | 84859 | 85540 | 522 | 525 | 73 | 56 | 3 | 17 | 6900 | 2402 |
|---|
| Stage 7-3 | 80442 | 83572 | 85540 | 90846 | 2526 | 4299 | 604 | 1007 | +1871 | +-305 | 8771 | 2097 |
|---|
| Stage 7-4 | 83572 | 84259 | 90846 | 91453 | 595 | 535 | 92 | 72 | @-60 | 20 | 8711 | 2117 |
|---|
| Stage 7-5 | 84259 | 84638 | 91453 | 91825 | 307 | 311 | 72 | 61 | 4 | 11 | 8715 | 2128 |
|---|
| Final Boss | 84638 | 93284 | 91825 | 99159 | 8527 | 7263 | 119 | 71 | +0 | +1312 | 8715 | 3440 |
|---|
| Escape Hatch | 93284 | 93971 | 99159 | 99839 | 618 | 620 | 69 | 60 | 2 | 9 | 8717 | 3449 |
|---|
| Reentry Cutscene | 93971 | 95148 | 99839 | 101003 | 1092 | 1092 | 85 | 72 | 0 | 13 | 8717 | 3462 |
|---|
| Reentry | 95148 | 99408 | 101003 | 105251 | 4181 | 5182 | 79 | 66 | 1001 | 13 | 9718 | 3475 |
|---|
| Total (Input) | 0 | 98288 | 0 | 103005 | 90079 | 95115 | 8209 | 7890 | 5036 | 319 | (N/A) | (N/A) |
|---|
| Total (Gameplay) | 0 | 99408 | 0 | 105251 | 91131 | 97298 | 8277 | 7953 | 6167 | 324 | (N/A) | (N/A) |
|---|
Note: "Level Loss" and "Total Loss" are not simply differences in lag frame counts, I wanted to make the "loss" counts a sum of total frame loss due to version differences
"*":This level contained non-skippable enemies with higher HP in my version, I totaled the difference, and divided by average damage per frame, then added that number both to level savings, and level loss
"+":This level contained a "1-hit per cycle" boss with higher HP in my version, I took the number of frames per cycle multiplied by the number of extra cycles I had to wait on, and added that number both to level savings, and level loss
"@":On this level I lost time due to inability to take damage, but because of various uncertanties, I was unable to calculate how much time I lost due to that
Final Frame Savings: 5839
Input Frame Savings: 4717 (input is ended later than the prior movie because I need to avoid damage longer during the reentry sequence)
Possible Improvements
- Changing difficulty -- I learned too late that the only difference hard mode makes is in terms of Boss HP, and the amount of damage Sparkster takes from enemy attacks.
- Changing versions -- The Japanese version of hard mode allows the player to take some hits without dying, and has decreased HP on some enemies and most bosses.
- Lag management -- the game lags quite often, and I may not have found the most optimal way to deal with it.
- Better Boss fights -- there are a couple of boss fights, especially the lava fish, that I'm reasonably certain I didn't find the optimal attack strategy, but couldn't find anything better.
Thanks to
- CleverDan, for making an old run I could compare to.
- Deep Loner, for demonstrating the real TAS potential of this game, and explaining the many new tricks he found.
- Nitsuja, for adding autohold into Gens. This really saved my fingers when I had to hold attack and a direction for long periods.
- Nitsuja again, for helping show me how to make interesting tools for Gens, like Ram search/watch, camhacks, velocity displays, Layer toggling, and more...
- Hawq, for developing gens trace, which allowed me to disassemble portions of the game when I needed to figure out the mechanism behind something.
- The Sonic hacking community as a whole, for all their awesome articles on Object Status Tables, which helped immensely when I decided to make a Hitbox and HP display tool for this game
- Moozooh, Adelikat, Cardboard, JXQ, Emu, Titus Kwok, mmbossman, ShadowJacky, Raiscan, LagDotCom, and especially Derakon (who registered on these forums just to post that my WIP looked good) for their support in the creation of this run.
adelikat: Accepting for publication as an improvement to the published movie.