This page documents information about Mega Man X
,
Mega Man X3
,
Mega Man X2
,
Mega Man X multiple game
. Many of the tricks demonstrated here are near impossible in real time and documented for the purposes of creating Tool-assisted Speedruns.
The purpose of this page is to document all the known tricks of the SNES Mega Man X games so far.
Because of the nature of this site, we concentrate here on tricks that are nearly impossible to perform in real play, but are useful in the making of tool-assisted speedruns. For most of the tricks, a frame advance feature in an emulator is a definite must-have.
In this X series, Capcom has fixed many of the glitches that affected the original series, and introduced new ones. Although the famous zip-through-level-structure glitch has been dealt with, new features such as X’s dash, dynamic weapons, and boss reactions to weapon hits have added new ones.
Note: "X" on this page refers to the player character Mega Man X, unless the context clearly indicates otherwise.
Table of contents
- The basic techniques
- Bosses
- Dialog and event script tricks
- Intro Skip
- Vile-Zero dialog bug (MMX1)
- Sigma-Zero dialog bugs (MMX2)
- Shōryūken invincibility while playing (MMX2)
- X’s black shots (MMX2)
- Defeat Chop Register early, but become immobile (MMX2)
- Jump early from X-Buster upgrade demo (MMX2)
- Facing backward on cut-scenes
- Window of Opportunity
- Move around before Overdrive Ostrich rematch
- Other useful tricks
- Useful links
- See also
Movies
The basic techniques
Midair Tricks
Jumping off sloped ground
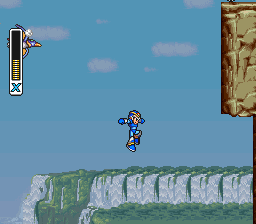
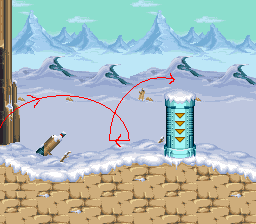 If you jump while walking (not dashing) down a slope, your jump will be higher than normal. Sometimes, this trick allows you to gain access to areas usually only accessible through other means, but is more often used either to barely make it over a wall, or to jump earlier than normal to reach an overhang (if coming from the bottom of the slope), or to reach an overhang faster. Note that up-slopes are also down-slopes in disguise; when going up a slope, press the opposite direction for a couple frames and jump. The image to the right demonstrates how to clear a wall that is barely too high to dash-jump over.
Sloped ground also gives a horizontal boost, whether walking (not dashing) downward on it or jumping off of it from walking. This trick is useful when you do not have the dash (in the first part of MMX1). There is no negative boost for walking or jumping up-slope.
Water Hopping (MMX2, MMX3)
By tapping jump while on any body of
water’s surface, it is possible to hop along
the water, giving you the ability
to cross it without ever having to dive down.
This technique can be enhanced by dashing onto
the surface of the water, so that distance
between water hops is made greater.
Double triangle-hop
You do not have to be right up against a wall to wall-jump; you only need
to be within a few pixels (around 5 or 6) of the wall. So it is possible to wall-jump
when right up against the wall, and then wall-jump again as you ascend off of it, allowing
you to gain extra height.
The Ride Armor's Jets (MMX2)
By charging up and lunging off an edge, the ride armor maintains lunging speed while flying around. Tapping A (around once every 7 frames) makes the best use of the jets.
Resetting the mid-air dash (MMX2)
Use of the charged Speed Burner or Giga Crush, or grasping the bottom of an overhang as briefly as possible, resets the mid-air dash. Normally, you can only air-dash if you don't dash jump, and only air-dash once during the jump.
Air-dashing close to the ceiling and grabbing the overhang from underneath (MMX2, MMX3)
Because X's dash hitbox is shorter than his standing hitbox, X can air-dash very close to a ceiling if one side has an overhang. If the ceiling is U-shaped (two close overhangs), X can air-dash from one overhang and grab the other overhang from underneath.
Luck Manipulation
Methods of luck manipulation
Compared to the Mega Man series, it is harder to luck-manipulate. Simply doing a different dance won’t do it.
Luck manipulation methods from best to worst:
- Drag X down a wall so that dust sprites appear (the best method against bosses).
- Kill more (or less) enemies.
- Position yourself differently or take damage (usually doesn't work).
- Wait a frame or two (or more).
When to use luck-manipulation:
- Item drops
- Boss actions
- Other
Dr. Light capsule manipulation (MMX2)
For some reason, the capsule in Wheel Gator’s stage opens at variable times, any time from instantly to 2 seconds later. You want the capsule to open instantly.
The reason is that, in these games (not just X2), the capsule opens only after the camera is centered properly. In Wheel Gator's stage, the screen periodically shakes.
Weapon Glitches
Passing through enemies
In some situations, the best way to get around an enemy is to go through it, without taking damage. Sometimes when an enemy is in continuous contact with a certain weapon, collision checks are ignored.
Charged Chameleon Sting (MMX1): Designed that way.
Charged Rolling Shield (MMX1): Even if an enemy destroys the charged Rolling Shield by contact, it won’t do collision checks on X for about 7 frames.
Charged Speed Burner (MMX2): X’s Speed Burner dash allows passing through all non-underwater enemies.
Silk Shot (MMX2): Sometimes, the shrapnel from this weapon stops collision checks until the enemy is already destroyed.
Tornado Fang (MMX3): If an enemy can be hit by Tornado Fang, it won’t do collision checks for about 15 frames.
Passing through the giant fish’s laser in Bubble Crab’s stage (MMX2)
If you use charged Speed Burner, you may be able to gain enough horizontal speed to pass through the fish’s laser unharmed (poor collision checking). Normally, X cannot pass through the laser.
Dashing uncharged X-Buster
By dashing and then shooting uncharged X-Buster shots, the first that comes out does more damage than when not dashing. Specifically, in X & X2 only, this shot does 2 damage to bosses, rather than the normal 1 (this does not hold true against a couple bosses in X2, or against X3 bosses except the intro boss which takes 4 instead of 3). The technique works
as long as you are in some type of dash movement, including jumping after dashing, and dashing off a ledge.
Shooting while charged and remaining charged (MMX1, MMX2)
In MMX1, if you fire just as you regain control of X and you are charged up, you shoot a normal shot while keeping the charge (for MMX2 it is just before control). This trick works with any weapon. A possible use is to gain an extra second to charge up when only partially charged.
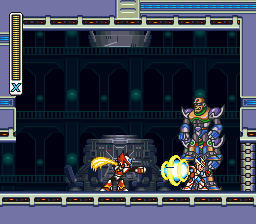
Strike Chain (MMX2)
 The Strike Chain is a weapon and grappling hook with many properties that are important in a speedrun:
The Strike Chain pulls X toward a wall. This method of horizontal movement is one of the fastest in the game, even though it is brief and limited. When charged, it pulls X even faster and from further away.
As the Strike Chain pulls X, vertical speed is preserved. X’s speed only resets if he reaches the end of the Strike Chain. If the Strike Chain pull is cancelled before then (by pressing opposite direction to the pull), X drops off the Strike Chain at the same vertical downward speed as when before being pulled, or even jump upward slightly if X was jumping upward before being pulled.
X can enter thin floors with Strike Chain. If X fires a Strike Chain prior to climbing down a ladder, the Strike Chain will continue and grab the interior of a thin floor when X climbs down. As a result, X is pulled into the floor. When X is inside the floor, it functions as a ladder. This trick does not work on floors with walls underneath.
The Strike Chain can reset vertical speed. If a Strike Chain grapples something and either pulls X completely or not at all, it resets vertical speed. Simply using Strike Chain close to an overhang resets vertical speed while keeping dash movement.
Beam Saber (MMX3)
 The Beam Saber (or “Beam Sabre”) is the secret weapon that kills bosses in two hits. Yet much time can be saved from efficient usage:
- The Beam Saber will not fire until the charged shot is gone. The fastest way to clear a charged shot is to shoot it into a nearby enemy (the boss). It is necessary to prevent the boss from being harmed by this shot due to its 60-frame invincibility, so pre-hit the boss to make it flash beforehand in such a way that the charged shot does not harm the boss but the sword does. If it is not possible to do so in this manner, the next fastest way is to dash while shooting the charged shot off the edge of the screen.
- The Beam Saber strikes the fastest on the first frame on which it appears, which is behind X. X draws the Beam Saber one frame faster if he stands on the ground to start swinging than when in midair.
- To charge up a second Beam Saber, it is fastest to take damage after hitting with the first Beam Saber so that the slash animation is cancelled. Post-slash animation has no effect on charging.
- To cancel either the post-slash animation or the Beam Saber altogether before it slashes, quickly switch weapons. Useful for regaining full control of X.
- The Beam Saber allows charging of all weapons to the yellow level, even without X-Buster upgrade. This allows firing a special weapon and charging to prepare a Beam Saber.
Beam Saber/Charged X-Buster double-jump (MMX3)
If X/Zero swings his Beam Saber or shoots a pink/red/green charged shot either during the first part of a wall-jump or during a vertical air dash, and jump is held down, X immediately jumps up as if he jumped from ground. Combined with switching weapons to regain control, X can gain additional height and even air-dash again (Zero cannot switch weapons so requires being hit). Note that this trick alone cannot put X in dash movement.
YouTube video (air dash): http://www.youtube.com/watch?v=DqgAp3cMNJU
Zero’s continuous Beam Saber (MMX3)
During the time when you control Zero, if you have Zero slash with the Beam Saber, then rapidly jump (once every 4 or 5 frames) Zero will keep the sword out and it will continue to damage enemies. This trick is not particularly useful, mainly due to not needing to control Zero for most of the game.
Taking damage to save time
Cancelling damage animation near a wall
 If you press left or right to grab a wall when X is forced toward it from being damaged, damage animation will be cancelled. Not only does this save time, but it prevents X from falling a long distance or recoiling, and thus plays a vital part in spike-shaft climbing.
Touching lethal ground while damaged
In many games, damage causes the player character
to become invincible for a short time, even to spikes.
While by now this is nothing special, there are
situations in the Mega Man X series where using
this can save you from having to get a
weapon and backtrack to a level you already
visited in order to use it to get a Heart Tank
or Sub-Tank. You can also climb spiked shafts rapidly without using platforms if there are enemies around.
Gaining height from hit recovery
A rarely necessary trick, if you get hit while you are
in the air, you will very slightly ascend due to the hit
recovery animation. Thus, you can technically gain additional
height during a jump by getting hit while you are at its peak.
It is possible to combine with Cancelling damage animation near a wall to cancel damage animation while still ending up on top of the wall.
Bosses
Abnormal boss recoveries
While in general, bosses have a one-second invincibility after being hit, there are exceptions. A concept that occurs in the X-series and not in the original is that sometimes stunning the boss with his weak weapon will make him do some different action. Occasionally, these different actions can override the current state of invincibility (either forcing on or off invincibility). It is this forcing on or off of invincibility that causes glitches. Not all tricks are glitches; some tricks simply take advantage of the programmers’ erroneous assumptions concerning invincibility.
- Spark Mandrill (X1): Becomes vulnerable again while he is still frozen from Shotgun Ice.
- Flame Stag (X2): Invincibility is forced off when he starts throwing flames while on the ground. Bubble Splash can force this action.
- Overdrive Ostrich (X2): Becomes vulnerable again while he is still frozen from Crystal Hunter. When he breaks out of frozen animation, he is invincible for 60 frames. Just before he shoots charged Sonic Slicer, he can be hit. Then right after, invincibility is forced off and he can be hit again.
- Sigma 1 (X2): Becomes vulnerable every time he performs an action from the ground. This is notable when he dashes to slash you.
- Toxic Seahorse (X3): Becomes totally vulnerable (no recovery) for about 20 frames while he is still blinking from Frost Shield. Must be hit above a certain height.
- Volt Catfish (X3): Invincibility is forced off to Tornado Fang when he turns blue from his super attack. Still, avoid using Tornado Fang except on the last hit.
- Crush Crawfish (X3): Becomes totally vulnerable (no recovery) for about 120 frames while he is still blinking from Triad Thunder. Use a rapid-fire weapon.
- Neon Tiger (X3): Invincibility is forced off when he performs his next action from the ground.
- Gravity Beetle (X3): Invincibility is forced off when he is hit by Ray Splasher while flashing.
- Blast Hornet (X3): Gravity Well does damage to Blast Hornet in a unique way and has nothing to do with invincibility. The blinking is for show.
Defeating bosses fast to avoid long invincibility
- Wire Sponge (X2): If Wire Sponge’s health goes below 10, then after he completes his current action, he becomes invincible for a long time while using his lightning attack. If his current action is hanging on the ceiling, then you can beat him before he finishes this.
- Wheel Gator (X2): Wheel Gator can be hit with Strike Chain right away at the beginning, and can be hit just before diving, thus forming a cycle.
Bosses that recover like minibosses
Vile (X1), Velguader (X1) (or "Sigma's Dog"), and "Sigma Virus" (X2) (the final boss), all have recovery times similar to most minibosses (around 20-30 frames recovery). For Velguader, the weapon of choice, Shotgun Ice, does not disappear on impact, but creates pellets. You want to shoot so that the pellets disappear fastest. Sigma Virus has 64 health.
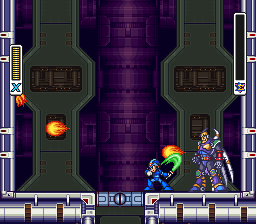
Sigma’s Broken Sword Defense (MMX1)
Sigma uses his sword as a shield to block shots. However, if X fires Electric Spark while standing very close to the sword, the Electric Spark goes through the sword and hits him.
Dialog and event script tricks
A major source of dialog bugs is multiple event scripts breaking each other.
Intro Skip
There is a glitch where the intro scenes can be skipped.
To do that (in Snes9x v1.43),
press the start button exactly on the following frames, and nowhere else:
- (MMX1): 358, 393, 445, 447
- (MMX2): 441, 444, 508, 510
- (MMX3): 441, 444, 519, 521
Explanation:
- The first press clears the opening as soon as possible (it is permitted to hold down any button to clear).
- The second one skips the intro scene by glitching.
- The third button presses "Game Start" from the menu.
- The fourth button clears this menu screen without having to wait for it to fade.
Vile-Zero dialog bug (MMX1)
YouTube video: http://www.youtube.com/watch?v=Rx4DasCTb-s
It is possible to, by delaying dialog scrolling when Zero
jumps on Vile, to form a Vile/Zero mutation image.
Sigma-Zero dialog bugs (MMX2)
There are two versions of this glitch, both requiring
the shōryūken and all the Zero parts:
1) By doing a shōryūken into the center of Zero's room
during the final level, you place
X in the middle instead of his normal location. When Zero
punches a hole in the floor, X simply falls in and the script
where Sigma prepares for his first attack runs at the same
time as Zero saying “Sigma lies just ahead.” This trick
requires collecting all of Zero’s parts and the shōryūken.
For some invincibility fun, see Shōryūken invincibility while playing
below.
 2) From the rightmost point where you still maintain control of X, it is possible to dash and use shōryūken so that X ends up right between Sigma and his black Zero. From so far in, when Zero shoots at Sigma, he will hit X instead, giving him control. Then, just jump into the hole Zero makes and continue (if you are performing the invincibility trick later, use a sub-tank to refill health).
Shōryūken invincibility while playing (MMX2)
There are at least 4 places in the game where the shōryūken
can be used to make X invincible. The trick involves glitching
an event script into executing what would be the “Gain Control of X”
command while you already have control of X and are performing a
shōryūken.
The first and most well known is during the first battle with Neo Sigma[1].
Perform the Zero-Sigma dialog bug. When Sigma’s health gauge is charging,
perform a shōryūken anywhere. If you are still doing it when the gauge
reaches maximum, you will stop in midair and be invincible for the
remainder of the battle unless you perform a shōryūken again or beat Sigma.
YouTube video: http://www.youtube.com/watch?v=LwIkwuT8ZMI#t=0m54s
Note: The following three tricks are not of serious interest in a speedrun. They are completely out of the way.
The others are in Morph Moth’s stage, Magna Centipede’s (without Sigma), and Bubble Crab’s. For Morph Moth’s level, simply perform a shōryūken into the battle room with the second junk robot miniboss.
The others are in Morph Moth’s stage, Magna Centipede’s (without Sigma), and Bubble Crab’s. For Morph Moth’s level, simply perform a shōryūken into the battle room with the second junk robot miniboss.
For Magna Centipede's level, you will need a sub tank. Use shōryūken into Chop Register’s
room as far as you can. You will be hit by the materializing sword and
regain control. Heal up and use the shōryūken as the battle would start.
For Bubble Crab’s level, use the Giga Crush just as the submarine exits
its bay, so that the submarine travels underneath X, who falls on it. Again, heal quickly after taking a hit and then use shōryūken. Bubble Crab’s level requires very good timing and quick reflexes to accomplish compared to the others.
YouTube video: http://www.youtube.com/watch?v=KAtozy0EItU
X’s black shots (MMX2)
Whenever X is invincible from the above glitches, X will shoot black-and-orange charged X-Buster shots. This lasts until you switch weapons or X loses invincibility. Another way to gain black shots (if you didn’t get all the Zero parts) is to hit Zero last with the shōryūken.
Defeat Chop Register early, but become immobile (MMX2)
At Chop Register’s room, go in as far as possible without losing control of X, and use Giga Crush. If done right, the Giga Crush attack will destroy Chop Register as it barely comes on the screen. However X will be stuck (since the instruction to regain control never occurs), so this trick is not useful at all. It is also possible to use charged Remote Mine to perform this trick, since it is slow.
Jump early from X-Buster upgrade demo (MMX2)
After getting X-Buster upgrade in Wheel Gator’s stage, you regain control right after X stops charging and starts firing. Although you can’t walk or dash, you can jump forward (not dashing), allowing a head start. Alternatively, you can jump backward and cancel the corkscrew shot animation by grabbing the base of the capsule, but this seems to be slower.
Facing backward on cut-scenes
The simplest way to do this is to approach the trigger as close as possible without losing control, then press right-left (must be done from rest). In MMX1, it can be done unassisted by riding a charged Shotgun Ice platform backwards. Note that some scenes force X to look the right way.
Window of Opportunity
Window of opportunity is a one-frame timeframe when you have player control (usually unintentionally). There are times in the game where this occurs:
- Before all boss rematches in MMX2 which have X drop into a room (weapon switch only).
- In Crush Crawfish’s stage after you destroy the engine, just before you drop. (MMX3)
Move around before Overdrive Ostrich rematch
For some reason, if you move around when you land from teleportation, Overdrive Ostrich will not begin to appear until you stand still for a frame. This trick does not seem to be useful.
Other useful tricks
Flame Mammoth’s alternate path (MMX1)
Using the junk heads, it is possible to enter where the heads dropped from.
This glitch does not work in E version.
YouTube video: http://www.youtube.com/watch?v=MAz3t856oCk
Note: This alternate path is slower, because of a
mysterious climb somewhere along the way.
Spike shaft no-damage hit on X (MMX1)
In Boomer Kuwanger’s level, the spikes that line the walls (not the spikes underneath the barriers) do 8 damage to unarmored X. However, if X jumps off the walls (without contacting them), X gets hit but takes no damage.
Hadōken sequence (MMX1)
It is common knowledge that you must visit a certain area (near the end of Armored Armadillo’s stage, high up on the last wall with energy capsule) five times, and you must have all the items, weapons, and upgrades to get the hadōken. However, there are a couple misconceptions:
- It is assumed that you must have all the items, weapons, and upgrades to begin the sequence; this is not true. You can have nothing and start to visit the hadōken area and it will count as a visit. This is why it is sometimes reported that you need four visits (because the first visit to Armored Armadillo’s stage counts as a visit if you get close enough). As for having everything, it comes into play only on the last visit.
- It is assumed that you must grab the energy capsule; this is not true. Getting near the area where the capsule would appear is enough. You can simply make X hit the lower-left corner of the visit area, as shown in the image above.
Note that you also need full health on the last visit to make the capsule appear.
The number of visits is stored in memory address 7E1F7E. Check this address to make sure that you visit.
Mid-air Hadōken
The mid-air hadōken can be done as follows:
- Charge up Shotgun Ice and put it in a wall.
- When it forms a platform, stand on it.
- Start the hadōken sequence by pressing down, down-forward, forward, then press start to enter the sub-menu.
- Select X-Buster, then press fire on the first frame when you regain control.
- If done right, X will fire a hadōken in mid-air.
This trick is useful against Rangda Bangda (face boss) and Sting Chameleon.
Bubble Crab’s Sub-Tank (MMX2)
Using both Jumping off sloped ground and Water Hopping techniques,
it is possible to obtain the item without charged Bubble Splash.
YouTube video: http://www.youtube.com/watch?v=SZs7vnEgglk#t=8m24s
Go through Crystal in Crystal Snail's stage.
Cancel long weapon effects (MMX3)
If you use charged Gravity Well or Triad Thunder, you can cancel the long weapon effect by entering the sub-menu and exiting with a different weapon. This is useful when getting items that require those weapons, or when using Gravity Well against Blast Hornet (above).
Lag glitches that can only be performed on consoles
Because of the console's inferior power, often there is lag on consoles where there wouldn't
be on a computer emulator. Though lag is usually undesirable, sometimes lag can cause glitches.
In that case, sometimes these glitches can only be done on consoles that generate the necessary
lag. Computer emulators may not emulate enough lag.
As an example, it is possible to skip the Crystal Snail miniboss in X2 on a console
by using a charged-up Silk Shot. Apparently, it cannot be done in Snes9x.
It is demonstrated in the console speedrun of MMX2 at SDA.
Useful links
See also
Authors:
[1] Confusingly, the first form is called either “Neo Sigma” or “Sigma”, and the second form is called either “Sigma Virus” or “Neo Sigma” (respectively). Technically, “Neo Sigma” is the correct name for both forms, but the wireframe Sigma will be called “Sigma Virus” on this page, because of the similar appearance to MMX3’s Sigma Virus.
Subpages for Game Resources / SNES / Mega Man X
Expand/Collapse collapse-content-_aaad16f6c7924638bb67aa3433c48b4e
See also
- Game Resources - we have resource pages for other games too!
- Common Tricks - tricks common to many games
- Boss Fighting Guide - tricks specific to boss fights
GameResources/SNES/MegaManX last edited by adelikat on 8/11/2022 4:31 PM
Page History Latest diff List referrers View Source