Emulator used is BizHawk 2.3.0 with mGBA core.
This is a 100% TAS which improves upon Biospark's TAS. Biospark's TAS uses VBA, which is faster than Bizhawk by about 1 second for every minute. Therefore, this updated TAS is about 2 minutes and 10 seconds faster. The majority of this time save is an improved cleanup route which saves ~50 seconds, exiting through Sector 2 to the Reactor rather than going up the long Main Deck elevator. The rest of the time saves are from out-of-bounds tricks, small movement optimizations, and RTA strats. Just like the Any% TAS, RTA is prioritized and jumping through doors happens frequently to speed up transitions.
Game Mechanics/Tricks
- Out of Bounds
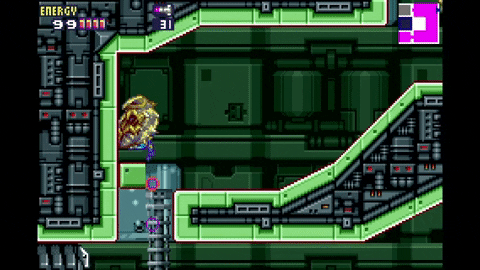
- If Samus morphs, cancels the morph, and then jumps, she will get moved into an adjacent wall, provided there is a ceiling block above. While in a wall, you can move around while spring-balling (although only upward). This lets us zip around rooms much faster than usual as well as bypass walls. This is most easily done using a frozen enemy or a crumble block.
- Door Fixes
- Jumping through some doors saves time by reducing door scroll time. This saves real time but loses in-game time.
- Luck Manipulation
- Room patterns depend on the frame at which you enter the room, so extra frames have to be added to obtain more favorable enemy positions, eyedoor randomness, etc. Because items are picked up so frequently in 100%, extra frames can be added during the item acquisition to subtly change eyedoor RNG and enemy patterns. Of course, this is not always possible, and therefore these extra frames are spread out across room movement as best as possible to not make it obvious.
Other game mechanics can be found on the Metroid Fusion resource page: GameResources/GBA/MetroidFusion
Comments/Improvements by Section
Main Deck
- Nothing significantly different here.
Sector 1
- Slight improvements to the Charge Core pickup location in order to leave the room faster.
Sector 2
- E-tank right before Zazabi is picked up after the fight. Normally this is slower but the eyedoor luck was much better when the item was aquired later.
- Zazabi - the number of jumps given by this boss can only be manipulated during the fight by pausing after damaging it. Instead of doing this 3 times for each phase, the game is only paused once, and the rest of the manipulation is done before entering the boss room, saving a decent amount of RTA.
- A clip is done near the end of the sector using a kihunter cocoon to skip much of the room.
Sector 4
- Small optimizations
Sector 3
- A damage boost off of BOX is used to exit the boss room earlier. Interestingly, if you leave this room too quickly without waiting for 4 frames, there will be no music and the computer will tell you "Target eradicated", not allowing you to progress.
Sector 6
- The crumble block in the SA-X encounter room is used to clip. By repeatedly morphing and cancelling it with a spin jump, Samus can move through the morph tunneled as well as the right wall. Unfortunately, the SA-X has to be encountered to progress the event system so this is not skipped. This clip alone saves 16 seconds.
- Faster Mega Core fight by damage boosting to the left off the 1st hit.
Sector 5
- A waver is frozen to do a clip to the top of the central room. Saves 7 seconds.
Emergency in Sector 3
- Another clip done while leaving Sector 3.
Animals and Sector 5 Revisit
- If Samus morphs while facing away from a door right as it closes, she can clip into the wall and continously spring ball up it. This is used to get to the top of the room to the right of the animals without needing to freeze enemies.
- Some more clips are included in Sector 5.
Yakuza
- Had to settle for mediocre pirate patterns in the room before Yakuza. Each pirate has a random position it can be, so getting a good pattern for all the pirates as well as the eyedoor is extremely lucky, and that was not the case here.
- Yakuza's 2nd phase can be skipped if on the 2nd round of fire you manage to reduce its hp to 0 from 1000. This is possible by unmorphing and remorphing to keep missiles as close to Yakuza as possible.
- The Core X is destroyed above the sweet spot, so Samus can jump as early as possible and collect the X as she is descending. Waiting for the Core X to move into position to obtain space jump as early as possible is slower because exiting the room requires moving up opposed to left/right.
Sector 2 and Nettori
- Another clip is used with a frozen Kihunter to skip extra door transitions. This means one of the items normally obtained here is picked up during cleanup later on.
Sector 5/Nightmare
- Nothing very different here, Nightmare chases an invisible square that can be redirected by messing around with the crumble blocks at the top of the room, making Nightmare immediately swoop to the ideal death spot.
Lower Sector 4
- Some more clips and minor optimizations.
Sector 6/XBOX
- Added more clips here which save a substantial amount of time.
Sector 1/Ridley
- Better charge beam usage on Ridley as well as a better Core X (similar to Yakuza).
Cleanup
- Entirely different route.
- Added a new clip in Sector 3 cleanup that saves 2 or so seconds.
- Added a new clip in Sector 6 similar to the one right before XBOX. Due to screw attack, though, it wasn't possible to carry speedbooster into the next room.
SA-X/Omega
- Very slight frame improvements (second SA-X form doesn't jump).
- Better Omega fight positioning, eliminating 6 extra beam shots.
Overall, very happy with the quality of the TAS. Eventually I will make a memory corruption TAS (which thankfully is much shorter).
Also, use frame 5549 as a screenshot for the TAS.
Memory: Claiming for judging
Memory: Great work on implementing the new skips and tricks into the 100% run! I loved to see what was possible with zipping in this category.
Accepting to obsolete [2086] GBA Metroid Fusion "100%" by BioSpark in 1:35:19.30.
Spikestuff: Publishing.