Prologue:
Heavy use of double cornerboosts, 19 frames saved off any% publish.
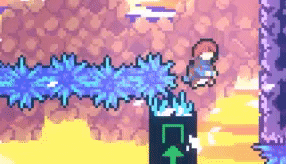
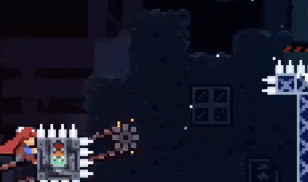
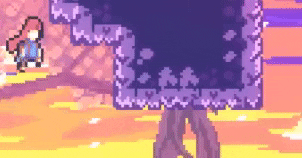
City A:
The first section of City has a lot of berries before a deathwarp, and not a lot of places to collect berries. While in most levels we only collect berries when it would lose 1-2 frames, here we’re willing to lose as much as 7 frames to collect a berry.
0:27: We skip a berry to the left here, and will get it later by re-entering from the checkpoint. This saves about a second of IGT at the cost of 2 seconds real time.
0:40: We enter a code by dashing in specific directions to spawn the heart, then die to skip the heart spawning cutscene. Saving and quitting skips waiting for the heart text to appear and disappear and saves slightly over a second IGT, again at the cost of 2 seconds real time.
1:22: Getting 2 speed boosts off the back of the block then up-left demoing over it breaks exactly even with a much less interesting strat.
1:25: We skip 2 berries and the cassette here, and will again get them separately from the checkpoint. This saves 3 seconds IGT and is roughly even real time.
0:12 (After returning to map): Jumping 3 times off the block, once off the spiked wall then dashing down-right gives us 5 speed boosts and allows us to get back before the block does.
0:17: Returning to map skips part of the cassette cutscene and some backtracking.
Site A:
New mechanics:
- Dream blocks: We can jump the frame Madeline exits the block, then again after she exits to get more speed. Alternatively, as leaving a dream block puts us in coyote time, we can hyper when exiting a dream block (although this is seen more in chapter 7).
Restarting chapter after collecting the heart saves a second, but means we have to rewatch the intro cutscene.
0:14: Vertical position is maintained across cutscenes, and Madeline’s dash is refreshed inside the dream block.
0:25: We can cornerboost off the cassette blocks as they disappear.
We avoid collecting berries and make the trail as long as we can without losing time.
2:22: The speed here is made possible by chaining an ultra, 2 delayed ultras, and 2 more regular ultras.
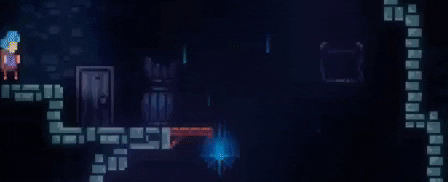
Resort A:
0:16: Dashing pauses the game for 3 frames and Madeline for 4 frames. By dashing, we let the 2nd dust bunny move for one more frame before we reach it, and we can get past it with much more speed.
1:09: This cycle is only possible because the game uses hitboxes from the previous frame, Madeline is actually touching the dust bunny hitbox here.
1:37: Doing a grounded ultra then cornerboosting off the key door allows us to maintain ultra momentum.
1:52: There are two similar routes in Huge Mess, one of which does the bottom section (crates) first, and one which does the middle (towels) first. While towels first has somewhat more awkward movement, making crates first preferable non-TAS, it requires much less movement to talk to Oshiro between sections, saving 3 seconds overall.
2:22: Hitting the left side of the heart bounces us to the left. By dashing the frame we hit it, we can break the heart while getting bounced to the left. We also avoid holding down at the start of the dash, as that prevents having a crouched hitbox and allows us to collect the heart lower.
We re-enter this room and deathwarp - you’re not expected to re-enter like this, and we respawn at the closest checkpoint, in the upper half of the room. This skips talking to Oshiro once and saves 9 seconds.
3:20: Putting the key in the door then leaving to get the last berry saves about a second over just waiting for the door to open.
4:05: When we enter this screen, the key in it starts to rotate. The key can only unlock the door when it’s facing the door. This means that a portion (1/3rd) of the time saved between entering this room and putting the key in the door will be lost to the door taking longer to open. Duckjumping under the key the first time through the screen gives a much better key cycle and saves .2 sec.
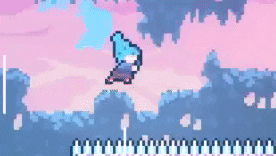
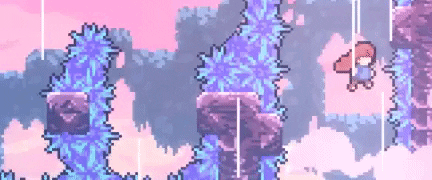
Ridge A:
New mechanics:
- Bubbles - entering a bubble with a ducking hitbox will move the bubble up 2 pixels. (This tech is informally called Archie after a parakeet belonging to a Celeste runner.)
0:25: If you’re within three pixels of a wall and falling, sideways wind will not affect you. We use this to slow down quickly when turning around to get the berry.
0:37: The strawberry seeds only disappear if you jump or dash off the ground, or stay on the ground for 9 frames, which we can abuse by jumping out of coyote time.
0:44: Cassette blocks are based off the music (so based off real time). Causing IGT lag by repeatedly dashing causes cassette block cycles to take less in-game time.
2:20: We go out of the way to do a delayed ultra here, which gives an additional speed boost into the next screen and allows us to go straight to the middle platform.
2:49: We’re able to collect the berry on the little ledge next to the spikes, skipping having to go back against heavy wind.
3:18: By alternating left and right each frame while jumping, we can move slowly to the right while staying in spike hitboxes, then jump again on the frame we leave the spike hitboxes.
We do a spikejump to restore stamina, and finally do a demohyper off the spikes on the next platform as it starts moving.
3:32: The wind pushes us into the spikes on the ground before the second bubble, and we can jump out of coyote time to skip the bubble.
3:35: Doing a grounded ultra into the snowball preserves ultra speed, which we chain with another ultra in the next screen.
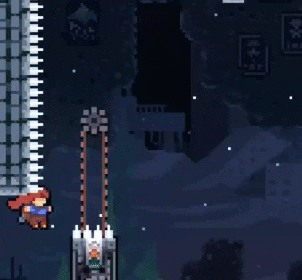
Temple A:
New mechanics:
- Theo - Grabbing Theo cancels a dash but freezes Madeline in place, making it possible to carry a lot of speed into grabbing him, but making the section very difficult to route optimally.
1:07: Doing a spike crouchjump then a delayed ultra just barely gives us enough speed to make it back to the block after getting the berry.
Normally you can get a maximum of 270 speed when cornerboosting off a corner with a spinner, any faster and you’d die to the spinner. The block here moves 1-2 pixels each frame, and by moving over it on a frame where it moves 2 pixels, we can get more speed than usual without dying.
On the way back, we can get 2 speed boosts off the moving block and maintain it through several rooms.
2:01: The route we take in the first section of depths requires significantly more backtracking than the unassisted route, but saves time by conserving speed from a moving block through 2 screens, saving .1 sec overall.
3:27: Getting this key early is easily the biggest TAS-only skip and has a bunch of simultaneous requirements - Madeline must be crouching, have a somewhat precise x-position and speed, and have a y-position precise to ¼ pixel. This is made more difficult by the corner right before we jump, which limits the potential speed/position combinations we could have. The solution we found was to hit the corner with exactly 45 y-speed and 120-145 x-speed, turn around and grabjump.
3:45: Saving 2 frames on this room would let us dash straight out of the penultimate bubble, skipping a cycle.
6:57: Having Theo hit the right side of the seeker both moves Theo further right and puts the seeker in a better position. After getting the berry we dash into the seeker, which restores our dash and puts us in the right place to do a grounded ultra into Theo. This wasn't actually planned, but the seeker happened to be in the right position.
7:06: The dash-activated moving blocks make you stay on them if you dash while above them. We can work around this by jumping ahead of the block and dashing into Theo. When we pick up Theo, the pickup animation moves Madeline back onto the block, but conserves the momentum we had when we grabbed Theo. Jumping off the block again gives a 4th speed boost, which is enough to clip through the spikes in the next room.
Reflection A:
New mechanics:
- Feathers - holding diagonal on the dpad/keyboard gives a larger initial speed boost out of the feather than analog does. Otherwise we use analogue to control the feather more precisely.
- Bumpers - Holding away from a bumper when you hit it gives a 1.2x speed boost (called bumper boosting), and if you hit a bumper close to the edge, you’ll always get the maximum speed boost.
0:47: We do a hyper + bunnyhop off the Kevin, dash up-left, then reverse cornerboost on the other side of the screen transition to get a 4th speed boost. We actually have to slow down in order to avoid clipping through the cassette before it loads.
1:00: Grabbing the wall here while grounded allows us to wallboost without using stamina. However, stamina is still refunded, allowing us to grabjump one additional time.
1:09: The water here allows us to enter all 4 6-dash codes without ever waiting to get our dash restored.
0:05 (after returning to map): Hitting the falling block at the right time sets it up so we can get our dash back on it after hypering off the Kevin. We slow down to avoid the spikes in the next room by hypering.
0:15: Taking the first 2 bottom screens here forces some awkward movement to get back to the top section, but saves 3 seconds overall.
1:04: This bit consists of a delayed ultra, 2 normal ultras, an ultra into a cutscene, and 3 more delayed ultras, making this the longest ultra chain in the TAS.
1:39: We’re able to get 4 speed boosts from the Kevin, but end up going too fast. If we hit the edge of the screen after the cutscene, we’ll lose all our speed. To avoid this, we dash after the cutscene to give the camera an extra frame to catch up.
Summit A:
2:51: There’s a 2 pixel difference between the bottom of Madeline’s hitbox (used for collision with blocks) and hurtbox (used for collision with hazards). If only her hitbox hits the corner of a dream block, we can go through it, even if there are spikes there.
4:04: The cycle here is made possible by doing a delayed ultra into this room, then doing two reverse cornerboosts to get over the block in the center. This cycle also allows us to chain a couple ultras into the gem room, saving even more time.
5:12: Chaining three ultras builds up enough speed to effectively skip the next room.
5:28: Unfortunately, the berry train must come to an end. We have to do a deathwarp in about 3 minutes, and this is among the few places we can collect berries without any timeloss.
6:32: A deathwarp here would save 1.7 sec, but even with the berries we collected back in 2000M, we still can’t collect them fast enough.
8:09: The heart animation takes quite a while to play, during which we can grab the next two checkpoints and get back before the heart spawns. Saving and quitting puts us back at the last checkpoint, saving about 5 seconds. The waits here are specifically timed as to not break the 1up chain.
8:20: Downwind is prone to long chains of spikejumps, thanks to the ease of spikejumping here. This one’s a cornerboost into 3 spikejumps.
8:34: Rather unique combination of tech here - we wallboost to turn around quickly, hit the spiked ground while moving left, then hyper out of coyote time, cornerboost, and do another spikejump.
9:30: Hitting this spring twice gets us enough height to do a wallbounce followed by a demo.
9:41: Skipping Badeline here avoids having to wait to land after the screen transition, and more importantly, skips collecting a berry.
Core A:
New mechanics:
- In Core, your dash is only refreshed when you hit a refill gem or screen transition. This made Core A and B very difficult to TAS, as we had to figure out the best places to use our limited dashes, and dashless movement is very difficult to optimize.
- Core blocks - Their hitbox disappears when you jump off, so it’s impossible to jump multiple times off one.
- Lava blocks - These act as walls, and there’s a one pixel area where you can walljump off lava without dying. With proper vertical positioning, it can also be possible to cornerboost off of lava.
We wait for a quarter-second at the beginning, as we need to skip a cutscene and we can’t open the menu until the intro animation finishes.
0:27: By doing an ultra off the core block and getting 2 speed boosts, we can get the first berry while the level is still in fire mode, skipping most of this checkpoint.
0:46: Skipping the fire/ice switch in this room prevents having to backtrack after hitting a later switch, and saves around 1.5 seconds.
2:34: We’re able to get a bumper boost without slowing down by crouchjumping then hitting the bumper when Madeline unducks.
City B:
0:13: By doing a cross-screen cornerboost, a couple wallboosts, and a 5-tile walljump, we can get up to this block with a dash and minimal stamina use, and proceed to get 3 speed boosts from the block.
0:40: We wallboost off the second block here to get a faster spikejump to the left. We then do a double cornerboost at 137 speed (close to the maximum amount) to get to the next block. We end up running out of stamina, and have to do a 5-tile walljump to even complete the screen.
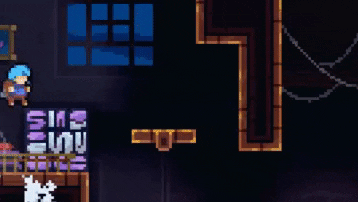
Site B:
0:19: Madeline stays in dream blocks as long as one pixel of her hitbox is touching a dream block. By making sure we’re always partially in a dream block, it’s possible to clip through this wall.
Resort B:
0:18: If Madeline is below a one-way platform during a dash, she’ll slowly move up to the platform. This makes it possible to be low enough to get the coin but still hit the spring.
Ridge B:
0:13: This rather elaborate autoscroller skip saves 6.5 sec.
1:20: This autoscroller can be optimized by clipping corners with the block so we don’t have to move it sideways quite as much.
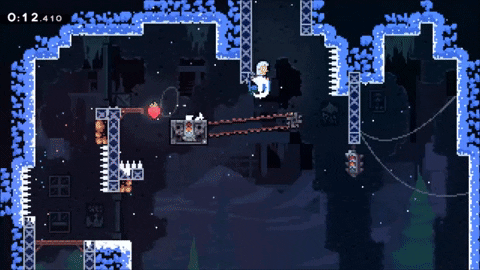
Temple B:
2.941 sec / 173 frames saved over any% publish.
0:16: Two jumps off the block, a dash, and a reverse cornerboost give us enough speed to skip most of this screen. Going through the spike tunnel at the end of this room skips getting a key and saves around 21 seconds.
0:25: We have to wait for a cycle, so we stall by repeatedly grabbing under a wall with spikes. This works the same as ceiling pops, just we don’t actually jump.
1:21: Theo tries to move if he’s above spinners, so by having him land on the right side of this spinner, he ends up in the right position to ultra into.
1:41: If you aren’t carrying Theo, you aren’t allowed to exit the room until after he does. By throwing Theo early so he takes longer to exit the room, we can do a higher jump while waiting for him to exit. The additional height allows us to do an extra ultra before grabbing Theo on the next screen.
Reflection B:
5.967 sec / 351 frames saved over any% publish.
1:45: While we could demo straight to the end of the screen here, going out of the way to do a waterboost ends up being slightly faster.
2:55: Bumper boosts out of a horizontal dash like this would usually be impossible, but since this bumper is moving right, it actually moves into Madeline the frame we hit it.
3:29: The bumper boost out of a wallbounce is just barely possible, and makes it possible to reach the next cassette block only 2 frames before it disappears.
Summit B:
0:43: We get enough speed off the moving blocks that it’s worth it to save our dashes for slightly faster movement towards the end of the screen.
1:25: We grab the side of the dream block wall to get as little height as we can from it.
3:00: If a block is moving up faster than Madeline can jump, it’s possible to cornerboost off the bottom and go under it. We follow this up with two dash refreshes off upward moving spinners.
4:10: The demo here is only possible thanks to upwind moving Madeline up after the dash ends. Saving a dash here would save several seconds, as it would allow chaining spikehypers and skipping Badeline, but unfortunately seems to be impossible.
4:40: We do a demodash off the last cloud through the spikes, but since the demo started on a platform, we can get our dash back and hyper after passing through the spikes.
Core B:
0:02: For whatever reason, Madeline automatically jumps for 0 frames at the end of each dash. While this doesn’t do anything on its own, it makes it possible for a jump to carry through a dash. By doing a one frame wallbounce before a dash, it carries through the dash and causes a midair jump.
0:04: This ultra chain is the most precise thing in any maingame TAS of Celeste.
Our best option for starting the ultra chain here is to do a reverse hyper into a delayed ultra.
Normally when we do a reverse hyper into a delayed ultra, it takes either 12 or 14 frames to land from the ultra. However, if Madeline’s subpixel position before the hyper is in the lowest 30th of a pixel, it will only take 11 frames. It’s not normally possible to manipulate position this precisely. However, we found that doing a 9 frame up-diagonal dash would make this possible.
All of this means we don’t have to slow down in order for the ultra to land, saving half a second over the next few screens.
0:40: When core blocks disappear, they put you into coyote time, which you can hyper out of to gain a bunch of speed.
1:22: The cornerboosts at the start of the room include a double cornerboost at 143 speed, which requires a position precise to 1/40th of a pixel. (aka “just get lucky,” you can’t manipulate position that precisely.)
2:18: We have to push down the last platform far enough that we can demohyper through the last spikes.
City C:
If we could get the right speed off the second block in the first room, we could skip the third block entirely. Unfortunately, the best we could do was slightly too fast, and ended up 1/15th of a pixel away from skipping it.
Having the last block push us during a dash up lets us get 3 speed boosts into the next screen.
Reflection C:
0:17: For some reason, if you move over the edge of a Kevin the frame it hits a wall (note that the Kevin has to move 4 pixels the frame it hits the wall for this to work), you’ll move down further than usual that frame. Some weird combination of mechanics we don’t really understand, but it lets us get 4 boosts off the Kevin instead of two.
Spinner collision doesn’t load until they appear on screen, but the behavior on the edges of the screen is less predictable. Each individual spinner only checks if collision should be loaded every three frames, and which frames they check on is determined randomly. (It’s consistent, as the RNG is seeded with the name of the screen.)
We clip through 2 onscreen spinners here, and the clip will only work every 3 frames, as we need the first spinner to take as long as possible to load collision.
Core C:
For all the insanity, the last screen isn’t all that complicated. We get 3 speed boosts off the block, get the speed boost from a delayed ultra when we land, do 2 ultras, and the rest is offscreen, where lava and spinners don’t have collision.
The main reason preserving speed is difficult is that as soon as Madeline reappears on-screen, the lava will have collision again. By doing a reverse cornerboost, we can just barely get above the lava before reappearing.
We’re able to collect the heart while in lava, as it has offscreen collision.
Map of 8c
Farewell:
New mechanics:
- Moon blocks - If you dash into one of the floating blocks, it moves away from you. Since it’s moving away, you’ll get a speed boost from jumping off it. By jumping off multiple times, then landing while it’s still moving away, we can get up to 5 speed boosts.
- Jellyfish - Throwing a jellyfish behind you increases your speed by 70. We often hold on to them though since you lose speed slower while holding one. By holding down when we release a jellyfish, we can drop it in place. Jellyfish disappear when they hit the translucent barriers, but we’re able to get through the entire chapter while saving all the jellyfish.[1]
1:27: We build up speed here by doing 4 ultras and throwing 2 jellyfish behind us. The spikes on the next screen do not have collision until the first frame we move.
1:34: The amount of vertical speed you get when grabbing a jellyfish is based off player actions, not speed. Even though we wait for a while to grab this jellyfish, we’ll always get the same boost for so many frames after a wallbounce.
1:48: The skip here skips getting all 5 keys in Power Source. The intended setup is to get a double dash crystal and keep it all the way to the skip, but we can dashjump into the spiked corridor to do the skip with only one dash.
2:08: When falling off a moving object you get a speed boost. By crouching while falling off this cloud, we can use the upward speed boost to slide in between the spinner hitboxes here.
3:03: The game doesn't consider that a jellyfish could be released into a moving platform, allowing for some rather glitchy effects if you do so.
3:36: Using the binoculars here lets us move the spinners to the right of Madeline offscreen. They will not have collision until the camera moves them back onscreen, allowing us to clip through.
4:35: This is probably the closest we’ll ever get to an out-of-bounds trick in Celeste. If we could escape the starting area to the right here, we could reach a Kevin block you’re not supposed to be able to, and take it to the end of the screen, saving up to 8 seconds.
4:53: We’re able to build up enough speed on the moon blocks to clip through spikes during the feather animation. The feather hitbox is smaller and can just get through the two spinner hitboxes here.
6:18: Madeline bounces up after hitting a Kevin, and by hitting the corner of the Kevin we still are able to bounce up.
6:49: Unlike basically everything else in Celeste, this checkpoint is on global cycles. This means we have to wait at the ends of screens a couple times, although we can dash in order to save in-game frames.
7:07: Reverse cornerboosting off the blue block as it appears makes it possible to skip a cycle. We’re very close to saving a cycle entering this room, but there’s not much room for optimization in the previous room so it seems unlikely.
7:44: Demoing into a bird makes the bird launch you 5 pixels higher.
7:50: By jumping high enough before hitting the power block the second time, it’s possible to hyper out of coyote time after hitting it.
10:19: After dashing into the moon block here, we demo hyper out of coyote time into it. This gives us much more speed than we could normally get off a moon block, enough to skip the Kevin in the next room.
11:17: Having the fish here explode puts it in a better position when we backtrack through the room later.
11:26: In this long sequence of jellyfish, we grab the 4th on the first pixel possible and throw it one pixel before it would hit the barrier. Grabbing it with only 1 more speed would make us hit the barrier before we could throw it, with 4 less we couldn't get to the power block without climbing.
11:41: We’re able to use the fish that exploded earlier along with a feather we skipped to skip part of the trip back through the screen.
12:38: We’re barely able to throw the last jellyfish under this platform without losing any time, resulting in a grand total of 0 jellyfish killed in the TAS.
[1]


 Nice movie!