"He was trying to buy more sand for his hourglass. I wasn't selling any." (Max Payne). A fitting quote for this GBA game that—a little over 20 years after it was
first discussed on the forums—gets completed in less than 17 minutes in its first ever full TAS.
Software & hardware
- Emulator used: BizHawk 2.11 (with the “Tool-assistend Speedruns” profile and no further changes to the settings)
- ROM SHA-1 checksum: 7007F087A3022BD0D9D9B0D99489096F877794FF
- GBA Bios SHA-1 checksum: 300C20DF6731A33952DED8C436F7F186D25D3492
Game objectives
- Objective of the run is to reach the ending screen after the final level as fast as possible
- Time: The final necessary input happens on frame 59646
- Re-record count: 807101 (as a result of botting, cf. below. This makes for a rerecords-per-movie-length ratio of ~13.5 which, as of now, is the 33th largest ratio on the site)
About the game
Max Payne is a third-person shooter from 2001 by Remedy Entertainment, which later became a well-known and beloved trilogy. Far less known, however, is that the original Max Payne also received a Game Boy Advance port, released in 2003 in the US & 2004 in Europe (known there as
Max Payne Advance). While the story is the same, the gameplay is quite similar across ports, and all levels from the GBA port are also in the PC version, the biggest difference is the player’s perspective. While the PC port is a 3D shooter, the GBA game uses an isometric perspective which takes quite some time getting used to—more on this in the
“Movement” section below. Also, like the PC port, Max Payne Advance is divided into three parts; however, because of the hardware limitations the GBA version has less levels (12 in total).
As for my history with this game: after playing the Max Payne games in my youth, in 2016 I discovered the GBA port of the first Max Payne and I promptly started running it. I did so on-and-off for around two years, and during that time I also discovered a
TAS of the first level on Youtube, uploaded by
exileut in 2014 (
original input file). While that project, unfortunately, was never pursued further, I am happy to remedy this by means of this very submission.
Game version
As stated in the beginning there are two versions of the game: the initial US version, and the EU version that was released a few months later. Interestingly, these versions differ significantly as the EU version shipped with some bugfixes, improvements, and other changes. I originally reported on these differences in
this forum post—which is itself just a summary of the
complete list of version differences from speedrun.com (
source file/backup)—but the upshot is that there are two major differences which make the EU version preferable from a TAS (as well as an RTA) perspective:
- There is a EU-exclusive glitch called "ammo underflow". I’ll explain it in more detail in the “Glitches and other tech” section below, but the upshot is—as the name suggests—that you can underflow your ammo count and jump from 0 straight to 255 at the start of the next level. This unlocks a variety of much faster ammo routes throughout the run.
- After level 5 you lose all your weapons for story reasons. However, only in the EU version do you get them back after level 6; although without ammo, but being able to use all weapons again without having to pick them up a second time is a huge timesave.
Another thing that may also speak in favor of the EU version (but that I have not tested because the previous two points are convincing enough on their own) is a difference regarding what turning off “Gore” in the options does. In the EU version, this removes all blood from the game, while in the US version it only removes the blood from enemies that you're actively shooting, but the blood that's part of the scenes is still present. Because blood is a huge source of lag (cf. the
“Glitches and other tech” section below), it may be that just having the blood textures on-screen already slows down the game, which would make the EU version even faster compared to the US version.
Lag frames
At first glance, this game looks like it is made for TASing: the 12 levels consist of 221 short, individual rooms, and there is not a single lag frame in sight in TAStudio (after selecting “New Game”). So if the route needs to be changed retroactively or if any optimizations in previous rooms have to be implemented, that should be easily possible... right?
In reality—almost in a comedic twist—the
exact opposite is the case: BizHawk never detects it as a “lag frame” because the game engine checks the user input on every frame, but often times the game draws identical frames thanks to too many logic-advancing steps between updates to the renderer
1. What this means in practice is that changing just a single frame will make everything after it de-sync typically within the next room, and at most after 3-4 rooms. Even going from BizHawk 2.10 (where
v1 of this TAS was done, a basis for more in-depth ammo & route research) to BizHawk 2.11 desynced in the fourth room of the very first level—most likely as a result of BizHawk 2.11 updating to a newer mGBA version.
The implication of this is that TASing this game requires meticulous planning. You have to know in advance which weapons and ammo to pick up, where to use painkillers, which enemy to kill with which weapon, etc. as making on-the-fly adjustments is usually quite costly, and retroactive changes are essentially impossible.
1: What I think happens (based on this documentation) is that the game draws to a hidden screen while showing the other one, and then flips them (“page flipping”). If the hidden screen wasn’t updated, the next frame looks the same even though the game kept running. This page flipping is probably also the reason why menus/textboxes can feel delayed and why there’s a multi-frame gap between pressing shoot and seeing the shot.
Game mechanics
This title’s gameplay boils down to two elements: movement and combat, both of which prove surprisingly complex beyond first glance.
Movement
Using the D-Pad you can move in 8 different directions. However, as mentioned in the beginning, the GBA port of Max Payne uses an isometric perspective which results in the D-Pad buttons relating unintuitively to the direction you move in:
In other words, to move up with respect to the screen, you have to press Left+Up on the D-Pad. While there is a setting in the options to fix that, i.e., to make the D-Pad directions correspond to the screen directions, this change makes the game rather awkward to play as the levels and room layouts are made with this 45°-rotated movement in mind.
Another thing you may notice when looking at Max’s game-internal speed values is that they seem to not align with the “actual speed” (i.e., the difference between the position values of two consecutive frames). To understand this discrepancy we have to understand how the game updates speed and position: The routine, quite simply, is
- Add acceleration to current speed: each frame that you’re holding a direction the game adds a base acceleration in that direction to the current speed (using a sine/cosine lookup table to split it across x-/y-speed). This base acceleration equals
0x00006A26, which is ≈ 0.414... in Q16.16 (at ROM 0x016528 / system bus 0x08016528)
- Update the position according to this new speed
- Dampen the speed value & write this new value to RAM. This damping factor is encoded directly in a thumb instruction (
mov r4,#0xCD at ROM 0x0159A2 / system bus 0x080159A2, where 0xCD=205, and 205/256 ≈ 0.8). The purpose of this step is to ensure that the speed does not grow indefinitely, but instead stabilizes at a value of ≈ 1.66....
You can even sometimes see this logic in action by looking at the speed values in RAM: there exist frames where the speed dampening happens after the frame is drawn meaning that sometimes, for a single frame, you’ll see a speed value of ~2.08.
Combat
Bullet time is the most iconic combat mechanic in Max Payne: when activated while standing still, everything slows down, which results in the enemies being unable to hit you. However, slowing down is... well, slow, so in a TAS this feature is used sparingly, e.g., to reduce lag or to survive traversing a room with enemies in certain situations. Note that you can also activate bullet time while moving which results in a slowmo jump (this enables damage boosting, cf.
below).
Other than that, combat is quite straightforward. You press “A” to use your weapon, and if you
hold A then Max will use his weapon continuously until you let go of A again (I’ll go more into detail on the advantages and drawbacks of these two “fighting modes”
down below). Now when I say “press A to use your weapon” what you actually have to do is hold A for at least two frames because otherwise the game does not recognize it as a shot. And it’s even worse: because the lag is invisible to TAStudio (as explained
above), you may need to hold shoot for 3 or sometimes even 4 frames for the game to register the shot. However, you never know how long the button has to be held in advance so you always have to try all of these three options. Also note that the animation of a shot takes two frames as well.
Weapons
This game features two melee weapons, nine firearms, and three grenade-based weapons. Your starting melee weapon is the lead pipe & your starting firearm is the M9, and enemies drop stronger weapons as the game progresses. Here is a table of all weapons available in the game, together with all their stats:
| Weapon | Lead pipe | Baseball bat | Eagle | M9 | Dual M9 | Jackhammer | Pump action | Sawed off | M4 | Ingram | Dual Ingram | M79 | Grenades | Molotov |
|---|
| Maximum ammo | - | - | 48 | 162 | 162 | 80 | 80 | 80 | 150 | 250 | 250 | 20 | 20 | 10 |
| Ammo per weapon pickup | - | - | 12 | 15 | 30 | 12 | 7 | 2 | 30 | 11 | 22 | 75 | 75 | 75 |
| Ammo per ammo pickup | - | - | 12 | 15 | 15 | 12 | 12 | 12 | 30 | 22 | 22 | - | - | - |
| Weapon cooldown (in frames) | 24 | 24 | 20 | 16 | 14 | 20 | 40 | 30 | 10 | 10 | 5 | 60 | 5 | 1 |
| Damage per shot | 450 | 750 | 112 | 75 | 150 | 375 | 300 | 375 | 150 | 225 | 225 | 301 | 360 | 319 |
| Damage per second | 517 | 862 | 304 | 249 | 560 | 1018 | 427 | 700 | 747 | 1120 | 1920 | 228 | 377 | 476 |
Some comments on the rows:
- There are two times of weapon-related pickups: the weapons themselves, as well as ammo for weapons. The number of bullets you get from each type is constant. However, sometimes there is a difference between ammo pickups and ammo from weapon pickups (e.g., picking up a Sawed off gives 2 shotgun ammo, but picking up a shotgun-ammo pack gives 12 ammo); hence the two separate rows.
- The weapon cooldown is a value in RAM which tracks how many frames you have to wait before you can use the same weapon again.
- The damage-per-second value is an approximation to get a sense of a weapon’s effectiveness.
From this table we can draw two conclusions:
- The Dual Ingram is the most effective weapon, with a DPS nearly double of the next-best weapon, the Ingram.
- The Sawed Off is the strongest weapon in that it has with the highest damage per shot.2
The take-home message of this table is that shotguns are best if the enemies are not too strong & if there are not too many enemies in the room, while the Dual Ingram excels in rooms with many, and in particular many strong enemies.
2: Technically it is tied with the Jackhammer in that regard, but the latter is a secret weapon that you can only pick up in level 10, and you have to make quite a detour to get the Jackhammer. Hence I’ll exclude it from any considerations related to this TAS.
Combat movement
Coming back to the two combat modes (“tapping A to shoot” vs. “holding A to shoot”) there is one crucial difference. If you tap A you have to already look in the correct direction for the shot to hit, but if you hold A, then Max will automatically aim at the nearest target and shoot it continuously, in which case the direction Max faces is locked until you let go of A. What this means is that, while holding A, you can move in any direction without breaking aim. For example, if you have to shoot an enemy opposite of the door you have to exit through, you can hold A to shoot while, at the same time, moving towards the exit.
This fact warranted closer investigation of how movement speed is affected in these two modes. There are two aspects to it: If you hold A to shoot, your movement speed is reduced by 50%, and whenever you let go of A after shooting, your movement speed is set to zero. This begs the question: when fighting many enemies while having to move, is it faster to move at half speed the whole time or is it faster to do continuous single-shots where your speed is reset, but in-between shots you can accelerate back up? It turns out that the answer depends on the weapon; more specifically on its cooldown timer. The following table—summarized from
this investigation sheet of mine—gives the complete answer (the timeloss is always in frames):
| Weapon | M9 | Dual M9 | Eagle | Pump action | Sawed off | Jackhammer | M4 | Ingram | Dual Ingram |
|---|
| Timeloss (2 shots, press A) | 14 | 15 | 14 | 14 | 15 | 14 | 14 | 14 | 13 |
| Timeloss (2 shots, hold A) | 15 | 15 | 17 | 27 | 23 | 17 | 12 | 12 | 9 |
| Timeloss (3 shots, press A) | 21 | 22 | 21 | 21 | 22 | 21 | 20 | 20 | 18 |
| Timeloss (3 shots, hold A) | 24 | 23 | 28 | 48 | 39 | 28 | 18 | 18 | 13 |
| Timeloss (4 shots, press A) | 28 | 29 | 28 | 28 | 29 | 28 | 27 | 27 | 24 |
| Timeloss (4 shots, hold A) | 33 | 31 | 39 | 67 | 55 | 39 | 24 | 24 | 16 |
The take-away message from this is that if the weapon’s cooldown is at least 14 frames, then pressing A to shoot while moving is faster than holding A (because there is enough acceleration between shots to make up for the speed being reset each shot). On the other hand, for weapons with a cooldown of 10 frames or less, holding A to shoot is faster. What this means in practice is that for the M4 and the Ingrams you should hold A, while for all other weapons (mainly the M9 and later the shotguns) it’s faster to tap shoot while moving.
Changing weapons
In this game you change weapons by holding L—which opens the weapon menu—and moving your cursor to the weapon you want to change to. Moving the cursor diagonally in this menu is possible (e.g., Down+Right goes down-right in a single frame), and another thing to be aware of is to first move the cursor left/right and then down/up (because length differences between neighboring columns in this menu are compensated for automatically when going left/right). Also after switching to a different weapon, a short animation will play where Max pockets his current weapon and gets the new weapon from inside his coat. This animation can be cut short by opening the weapon menu at the right time (cf.
“animation cancelling” below).
Health
In this game, health is stored in RAM as a signed 4-byte value. The maximum health is 255, the minimum health is 0, and if your HP value is negative, then Max is dead. This game offers three ways to increase your HP:
- Pick up and use painkillers. Each painkiller restores 48 HP, but not instantly; instead the health meter increases gradually by 48 HP over the course of a few frames.
- If you are alive but have less than 80 HP, then shortly after you took the last hit your health slowly increases back to 80.
- Strictly speaking, this third way is not a game “mechanic”, but you can die within a level to respawn at the beginning of the current room with full HP. This works because for each level you have 5 lives, meaning you can treat death as a resource. While this is done in RTA runs (there exist safety/consistency strats based on this mechanic), I didn’t find a single instance where this mechanic was faster or useful in TAS.
Health resets after every level, that is, you always start a new level with full HP.
Glitches and other tech
Door clipping
Let me start this one with a bit of a history recap. In late 2017 I encountered something strange: after a run had died in level 2, I fooled around to vent my frustration and, out of nowhere, I suddenly
passed through a locked door. Of course, I immediately tried to investigate why that happened... unfortunately without success. I even got my friends
Samabam and
epicdudeguy involved—neither of whom have played the GBA port before—and while they both managed to get the glitch a few times, we did not find any underlying pattern meaning this glitch remained unresolved.
Fast forward to September of 2025. I’m considering TASing this game, but that means I’ll have to sink even more time into understanding this glitch because there’s no way I can make a TAS without it (after all, this level 2 door clip should save ~50s if done optimally). After all these years, I had a fresh perspective on things so after reviewing all existing videos of the clips I got the idea that maybe breaking boxes had something to do with the door being open all of a sudden? After a bit of investigation and finding relevant RAM addresses I confirmed that had to be what’s going on. I posted about it
on the forum, and after I had finished the first version of the TAS I decided to dig deeper and reverse engineer this glitch. The full explanation is given
here, but the
tl;dr is as follows:
When you shoot a crate, the game stores that information (so this broken crate is not loaded in “whole” again when re-entering a room). However, there are two routines for this: an old one that the devs overhauled but forgot to remove in the end, and a second one which does things correctly. The part of RAM that the old routine writes to is mostly unused, except for a few bytes at the start that track whether a door in the current room is open. So what can happen is that when you shoot a box, this deprecated routine unlocks a door by setting the corresponding “door byte” to 1.
Now you might think: “If that’s what’s going on, how come this glitch is so hard to reproduce? Shouldn’t shooting the same crate always open the door?”. This is the second aspect of this glitch. Because this routine is deprecated, which byte is set to 1 is decided by a different, uninitialized byte (think of it as “random garbage”). This means the door is unlocked if and only if this uninitialized byte holds a specific value. But the chance of this being the case is rather small (1/255 = 0.4% when going by random chance), which is the reason (a) why this glitch was only reproduced a handful of times over the years, and (b) why we did not see any pattern behind when the door opened.
So what does all of this mean in practice? The bad news is that targeted manipulation of this magic uninitialized byte is basically impossible because it is not static (rather, it jumps around in RAM based on a certain pointer). The good news on the other hand is that because I now knew how this glitch worked and what to look for in RAM, I could go from “do random things and hope for the best” to “do random things and have a Lua script tell me whether that will make the door clip work upon shooting the box”. This wasn’t perfect, but it certainly made this glitch a lot more feasible.
One final thing I want to mention here is that, unfortunately, this glitch is not useful anywhere else. For one, there are only a few rooms with a locked door
and a crate, and the only rooms like that where a clip would save time at all (rooms M19 and M20 in level 8) I did not get the clip to work even once. For more info on this refer to the corresponding forum posts:
1,
2.
Animation cancelling
This one is rather straightforward. As mentioned
earlier, animations can be interrupted by opening the weapon menu. The one exception to that is the weapon switch animation, where the weapon menu is disabled for the first few frames. What this means is that any weapon switch animation can be cut short by opening the weapon menu a few frames into the animation; this saves 7 frames every single time (from 21 frames weapon switch duration down to 14). Beware that this does
not reset the weapon cooldown, it “only” stops the current weapon-related animation; so this tech cannot be used to rapidly shoot firearms.
Ammo underflow
Let me first tell you how to perform the ammo underflow glitch, and then explain what is happening game-internally. If you press A to shoot/attack & then cancel the weapon animation by pressing L (recall the aforementioned animation cancelling), then the game will "store" the attack. This stored attack can be used to fire a weapon which does not have any ammo left, thus resulting in a negative ammo counter. Once you finish the current level, in the next level that weapon will have maximum ammo3. This glitch is obviously very useful to re-fill a weapon’s ammo count without having to pick up ammo everywhere.
- First byte: weapon cooldown
- Second byte: tracks whether you’re trying to shoot a weapon with no ammo
- Third byte (bool): records that a shot is allowed to happen
- Fourth byte (bool): set to 1 if you shoot when you have no ammo, upon which the game switches out your weapon for another, non-empty weapon of yours
The key here is the third byte. When you shoot a weapon the game
- first does all the checks to see whether this shot is allowed to happen,
- then (if successful) the third byte is set to one,4
- then the shot/attack happens,
- and after the attack is finished the byte is set back to zero.
With this in mind you may already see how you can abuse this system using animation cancelling: pressing L interrupts the current animation so if you do that between “the third byte is set to one” and the attack finishing, that byte keeps the value 1. But then if you change to a weapon that has no ammo left, because the third byte is still 1 the game interprets that as “all checks were cleared, this weapon is allowed to shoot”.
For RTA runs, this glitch can easily be performed via the melee weapons (because their attack animation takes up to 1 second), but in a TAS we can use any weapon. Thus the optimal way of underflowing a weapon is:
- Get ammo to 0
- Switch to a neighboring weapon
- Queue a shot as early as possible & immediately switch back to the weapon to be underflowed
- Cancel the weapon switch animation
- Shoot
3: More precisely, the ammo count will be whatever value it currently is plus 256. So a -1 turns into 255, a -2 turns into 254, etc. because the high 3 bytes are initialized to 0 and only the last byte is kept.
4: Beware that there are other ways to set the shot-queue byte to 1: If you press A right before the weapon cooldown timer goes to 0, a shot is queued (because it processed after the cooldown is 0 thanks to the game’s processing delay) but not executed (because the A press happened when the cooldown was still non-zero). Also shooting at the start of a room when the game doesn’t accept any inputs yet sets the third byte to 1. However, both these things only work if your ammo count is non-zero, making it useless for underflowing.
Damage boost
In level 8 out of 12, the game introduces “mines”: explosives mounted to a wall which go off if you touch the laser coming out of them. Mines can be used to give you a speed boost if you jump into them (by activating bullet time while moving to do a bullet time jump).
However, strictly speaking, this is less a damage boost and more another animation cancel. During bullet time the game slows down, meaning Max’s movement speed during the jump has to be increased so that it looks like Max is still moving at normal speed during the jump. The game achieves this by setting the speed during this move to 6 (recall that the
usual maximum speed is 1.66), so when the bullet time is interrupted your speed is suddenly more than three times the usual maximum. However, bullet time during a jump cannot be stopped at will (e.g., by pressing R again); the only known way of stopping the bullet time is to get damaged by a mine explosion during this jump, resulting in moving at a speed of 6 for a short time.
Other tech
To conclude this section let me list some minor or less notable, yet still important tech.
Turning off blood
As reported in
this forum post, around half a year into doing RTA runs it was figured out that turning off blood ("gore") in the options reduces lag
by a lot. The reason for this is that having blood on leads to many extra animations (“blood particles”) being loaded when shooting enemies. Turning this setting off before starting a new games takes ~2 seconds, but already in the first level turning off blood saved ~3 seconds (
room-by-room comparison spreadsheet). Using linear extrapolation, this gives a rough estimate of ~43 seconds of timesave over the course of the full run. Even if this estimate is off by a few seconds, this is just a ballpark estimate which shows that this extra menuing at the start of the run is more than worth it.
Sticky jump
If you jump at a specific distance from a ledge your jump will be cut short, resulting in less air time:
What happens here is that if the trajectory of your jump is close enough to the edge (without you hitting the wall), the game ends the jump animation because it considers the target height reached. Shortening jumps this way saves time almost always, except in certain situations where the ledge is positioned right before a room transition.
Skipping textboxes
As is true for many games, textboxes can be skipped with A as well as B. However, this does not save time over pressing A frame-perfectly because textboxes need at least two frames to show up, so there is never a situation where you can skip textboxes on two consecutive frames.
Resources: Guides, Lua scripting, and botting
All collectibles and enemies
When making a TAS it is most useful to have access to all kinds of information about the game. Shortly before I made the TAS I decided to compile every single collectible the game has to offer
into a big list (
source file/backup), a demanding task that, however, proved invaluable when creating this TAS. For said guide I created maps of every single level to label every room in the game in order to make locating items using this guide possible.
In addition to all collectibles, I also compiled
a spreadsheet (
backup) with all enemies encountered in an Any% run, as well as their stats, etc. Otherwise, theorycrafting the optimal ammo route, frankly, would have been impossible.
Memory addresses & info display scripts
The first thing I created to access further game information was a
RAM watch file. However, I quickly realized that working with this file was largely infeasible because many of the RAM values I cared about were dynamic, so if I wanted to read them reliably I had to find stable pointers to these addresses. So
that’s what I did, and this allowed me to write Lua scripts that display
all of Max’s stats as well as
all relevant info regarding enemies and boxes. To make this more tangible let me give two examples of how these scripts helped me with this TAS:
- In the first version of the TAS, I optimized routes and turns around corners based on environmental visual cues. This meant either looking at Max’s sprite & whether he turned slightly because he grazed a corner, or making out a pixel in the background and comparing different routes by comparing the location of said pixel at a fixed frame. While this gives a good first idea, it’s of course quite imprecise; with the info displayer—which involved position, speed, and direction—these optimizations became not only much better & more objective, but optimization also became a lot quicker because eyeballing pixels takes a lot more time than comparing numbers on the screen.
- The only cue I had to see whether a shot of mine hit an enemy in v1 of the TAS was the sound an enemy makes when getting hit. This was prone to errors and also slowed me down because catching that sound becomes a lot harder the faster the emulation runs. With the enemy display script, again, I could just look at the enemy HP on screen to see whether my shot hit—even in unthrottled clock (fastest emulation speed) mode.
Botting
For me, this is easily the most exciting thing coming out of this TAS. It started when I played around with
BasicBot and quickly noticed that this tool doesn’t help much with this game in particular, because BasicBot distributes inputs randomly. This is a problem because most of the inputs only happen on isolated frames, but
recall that in this game 1-frame inputs of shooting or movement don't do anything.
However, I still saw the potential of botting for this game which is why I wrote a script that I, by way of homage, called "AdvancedBot" (
github page &
the forum post where I first brought this up). The idea is the same as with BasicBot, where the script tries different inputs and in the end chooses the one that "performed best". The difference to BasicBot is that AdvancedBot uses
only consecutive inputs, so, for example, if you want to test A presses in a certain window of frames, the script only tries configurations where the A presses happen on consecutive frames (i.e., no breaks in between). This simple change kept the scope of botting broad while bringing the search space down from exponential to just quadratic in the size of the test window, thus making brute-forcing certain tasks much more feasible. I even reached speeds where almost all the tasks I used the bot for were done in less than 2 minutes. Here are two videos of the bot in action to give you an idea of how it works:
Using these
tips and tricks the fastest emulation speed I reached while testing was close to 900 FPS
While the bot’s main use was to find earliest possible inputs & shortest paths (e.g., for optimizing room exits) it also found numerous instances of lag reduction. As an example: in the very first level when going from room M1 to room M2,
turning towards the stairs early saves 5 frames over turning as late as possible, which is not due to traveling less distance (this problem is invariant under shifts) but really due to less lag frames. Other times, the bot found paths where travelling more distance than necessary was faster because of less lag, which is something I wouldn’t have found by hand because testing all of this is simply infeasible.
The route
- Is picking up a certain weapon worth it? / Which weapons can I even use in each level? This is where the previously mentioned all collectibles guide came in handy.
- Is switching weapons worth it? Recall that—even with animation cancelling—a weapon switch takes at least 14 frames so the timesave due to a switch has to be sufficiently large for the switch to be viable.
- What is faster: picking up ammo or using the ammo underflow glitch at the end of a level? Recall that underflowing the ammo requires you to (a) have the weapon in question, but (b) have no ammo for the weapon. So there may be (and there are) situations where the ammo you can pick up along the way is the better choice.
It quickly became clear that for the first few levels I should get the strongest possible shotgun (first the Pump Action, and then the Sawed Off) because up until level 9 it can kill almost all enemies in one shot, while the Dual Ingram becomes more and more important the closer I get to the end of the game. For mid-game, however, this choice was a lot less clear which is why a thorough analysis was so important (cf. also the
level 6 comments below). With all that in mind, here is a table with a summary of the ideal weapon route for each level:
| Level | Route |
|---|
| 1 | Use the M9 (starting weapon), then switch to the Pump Action (basic shotgun) as soon as you encounter one along the way |
| 2 | More Pump Action |
| 3 | Pick up the Sawed Off from the enemy at the start of the level, but don’t switch to it yet (avoid the weapon switch timeloss). Then towards the end of the level pick up an Ingram & use it for the rest of level 3 |
| 4 | Use the Sawed Off. In the second half of the level pick up a second Ingram (this automatically gives you the Dual Ingram in the EU version) for later |
| 5 | Continue to use the Sawed Off until the third last room, at which point you switch to the Dual Ingram to save a bit over 200 frames on the final boss of level 5 alone |
At this point
recall that, for story reasons, you lose all your weapons and ammo at the start of level 6, leaving you only with the baseball bat. While you get your weapons back at the start of level 7 (in the EU version), you
don't get your ammo back. This is why, in terms of ammo routing, the first 5 and the last 7 levels are separate entities.
| Level | Route |
|---|
| 6 | Baseball bat, then switch to the M4 as soon as you get it. In the middle of the level take a ~2s detour to get an Ingram (needed to underflow Ingram ammo at the end of the level; this aspect of the route I thought about the most and eventually concluded that it’s the best course of action, which was then confirmed when making the final TAS, cf. the level-6 comments below) |
| 7 | Dual Ingram (because of the three mini boss fights). At the end switch back to the Sawed Off |
| 8 | Sawed Off; last level where this is viable because from level 9 onwards enemies will need at least 2 Sawed Off shots to die. At the end of this level there’s some downtime where we can switch to the Dual Ingram & already waste some ammo in order to prepare for the final Ingram ammo underflow at the end of level 10 |
| 9 | Dual Ingram, not much to say here |
| 10 | Dual Ingram; waste some more ammo right before room exits (only loses a frame or two each time) to make the underflow at the end of the level work |
| 11 | Dual Ingram. Only thing to take care of are two ammo pickups along the way |
| 12 | Dual Ingram and then the Grenades for the steel ropes |
To not overload this table I kept the painkiller pickups out of it, but let me mention the main reason I have to pick up painkillers in the first half of the game are the damage boosts in
level 8.
Summary: This game’s “first principles” of timesave
Before finally coming to the level comments I’d like to present a list of things to keep in mind when aiming to go fast in this game. Some of these are points I’ve already raised, but I want to list them explicitly again for easier access. Moreover, while some of these principles are not set in stone (and more situation-dependent), they are certainly a good starting point/guideline.
Movement
- Minimize the number of turns because you’re moving up to ~10% slower while changing direction
- Make sure that during a turn, neither the x- nor the y-speed value is reset to 0 due to bonking, not even for a single frame (this was the hardest to catch before the Lua display script)
- When jumping up a ledge, always look for the one frame where the jump is cut short
- Let the bot optimize all room exits, because there are so many different doors & conditions for the fastest exit (also depending on how/from where you approach the door) that it’s much, much slower to optimize by hand
In combat
- If there is a way to skip/not kill an enemy, that’s likely to be preferred over fighting
- If you have to shoot an enemy, try to do so as early as possible (lag reduction)—possibly before he’s even on screen
- Shotguns are to be preferred in early game, while the Dual Ingram is the best late-game weapon
- For weapons with a long cooldown (M9, shotguns) tap A to shoot, and for weapons with a short cooldown (M4, Ingram) hold A to shoot
- Always try to cancel animations
- Try to end fights with as much health as possible (without sacrificing too much speed). Being low on HP severely limits possible routes through upcoming rooms and often loses time later, e.g., because you have to use bullet time to not get hit by a shot
- For rooms with many enemies bullet time can reduce lag, but it’s only worth it if you don’t have to move somewhere
Finally, let us get into the actual TAS: notable improvements over old iterations, things to consider in each level, etc. The structure here is two-fold: at the start of a subsection I’ll say something general about each of the 12 levels, followed by comments about specific rooms (not all rooms though; for many of them there’s nothing to say or they’re outright trivial). In the
encode, the current room can be found in yellow at the bottom (this is my
room displayer script in action, which is based on the
aforementioned all collectibles guide).
Most of the comments below are based on the following two spreadsheets (as well as everything I posted on the forum so far):
Because these spreadsheets were not made with presenting them in mind—and also for the sake of posterity—I will summarize all the relevant info and noteworthy points in this section.
Also whenever I talk about a difference in lag frames I am
not referring to lag frames in the BizHawk/TAStudio sense (i.e., red lines due to “no input poll happened this frame”)
because there are none. Instead, I used a
custom script which tries to detect whenever a frame looks equal to the previous one (by comparing PALRAM, OAM, and VRAM between neighboring frames). While this is not perfect—for example, the script detects a lot of false positives: black screen between room transitions, cutscenes where nothing happens/we wait for a textbox, etc.—this should still enable basic lag comparisons between input files (as false positives are often consistent between runs).
If you’re less interested in specific level/room comments and care more about a comparison of overall level times, the following table compares the best splits from my RTA runs with the time I needed in v1 as well as the final version (v2) of the TAS, in minutes and seconds:
| Level | Best RTA time (approx.) | TAS-v1 | TAS-v2 | Notes |
|---|
| 1 | 1:30.1 | 1:24.3 | 1:23.4 | The encode of exileut’s level 1 WIP took 1:32.7, and my remastered version of that was still 1:28.9 |
| 2 | 1:30.8 | 34.0 | 33.3 | This big difference is due to the level 2 door clip |
| 3 | 1:55.0 | 1:36.1 | 1:33.5 | - |
| 4 | 2:16.1 | 1:59.1 | 1:56.6 | - |
| 5 | 1:36.0 | 1:25.9 | 1:20.4 | - |
| 6 | 1:00.2 | 0:50.3 | 0:50.8 | Timeloss between v1 and v2 from changing the weapon route here to save much more time later on, mainly in levels 7 and 11 |
| 7 | 1:18.9 | 1:03.8 | 0:58.8 | - |
| 8 | 2:20.2 | 2:01.8 | 1:56.2 | - |
| 9 | 2:09.6 | 1:54.3 | 1:52.7 | - |
| 10 | 1:15.6 | 1:02.9 | 1:02.1 | - |
| 11 | 3:17.3 | 2:33.6 | 2:19.7 | Timesave in v2 from being able to use the Dual Ingram for the entire level |
| 12 | 0:33.3 | 0:27.2 | 0:20.4 | Timesave in v2 from animation cancelling the grenade throws at the end |
Before new game
The first notable strat happens before the run even starts:
recall that turning off blood ("gore") in the options saves ~45 seconds over the course of the run from lag reduction, so going into the options and changing this is easily worth it. Also: 1. menus in this game wrap (i.e., pressing Down on the bottom menu points gets you back to the top of the menu), and 2. you can ignore the game’s “Back” buttons that return you to the previous menu, because pressing B does the same thing.
Level 1
The intro level. There won’t be much to say here as the game mostly introduces its various different mechanics.
Level 1 - Room M1
Not killing the two guys that spawn here is faster, not only because of skipping the fight itself but also because killing both of them would bring up extra textboxes. The timing for when to turn towards the stairs here was found by AdvancedBot; while v1 of the TAS turned diagonally as late as possible, the version you’re seeing here is 5 frames faster due to lag reduction.
Level 1 - Room M2
One notable strat here is to already move backwards towards the exit while shooting the enemy at the end of the corridor. This saved 19 frames compared to v1 of the TAS.
Level 1 - Room M3
There are two things to mention in this room:
- After I pick up the Pump Action and immediately switch to it (because it one-shots everything this early in the game) I do the first animation cancel of the run to save 7 frames.
- I made sure to not get hit here because I need the HP to damage boost through room D2 later.
Level 1 - Room C1
The condition for the NPC to stop crouching/standing up is weird. Roughly, you have to walk to a specific spot and face a certain direction (else you lose time by Max readjusting himself before the scripted sequence starts). But even if you skip said readjustment, the frame on which the sequence starts still varies. Counterintuitively, delaying the shot for a bit makes the event trigger faster. Overall, after trying many different positions & timings I managed to save 3 frames over the first iteration of the TAS.
Level 1 - Room D2
Prioritizing leaving the room over killing all enemies turns out to save ~half a second. This is mostly due to the
Pump Action’s 40 frames of reload time which you can save one iteration of if you leave one enemy alive & instead kill it on the return path.
Level 2
This is the level with the biggest timesave over RTA because of the level 2 door clip. The door in room M4 is locked, and you’re supposed to open it by going into the vault area and retrieving the detonator to blow up said door. However,
as explained before, by meticulously manipulating the RAM (in the form of shooting boxes in the previous rooms) I manage to set the uninitialized byte of one of the crates in M4 to 1 which results in the locked door opening (
0x0200512F being set to 1) upon shooting the crate.
Level 2 - Room M1
I saved 11 frames in the first room by shooting the fire tank as early as possible so the front enemy dies right away. These shots can land deceptively early which is why I missed it in v1 of the TAS.
Level 2 - Room M2 & M3
While shooting boxes to set up the door clip I also pick up some shotgun ammo along the way to make the weapon route in Part 1 of the game work.
Level 2 - Room M4
AdvancedBot found a way to spare/walk around the last enemy without losing too much health (if I took too much damage here the fight in the next room would be quite problematic). Overall, rooms M2-M4 combined end up being 10 frames faster than in v1 of the TAS.
Level 2 - Room M5
I hold Right a bit longer than I have to (until frame 7976) because else the shotgun ammo pickup is not recognized (i.e., it is picked up but not saved for the next level) which would be bad because I need that ammo for the route.
Level 3
The point of this level is to hunt down and eliminate the game’s first “mini-boss” (if you can really call it that): Rico Muerte. Notably, we obtain the Sawed Off—a stronger version of the Pump Action—at the start of this level.
Level 3 - Room M1
I walk towards where the second enemy ends up (=where the Sawed Off will drop) while he’s still moving. In fact, this is one of the few times where holding shoot with a shotgun is better because I don't have to maximize distance here, and it allows me to
constantly aim for the enemy. However, as mentioned in the
weapon route overview I don’t switch to the Sawed Off right away. Overall this saves 3 frames: 14 frames now from not switching, minus 11 frames in room M8 later because there I have to kill 2 enemies back to back where I have to work with the increased cooldown of the Pump Action.
Also, exiting the room while shooting all three enemies would take forever, but I did not find a way out without killing none. The fastest exit I found was to kill the left-most enemy and then “split” the Right inputs to make a sufficient number of enemy shots miss so I don’t die.
Level 3 - Room M4
AdvancedBot found that shooting as late as possible (a 4-frame shot) saves 4 frames on room exit, because then slowing down/accelerating back up from the shot is cut short by the room exit.
Level 3 - Room M6
If I turn earlier or use bullet time, I either die or do a little hop from the explosion (which loses on the order of ~20f because of not being able to move). What I can do, however, is to combine some of the right-movement towards the door I have to do anyway with the movement to dodge the explosion.
Level 3 - Room M7
It may look like I could’ve killed the enemy here earlier. However, enemies with a scripted sequence (e.g., walking to a certain spot) can only be damaged after that sequence has been completed. So I, in fact, kill him as early as possible because I wait for him to arrive at a certain location before which he is invincible; but if I ignore him he kills me in turn.
Level 3 - Room M8
I have to use bullet time for a few frames here, because otherwise the second enemy kills me (and I didn’t find a way to avoid that). Also I tried killing the left enemy first but that ended up being 3 frames slower than the route you see in the video.
Level 3 - Room C1
Here I saved 3 frames compared to v1 of the TAS by approaching the door differently in order to trigger the textbox earlier.
Level 3 - Room C2
In order for the door in M11 to open I have to look at the letter on the table here.
Level 3 - Room M13
I used a painkiller at the end of the previous elevator ride so I can take more hits in this room which, ultimately, allows me to get through this room without firing any shots. This saves 8 frames and 1 ammo, which outweighs the 2 frames I'll lose to getting a backup painkiller in level 4.
Level 3 - Room M14
This was an instance where shooting the enemy was faster than using bullet time to dodge his shot (albeit by just 1 frame).
Level 3 - Room M16
Neither me nor AdvancedBot found a way to avoid getting hit (without using bullet time to dodge his shot, so I had to resort to that).
Level 3 - Room M20
As mentioned in the
weapon-route section, this is where I get my first Ingram. This loses 5 frames now, but I’ll immediately make up for it in the next two rooms (on top of massive timesave at the end of level 5 due to having a Dual Ingram then).
Level 3 - Room M21
Here I save 52 frames compared to v1 of the TAS because 4 shotgun shots are quite slow to do. Importantly, the switch to the Ingram here does not lose any time because I have to wait for the boss to become vulnerable (scripted sequence for him to walk back a bit before he can be hit, and if I run out too early he damages me too much while I wait for his invincibility to wear off). One thing to note here is that I tried a fight route where I shot the second and third enemy "in one go" (i.e., without a shooting pause in between), but that ended up being 3 frames slower. This further cements
the idea that enemies should always be killed as early as possible for lag reduction.
Finally, AdvancedBot found a room exit which was 1 frame faster but which missed the shotgun shells close to the exit (needed for the weapon route).
Level 3 - Room M22
In this room, I saved another 25 frames compared to v1 of the TAS. Most of that is from using the Ingram, and the rest comes from not having to perform an ammo underflow here (as I did in v1). Also, as before, switching to the Sawed Off right before the end of the level does not lose any time because I have to wait for the final enemies to spawn anyway.
Level 4
The objective of level 4 is to hunt down and defeat another mini-boss: Vinnie Gognitti. The most important thing to do in this level is to pick up a second Ingram so we have a Dual Ingram for the end of level 5.
Level 4 - Room M3
Out of all the different turn points after the first corner that I tried, this was the fastest one. Again, they all cover the same distance but they differ in terms of lag (and here, the firetank at the end of the room is another constraint because you may have to slightly turn towards it to shoot it & open the door, depending on your position).
Level 4 - Room M5
Compared to v1 of the TAS I saved a combined 23 frames—as well as 2 ammo—by testing routes where I don’t have to engage in combat at all. At first I thought that losing HP this early on would become problematic later on, but there's basically no way to get to the second half of this level without going below the auto-heal threshold of 80 HP, and the later enemies do so much damage with their shotguns (90, or some even 110) that preserving HP would be of no consequence. The same reasoning applies to room M6.
Level 4 - Room M9
I tried an alternative route where I jumped over the box to the right, but that ended up being at least 9 frames slower (on top of exiting the room with even less HP).
Level 4 - Room M10
The first enemy jumping down the pit willingly is already funny, but boosting off of him to save 17 frames in this room is even better. I tried a lot of different timings and versions here (you can also just walk into him & use him as a platform, but then you’ll stagger upon landing which is slower) and this particular timing of the jump was the best I could find. Also by shooting the second enemy as early as possible I can get a painkiller without losing any time.
Level 4 - Room M13
AdvancedBot found a route through this room where by means of a few frames of diagonal input, the green jacket enemy gets baited into dodging out of the way (meaning he cannot shoot). This ends up being 7 frames faster than having to shoot once, and this is true timesave because I don't have to kill anyone in this room on the return path either.
Level 4 - Room D4
As described in the
“Route” section I need to pick up an additional Ingram here to have the Dual Ingram for level 5. Picking up the weapon here loses 23 frames, meaning it is well worth it given that I'll save 3-4
seconds at the end of level 5 alone. And if you're wondering, the weird left-right movement I do at the start of the room is to manipulate the enemy on the right (who drops the Ingram) into jumping towards the exit so the weapon detour is as short as possible.
One idea you may have is to kill the enemies, pick up the Ingram, and then go back the way we came from. However, that doesn’t work because entering room D5 is necessary to trigger the final chase sequence; and by that point going back from D5 through D4 and D3 is a lot slower (~100 frames) than just taking the intended route.
Level 4 - Room D2 (second pass)
The choice to make here is whether you get a boost out of the window or whether you drop down (this is decided by holding or not holding a direction on frame 17569). It turns out that boosting is ~14 frames faster than not boosting.
Level 4 - Room D1 (second pass)
Again there are different routes to take towards the exit. It turns out, however, that staying on the ledge the whole time is fastest (because going down the ledge or even walking left too early results in a little stutter from a mini fall which loses too much time).
Level 4 - Room M15
I saved 3 lag frames over v1 of the TAS by running towards the edge of the building as soon as possible.
Level 4 - Room M17
Shooting only one enemy was the fastest way through this room. Shooting both was 17 frames slower, and using a painkiller & shooting nobody was 29 frames slower.
Level 4 - Room M18
I deliberately lost 3 frames here to pick up a painkiller. This one is not strictly necessary for the painkiller route; however, 3 frames are relatively little cost for a painkiller, and this turned out to be a good decision because it allowed me to save 13 frames later, in
level 7, room M9.
Level 4 - Room M20
The movement after shooting the first enemy was fully optimized by AdvancedBot. The problem here is that if you turn too early, the two enemies to the left will kill you, but turning too late is of course slow because Max is travelling much more distance than necessary. Given that multiple routes exited the room on frame 20092 (4 frames faster than TAS v1) I concluded that that’s probably as good as it gets.
Level 4 - Room M21
One less obvious optimization I used AdvancedBot for here was how far to move towards Vinnie Gognitti: if you don’t move far enough the shots won’t land, but if you move too far you get the sprite on-screen which causes lag.
Level 5
At the end of this level waits the next mini-boss, Jack Lupino. Unfortunately for him, we have a Dual Ingram so our meeting will conclude after just 4 seconds.
Level 5 - Room M3
Because of lag, not killing anyone in this room was 9 frames slower, and I would even end up with way less HP (57 vs. 222 in the current route). In addition, I manipulated the enemy who’s closer to the door into staying in front of the door because that way I can pick up his painkiller without losing any time.
Level 5 - Room M4 (first pass)
I saved 24 frames here because I realized that you can hit enemies as soon as the room begins (by shooting over the counter; in v1 I only started shooting once I walked around the corner). Also killing all three enemies in this room was 1 frame faster than killing just the first two (as done in v1) because of the many additional lag frames, in addition to this 2-kill route losing me a lot of HP.
Level 5 - Room M4 (second pass)
In v1 I had to dodge a shot because of my low HP count, whereas here I could just tank it. This, together with testing all different possible turn timings and letting AdvancedBot optimize the ending led to cutting a third from this room in terms of time, from previously 188 to now just 134 frames.
Level 5 - Room M6
After killing the enemy on the stairs I switch from the Sawed Off to the Dual Ingram (which loses 14 frames on its own) because of the massive timesave it will bring me for the remainder of the level, especially the boss at the end.
Level 5 - Room M7
There are two choices to make in this room:
- Kill one enemy or both enemies?
- Go around the left or the right of the table?
After testing all combinations I found that killing both enemies while going right is the fastest, and I even pick up the right enemy’s painkiller. This is only one frame faster than sparing the guy on the left; the difference would be larger were it not for the textboxes that appear after both enemies have been killed. Overall, this was 11 frames faster than v1 of the TAS, and one could save another 10 if you manage to manipulate the right enemy into missing all his shots (I only got this to work in the weapon testing run I did after v1, but neither these nor any other inputs seemed to replicate this behavior in this run).
Level 5 - Room M8
The timing of the kill influences when the textboxes appear and how far the camera moves. So in theory, it could have been that delaying the shots ends up being faster because it may have allowed me to skip the textboxes earlier. However, that ended up not being the case (although I found one frame way later where, if the shot happens there, the room exit is tied with the current one; but I decided against using that one because it didn’t “look as clean”).
Level 5 - Room M9
This is the big one: using the Dual Ingram here saved 212 frames. A part of this timesave is due to using bullet time, because then you can kill the enemies before they are on screen & also before they move around and spread out. This also reduces lag, which in turn makes the weapon cooldown expire a lot quicker than it would with all the lag. Also I tried stopping the bullet time at various points, and I found a configuration which saves 3 frames over letting bullet time run until the end of the level.
For the fight itself, because the enemies are all rather strong I need 13 Dual Ingram shots (26 Ingram ammo). If I hold A all the way I need 15 shots because two of them miss. One of those misses I can salvage by adding a 2-frame delay between shots, but the first miss I cannot avoid (because I'd have to add a delay that's longer than the weapon cooldown, so it's just faster to let that miss happen).
Level 6
We start this level with no weapons and no ammo (story reasons). However, we will need lots of Ingram ammo for the late game. While the ammo for levels 11 and 12 will come from an Ingram underflow at the end of level 10, using anything but a Dual Ingram in levels 9 and 10 would mean massive timeloss. This forces us to make a crucial decision: Should we manually pick up Ingram ammo in levels 7 and 8, or should we get the needed Ingram ammo by underflowing at the end of level 6? At first glance, both these options have advantages and disadvantages. Option 1—collecting all the ammo we need—would force us to use the slower Sawed Off for level 7 (in addition to requiring a lot of enemy manipulation to limit the timeloss from the pick-ups). Option 2 on the other hand—underflowing at the end of level 6—would require picking up an Ingram somewhere in level 6 (no underflow without the weapon after all), and also this would give us too much Ingram ammo: because of the planned underflow in level 10 we have to end that level with no Ingram ammo, meaning we have to find rooms where wasting ammo does not lose too much time.
While I already predicted in my
ammo route forum post that option 2 would be at least 13 frames faster based on some preliminary testing, now that this TAS is done I could finally do a more accurate comparison (i.e., Ingram pickup, underflow & its setup, timesave from Dual Ingram in level 7, wasting ammo in levels 8 and 9). And it turns out that the true timesave of option 2 over option 1 is more likely ~49 frames. I’m glad that my first estimate was close enough to the (likely) true value that I was able to make the correct decision.
Level 6 - Room M2
I managed to save 17 frames compared to v1 by not killing the first enemy. This was always viable in theory because in TAS I don't need the M9 which the first enemy drops; yet in practice the problem was that running away would aggro this enemy which, in turn, would aggravate all other enemies in the level. So the timesave from not killing him melted away immediately because in the next room I could not do the stealth kill anymore.
However, as I played around more I realized that this is not the full story. While, yes, it is true that immediately running past the first guy does aggro him and ruins the next room, waiting for just a few frames before moving delays "activating" him; so much in fact that—while he still fires at me twice—that's not enough of a ruckus to alarm the other enemies.
Level 6 - Room M3
An important strat here is to move such that the second enemy is manipulated into staying close to the exit. This way I can easily kill him with my baseball bat and pick up his M4 without having to take a detour. With this in mind I saved 22 frames over v1, also by not switching to the M4 right when I picked it up but instead delaying it to the elevator right after (because that ride is scripted = downtime).
Level 6 - Room M5
There is a very subtle manipulation here: I interrupt my Down+Right movement at the start of the room by an Up+Left press only on frame 26367. This does not influence my direction (because it only
happens on one frame), but it makes the off-screen enemy jump to the left. That way he stays off screen the whole time which reduces lag by ~14 frames and also avoids him shooting at me, thus preserving my health.
Level 6 - Room M6 / B2
I determined this to be the fastest Ingram to get in this level, so I enter B2, quickly kill the enemy, take his Ingram, and exit again. Also it took quite some time to find movement in room B2 which makes the second enemy in M6 miss his shots (else I would’ve had to use & then pick up another backup painkiller later).
Level 6 - Room M9
Here I managed to find inputs where the enemy on the right misses enough shots such that I can just ignore him. This saved 30 frames over v1 of the TAS where I instead had to use bullet time to do the fight. Also at the end of the room the underflow preparation begins: first I switch to the Ingram and shoot once, and then I shoot again at the end of room M10. That way I have the perfect amount of Ingram ammo to underflow at the end of M11.
Level 6 - Room M11
This room is a great example of micro-optimizations during fights. At first I ended the level on frame 28409, but adjusting and trimming directional inputs in all kinds of places led to saving another 9 frames, most likely from lag reduction (less enemies on screen).
Level 7
This level marks the start of Max’s revenge arc, as it features three mini-bosses: Pilate Providence, Joe Deadpan, and Vince Mugnaio. Because we picked route option 2 in level 6, we will be able to use the Dual Ingram which will save us a lot of time in these three fights. This is also where the EU version shines, because—unlike in the US version—at the start of this level
we get back all weapons we had at the end of level 5 (else we could not use the Dual Ingram because we’d have to pick it up again).
Level 7 - Room M2
I have to kill the first enemy in this room because I need his shotgun ammo for later. And even if I didn’t, the pacifist path through this room would not be much faster & would lose me a lot of health. Also, killing the second enemy loses 11 frames compared to sparing him (and that route only ends with 33 more HP; 189 vs. 222). Another thing to note here is that the first kill could happen one frame earlier, but this would delay the room exit by 6 frames compared to adding a delay frame before the first kill.
Level 7 - Room M3
In v1 of the TAS I killed two out of the three enemies in this room. However, this time around I had AdvancedBot to thoroughly search for a pacifist route through this room. Indeed, I ended up finding a handful of 0-kill paths, the best of which was not only 19 frames faster than the fastest 1-kill route but it also ended the room with 89 more HP. Compared to v1 of the TAS this saved 18 frames.
Level 7 - Room B1
The goal of this room is to kill all enemies; only then does the other door in room M4 open. Because I cannot shoot over the table (unless I stand right in front of it) there are a bunch of different strats to try, e.g., run up to the table, wait for the enemies to leave the cover with or without bullet time, maybe some enemy manipulation to make them get to me faster? Long story short: position manipulation (4 frames of diagonal inputs at frame 29333) & no bullet time ended up being fastest.
One thing to note for this, as well as for the other two mini bosses in this level, is that I deliberately end the fight as close to the door as possible. I even tried to exit the room between the last kill and the textbox, but this doesn’t work because the end of the fight immediately freezes you in place.
Level 7 - Room M4
I found two exits here: one on frame 29703 with 155 HP, and one on frame 29702 with 88 HP. I pursued both of them for a few rooms and found that the first one is much better in the long run because being low-health becomes problematic very quickly & necessitates a lot of bullet time dodging and enemy manipulation.
Level 7 - Room M5
We have to make another choice here: kill both enemies in this room, or only kill the one close to the exit and tank the bullets from the first enemy? While the latter option ends up being 3 frames faster, it also loses 133 HP which, as before, results in a lot of timeloss later on. This is why I ended up killing all enemies in this room.
Level 7 - Room M8
I had considered letting the downstairs enemy live, but that cost me 24 (presumably lag) frames later on so I ended up killing him as soon as I got the chance.
Level 7 - Room M9
The extra painkiller I picked up in level 4 in exchange for 2 frames really paid off here. I took it right before entering this room, which allowed me to get through here without killing anybody (I tried the same without using a painkiller but AdvancedBot found no working path in that case). Overall this saved 27 frames over v1 of the TAS, as well as 13 frames over killing one enemy.
Level 7 - Room M12
Killing first the right and then the left enemy ended up being quickest (e.g., 6 frames faster than killing only the left enemy). What is more interesting about this room is how it is a prime example of how little sense lag makes in this game. If you looked at the input file you'd see that I hold "A" 2 frames longer than I have to when killing both enemies here. However, without these two extra frames I get through the room in 201 frames, whereas these at first glance unnecessary inputs allow me to exit the room after just 190 frames. Again: these extra inputs do not affect gameplay at all (if anything, they slow me down because I run at the capped combat-speed for 2 more frames), but for whatever reason they result in 11 less lag frames.
Level 7 - Room M13
I did the fight in this room 72 frames faster than v1 of the TAS (where I had to use the Sawed Off); however, some of this time I lose to switching back from the Dual Ingram to the Sawed Off here. The reason for this is that level 8 is the last level where the Sawed Off one-shots everything so it is the fastest weapon by a slight margin (recall that the reason we used the Dual Ingram here in level 7 were the mini-boss fights; the more enemies have to be killed in a room,
the more M4/Ingram/Dual Ingram excel).
Level 8
The most noteworthy thing about this level is that the game introduces mines here which enables
damage boosting.
Level 8 - Room M3
While all fighting routes through this room were comparable, the fastest one I found involves killing only the top enemy (which also lets me leave with 165 HP).
Level 8 - Room M4
Our first damage boost; in RTA all you do is bullet time jump into the lasers. However, back when I actively ran this game I found a peculiar version of the boost which catapults you out of the room right away; I dubbed it
"TAS damage boost" because I was not able to reproduce it. It turns out the key here is to not jump straight but rather at a slight angle so the explosion carries you further.
Level 8 - Room M6
Instead of going around the room and killing an additional enemy, you can just
jump over the lava pit here using a bullet time jump (there’s nothing else to it). Optimizing the time when to start the jump saved an additional 5 frames over jumping as late as possible.
Level 8 - Room M7
One small improvement (5 frames) here was to not wait in front of the explosion and then start moving again, but to move diagonally to already cover some of the distance towards the door while having to wait for the explosion.
Level 8 - Room M8
One strat in this room is to stay as close to the first corner as possible (
video) because that makes the second enemy throw a grenade diagonally and die from the immediate explosion, thus saving time as well as one shot.
Level 8 - Room M11
Neither me nor AdvancedBot found a way through this room without killing anybody. Killing only the left guy turned out to be 13 frames faster than killing both enemies (without impacting the final HP count).
Level 8 - Room M13
Another
old RTA strat: you can skip turning the valve by jumping into the laser and letting the explosion boost you into the exit before the fire kills you.
Level 8 - Room M15
This room features what is easily
the biggest damage boost in the whole game. This is also what we needed so many painkillers for (4 to be precise): Each explosion deals at least 57 damage (so 171 in this room), in addition to the damage boost in M13 which deals at least 53 damage (224 in total). Because I enter M13 with 80 HP and each painkiller restores 48 HP, I have to take 4 of them to survive the damage boost in this room.
For the boost itself, I tried many different starting positions & directions, and interestingly the “TAS boost” strat from room M4 is slower because here, you want the boost to end as soon as possible (the only reason that was faster in M4 was that you jumped right into the exit, which isn’t the case here).
Level 8 - Room C1
I found that doing the movement through the flames in one go (as opposed to going as far as possible at each given time) seems to be faster by 3 frames. This makes sense because waiting in front of a fire pillar introduces an additional acceleration phase each time.
Level 8 - Room M19 (first pass)
As mentioned before, I tried to implement the box clip here (would save ~11s) but I didn't get it to work even once. The main problems are that
- there is less manipulation potential here because there are no boxes right before the room where the clips happen, and
- this door clip needs the uninitialized byte in the box section of RAM to have a value of 2 (instead of 1, as in level 2) which is just less likely statistically, compared to the more likely bool values 0 and 1.
It also doesn't help that the uninitialized byte jumps around in memory so targeted manipulation is impossible either way, meaning all I can do is test random things and hope they work which, for this clip, they unfortunately did not.
Level 8 - Room M19 (second pass)
I found that using the painkiller at the end of the previous room was necessary, because otherwise I died no matter what (at least without bullet time manipulation).
Level 8 - Room M20
38 saved frames from finding a way to exit the room without having to kill the bottom enemy. Thanks, AdvancedBot!
Level 8 - Room M23
Overall I save 20 frames in this room, but this timesave has two aspects to it:
- I saved 36 frames from optimizing the room exit. The condition for the fade-out to happen seems to be related to being in a moving state while sufficiently close to the exit. So what I do is move in parallel to the door for the briefest time while shooting the last enemy, which triggers the fade-out. I did test a number of paths but many of them ended on frame 38855 and I couldn't get below that, so I took the liberty to conclude that this is how far this particular mechanic can be optimized.
- As mentioned before I have to waste Ingram ammo between level 7 and level 10 (54 ammo to be exact), else I cannot underflow the Ingram at the end of level 10 & the ammo route for level 11 does not work out (there is no viable way around this constraint). Anyway, right here is the one spot where (a) I have the Dual Ingram out, (b) my inputs aren't locked, and (c) I have to wait for an event (the time between calling the elevator and the door opening & the two enemies spawning). While the time is just slightly too short—it allows me to waste only 44 ammo instead of all 54—this is still very worth it as all these shots lost only 16 frames (as opposed to other spots where this loses ~40-50f).
Level 9
The largest part of this level is an escape sequence, meaning this level is on a timer because if you’re too slow the facility blows up and you have to restart the level (however, I doubt that many casual players realized that given how lenient this timer is).
Level 9 - Room M4
Slightly delaying the shots turned out to be 6 frames faster than shooting the enemy as soon as possible (despite the HP being the same on room exit), probably because this delay cut some acceleration phases, i.e., in the other scenario I had to adjust direction multiple times.
Level 9 - Room M8
There is an RTA strat here where you run into the fire and die after accessing the terminal: this sends you back to the start of the room (where you have to go anyway) and it also sets your health back to full, making it a nice strat for consistency. However, in TAS this turned out to be 98 frames slower than dodging the fire and just walking back.
Level 9 - Room A3
One thing to mention here is that once you got the keycard, an obstacle appears in room A1 (carved-in ceiling) which means you can't take the way you came from & you have to take the long way around.
Level 9 - Room M11
I found that there is a 4-frame window right after entering this room where you can shoot the mines without the explosion killing you. The second of those frames led to the fastest room exit, which was even 13 frames faster than the RTA strat of
damage boosting through the mines (which also needs an additional painkiller).
Level 10
More fighting. The most important thing to do here is to underflow the ammo at the end of the level—the only way to have enough Ingram ammo for levels 11 and 12.
Level 10 - Room M1
Again, many choices to make (left path vs. right path, how many/which enemies to kill). Left path & only kill the left guy was fastest, but the more interesting thing is that delaying the turn saved 18 additional frames (to not decrease the speed too much at the beginning). Also one additional A input after the first kill manipulates the second enemy into not hitting me.
Level 10 - Room M2
I found a room exit that keeps all my HP which is only 1 frame slower; however, losing 33 HP should be of no consequence so I traded it for the timesave.
Level 10 - Room M8
I found a route through this room that kills only one enemy (with same final HP) and that is 2 frames faster. However, because I have to waste these 4 extra ammo somewhere else this is not worth it.
Level 10 - Room M11 (first time)
I had the idea to walk towards the wall as soon as I regain control over Max (to turn the camera faster & maybe reduce lag) but that ended up being one frame slower than what you see in the video—most likely because the additional turn introduces an additional acceleration phase.
Level 10 - Room A1 (first time)
I have to delay killing the second enemy because I must not pick up the Ingram ammo he drops. Coincidentally, this seems to be faster for some reason; overall I saved 12 frames in this room.
Level 10 - Room M11
After trying many different paths and fight timings I found that, without the underflow, the fastest I was able to finish this room was 1 frame faster than in v1 (interestingly, the room inputs from v1—adjusted for lag—are 2f slower than what I got here). However, underflowing cost me 35 frames in this room (but doing so is necessary, else I’d lose a ton of time in level 11).
Level 11
The final “real” level, and it is fighting central: we start the level with 255 Ingram ammo from the underflow, and we still have to pick up ammo twice to not run out before the game ends. I’ll mention that in v1 of the TAS my patience ran thin (because I wanted to finally test ammo routes back then) which is why I didn’t optimize this level as much the first time around. Consequently, this is why the final version saved 826 (!) frames over v1 on this level. This shows that fighting in this game holds a ton of potential timesave, if you know
what to do & look out for.
Level 11 - Room M1
The left door is 2 frames faster than the right door; also the left door is better because that’s where I have to be after the first fight anyway.
Level 11 - Room M2 (first time)
This fight—and this level in general—is a great showcase for many of the
fighting-”first principles” I listed earlier: shoot enemies as early as possible (even before they’re on screen, which is where the
enemy HP viewer script is indispensable), hold A to shoot with Dual Ingram & move during it, and bullet time is only worth it if you don’t have to move to a specific spot.
Mechanically, this fight is split into two phases: at first, four enemies (middle left, middle right, back left, back right) spawn and have to be killed. Only then, two more enemies (bottom left, bottom right) spawn, and upon eliminating them the next keypad becomes active. Overall, I managed to save 103 frames over v1 in this room alone.
Level 11 - Room A3
One small strat to mention here is that shooting the terminal brings up a textbox, but you can skip that by firing the shot right before you exit the room. This saved 29 frames over v1 of the TAS where I didn’t do that strat.
Level 11 - Room M3
I found a route through this room where I don’t have to kill anyone, but it required some enemy manipulation: my initial movement is tuned to make the closer enemy jump left so he’s further away from me and can’t shoot me. This saved 11 frames over v1 of the TAS.
Level 11 - Room M5
You may have noticed that I took a weird path before the two final enemies spawned. This was necessary to manipulate the enemy with the Ingram into staying close to the exit so I can pick up his ammo (necessary for the route, and this is one of the two fastest Ingram ammo pickups in the level so there’s no way around this).
Level 11 - Room M6
The RTA strat here is to shoot the mine and wait until the chain of explosions kills the guy at the other end of the corridor. However, this turns out to lose 27 frames to staying as close to the explosions as possible & killing the enemy as soon as possible (most likely lag reduction).
Level 11 - Room M8
In
this sheet I tested what timing for the two jumps over the two final gaps makes me move farthest (with respect to the in-game coordinates). Similar analyses happened for the other jumps as well as for the two fights here. Combined, I saved 15 frames over v1 of the TAS.
Level 11 - Room M9
I tried to skip the enemy here but I didn’t find a way; his firepower is just too great, and the animation for pressing the elevator button & the door opening take too long so he killed me everytime.
Level 11 - Room M12
In the remaining rooms of this level I saved a lot of time because in v1 I ran out of Ingram ammo so I had to resort to the Sawed Off. In room M12, for example, the Dual Ingram saved me 182 frames. Also I already started moving backwards as I fought the last enemy to cover some of the distance towards the exit. Another thing to mention here is that I used my final 2 painkillers here for the end of the level to work out damage-wise.
Level 11 - Room M13
If you’re not careful/move along a “wrong” path, the enemies in this room fall victim to terrible pathfinding in that they run around the entire room to get to you. So while moving towards, say, the enemy on the left I have to look at his coordinates to make sure he stays as close to me as possible so I can minimize the distance I have to travel towards him. A similar manipulation (i.e., my distance from the wall) applies to the last enemy to make him appear from behind the corner as soon as possible. Compared to v1, this room was 233 (!) frames faster.
Level 11 - Room M15
Because of the two painkillers I took previously, I have enough health to only kill two enemies and tank the hits from the third and fourth ones as I run towards the exit. This contributed to another 155 frames of timesave over v1.
Level 12
The final level is a boss fight. After shooting three enemies, Max has to destroy four steel ropes with grenades to destroy the chopper, thus preventing Nicole Horne from fleeing. Nicole is apprehended and the game is over.
There is a strat here that I only realized I could do when making the final version of the TAS: animation canceling the grenade throws. The reason this works is that, while the full grenade throw takes around a second, the game-internal cooldown for grenades is just 5 frames. Hence shortly after throwing a grenade I can
animation cancel the rest of Max’s throw animation and proceed with the next throw.
The other TAS-only strat here is to not stand in front of the outer steel ropes when throwing the grenades, but rather to destroy them diagonally from a distance (in RTA these throws require a position setup because the hitbox of these ropes is weird). Altogether, this animation-cancel insight saved 409 (!) frames over v1, thus making this level almost 13 seconds (40%) faster than my fastest RTA segment here.
RTA timing
As per the
rules on speedrun.com, (RTA) “starts when you select New Game (...) and ends on the first frame where all four steel ropes are destroyed in Level 12”. For this TAS means that frame 1045 is the RTA starting point, and frame 58861 is the end, resulting in an RTA time of
16:07.996.
Possible improvements
Two possible improvements come to mind:
- While I managed to reduce lag a lot already—mainly thanks to AdvancedBot—there should be some advanced lag reduction possible which the traditional “optimize room for room”-way of TASing cannot cover. What I mean by this is that—because lag in this game is weird—losing frames in one room can save frames in the next room due to less lag (and sometimes also better enemy behaviour). I observed this multiple times throughout both v1 and v2 of the TAS; most notably, in v2, level 7, room M7 I found an exit that saved 1 lag frame, but for whatever reason it made the second mini boss of that level (room B2) significantly slower. However, these non-immediate chain of causalities are basically impossible to predict and would need an entirely different TASing approach.
- While the game has 8 main directions to move in, there is a way to walk at “odd angles”, i.e., directions that are not a multiple of 45°. As an example, you can walk at an angle of 22.5° by always holding Left and inputting Up every second frame; or alternating 2 frames of Up inputs with 1 frame of no Up input leads to moving at a 30° angle (video 1, video 2). While this may be useful in a few rooms, the biggest drawback of this tech is that the speed is not maximal (e.g., 1.56 vs. the maximal 1.66 horizontal speed). So while there may be applications for it in certain specific circumstances, implementing this makes optimization much more challenging because the optimization space explodes. Hence I’ll leave this to future TASes of this game; mainly to figure out whether this can be useful at all.
Suggested screenshot
While I had a few frames in mind, the coolest one in my opinion is the jump over the lava pit in level 8 (frame 33728):
Alternatives: frame 15717 (enemy boost)
or frame 58772 (double grenade)
Finally, thanks to
- exileut for the first WIP of this game
- Dimon12321, Patashu, and 7eraser7 for discussing and exchanging ideas, most notably when I started to figure out the mechanics behind door clipping
- the other RTA runners of this game: crazeyawesome and, most recently, joons88. Joons’ recent submission in particular brought this game back to my mind and motivated me to investigate level 2 door clip again, which eventually led to the creation of this TAS.
- Samabam and epicdudeguy for—back in 2017—helping me by getting level 2 door clip & recording clips of it. Having many different videos of this trick helped me to eventually connect this glitch to shooting crates.
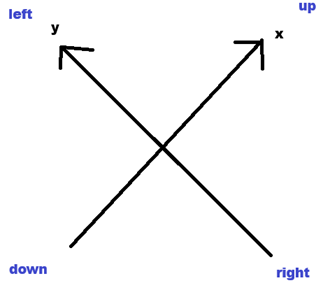


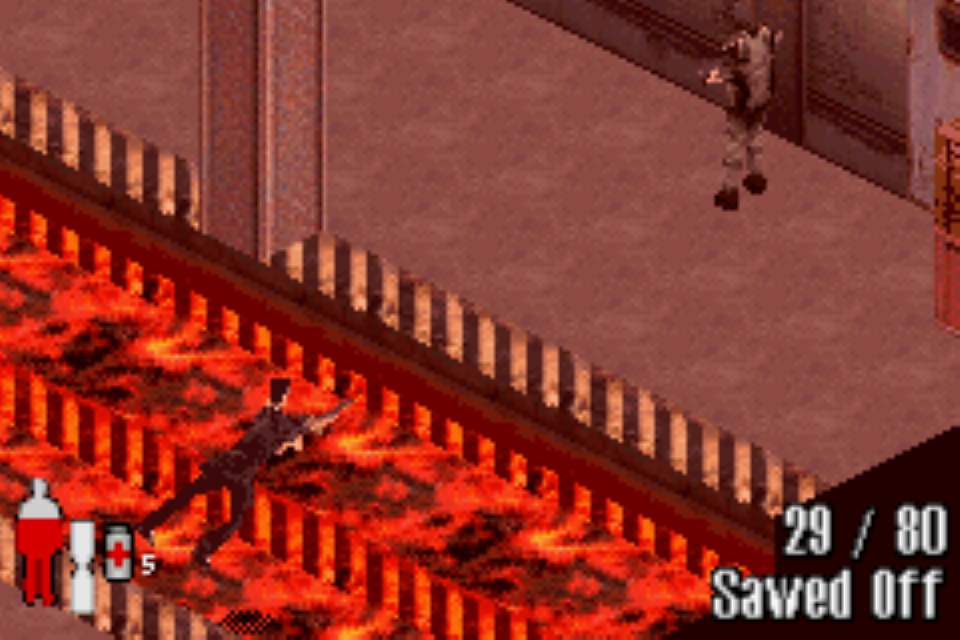
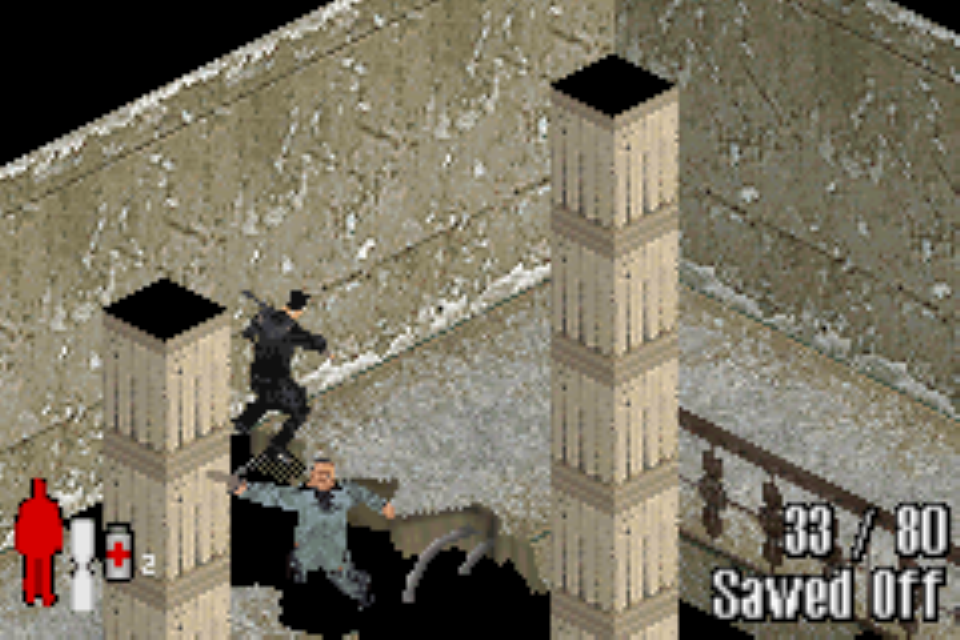
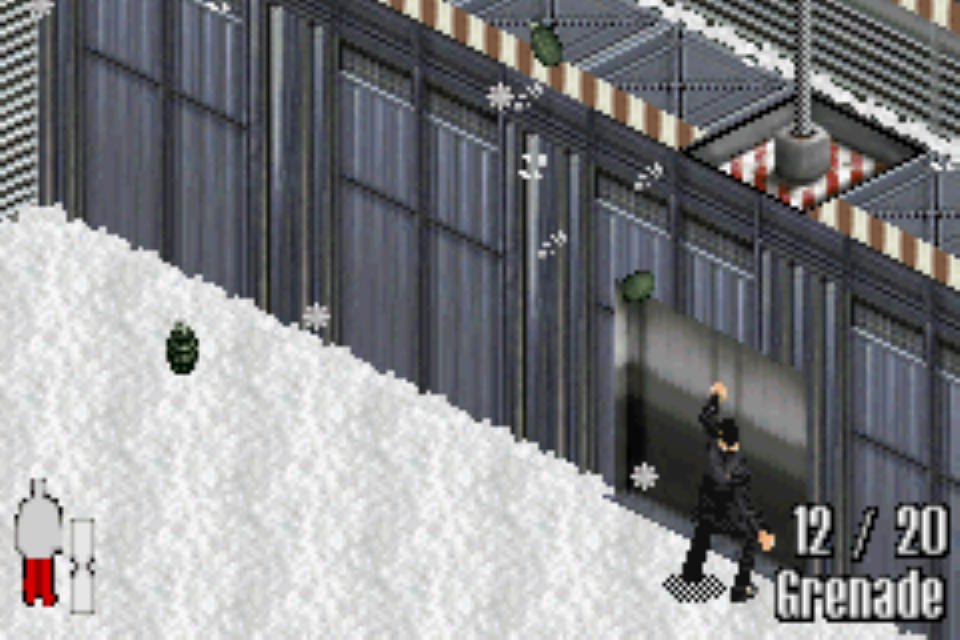


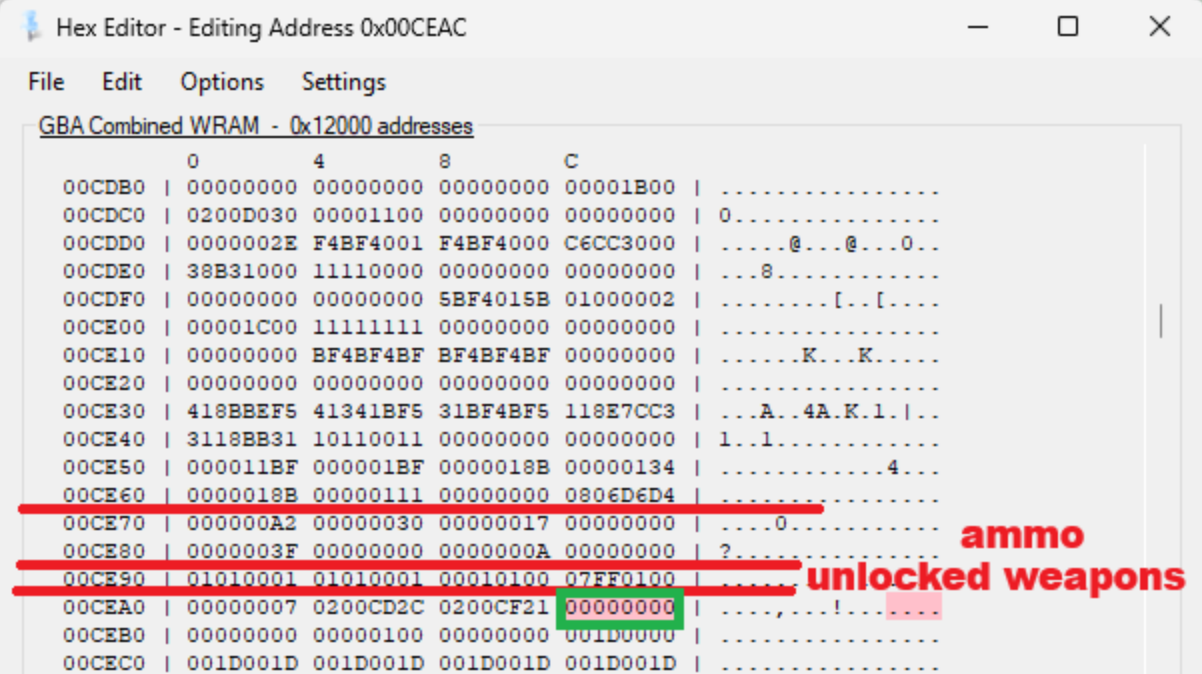