General notes
- Syncs on Bizhawk 2.11
- Documented Rerecord count - 27118
- Finishes the game with 100% completion.
- Performs sequence breaks.
- Uses glitches and exploits to save time.
- Takes intentional damage and deaths to save time.
Introduction
Rayman is a 2000 Game Boy Color game in the Rayman franchise. The game is a 2D platformer similar to the original Rayman from 1995 although this game is its own thing. It's a good game with strong visuals and enjoyable gameplay once you get past the game's really... questionable renditions of Rayman 2 music (although you can play the game with an easier soundtrack on the ears by playing the game through the Rayman 30th Anniversary collection).
I have already done regular Any% TASes for this game. I would highly recommend checking out my Any% submissions to learn more about this game (
https://tasvideos.org/10236S ) (
https://tasvideos.org/9798S ). I initially did not have any interest in running 100% but when Thextera started running the category, it got me very interested to look into the category myself and a couple of months later, I have made an entire TAS of the category.
The goal of 100% simple. In almost every level, there are electoons who are trapped in cages. Unlike the original Rayman, you don't actually need to save the electoons in this game. You can just avoid all of them and beat the game. In order to get 100% however, you need to break every cage and that is exactly what is done in this run. There are bonus levels and a whole extra world but those do not count towards completion so the goal of this run is to simply beat the game and break every cage on the way.
A big thing about 100% is that normally, you cannot beat the game 100% in a single playthrough. There are some cages in the earlier levels which require you to have an upgrade from later in the game (you get the Heli in Rainy Forest/World 3 and the Ring Grab and Ancient Forest/World 5). What you are supposed to do is that you are supposed to beat the game first and when you beat the game, the game gives you a password. You then need to input that password which will take you to a level select. From there, you can revisit any level in the game and break any cages you missed, including the ones you could not get before.
However, by utilising the game's various exploits, it is possible to break every cage during your first playthrough, eliminating the need to revisit any levels. Some of the cages you are supposed to come back for can easily be broken during your first playthrough but others require more creative solutions. The route in this run is to collect every cage on the first playthrough so that we don't have to input a password and slowly replay levels.
Breaking cages is odd. You typically need 2 punches to break a cage but there are some instances where a cage can be broken with a single punch. If your fist is coming back to you, that can break a cage with one hit although it breaks cages slower than using two punches (it also does not one hit cages at certain angles). Charging a punch breaks cages quickly in one hit but that takes a considerable amount of time to perform so it is only used in situations where charging a punch does not waste time. A gold fist can also break cages in one hit but that is rarely applicable. You also have to be careful when breaking some cages as if you go too far away from the cages, they won't actually break. Not only that but there are some cages where the game will tell you that a cage is broken and it will update your cage counter but the cage didn't actually break so your percentage doesn't increase and you have to go back to the cage and break it again. Cages carry over after you die which is helpful in some levels although we do have to be careful as dying too quickly will make the cages not count.
This game has a lot of exploits and I recommend checking out my Any% submissions for more details as I will be mentioning them without further explanation in this submission. I was able to find one extra exploit for this run which I will refer to as Vine Floating. If a vine is close enough to a ceiling, you can jump and punch at the same time which will make you float in the air. The float can be cancelled by punching or gliding (you also have to climb up for a frame before jumping/punching in a majority of cases). As broken as this sounds, I could only find one level where it was useful in the whole run.
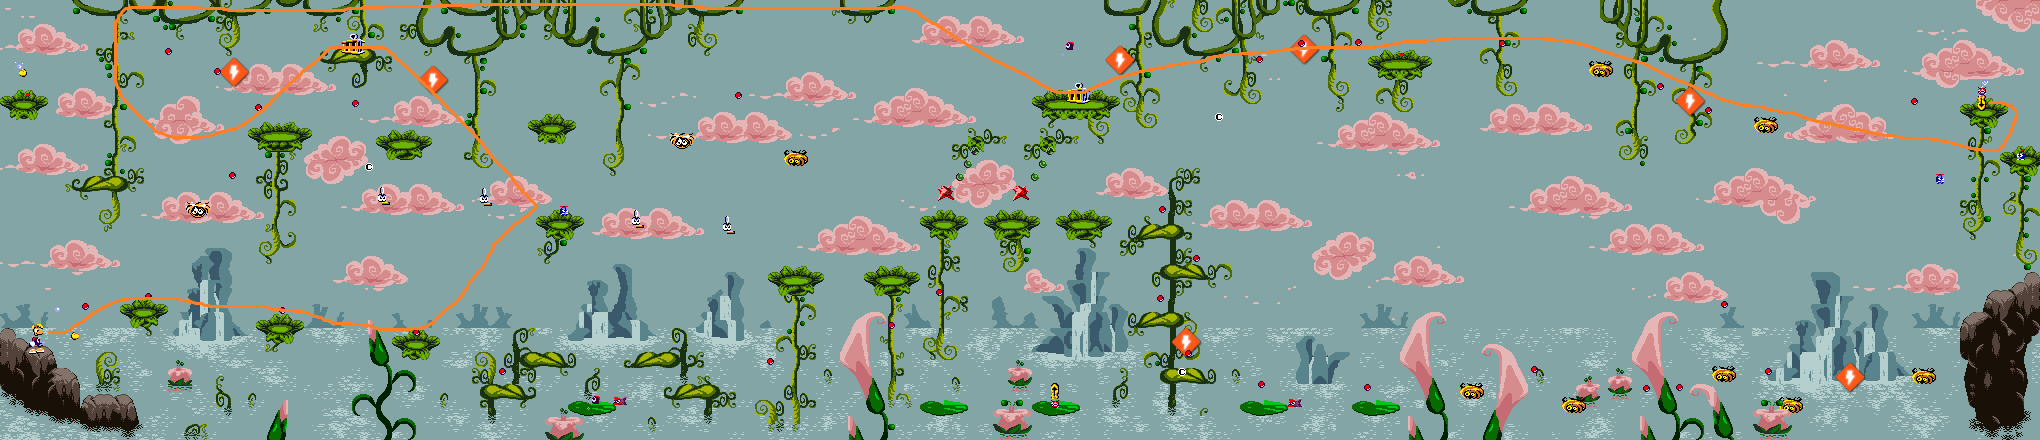
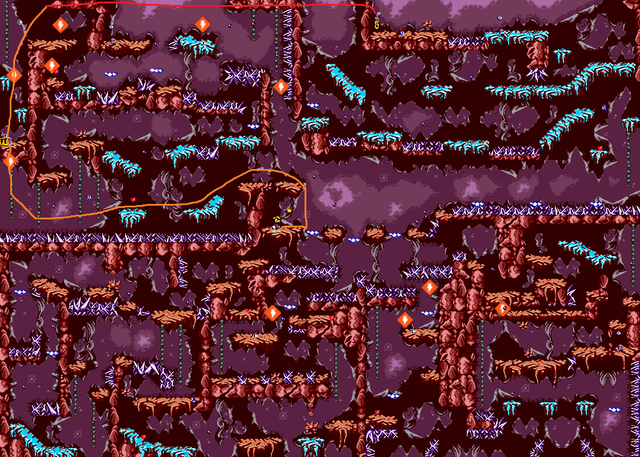
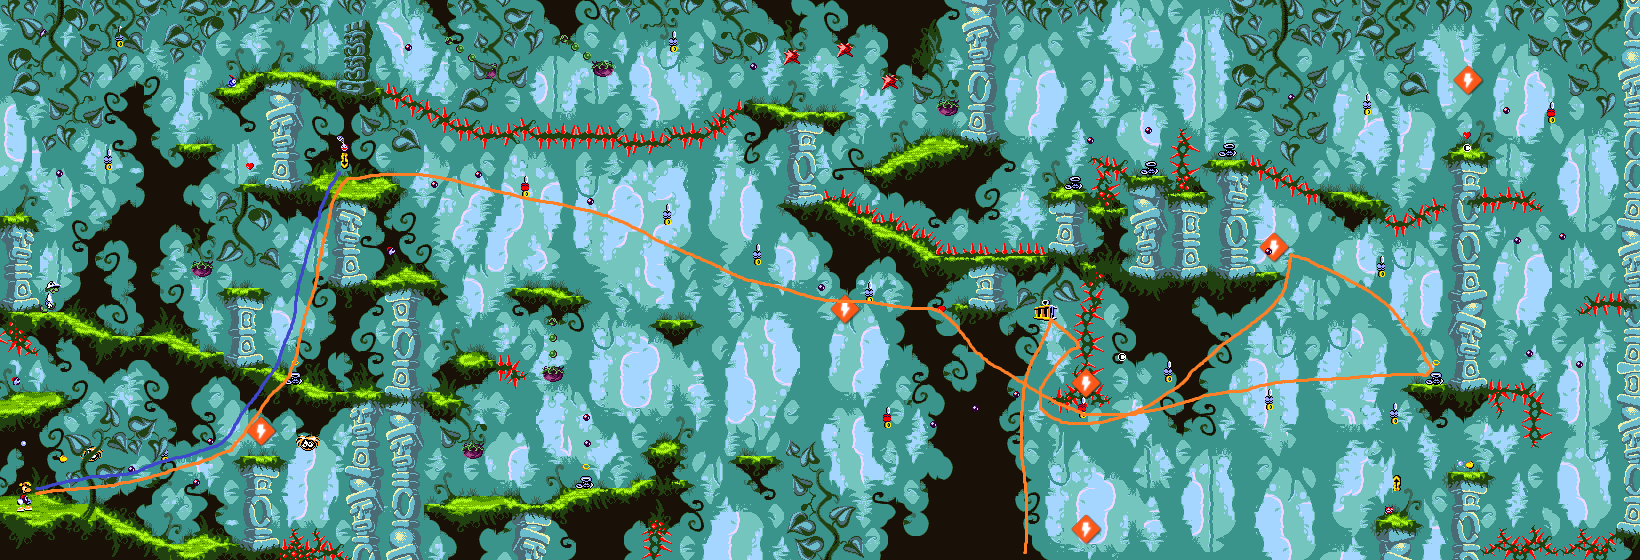
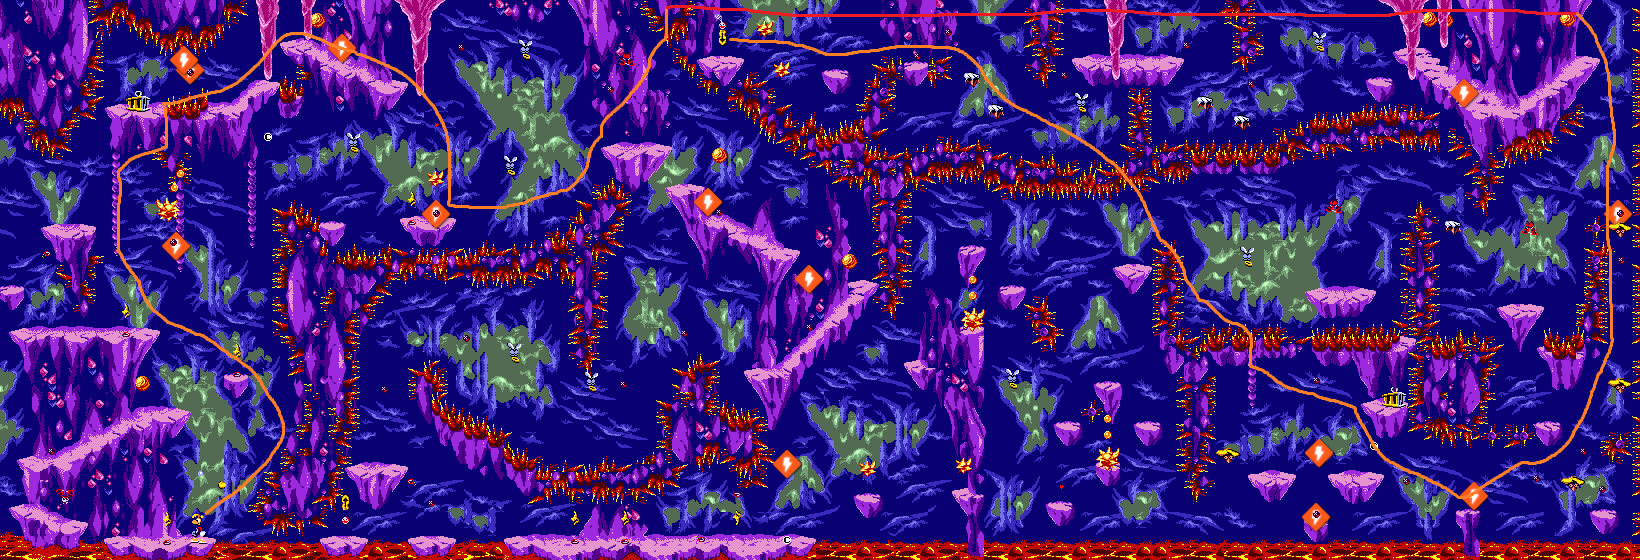
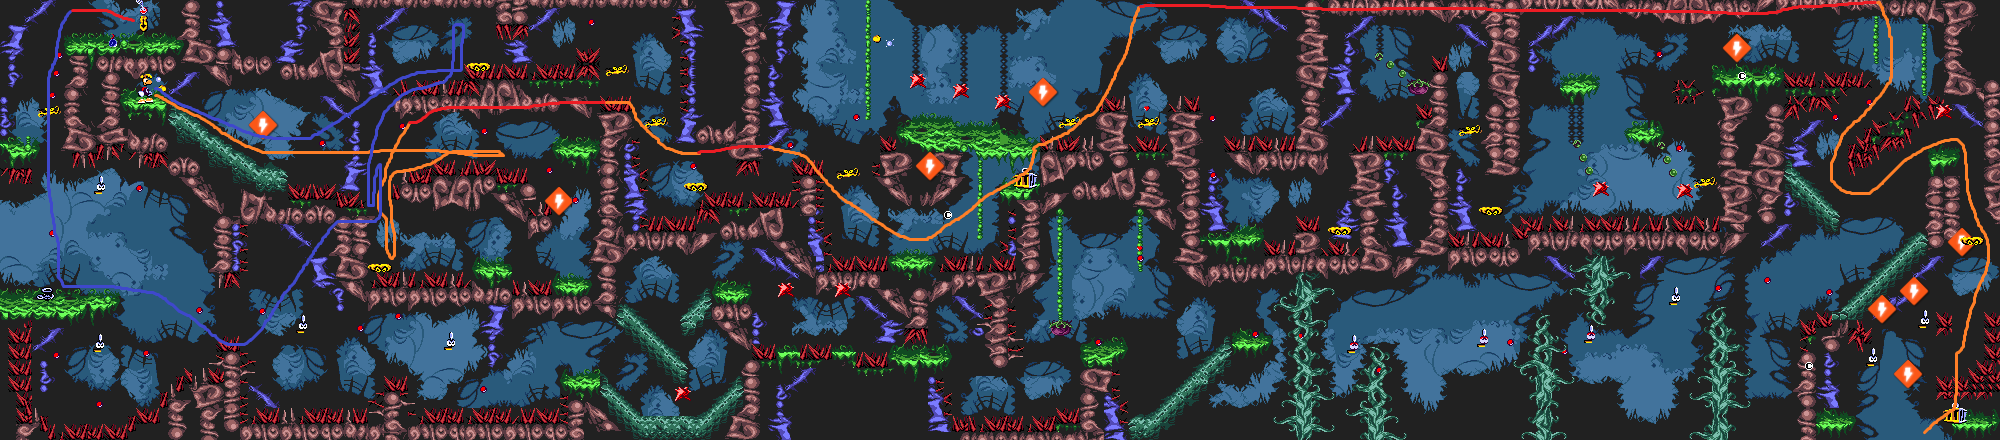
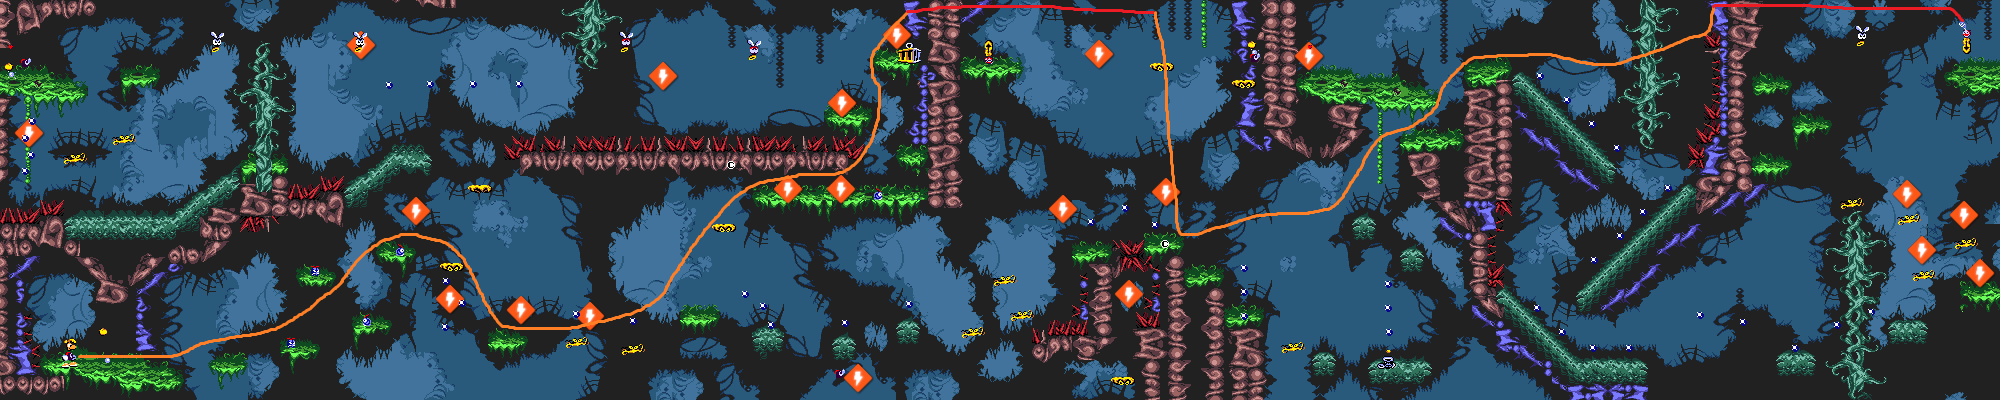
Here, I will go over some of the main strategies in 100%. I would recommend checking out my Any% submissions for more information on significant skips which are applicable to both categories. Like with my Any% submissions, I will be using visual representations of the levels to show the route on stages with unorthodox routes (courtesy of Ray1map). It has crudely drawn lines to show routes so I do apologise in advance if it is hard to read at times. Orange is the main colour used but blue represents a route after death warping and red shows a long zip.
Spellbound Forest 2
- This level contains 2 cages and the first cage we break is a cage we are not supposed to get yet. There is a cage above the first area and what you are supposed to do is that you are supposed to revisit the level later and use the Heli to glide over to the cage. However, we can use the enemy to perform a damage boost jump and get over to the platform without the Heli, being our first revisit skip. The second cage is the first cage you would normally see and it is out in the open, not requiring us to go out of the way.
Spellbound Forest 3
- This level is an auto-scroller and just like in Any%, we get momentum storage. The only difference is that we use the momentum storage to get the cage which is near the end of the level. This level is only frames longer compared to Any%.
Spellbound Forest 4
- When going for the cage, what you are supposed to do is that you are meant to go to the left side (after climbing up the vine) in order to trigger a platform to reach the cage. However, we can use a floaty jump to reach the cage without the detour.
- I don't do the damage boost at the end of the second plum section as the health is needed for later.
Airy Tunes 1
- The first cage is on a platform which is normally too high up to reach. You normally need to use the Ring Lum to reach the cage. However, we can build up a ton of speed and utilise floaty jumps in order to reach the cage on our first visit.
- After breaking the second cage, I jump into the drum in order to clip down to a later part of the level.
Airy Tunes 2
- You are supposed to use the Heli to reach the first cage but what we can do instead is that we can trigger the trumpet from below and we can use the trumpet to blast us forward. We have enough speed and distance to reach the cage, skipping another revisit. We can then use punch boosts on the slippery surface to make it back to the other side without dying.
Airy Tunes 3
- You are supposed to use the Ring Lum to get the first cage. However, we can use a damage boost to reach the cage without the Ring Lum. I also use momentum storage to reach the cage much faster.
- After getting the first cage, I death warp and then I get momentum storage on the lower cloud which I can then use to take a much faster path to the second cage.
Airy Tunes 4
- You are supposed to take the high road in the level and then take the low road to reach the first cage but what you can do instead is to simply perform a damage boost to reach the cage early.
- For the second cage, I get momentum storage and then I float up the level, hit the cage and then performing jumps to clip through a wall and reach a higher part of the level.
Rainy Forest 1
- You are supposed to use Ring Lums in order to reach the first cage which we still cannot use yet. However, we can manipulate an enemy from above to move away from its normal position and then we can perform a Glitched Double Jump (since we now have the Heli) to get hit by the enemy and then perform a damage boost jump to reach a platform that takes us to the first cage. I then use another GDJ to take a more direct path to the cage.
- After getting the first cage, we can then go backwards a bit and then perform another vine float in order to reach the second cage faster (you are normally supposed to go near the end of the level and backtrack a bit in order to reach the cage).
Rainy Forest 2
- You are supposed to use a plum to get the first cage but we can perform a GDJ and perform a well placed punch to break the cage without the plum.
- This is one of the most finnicky cages in the game. I wait forever before moving which is intentional as if I move any earlier, the cage will not count.
- You are supposed to use Ring Lums to reach the last cage but you can simply drop down from the top of the level (on the way to the exit) in order to reach the cage. You can then die after breaking the cage although you do have to play the whole level again since there isn't a checkpoint anywhere. This is one of the simplest revisit skips in the game, I wouldn't be surprised if people in 2000 figured this out.
Rainy Forest 3
- At the end of the level, I have to wait for the cage to spawn. I spawn the cage as early as I can and I break it as early as I can with a charged punch and precise movement.
Rocky Peaks 1
- You are supposed to use Ring Lums to reach the cage. However, you can very easily just reach the cage without using the Ring Lums. In this run, I had the golden fist which very easily allows you to hit the cage from a distance. This is another laughably simple revisit skip, you can just take damage and jump up to the cage if you don't have the golden fist.
Rocky Peaks 2
- I use momentum storage to quickly reach the cage and then instantly zip to the end of the level. This level would normally take 2+ minutes but this runs completes the level 100% in just 13 seconds, only 5 seconds more than the Any% run. We reach the halfway point after beating this level and funnily enough, we reach 49% as well.
Rocky Peaks 3
- The first cage is in the area we perform a huge skip into so I simply break the cage and make sure that it counts.
- To get the second cage, I get momentum storage and then I go into a wall and perform a precise punch in order to hit the cage while in the wall. The spikes then hit me which warps me on top of them.
Rocky Peaks 4

- The first cage I get is actually the last cage you are supposed to get. You are supposed to play through to the end of the level so a moving cloud spawns with the cloud taking you to the cage. However, we can use a ceiling zip to get to the cage immediately.
- After getting the first second, we can then use a ceiling zip to go right where the first cage is. We can then use a GDJ to reach the first cage early.
- You are supposed to use the Ring Lum in order to reach this cage. However, we can use a GDJ to reach the cage early (it is also possible to utilise charge punches on the ice to reach the cages without a GDJ). This is the final revisit skip in the run as we gain the Ring Grab ability after this level.
- After getting the second cage, I go back along the lower and then I gain momentum storage in order to reach the end of the level without needing to spawn the cloud which travels to the end of the level.
- This skip is also faster in Any% although I did not know about it when I made the Any% TAS.
Ancient Forest 1
- Instead of taking the intended route to the cage, I use a trumpet blast to reach the end of the level and essentially play the level backwards. You have to go quite a way back to spawn the cage but it is faster than not backtracking.
- After breaking the cage, I death warp and then use a trumpet blast to skip to the end, just like in Any%. This is slightly faster compared to going to the end without the death warp.
Ancient Forest 2
- Getting the cage only required a minor detour. I used GDJs to take as direct of a path as I could.
Ancient Forest 3
- I use a GDJ in order to reach the first cage early. You normally have to use a moving platform to reach the cage and the platform requires you to travel quite a bit forward.
- I use a trumpet blast to reach the second cage faster.
Fiery Depths 1
- You are normally supposed to take a long detour to reach the first cage. You go far past the first checkpoint, take a lower path and then go backwards a lot before reaching the cage. However, you can use the first Ring Bat in order to reach the cage early. If you hit a Ring Bat while it is falling, you won't actually grab onto it until it has finished falling so you can hit the Ring Bat while it is falling, go on top of the spikes and then when the game makes you grab the bat, it will clip you through the floor to below where the cage is. From there, you just need to take a small detour to spawn the cage.
- I use momentum storage to get the second cage and float up to the end of the level. This cage is extremely finnicky so I wait a lot to make sure that it counts. I also collect health here as it takes almost no extra time and I need the health for the next level.
Fiery Depths 2
- To get the first cage, I clip upwards and then at the top, I perform a damage boost jump into a ceiling clip to reach the cage quickly.
- To get to the second cage, I perform a damage boost jump into a ceiling zip next to the wall by the exit. Instead of going towards the exit (as Any% does), I zip along the ceiling to reach the right side of the stage where I can then go to the cage.
- After getting the cage, I climb up the vine where I can take damage on the vines and then jump into the area above me. I can then go backwards and jump through a hole in the ceiling to travel to the end of the level.
Fiery Depths 3
- The cage is surrounded by triggers which change the behaviour of the lava. I dodge a trigger which freezes the camera but there is another trigger which slows down the lava. I unfortunately could not avoid this trigger but I could dodge it for as long as I could.
Fiery Depths 4
- I quit out and reload the game in order to refill my health.
- After getting the cage, I perform the same major skip as Any% in order to reach the end quickly.
Arcane Forest 1
- After getting the first cage, I use a GDJ in order to quickly get back on the path to the end of the level.
- I get momentum storage on the moving platform at the end of the level so I can quickly reach the end after breaking the second cage.
Arcane Forest 2
- I get momentum storage on the vertical moving platform at the beginning of the level which is then utilised to perform zips.
- You are supposed to trigger the first cage on the top and then backtrack to the cage but you can easily use a low jump to trigger the cage from below and break it instantly.
- After the first cage I use the momentum storage I held on to zip through the ceiling and head towards the second cage.
- After breaking the second cage, I death warp and then perform the Any% route to reach the goal. There is a checkpoint on the top right part of the level but I skipped the checkpoint with a ceiling zip.
Arcane Forest 4
- I use momentum storage to reach the first cage quickly. I then use a ceiling zip to hit another platform and gain momentum storage again. From there, I climb to the top of the level with momentum storage and I then use the momentum storage to damage boost on spikes and then perform a ceiling zip to the end of the level. At this point, we have freed all of the electoons and after beating Mr. Dark, we have finished the game with 100% completion.
Conclusion
And that's the run. Rayman GBC 100% done in 23 minutes and 17 seconds (22:52 RTA). It was pretty neat and satisfying seeing just how low this category could go. This run is only around 6:20 longer than the Any% TAS and it is not much longer than the RTA Any% WR. I am definitely happy with how this run turned out. This category definitely turned out to be a wild ride. It not only still has a bunch of the big skips Any% has but it also has a lot of its own tricks and skips. I also found it neat when outdated Any% strats turned out to be useful in 100% (2-4 and 6-1 as two examples), that was often neat to see.
There is still a bit more room for optimisation, Mr. Dark's RNG could potentially be be better, more lag reduction could probably be implemented and certain levels could potentially have better routes but I am overall very happy with how the run turned and Mr. Dark as always makes me not wanna touch this run again unless significant discoveries are made. I hope this run turns out to be a fun watch.
As always, shoutouts to the Rayman speedrunning community (especially Thextera who helped route this category) and the creators of Ray1Map for creating online maps for this game which were extremely helpful for routing.
Challenger: Updating the run thanks to 16 seconds of improvement (some areas improved) found by the author.
Challenger: This project is truly an amazing piece of work to another level! Being able to reach all the cages without the need to revisit the game after you have the power-ups surpassed all expectations: everything is very well polished, optimized and achieved with a significant final product :)
Accepting for publication as a new "100%" branch.