The hack's patch is applied to the PRG1 version of Super Mario Bros. 3. Get the hack here.
Subtitles are included in the run if you'd like to see some commentary.
Subtitles are included in the run if you'd like to see some commentary.

Hack and run information
Super POO Bros. 3 (short for Super Grand POOBear Bros. 3) is a Super Mario Bros. 3 ROM hack created by ChaosComposer in 2016, inspired by the likes of Obitus1's Kaizo Mario Bros. 3 and Mitchflowerpower's Super Mario in The Final Kaizo. It's a strange hack all-round, with a plot that entails Mario going for a trip to the store to get a gallon of milk (though since it's a Kaizo hack and tough obstacles and courses await him, something is implying he's not going to make it back for a long time). Or so you think.
Apparently also, the kings are cosplayers who have decided to give the Toads mental breakdowns out of boredom.
Apparently also, the kings are cosplayers who have decided to give the Toads mental breakdowns out of boredom.
I first finished a TAS of the hack in 2017 on the PRG1 version, clocking in at 19 minutes. I began progress on another in 2019, which showed promise and was well ahead of the first draft in every level, though I stopped after finishing World 7. I went again for a third TAS in 2025 after seeing GuanlongX finish his a year prior (with help from me), but I came to a stop yet again after World 6 (in August 2025), not touching it again until July 2026. Lots of great improvements were made, and I didn't wanna let it go to waste, so I continued work on the run until it was complete, subtitles and all.
Since 2017, all of my runs of this hack were done on the PRG1 version, as it was the only version of SMB3 that I had on me back then; there are a few subtle differences between it and PRG0, but if I recall correctly, there is added lag on the level entrances (according to 100th Coin). Feel free to add to it or correct me if needed.
It'd be a lot of work for me to go and redo the run on the PRG0 version of the hack, and I didn't want to spend much time resyncing the run (especially when it came to the RNG), so I figured it's best I submit it as is here.
Since 2017, all of my runs of this hack were done on the PRG1 version, as it was the only version of SMB3 that I had on me back then; there are a few subtle differences between it and PRG0, but if I recall correctly, there is added lag on the level entrances (according to 100th Coin). Feel free to add to it or correct me if needed.
It'd be a lot of work for me to go and redo the run on the PRG0 version of the hack, and I didn't want to spend much time resyncing the run (especially when it came to the RNG), so I figured it's best I submit it as is here.
Techniques, tricks, and glitches worth explaining
(Note: Some of these may or may not have been explained or seen before in existing SMB3 TASes.)
When entering levels, holding Left on some of them before Mario appears will shift him to an X pixel of 16 instead of 24; this comes in handy for if I need to fill the P-meter in a tight starting area. If Mario simply appears standing, facing right, and doing nothing, it won't work since the first frame of input won't be registered.
Raccoon Mario can phase through hit blocks, usually done with the appropriate X pixel and horizontal speed by tail-flipping them. 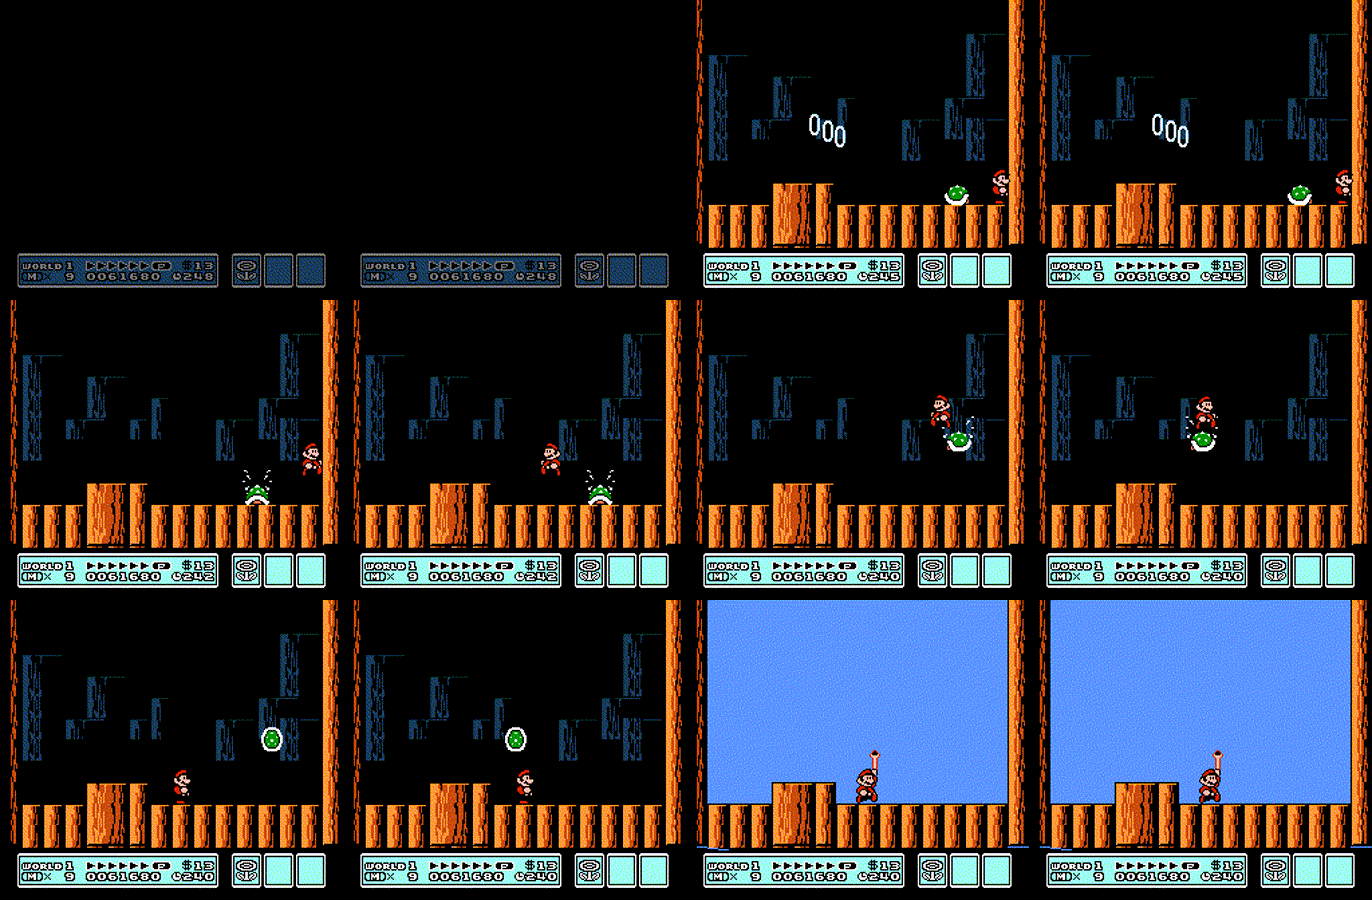
Defeating Koopalings right about where they'll drop the wand (usually in the center of their battle area) will have the wand appear faster than, say, if they're far to the left or the right edges. (See GIF.)
For walljumps, Small Mario's X speed needs to be at a comfortable 17+, while Big Mario's needs to be 33+.
In levels with airborne water areas, it's slower to be in them as Mario's X speed cap will drop overtime. Therefore, it's best to avoid them or at least not to be in them for too long.
The big ? block is wonky with collision detection; while hit, Mario can clip through the block with the appropriate X and Y pixels.
Simultaneously tail-flipping and stomping on a Koopa can allow for grabbing its shell and/or kicking it higher than normal, often used an entertainment trick to maintain flight without P-speed.
With Kuribo's Boot, Mario can jump in midair if he hops on the ground (Left or Right on the ground; no A press) and falls off, which can result in many creative jumps and reaches.
It's harder to lose speed while on ice-type blocks, which allows for ground wiggles/shimmies and backwards jumps with maximum horizontal speeds.
After defeating a Koopaling in a horizontal-scrolling area, Mario can move out and in to despawn and respawn the Koopaling to get them to fly up earlier. For the wand to appear though, they need to be in their shell, or else it'll result in a softlock.
Only the bottom portion of Big Mario is affected by lava tiles.
More on Raccoon Mario
Without P-speed: A presses will cap Mario's max horizontal speed and lower it until A is not pressed again for ~16 frames. When going at 40 speed, pressing A on certain frames will reduce Mario's speed to 39 for seven frames, then to 38 for the next ten, without forcing his speed to a 37; from here, it's optimal to not mash A, especially in the air, to ensure Mario can move more at faster speeds. However, if Mario touches quicksand after first taking flight with the P-meter filled, he can airwalk after getting out of the quicksand, and so he can keep the 56 speed as long as he's rising while airwalking.
With P-speed: Raccoon Mario can move at the max horizontal speed of 56 as long as he's on the ground. If at any point he's in the air, that maximum is capped and will slowly drop until it's at 23, so it's best not to be in the air so much to keep the 56 speed.
If Mario has filled the P-meter but has not first taken flight yet, he can still keep his 56 speed as long as A is not pressed or he doesn't land with the P-meter emptied.
If Mario has filled the P-meter but has not first taken flight yet, he can still keep his 56 speed as long as A is not pressed or he doesn't land with the P-meter emptied.
Level-by-level comments
Note that there may be graphical glitches and cutoffs, but they should not affect the run gameplay-wise.
World 1-1
I start off with quick bounces off the Goomba and the Koopa. I bust the brick with the shell and carry it as I gather P-speed and walljump. Then I perform a midair shell jump over the munchers and perform two walljumps over the wall, then I soar across the gaps to victory.
World 1-Hammer Bro
This is the only Bro encounter I ever face in the entire run; I obviously can't avoid it.
It's faster here to stomp the enemies from left to right. The last Goomba and only Hammer Bro are stomped almost at the same time, leaving the Hammer Bro to have only thrown one hammer while getting ready to throw the second.
The small chest only appears when all enemies (including projectiles) have despawned, and it depends on what side of the battle arena Mario is in. It's faster here to have it spawn at the left.
World 1-2
An autoscroll-less version of World 1-4 with Thwomps and Donut Blocks; those don't mesh well together...
I gather P-speed on the upcoming grass platform, walljump over the first wall, then go under the next. The rest is smooth sailing.
World 1-Fortress
Delayed the entrance by one frame to manipulate enemy RNG.
Left is held before Mario appears so that he can start further away from the edge to gather the P-speed in the tight starting area.
There are no items thus far, so bosses (including Boom Boom) can't be defeated any faster. It's not any faster to keep the P-speed approaching this Boom Boom either.
World 1-3
A modified World 1-6.
The first big ? block of the hack reveals a Super Leaf, and I use it to clip through the top munchers (twice) and fly across the rest of the level.
I cannot find a way under the pipe at the bottom to land on the cloud; the P-meter is emptied by then.
World 1-Castle (Airship)
First autoscroller.
In the middle of the level, I gather P-speed to later to clip through the last cannon and get closer to the right edge of the screen. I took damage from the cannon for later.
The first Koopaling, Larry, is centered and defeated to allow for the wand to be dropped, and I perform the special ceiling wand catch glitch thanks to the airborne structures.
Larry shoots out a magic blast upon first greeting. Slowing down to manipulate his attack pattern is slower.
Larry shoots out a magic blast upon first greeting. Slowing down to manipulate his attack pattern is slower.
World 2-1
Peach, the Bae, advises in her first letter that I use a P-Wing in this level because of the unscalable Bill Blaster; but as Small Mario, I am very much able to make as many as I want! ...although here it'd be better if I just made the minimum of four; I couldn't get it in three.
World 2-2
Another big ? block that reveals another Super Leaf. I make it onto the grounded brick and jump up to grab the Leaf and land on the big ? block.
Then I press on the P-Switch and make the required frame-perfect jump to go through the brick-turned-coin, then go through the semi-platforms and the half-coin/half-solid ground to gather the P-speed and fly under the wall and through the coins to the pipe.
World 2-Desert (Sandtrap)
Gotta jump over those upward slopes; a bad idea to go up the slopes and not down.
Regardless, a huge gap I cross thanks to Raccoon Mario's flutters, and more P-speed is built up before the super tornado jump over the brick wall. From here, it's minimizing flight time with the P-meter full, with help from a quicksand field to force Mario into a hyperspeed airwalk state.
World 2-3
Oddly, this level looks nothing at all like a desert. Likely a non-desert version of the original's World 2-2...
Well... I land on the near-top of the slope to slow down so I can efficiently land on the first Bill Blaster, then travel along the Wood Block tunnel.
A three-brick row stops me, so I need to tail-flip them out of the way. I also duck-jump under the one-block-high ceiling that follows, then tail-flip two more bricks over the P-Switch, falling through the coins and picking up a hammer inside a chest.
All the while I can't duck-jump clip due to the level having slopes. Not even a wallcatch works!
All the while I can't duck-jump clip due to the level having slopes. Not even a wallcatch works!
World 2-Castle
A quick Morton Koopa Jr. kill and centering as I move the camera around to ensure I grab the wand with the in-game timer at 290.
When completing levels, the in-game timer drain starts with the number in the tens place, then the ones place, subtracting once per frame (visually updated every two frames). During gameplay, the timer counts down slower when moving the camera around, so I can make use of that to put the number in the ones place the lowest possible and prevent it from rolling back up to 9. In the case, finishing with a 290 is faster than finishing with a 289.
Mario can also take damage from the spikes while falling after grabbing the wand; however, not only is it slower but also not the best idea going forward for the next two levels.
For the wand grab itself, the glitch won't work, even if I catch it from the ceiling edge. So I opt to grab it from the airborne platform instead.
World 3-1
A modified World 3-3, and our only encounter against the aggressive Boss Bass.
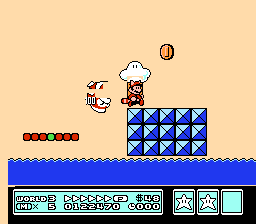
A few midair water areas that I maneuver around, then I gather P-speed halfway in; the stop-and-go rotary lifts were (and sometimes weren't) my friends to help fill the meter. Soon after, I clip through a grounded brick containing a P-Switch while also tail-flipping the Bass and breeze through the rest of the level.
At the end is a Magic Ball (? Orb), like the one dropped by the earlier Boom Boom; this one is red and makes a standalone appearance. Normally, once collected, Mario is controllably helpless as the timer still drains slowly before suddenly dropping to 000, resulting in a TIME UP. But since this level's in-game timer starts and stays at 000, this Magic Ball is (obviously) safe to touch.
The Boss Bass reappears afterward, all skin and bones.

Yeah, that pun sounded too fishy.
Oops, did it again! D: Man, me and my jokes...
Yeah, that pun sounded too fishy.
Oops, did it again! D: Man, me and my jokes...
World 3-2
A tight starting area, but unfortunately, I can't shift Mario's X pixel to 16 here while building that P-speed.
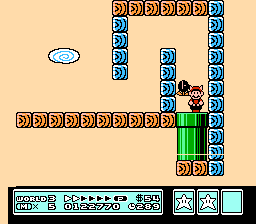
It's a race against the P-Switch, and I barely get by unscratched with the top muncher-turned-coin collected over the pipe. The final jump in the next area is delayed to avoid getting three-in-a-row Star cards.
World 3-Pyramid
I think it's only fair that this be a modification of World 3-9, is it not?
Here's a big ? block and a warpable pipe. I duck-jump, catch the wall, and clip through the big ? block to snag the Fire Flower.
I go down then back up on the pipes afterward, simple as that.
In Wendy O. Koopa's battle arena, I drop down to stomp her, and I fireball her faster than sitting still and looking pretty on the airborne platforms. The last fireball was delayed to get her closer to the center, again forcing her to drop the wand faster. The wand catch glitch works again here.
Wendy is also the only Koopaling killed with fireballs in the hack. The entire floor she's walking on is actually spikes.
Wendy is also the only Koopaling killed with fireballs in the hack. The entire floor she's walking on is actually spikes.
World 4-1
Simultaneous stomp-and-fireball-kills on the giant Koopas, then a walljump over the rest of the level. There is junk level data over, which is easy to cross through. I need to jump back down to enter the sideways pipe at the end.
World 4-2
A level taking place in a castle... Feels like an escape room, doesn't it?
Regardless, it's a simple one; a quick A tap to disarm the brick and coin, and another two jumps to break the next brick and reveal the Star.
Then I enter the door, run across the blanket of spikes, and walljump to make it to the pipe.
World 4-3
Jumping through the Super Mushroom to get through the first few Bill Blasters (apparently, the first few frames of Mario's presence doesn't count before he can touch the Mushroom), then I walljump, bounce from cloud to cloud, then break the big brick and walljump again.
Then I swoop down below the hanging Bill Blaster and duck-jump clip past the next big seaweed wall. The sole Piranha Plant is burnt to a crisp as I break the next big brick and jump to the top pipe.
World 4-4
Diving in for the next big ? block, which contains a Frog Suit, needed to swim past the bubble jet.
After passing the Lava Lotus, I go under the level and seek the nearest warpable pipe, which is to the left. A corner boost or two, then hitting the corner of the pipe to warp a little faster. The area that follows contains a chest with another hammer inside.
World 4-Whirlpool?
I mean... the map icon looks like a blue Quicksand, so it kinda seems a bit accurate in the sense that much of the world map is filled with water. (But that's World 3's job...)
Anyway... an empty big block (supposed to contain a Frog Suit on subsequent attempts), and this is another autoscroller that tests your endurance as the frogman; with blowtorches, midair waterfalls, and little wood blocks for you to watch your steps towards.
The entertainment inputs are from 2019, carried over and resynced to this run. I felt it was fun as is. :)
And delayed one frame before entering the pipe to manipulate Iggy Koopa's attack pattern; I made him move left and jump instead of just jump, allowing me to get the first stomp on him faster.
And delayed one frame before entering the pipe to manipulate Iggy Koopa's attack pattern; I made him move left and jump instead of just jump, allowing me to get the first stomp on him faster.
The wand catch glitch is put to use here as well for the last time.
World 5-1
The "41 speed" trick is put to use as I hop over the first Boo. It doesn't last long though as I opt to take damage on the second Boo and pass by the third to gather P-speed.
A lot of unavoidable lag with the Nippers at the end.
World 5-2
The P-Wing from after World 1 is put to use here, allowing me to fly over the munchers in the top-portion and the remaining gaps in the bottom. The final wall after the lag-inducing Spinies cannot be scaled over, as there is a ceiling preventing me from doing so.
I also can't duck-jump clip below the top-portion munchers, as even a single jump will force Mario to flutter up and hit the munchers, stripping him of the P-Wing benefits. Regardless, it's a remarkable ~9 to 10 seconds faster than waiting for Kuribo's Boot.
I also can't duck-jump clip below the top-portion munchers, as even a single jump will force Mario to flutter up and hit the munchers, stripping him of the P-Wing benefits. Regardless, it's a remarkable ~9 to 10 seconds faster than waiting for Kuribo's Boot.
World 5-3
Awaiting us in the lobby is a big ? block containing a Tanooki Suit, which we skip this time.
The rest of the level is a lot easier than it looks. Just buffer hop from the Paratroopa onto the first top pipe, jump to the next one, skip to another group at the top, leap to the wood block row, and scale the last pipe wall and drop to the warpable pipe. Not so bad.
P-speed was built past the first pipe.
World 5-Castle
Damage is taken here. I wait for the shoe'd-in Goomba to make it onto the first ? block of the three-block-row, then I bump it to get the Boot.
This is another little autoscroller, made a bit shorter by air-jumping under the pipe and getting across safely; a few seconds faster than going across the semisolid and air-jumping from there.
Roy Koopa jumps on first greeting; already a great attack pattern I got here! That first stomp is surprisingly quick here. After that though is the usual shenanigans, including where I catch the wall then get stunned by Roy's ground shake at the same time.
For the wand grab, once Roy's defeated, I lay low for a bit to have the wand appear lower as well, allowing me to grab it faster.
The glitch won't work here, and since this is a vertically-scrolling area, which means I need to try to move the camera in a way that it minimizes falling distance while getting the wand as early as possible; in this case, I got Mario just about in the center.
The glitch won't work here, and since this is a vertically-scrolling area, which means I need to try to move the camera in a way that it minimizes falling distance while getting the wand as early as possible; in this case, I got Mario just about in the center.
A tricky "F jump" has to be made before grabbing, and the one-block-tall gap isn't helping matters either. It's possible to make the jump as Big Mario in the Boot, but it's incredibly hard to gain much X speed in doing so; one of the reasons why I opted to do the jump as Small Mario in the Boot.
World 6-1
I shift Mario's starting X pixel to 16 and jump over the airborne muncher, trekking forward (and sometimes while facing backwards) in the Boot.
At the halfway point, there is a one-block-tall gap that Mario must slide under. I couldn't find a way to do so as Big/Fire Mario (being the other reason why I took damage in World 5-Castle), and going for the P-Switch without the Boot was slower. So I slide under as Small Mario and take damage from the Paragoomba to swiftly run through the final muncher tunnel and progress further into the hack.
World 6-2
An edited World 6-3.
Starting with five pairs of Note Blocks, I aim for the rightward ones to boing through the first half of the level, aiming for a shorter boing on the last pair to build P-speed.
It's slower to go for the leftward Note Blocks as I bonk on the right. It's slower to bounce on both because it'd result in a higher bounce, meaning longer to land on the next Note Block pair.
Past the pipe is the second half of the level, where individual frozen coins are placed over singular Note Blocks. I run through them normally because when clipping through the frozen coins, I cannot control Mario's bounce heights on the Note Blocks, which would require that I slow down to avoid falling to my death.
After that is a double-walljump over and down to the warp pipe to beat the level. At the bottom of the wall is a couple of frozen coins, implying you're required to be Fire Mario to proceed through the second half of the level.
Speaking of, if you've preserved your Fire Mario status by the time you finish up with the first half of the level, you can thaw out a couple extra coins and run through a tunnel; there, you'll find yet another chest with a hammer.
I believe getting the chest would be faster than going through the entire level, but since I'm Small Mario, we can't earn a free pass with that hammer.
I believe getting the chest would be faster than going through the entire level, but since I'm Small Mario, we can't earn a free pass with that hammer.
World 6-3
Awaiting us are two Fire Flowers, and I know too well that just about means being Fire Mario is required here.
You can touch both at the same time, though it'll only result in one power status upgrade (Small Mario to Big Mario), so they'll need to be grabbed individually.
You can touch both at the same time, though it'll only result in one power status upgrade (Small Mario to Big Mario), so they'll need to be grabbed individually.
We're slippin' and slidin' in this little funnel of icy fun; stopping us first is a wall with bricks at the edges, a frozen coin in the center, and frozen munchers in-between. The way to go? Thaw out that coin.
Fire Mario at 56 speed moves faster than his own fireballs, so just as I get close to the wall, I fireball the frozen coin out and walljump (duck-jump) off it, crawling in the now empty space and run across the-
Fire Mario at 56 speed moves faster than his own fireballs, so just as I get close to the wall, I fireball the frozen coin out and walljump (duck-jump) off it, crawling in the now empty space and run across the-
Munchers. A floor of munchers. Not much we can do there, just take damage and move ahead. Afterward is another frozen coin on the left side of the pipe, which I corner clip through to get a boost. I do so again on the big ice block right beside the bridge of frozen coins and scurry along.
Thawing out that coin is faster than a duck-jump clip there; same with that final corner clip (3 frames faster for the latter).
World 6-Fortress
Why so blue? Besides being just a short redo of the original World 6-Fortress 3...
Four Stretches invade the floor, making the idea of gathering P-speed useless (and slower). So without it it is as I hop, skip, and jump over the Stretches and the spikes.
This second and final Boom Boom miniboss battle has Boom Boom in a vertical funnel, a pair of pairs of bidirectional glowing waffles of doom (that's two pairs of Roto-Discs going two different directions, both of them close enough to barely touch the edges of the inside), and no getting out of it once I pop right in.
Well... words aren't necessary to describe what's going on in there. What matters is how I kill Boom Boom and how quickly I do so. Which isn't really much except stomp, big jump, stomp, big jump, stomp. (And there isn't much of a difference I can make with speeding up the process; that's just how we roll I guess.) 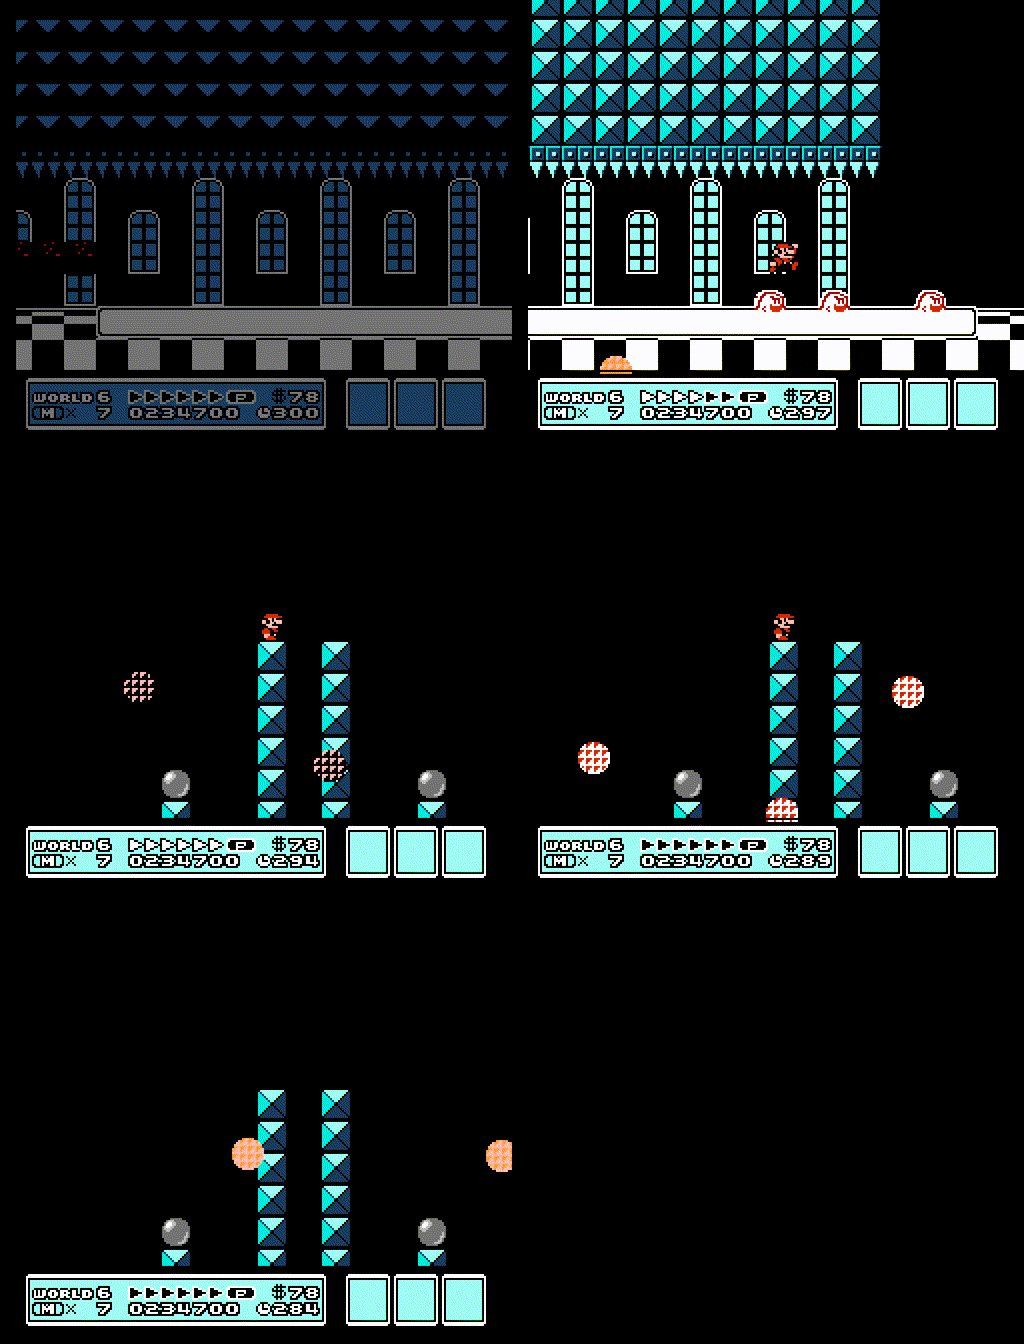
Something I tried here was I scrolled the camera up with P-speed before initiating the fight, just to create a "death barrier" for Boom Boom to meet his demise quicker. No use; Boom Boom was still alive with the multiple hops and Mario was unfortunately left to test the "death barrier" himself and meet his... death.
World 6-Castle
What starts as an entrance to World 6-6 ends up being a Parabeetle ride on an airship that won't autoscroll left.
Here though, the Parabeetle isn't necessary. Just big leaps across, a couple of walljumps, and to finish that "ride" off, hitting the corner of the pipe.
There isn't much to say about the process of thumping ole Lemmy to oblivion. In the aftermath, however, P-speed is preserved to allow for me to zip to the left and back; this despawns and respawns Lemmy, sending him flying up faster than normal, which means I get the wand earlier too.
It's the only instance of that glitch working though, as you'll read in the next level about what happened when I tried there.
It's the only instance of that glitch working though, as you'll read in the next level about what happened when I tried there.
World 7
World 7 is the only world with just a singular level (and the only world with the snippy-snappy mappy Piranha Plant standing on the sidelines), so you're really not gonna see much of it in this hack. Or at least... not in this run. I think you will read a lot about what's going on in the text though.
This world's only level is a vertical one.
This world's only level is a vertical one.
I start by gathering the P-speed, which is 43 frames slower by the time I get to the mandatory warp up. However, the sheer speed makes up for it when I grab the upper Koopa's shell and walljump up, leaving me now ahead by 22 frames verses without the P-speed. I think it also helped that the upper Koopa spawned was facing and walking right, which brought Mario closer to grabbing the shell.
A few high hoppers later, a Lava Lotus shows up, that lil rascal.
Right, this is gonna be a bit tricky for me to explain, but here it goes: I turn Mario to face the left. Once fully turned, I throw the shell to the right. I skid, then jump at the appropriate time, to the point where the shell hits the Lava Lotus and, at the same time, Mario has stomped the shell to stop it. Then, at the minimum possible X speed, Mario lands and grabs the shell and can proceed onward and upward.
Stomp too early, and the shell won't hit the Lava Lotus. X speed too fast and Mario only kicks the shell again without grabbing.
Basically, think of it like a midair shell jump... that's not in the air. I think that just about does it for how it works.
Stomp too early, and the shell won't hit the Lava Lotus. X speed too fast and Mario only kicks the shell again without grabbing.
Basically, think of it like a midair shell jump... that's not in the air. I think that just about does it for how it works.
Anyway, after that, I maneuver around the two spit-out lava balls, maintain the P-speed with the hops, and move it on up with the shell still in hand. Then it's a few wraparounds like a spiral tower (in a way), I stomp on a couple of Paratroopas as early as possible, and then I navigate through the Wood Block Maze.
In my way next are a couple of P-Switches with coin walls right past each of them. The intent by ChaosC is I need to survive Ludwig's magic blasts and ground shake attacks while waiting for both P-Switches to expire. But since I have the Koopa shell with me, that obstacle is practically ignored.
Like with the Lava Lotus, I do the "not-so-midair shell jump" trick on the first coins-turned-bricks barricade to eliminate not one but two coins-turned-bricks (as that I believe has been the go-to on the basis of the original game), and I re-grab the shell and climb up, again maintaining that P-speed on the way. T'was a tough bit that one, but thankfully it's the only one.
The second step is then skipped as I proceed to stomp on the second P-Switch and kick the shell one last time at the last brick, ditching it as I make a run for the pipe.
Like with the Lava Lotus, I do the "not-so-midair shell jump" trick on the first coins-turned-bricks barricade to eliminate not one but two coins-turned-bricks (as that I believe has been the go-to on the basis of the original game), and I re-grab the shell and climb up, again maintaining that P-speed on the way. T'was a tough bit that one, but thankfully it's the only one.
The second step is then skipped as I proceed to stomp on the second P-Switch and kick the shell one last time at the last brick, ditching it as I make a run for the pipe.
Many other pipes are left warpable with destinations in the same room, much like in the original. Some have unintended warping points too, though they didn't seem very useful when I checked.
Time to take it out now on the field in one final Koopaling confrontation with Ludwig Von Koopa. The same three quick stomps are made as I attract him to the spot where he'll drop the wand.
I tried to despawn and respawn him in hopes that he would drop it earlier like with Lemmy, but when I respawned him, he was standing upright as he levitated up and didn't retreat into his shell, resulting in a softlock; the wand glitch won't work here either. So I settled for keeping the P-speed and opted to yoink the wand just a couple pixels lower than normal (Y pixel 98 instead of 96), clipping slightly through the first upright pipe. That at least helped in saving a frame for the transition.
I tried to despawn and respawn him in hopes that he would drop it earlier like with Lemmy, but when I respawned him, he was standing upright as he levitated up and didn't retreat into his shell, resulting in a softlock; the wand glitch won't work here either. So I settled for keeping the P-speed and opted to yoink the wand just a couple pixels lower than normal (Y pixel 98 instead of 96), clipping slightly through the first upright pipe. That at least helped in saving a frame for the transition.
The World 8 Map Pipes
The pipe areas are the same as those in the original; you exit from above, slide, and enter below. There's not much that changes here.
The World 8 Hands
Like in the original, only three exist below the signature of doo- I'm sorry, POO. I only needed to delay for one frame to get through with the first hand, but thankfully no further for the other two.
The World 8-1
Not sure why, but ChaosC decided for World 8-1 to be a carbon copy of World 1-1. That's not to say the inputs are a carbon copy as well, as they're varied a little; they had to be due to the changed subpixels and whatnot. Other than the input variation and the fact that I somehow finished one frame faster than in World 1-1, the strategy there is more-or-less the same.
The World 8's Dark Side
Going down would require that I have four hammers to chip away at four boulders for a chance to find the "Secret True Ending", but obviously since I only have two hammers, it's just two map steps away to the final map pipe.
The World 8's Final Level (World 8-Bowser's Castle)
I hold Left again to shift Mario's X pixel back, then gather the P-speed. An oversight from the hack author, but I hop from Bowser Statue to Bowser Statue through the two-block-wide hole into the one-block-tall gap. Then I skip over the invisible lifts.
Then down the hole and to the right... Then to make it back up through the two cubbies (Is that what you call 'em here?), though I make a big jump to skip the first one.
Then two ? blocks await me, both containing powerups. Both are hit ASAP to reveal the powerups optimally.
For the first ? block, I delay a bit after hitting, then jump and go slightly into the bottom-right corner to grab the Super Mushroom on the first frame it appears inside. Coined by Lord Tom and Tompa as a glitched Mushroom grab and originating from GlitchMan long ago, this saves time waiting for the Super Mushroom to fully emerge from the block and start moving horizontally; though it's harder to perform than in the first Super Mario Bros., I believe due to the game better handling ejecting Mario from walls.
The second ? block contains a Super Leaf, and I wait for it to be below the ceiling, then drop down to the deadly lava fall. At the lava fall, A flutters are minimized to make the safe landing faster.
The walking Koopa is ignored as I leap across the giant vat of lava, with two Paratroopas coming to my rescue.
The first Paratroopa is simultaneously tail-flipped and stomped, then, once I'm able to grab ahold of its shell, I face left, then perform a midair shell jump despite having a normal running speed cap of 40 (and not P-speed). The second Paratroopa is tail-flipped and stomped as well, though I hold on to its shell a little longer; at the appropriate height and distance, I kick it to the wall, then again tailflip-stomp it to keep it in Mario's mitts.
The non-P-speed midair shell jump I believe is slightly faster than performing a duck-jump, then bouncing on the first Paratroopa. Had I chosen to perform a midair shell jump anyway, Mario would've needed to un-duck to grab the shell, leaving the duck-jump to be pointless.
Taking the intended route is just a tad bit faster than performing a duck-jump clip, walljumping through the junk level data, and duck-jump clipping again. The junk level data trapped inside contains three doors, all leading to the secondary room of original; the doors there crash, while past the second door in that room is impassable junk level data.
Next, I walljump, kick the shell again to perform another walljump, and tailflip-stomp it again as I scale the wall. I kick it out to the Thwomps as I go for the drop (with only the bottom one surviving).
Corner-clipping below the Thwomps is undoubtedly slower.
Making headway for the incoming tunnel, I tail-flip the shell again to prevent it from getting away; I'm not done with it quite yet.
Normally, a Paratroopa is supposed to spawn over the next pool of scalding ketchup, but I think because I hit the sprite limit with the Thwomps, Podoboo, and the shell in my hands (also likely hinted by the lag frame), the Paratroopa is non-existent. So I go for the jump anyway, once again kicking the shell to the wall and tailflip-stomping it to get across.
Once I maneuvered around the wall to avoid bonking into it, it was time to make mincemeat out of Bowser.
Traditionally, it takes 34 fireballs or hammers to take out Bowser. As seen in Lord Tom's "Total Control" TAS however, it takes only one shell running over him to defeat him, reducing the need here to get the Hammer Suit. The ending sequence plays out like usual too!
Like in Lord Tom and Tompa's 2010 SMB3 TAS, I wait for Bowser to perform a small hop after he lands, then hit him on the frame he does; this saves about a second compared to killing him normally. Shell-shocking him above is also slower as Bowser's entrance drop is faster than his death drop.
And finally, 1-ups to celebrate! As I tail-flip and stomp the shell for quite some time until the in-game timer drains to 000, leaving me to shift my focus to the door being opened. It's not 99 lives, but it's a little something special in an effort to stick to traditional SMB3 TASing efforts. :)
Possible improvements?
When I reworked a bit of the run on the PRG0 version, I was able to find a 2-frame save on World 1-Castle, two 1-frame saves on World 2-2 and World 2-Desert (Sandtrap), and an 8-frame save on World 3-2, but realized later that I was slower on World 1-3 and World 2-3 by 14 and 8 frames respectively, so the overall timeloss after World 2 was unfortunately bigger than the timesaves found.
And I realize now that it's possible to ditch the Star in World 4-2 and play through World 4-3 as Big Mario to save 41 frames.
World 5-Castle's wand grab is pretty alright, but I'm honestly not sure if it's the best it could be. It's a tricky area to work with.
As plentiful as those improvements are, I don't want to go and redo those levels for a few reasons.
- Most of them are relatively small improvements, so I don't believe it'd matter much for the time being. Had I found them earlier, I would've implemented them in the current run.
- I've gotten pretty far already in my progress in completing the run, and going back to improve the levels now just to save several frames would take longer mostly due to the changed subpixels, which are not reset in-between levels.
- The RNG for some of the levels would be changed, and I'd have to find a way to better adjust it to preserve the latest and greatest improvements, if they're still possible.
So with those reasons in mind, I'd say my run is fine as is here. Maybe if bigger improvements are found, I or another SMB3 TASer can implement it in a future revision on the PRG0 version of the hack. But I say for now, let's wait on it; another time...
Special thanks
- Grand POOBear, whom the hack was made for, for his efforts in Mario speedrunning and Kaizo conquering
- Mitchflowerpower for being a dedicated SMB3 speedrunner
- Lord Tom, Tompa, Maru, and the other professional SMB3 TASers for the work they put in their runs
- GuanlongX for finishing his 18-and-a-quarter-minute run
- ChaosComposer for putting together the hack
- You for watching, reading, and enjoying the run and its content
I loved how the run turned out in the end; I'm not totally in-tune with Super Mario Bros. 3 as much as I am with the original Super Mario Bros., but I'm sure my advanced knowledge of the game truly paid off.
Suggested screenshots?
Hard to decide for me... Hopefully you might find these a little interesting (or again, you can pick whatever frame you want; it's up to you!).
Frame 20783, World 3-1
Frame 22370, World 3-2
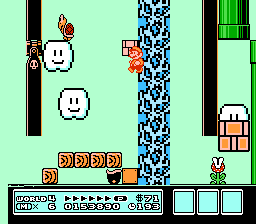
Frame 28719, World 4-3
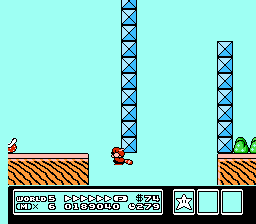
Frame 39369, World 5-2
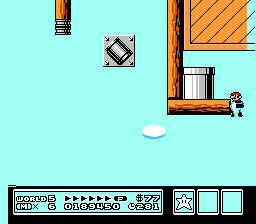
Frame 41864, World 5-Castle
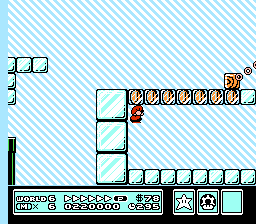
Frame 47427, World 6-3
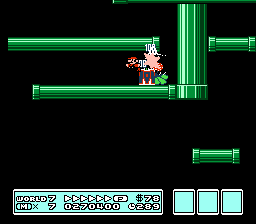
Frame 53927, World 7 (its only level)
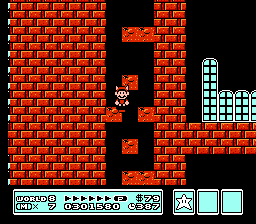
Frame 61151, World 8-Bowser's Castle
Challenger: Claiming for judging.
Challenger: This is an interesting SMB3 hack with shenanigans such as the intended usage of P-Wing for only one stage, Kuribo Shoe being more useful than usual, fighting bosses outside airships, finishing stages through pipes and some other different stuff. The optimization here is superb! Great job after all.
Accepting to Standard for publication, and about the suggested screenshots, the best one for me is 'Frame 41864, World 5-Castle" thanks to a clever strat that requires precise timing and positioning :)
McBobX: Processing...