- Information
This is a Tool Assisted Speedrun of the GBA game Fantastic 4 - Flame On that was released in 2005.
The TAS starts at power on at frame 0 and ends at frame 102,859(time = 28:42.138) when we press Start to display the end credits
In order to replicate the TAS yourself, please make sure that you have the following:
- Copy of the game 2369 - Fantastic 4 - Flame On (E).gba
- The emulation software EmuHawk version 2.8.
The software EmuHawk version 2.8 will need to run on these settings:
- Profile = Tool Assisted Speedruns (to not lose accuracy in the frames)
The ROM checksums (SHA1) are:
- 2369 - Fantastic 4 - Flame On (E).gba = 9bf00167388db1394510a47e49a59d8793cf1c65
- gba_bios.bin = 300c20df6731a33952ded8c436f7f186d25d3492
- Online checksum SHA1: ( https://emn178.github.io/online-tools/sha1_checksum.html )
- Short Description
Fantastic Four: Flame On is a GBA game based on the 2005 Fantastic Four film focusing on the Human Torch. We play as Johnny, the protagonist, who came back to earth with new powers. The enemies in the game are Skrulls who are trying to capture him and steal his cosmic powers.
- Rules of any% completion
The category of this TAS is any%, meaning that we need to reach the end credits.
- Gitches/Exploits
- Corrupted Dash/Charge
- When Johnny dashes mid-air (not grounded), you can take advantage of the normally impossible Left + Right and Up + Down to corrupt the animation. It is then possible to make a static dash/charge with Left + Right and to do a sideways dash/charge with upwards animation when using the combo Up + Down. If you want to see it used, go to the final boss as it is used a lot there. If you want to use it in TAS, be careful because these cannot be interchanged with the normal ones as they have slightly different hitboxes. Maybe 1-2 frames difference when hitting enemies.


- Bouncing
- This form of movement is by far the fastest, but has not much control. As said above, speed in this game works like a curve, increasing and decreasing depending on your inputs. To put it briefly, bouncing is the action of retaining a dash/charge speed when you bounce off the ground while attacking. To be more precise, here is how you can do it:
- 1 - Do any air displacement, preferably dashing or charging because they have a lot of speed, which is what we want.
- 2 - Before landing, do a land cancel (explained above)
- 3 - During the sliding attack animation, jump by pressing A. It will do a normal jump, but with the speed of the air movement we did before.
- The reason why it is so fast is that there is 0 build up time once it is started, and you can chain the bouncing forever (until you reach a wall or ceiling of course. Ceilings decrease your speed slightly). In comparison, dashing and charging will need a rest period on the ground to recharge the number of actions you can do. There is a slight issue with bouncing though. When you slide attack, you are not technically on the ground, walking, at any moment. That means you do not recharge your action jumps!
- This form of movement is by far the fastest, but has not much control. As said above, speed in this game works like a curve, increasing and decreasing depending on your inputs. To put it briefly, bouncing is the action of retaining a dash/charge speed when you bounce off the ground while attacking. To be more precise, here is how you can do it:

- Corner Bouncing
- That is bouncing on one of the rounded corners of a ledge. Depending on the angle, you might get more of less air time with it. It is not really useful, unless you need to go a small ledge quickly, but then a normal bounce as a result of a dash/charge is most likely better.

- Early Landing
- Punching the air several times has shown in many cases to decrease the upwards momentum, and we can land sooner than normal. It's not much, maybe a couple frames, but still useful in some places.

- TAS Breakdown
Here is a summary of the TAS.
Table of contents
0:00 - Power On
Nothing unusual here, just booting the game.
0:35 - Tutorial
This is the start of movement, where we are supposed to learn how to walk. But this is a TAS, so it took me a while to actually develop a good understanding of how moving is done in the game. There are a couple, and I'll try to explain them here, since they all appear in the tutorial.
- Walking
- This is pretty much just pressing Left or Right on the D-Pad. There is no running button in this game, unfortunately. If we want to do precise movement, we will have to walk, but to be more specific, we just hover in this game. Luckily, we almost never walk unless we are in a locked screen. But then, time is better spent attacking enemies than walking!
- Jumping
- Press A to get a lot of upwards momentum. You only need to press it once, and you always jump the same height, regardless of how long you hold A. Since in this game, speed is more of a curve instead of fixed values, if we have a certain speed before jumping, we retain that speed during the jump. It is particularly useful after a dash or a charge, but I'll get to it in a minute.

- Dashing
- A very fast method of movement in the air. To do it, you first have to jump, then hold any direction and press A again. It will make Johnny dash in the air in this direction, be it Up, Down, Left, Right, and Diagonals. It has the advantage of having an instant start, but it does not go very far. It is possible to chain several of them after some flying upgrades, which makes air movement the main type used.

- Charging
- It is the "attack" version of Dashing. You can use it by holding B before a dash, and instead of dashing straight on, you do some sort of a spinning animation that is bigger than a dash, and it attacks enemies. It needs a little bit of time to start, but this is compensated by it's duration. It is a bit longer than a dash, so in the end, it is faster. It is preferred over a dash, unless you need to not go too far, like to go up a ledge for example.

Now that I've covered the basics, let's go into exploit movement:
- Land Cancel
- When Johnny has enough downwards speed, he will do some sort of hero pose as he lands. That costs a lot of time, and it also sets our speed to 0. To cancel this, you have to press B before landing so that the attack animation overlaps with the moment Johnny lands. What should happen is that the attack animation starts to play before you land, and continue until after you have landed. Johnny will then slide horizontally with the speed at which he was going in the air, and this lasts until his attack animation stops playing.

- Bouncing
- This form of movement is by far the fastest, but has not much control. As said above, speed in this game works like a curve, increasing and decreasing depending on your inputs. To put it briefly, bouncing is the action of retaining a dash/charge speed when you bounce off the ground while attacking. To be more precise, here is how you can do it:
- 1 - Do any air displacement, preferably dashing or charging because they have a lot of speed, which is what we want.
- 2 - Before landing, do a land cancel (explained above)
- 3 - During the sliding attack animation, jump by pressing A. It will do a normal jump, but with the speed of the air movement we did before.
- The reason why it is so fast is that there is 0 build up time once it is started, and you can chain the bouncing forever (until you reach a wall or ceiling of course. Ceilings decrease your speed slightly). In comparison, dashing and charging will need a rest period on the ground to recharge the number of actions you can do. There is a slight issue with bouncing though. When you slide attack, you are not technically on the ground, walking, at any moment. That means you do not recharge your action jumps!
- This form of movement is by far the fastest, but has not much control. As said above, speed in this game works like a curve, increasing and decreasing depending on your inputs. To put it briefly, bouncing is the action of retaining a dash/charge speed when you bounce off the ground while attacking. To be more precise, here is how you can do it:
- Corner Bouncing
- That is bouncing on one of the rounded corners of a ledge. Depending on the angle, you might get more of less air time with it. It is not really useful, unless you need to go a small ledge quickly, but then a normal bounce as a result of a dash/charge is most likely better.
- Early Landing
- Punching the air several times has shown in many cases to decrease the upwards momentum, and we can land sooner than normal. It's not much, maybe a couple frames, but still useful in some places.
With that said, let's start with the run!
One very useful feature of this game is the in-level timers. When I want to refer to a moment in the level, it will be much easier to do so by using this timer. It is located at the top right of the screen.
This game is split between platforming levels, and mini-game levels, but we will come back to this a bit later. What we need to know right now is that the tutorial is for the platforming levels. This tutorial is very typical of any tutorial in a GBA platformer game. We have a narrator (Reed) that explains to us how to use our new moves.
We first start with the dashing and charging moves, which allow us to move in the air, to go much higher than a normal jump. Then, we are introduced to the concept of locked screens. These are restricted areas in a level that activate once you reach them. There is typically an invisible trigger to activate them, and whenever we can, we avoid it because locked screens are time consuming to go through. The main method to avoid a locked screen is to jump over the trigger, but for the tutorial, we have a ceiling! After all of my attempts to skip the trigger, I did not manage to get past it.
So, we get to the first locked screen. We are then instructed to break 3 robots that arrive at split intervals. The game remembers the attacks we use to defeat them, and for now, we have to use simple attacks (B) to break them. If we do not do as we are asked, the locked screen will start again, until we beat them in the way required. These robots have an annoyingly long invincibility delay before we can attack them. It is long enough to be noticeable in the run, but I make sure to hit them at the very first possible frame. what matters the most is that we have beaten every robot when the last one's invincibility wears off.
We then move on to the second locked screen, and this time we have to use our charging to break them, so we do as instructed.
The next locked screen wants us to use a ranged attack, the fireball. We do this by holding the Down directional button and attack with B.
Finally, the last locked screen requires us to kill enemies with special moves. The best attack to kill them is the inferno because of the duration of the attack, but the fastest method is actually the supernova. The delay between an attack and the first frame you can move after is:
- Supernova: 76 frames
- Inferno: 111 frames


We kill the enemies with 3 supernova and we go right to the end of the level
FROM NOW ON, ANY TIME REFERENCE THAT IS NOT PART OF THE TABLE OF CONTENTS WILL REFER TO THE IN-LEVEL TIMER UNLESS SPECIFIED.
1:04 - Level 1-1 Snow
This level is the first one where we can show the true power or bouncing. It will be used a lot to save time which would otherwise be used to dash or charge.
We start the level with a series of dashes, charges and bounces until we reach a breakable wall at 0:11 that takes 4 hits to go down. 2 punches and a charge easily breaks it. At 0:20 we start a dash that lasts until 0:28 thanks to numerous bounces on the roofs. It allows us to skip several locked -screens below. At 0:28, we need to avoid a locked screen again, and this one gave me a lot of trouble. As I said before, locked-screens are activated by a trigger earlier in the level. I have not been able to locate if with 100% accuracy, but I believe there are two for this lock specifically. The first one we dodge at 0:25 when we punch slide as we bounce, and the second one at 0:28 when we charge over it. It is a theory of mine that doing a punch slide allows us to not activate the trigger, but I am not able to replicate this yet. I'm just doing trial and error for this because I don't have a way to actually locate them yet.
The next lock-screen skip is at 0:34 and we have to go over the trigger again. This time the trigger is on a ledge where the snowman is, but we need to go a bit higher for this one with a diagonal charge.
The final lock-screen is at 0:40, and despite all my attempts, I have not managed to skip it. I spent days on it with no success. Two supernovas are enough to go through, and we reach the level boss.
The skrull boss does not die in 1 hit like the other goons, so the best thing we can do is to find its HP, and how much damage each of our attacks do. I used RAMWatch on Bizhawk and I could not find the memory address for the HP, so I had to brute force it. When I arrived at the boss, I had 2 special moves left. I tried every possible attack combo to know how many attack of each type it takes to defeat it and this is what I have:
| Method | Supernova | Inferno | Fireball | Punch | Charge | |
|---|---|---|---|---|---|---|
| Inferno + Fireball | - | 2 | 8 | - | - | <- fastest so far |
| Inferno + Punch | - | 2 | - | 8 | - | |
| Inferno + Charge | - | 2 | - | - | 8 | |
| Supernova + Fireball | 2 | - | 19 | - | - | |
| Supernova + Punch | 2 | - | - | 19 | - | |
| Supernova + Charge | 2 | - | - | - | 19 | |
| Supernova + Inferno + Fireball | 1 | 1 | 16 | - | - | |
| Supernova + Inferno + Punch | 1 | 1 | - | 16 | - | |
| Supernova + Inferno + Charge | 1 | 1 | - | - | 16 | |
| Fireball | - | - | 24 | - | - | |
| Punch | - | - | - | 24 | - | |
| Charge | - | - | - | - | 24 |
From this data, I could summarize that the boss has 24 units of health, where one unit is the weakest attack, punch/fireball. I could also see that when I cast the inferno, it hits twice, which is better than supernova. I also understood that all special attacks and all normal attacks had no damage difference inside their own category, so it does not matter which one in a category I use. With that new information, I realized I should be able to defeat the boss with 3 inferno, but I only had 2 special moves left.
To fix this, I went back a little bit in the level slightly and made sure to kill one enemy to fill my special attack meter enough for an additional attack. The best enemy for this is the one just before the boss, lucky! At 0:43 I waste some time to fireball + punch a skrull and I go to the boss. When I land, I have to hit the boss with punches a tiny bit to continue filling the meter, so I do in total 2 punches and 3 inferno, and the boss is defeated. This method is faster by around 115 frames compared to the previous fastest, 2 inferno + 8 fireball.
We finish the level with a skill point to use, so we place it in "Flight + Charge" because it will allow us to do two dashes/charges before having to land.
2:17 - Snowboarding
Oh boy this level was fun. This is not really a platformer level, but more of a "get-to-the-end" level. It is a snowboarding race against the nurse, and we absolutely demolish her personal best. Movement mechanics is a bit different in this level, which never comes back, by the way:
- Moving
- Left, and Right to go left and right. Pretty basic, but overall slows the downward movement so we do it as little as possible.
- Jumping
- It allows avoiding obstacles.
- Trick
- While in the air, we can also do tricks to gain a bit of speed boost in a meter. For this, we need to hold A in combination with the following button:
- A+Left/Right: Pulls the board up. The longer you keep it up, the bigger the boost you receive when you land.
- A+Up/Down: Do a spin. It has a mandatory completion time, so you need to make sure you have enough height to complete it. If you fail to complete it, you crash. It has the advantage of being x2 the reward of a A+Left/Right trick, without costing extra time. We do it as much as possible, but there are not many places it can be done.
- While in the air, we can also do tricks to gain a bit of speed boost in a meter. For this, we need to hold A in combination with the following button:

- Boosting
- By holding B, we can go faster. The longer you press, the faster you go, up until you reach a cap. When you jump while boosting, you retain your boosted speed all the way during the jump without spending any boost. It is very useful to go fast without spending too much in the meter.
- Crashing
- Don't do it. Ever. It sends you back to a safer spot and resets your momentum. Nothing good can come out of this. If you ever find a way to make this useful, I'd be surprised. You can do it by either colliding with trees, fences, stones, ..., and by holding a trick while landing. It is important to let go of a trick before landing, or you will crash. Also, crashing while doing a trick will cancel any boost you might have earned by doing said trick.
Originally, before testing the level for good strats, I tried to complete it the "human" way. That is, doing tricks only at cliffs. This would make me reach the midway point at 0:41. I then realised you can do tricks while not even in a cliff jump. You can simply jump from the ground, do a trick and land on the same level. I then had to redo the entire level because this was WAY faster.
Alright, the way to beat this level is simple. Boost as much as you can while doing trick jumps, and keep a linear path. Turning is slow, remember. Cliffs are your friend, so pick the path with the most of them. I found that the right path is a bit better, because you can do more tricks, which you convert to SPEEEEED. Try to avoid the grass patches because they slow you down.
Right at the start, we do a few trick jumps and head to the right. We keep going until we reach about 40% of the track at 0:24. We then head into the trees because turning to go left or right would have been too sharp of a turn, and would have killed our momentum. We arrive at the midway point at 0:32 (9 second difference with my previous attempt!) and we skip the slow ramp.
Now that we have a bit of speed, we can head to the left for a more linear path. We do so until 80% of the level at 0:52 where both left and right paths merge. A couple more trick jumps, and we reach the end. We leave the nurse in the dust, finishing the level at 1:02 when she has only completed half of the race. It might be possible to improve it, with a different path. If I don't edit this, it means I have not found a faster way. I am hoping for a sub 1 minute. That would only be 2 seconds faster which might be doable.
3:28 - Level 1-2 Snow
Very nice and easy level. We are still in the snowy mountains, and in this level, we have no locked screen required! Well, that is if you don't include the boss fight of course. We start the level by climbing a small cliff and we avoid the first locked screen at around 0:05. We charge over the house at the right angle and speed to get the maximum distance in the cave below. After breaking the ice wall at 0:11, we climb out of the cave and charge up to the ledge under the second house. We avoid another locked screen at 0:19 by going over it. We continue right until the checkpoint and at 0:26, we avoid a locked screen. We take a short trip in the cave, and as we exit, we avoid another locked screen and we land at the boss at 0:40. Three infernos defeats the boss, and we charge right until we reach the exit.
There is a softlock possible here, which I strongly recommend against attempting. After you defeat the boss, if you move to the right you can skip the nurse dialogue. It just does not appear. However, when you reach the end of the level, it will softlock and won't fade to black!
4:38 - Level 2-1 City
We are now in the city, headed for the motocross level. There will be several locked screens to avoid, so moving is going to be a bit weird. We start by going over the first two locked screen before heading in the tunnel. In there, we have a mandatory locked screen, so we need to fight the skrulls at 0:11. We do a supernova to kill the first wave, an inferno to break the turret, and we finish off the remaining skrulls with punches and fireballs to save our special moves for later.
As we exit, we have a mini-boss at 0:22, which dies with a single inferno. We go over the next 4 locked screens, then head back into the tunnel at 0:44. No locked screen in there, so we can just go through. When we exit at 0:48, we have a final mandatory locked screen, and we will have to do one inferno, finish the turrets with fireballs, another inferno on the last wave of skrulls and charge through the flying skrull right to the end at 0:58. Level done in under a minute! Yay!
5:55 - Motocross
This level is similar to the snowboarding level, in the sense that you have to go to the end of the level as fast as possible, and you can do tricks in the air to gain boost. However, this time it is not in 3D, but rather you go in a straight line with a motocross bike on a track. You need to do three laps to finish the level. The tricks here are a bit different than previously. To gain the maximum boost, what matters is how many tricks you do while in the air. The more different tricks, the more boost you get, and the duration of a trick will only increase the high score meter. So, you only do a trick for the minimum required time to get the boost, which is 30 frames (0.5 second).

For this level, we can hold the A button to accelerate and R button to boost the entire time, because we never go to 0 in the boost meter, thanks to the tricks we can do. Nevertheless, this is a level that cannot really be optimized because of how easy it is, and how little choices we have to go faster than what RTA can do. After the three laps are done, we head back to the city.
8:17 - Level 2-2 City
Right from the start, we are greeted with two locked screens. It is possible to avoid them by jumping over the triggers, but this time we have to move rather precisely. The exact movements are: 2 diagonal dashes Up+Right, 1 charge Right, and then land in front of the shop with the red sign at 0:03. You need to land exactly at the second door after the lamp post, under the character that looks like the number 3, before the four dots. The first locked screen is avoided, now let's tackle the second one here. 1 dash Up, 1 dash Right, and 1 charge Right. You should land on the balcony, and also avoided the second locked screen!
The rest of the level is on rooftops, so we need to climb up. Here comes a new mechanic I did not expect, but gladly welcome into my skill set: early land. For some reason, when you punch the air 2 times in a row after jumping, you can land sooner. To be more specific, after the second punch, the upwards momentum gets cancelled and you fall a bit earlier, as if the usual bell curve of a jump got cut, and you land a bit faster at the very start of the fall. It isn't much, maybe a couple frames earlier, but it still is something! We then get to the first roof and land just before the antenna at 0:11 to not trigger the next locked screen. We can avoid it with 1 dash Up, 1 dash diagonal Up+Right, and 1 charge Right. We should land right next to the nurse.
We continue right until the next locked screen at 0:20, which, to my knowledge, cannot be avoided. We take advantage of the low HP of enemies to kill them without our special attacks, and the charge is quite effective at hitting several enemies at once. After we are done beating the skrulls here, we continue to the right for another locked screen at 0:32. This time we will use a charge and then our inferno to beat the skrulls and the turret. We then continue to the right for the final locked screen at 0:42, and here we go all out. We kill all the skrull waves with inferno except for one in the middle to gain a bit of distance to the right, and to save the last special attack.
The boss of the level is ahead, so we dash our way there, avoiding all the remaining skrulls and arrive at 0:54. One inferno is enough for the scientist, and we go right to the end of the level at 1:02. We are then greeted by the main enemy of the next level, who taunts us before disappearing off-screen. Once the level is done, we gain one skill point which we put in "Supernova + Fireball" because it will help us fighting the next boss. We will need a lot of fireballs, so we better have a stronger attack.
9:41 - Level 2-3 Flying
This is the first flight based level. It is also somewhat an auto-scroller, but it has some parts that can be sped up still. In this level, we are constantly flying to the right, and our move set is rather limited. We can move in all directions, use our special attacks (inferno and supernova) and throw fireballs.
The only additional move we get for this new type of level is the charged fireball, which has three stages. The first stage is the original B button press to throw a fireball. The second stage happens when you hold the B button, the fireball charges, and when you release the button, the fireball is shot. The third stage is holding the B button for longer, which will result in a stronger charged fireball. Obviously, charging a fireball makes it stronger, bigger, and a bit faster. The speed aspect of the charged fireball is not considered much because we either don't have time to charge the fireball between consecutive hits, or we 1-hit KO enemies on the first frame and a charged fireball makes no difference.

There are two kinds of enemies in this level: the passive, and the required.
- Passive enemies are the kind that do not matter at all except to rack up points and charge the special move bar. You can hit them, but it won't make the next wave appear faster. They are the small drones that go in and out of the screen in a predetermined pattern, and do not try to go towards you.
- Required enemies will have to be brought down as soon as possible. When defeating a wave of these, the next wave is triggered, so time is of the essence here. There are essentially two ways to go through a wave like this. Either use the supernova to kill the entire wave in one attack, or fireball every enemy of the wave as soon as they appear. Depending on the enemies present, it might be faster to fireball them all, rather than sitting through the supernova animation.
Now, let's see how we tackle each of these waves.
- 0:00 We start the level with two waves of drones: green spinners and blue turrets. The spinners damage you on contact, and the turrets will shoot horizontally.
- 0:17 - Then, a wave of three required skrulls, which we kill with a supernova.
- 0:21 - Now, a wave of green spinners, with blue turrets at the end. We supernova these as soon as possible because it makes the next wave appear faster.
- 0:30 - Green spinners are back, so we break as many as we can to charge up on special attacks.
- 0:37 - Two small waves of required large drones. The first wave is a single drone that we shoot on the very first possible frame, and the second wave has two large drones. These two are 1-hit KO with a charged fireball, slightly delayed of a couple frames so that both are hit with a single hit. It is faster to use fireballs than to use a special move here.
- 0:40 - Back to the passive enemies, with blue turrets that appear one after the other, so we hit them all on the first frame.
- 0:45 - Another wave of required skrulls, so we supernova them right at the last blue turret of the previous wave.
- 0:48 - Big wave of passive enemies, that kill as soon as we can. Green spinners and blue turrets come from the left and right, so we have to move a little bit.
- 1:11 - A wave of required skrulls, that we can fireball because they are so close to each other, followed by a large drone.
We end the level with a supernova at the last frame because it does not cost time, and the pose is funny.
11:10 - Level 2-4 Gargoyle

First real boss of the game, we even have a health bar! It is very straightforward though, we don't need to do much to defeat it. All we need to do is use our four special attacks with inferno, and spam fireballs until it dies. If you were wondering, charged fireballs don't do more damage here because of the time it takes to throw them, so simple ones are fine. Fun fact, since a fireball has an animation time of 8 frames total, we can throw around 7-8 fireballs per second. Insane! The boss dies after 15 seconds of fight, and we have a victory animation that drags the timer to 0:20. I was hopeful to be sub 20 seconds, but it's not possible with the current strategy, and I don't think we can do better than this.
11:44 - Level 3-1 Island
We start on a beach, and we have to avoid screen locks right away. We jump over the first one, land before the palm tree, and jump over the two next ones. Then, we continue on the right, to the top of the ruins. We have a mandatory locked screen here at 0:17, and we will have to defeat all skrulls manually.
We weaken the blue one with a fireball, then we charge through the group of yellow ones, and finish them off with a punch. This punch forces us upwards because of the stair bounce, so we throw a fireball to kill the upwards momentum. When we land, we do a charge through the entire group, then a punch, and another charge in the opposite direction. Next wave is like the first, so we charge and punch, and finally, we have a large turret to take down. It is faster to throw four fireballs than to use the inferno, so we can save some time here thanks to our skill upgrade at the end of level 2-2.
Then we continue to the right for the next locked screen at 0:27, and this time, we go all out. Three supernovas to defeat all waves, and four fireballs to kill the turret. We head to the top of the cliff on the right, and at 0:37, we arrive at the very first time based locked screen! Or so I thought at first. It is possible to not have to fight the skrulls here and just wait for the flying drone to exit the screen for the locked screen to go away. However, if you break it, the locked screen goes away instantly! An inferno is the fastest way here because of our momentum as we arrive, and the height required to hit the drone. This saves around 2.5 seconds compared to just "waiting it out".
At 0:40 we break the door to the right, activate the checkpoint, and go down the stairs. We can't see it because we are too fast, but there is a falling boulder rolling after us in that small stairway. We continue all the way to the next door, and the skrull scientist is waiting for us in the next room at 0:55. One inferno does the trick, and we make sure to aim it at the door as well, so that we don't have to hit it after. Two jumps over the lava later, we arrive at the end of the level at 1:02.
12:59 - Level 3-2 Volcano
We start this level right where the previous one ended. We are underground and we have to get out. To do this, we go over the lava pit and climb out at the vertical exit on the roof. We have just enough dashes and charge to leave, lucky! After this, we have several locked screen to skip. Our insane flight stamina will help us to fly above them. We dash to the right and do one jump, followed by two diagonal dashes UP + RIGHT, and a charge to the right. We land at 0:12 right before the last palm tree before the cave, and we do some bouncing to reach the door at the bottom right.
Note that at this point I found something interesting I cannot find a use for at the moment. Remember when I punched the air several times to land faster in level 2-2? Well, if you do this while going up, and after bouncing on upwards stairs, you fall more slowly. That means you can actually gain more height, since you don't lose as much upwards momentum as fast. For example, if you were to bounce on the second flight of stairs at 0:13, you normally land at the lower door, but if you punched the air continuously, you would land at the upper door! It might prove useful later in places where we need height, but not here. The fastest path here is the bottom door, so we take it.
As we arrive at the door at 0:15, we charge through it to open it, and we hit the skrulls enough so that they don't bother us before we continue. We arrive at the second door at 0:19, and we open it, and kill the skrull here. Right after, we continue to the right and just before the door, we charge at the stairs because the area of effect of a charge is large enough for it to activate the door, and it is faster than charging at the door itself.

We continue to the right and we arrive at a skrull scientist at 0:28, which we can beat with an inferno. It is better to land before it, and after we kill it, we move back a bit, in the edge of the middle pillar. That is the perfect position to start a dash and go down the stairs a bit later. We then choose the upper door at 0:35 where the nurse is, and we continue on our way to the middle path. To be more precise, at 0:40 there are rounded stones above and below, and from here, we go between them to the door.
The first locked screen of the level is at 0:45, and we can get through all waves of skrulls with two supernovas. We then continue to the right and we go through the upper stairs and arrive at the second locked screen at 0:52. This time, we need to get our hands dirty and kill the skrulls with punches, fireballs and charges. We then head on to the right to the door, and after going through, we exit the level at 0:58.
14:09 - Level 3-3 Flying
Another flying level, and the mechanic is pretty much the same as the previous one. We just need to kill the enemies as they come. Here is how we deal with each wave:
- 0:00 First enemies here are some small blue turrets, which we can fireball, followed by one large drone.
- 0:12 Small blue turrets again, but they come one by one, so it is much easier to deal with them.
- 0:21 Next wave is green spinners, all coming from the right. We can break them as soon as they appear.
- 0:34 Second wave of green spinners, but now they come from the left. It is much easier to hug the left screen border at the middle and shoot as they come.
- 0:43 Flying skrulls appear, and a supernova is the fastest way to deal with them.
- 0:46 Small blue spinners! They are stronger than the green one, but we still 1-hit them with the fireball, so it's nothing more than a colour change for us. They come from both sides, so we need to do a little dance up and down to hit them all.
- 0:54 Two flying green skrulls appear right at the middle of the screen. Luckily, they are far enough apart so that we can hit both of them at the first possible frame, with two different fireballs.
- 0:56 Next wave consists of small blue turrets coming from both sides, easy to beat if we go up and down again.
- 1:03 LOTS of small blue spinners. They only attack from the right, so it's not so hard to shoot them, but the sheer number of these makes it almost impossible to kill them all without TAS. It is also necessary to let one go free at the very end of that wave because we need to prepare fro the next one. It does not waste time, so it's fine.
- 1:11 Very quick wave, with one large drone followed by two more. Charged fireballs 1-hit them and it is faster than several simple fireballs, so we kill them this way.
- 1:12 Right after the previous wave, zero waiting time here. Blue spinners coming from both sides in short bursts of three drones. Easy to take them down. There is a massive waiting time of 6 seconds after, and we have nothing to do here but wait. You also might have noticed at 1:22 That our special attack counter was at "8", and after filling the blue circle, it was still at 8 even after cycling over! You won't see that often because we tend to use our special moves when we can.
- 1:30 Several mini waves of flying skrulls, all attacking from the left in packs of two. Luckily, a charged fireball can hit both skrulls at the same time, so we wait at the left side and shoot. After the wave, we slowly move to thee right to prepare for the final enemy.
- 1:41 Last wave is a flying blue skrull. You might not even see it because it is still somewhat off-screen when we take it down with a charged fireball.
We end the level with a supernova at the last frame once again, just because we can.
16:01 - Level 3-4 Spear Boss
Very short level, mainly because it is just a boss fight. I actually did this level many times, improving the boss fight every time, and even though it looks weird, it actually is the fastest method to deal damage.

So, let's start the level by heading to the right, opening the door and go down the stairs to meet the boss. This level features one of the very few times we need to walk to the LEFT to continue forward in a level! After the stairs, we go through a long corridor and arrive to the boss.
Once again, I was unable to find a proper health meter in the game memory, so I will use the smallest unit of health given to us on screen, which is 20HP. To deal damage, we have several options:
- Punches: Way too slow. Not even a possibility
- Fireballs: Works, but is not consistent because we need 2-3 hits of fireballs to deal 1HP of damage. It is quite fast and can be used from anywhere, so distance isn't an issue. If we were to solely use this, we would arrive at a final time of 0:32, which is nice but we can do better.
- Special Moves: Supernovas and Infernos are good, but very limited in uses. If we were to solely use infernos to deal damage, we would be able to hit 8 times only, leaving the boss with 12HP, and still having to find a way to kill it.
- Fireballs + Special Moves: A little bit better than plain fireballs, but not there yet. The problem we have is the time between consecutive hits. Since the build up time of special attacks is quite long, we can't use then whenever we want. The best way to use them is actually at the very end, with a single inferno to finish the last 2HP of the boss. This saves about 1 second over the plain fireballs strategy, with a final time of 0:31.
- Fireballs + Charges: Now we are talking. This is how we kill the boss. Charges will always deal 1HP of damage, and it can hit at any time. As far as I have seen, it is also the fastest method to deal damage, because of a certain trick. Charges are usually done in the air or on the ground, in any direction, but most commonly either left or right. If we start on the ground, we can only do left or right, but if we jump before we can do all eight directions.
Let's talk about the mechanics of a charge in the air, which are a bit glitched. A normal charge is done by pressing the A + B + direction while in the air, or just A + B while on the ground. There is a fixed animation time for it, so you can't make it longer/shorter by pressing the A or B button for a longer/shorter time. On a real D-Pad, it is not possible to do opposite directions, so the developers did not account for these. The glitched charge isn't used to beat the boss, but it is still a good idea to explain it:
- The effect of doing a charge with a direction LEFT + RIGHT is a static charge in the air. It looks like we are charging on an invisible barrier, but we actually have no momentum in the charge, so we stay where we are.
- A charge done with the UP + DOWN + RIGHT button is a bit funny to watch. Johnny will do a charge to the right, but the animation is that of an upwards charge, so it will look as if the charge UP slides to the right instead of up. The game is rather sturdy in the sense that you can still deal damage this way, and there is no side effect to this trick.
- Any other combination work as intended, so no need to talk about them. UP + DOWN + LEFT will do a left charge if you were curious.
As said before, it is not possible to extend or shorten the charge animation. However, if we collide with a wall or with the ground, we will do a superhero pose and stand back up. This is actually faster than a plain charge, so we will use this to beat the boss.
The final method we will use is the following:
| Action N | Action | Damage | Remaining HP |
|---|---|---|---|
| 0 | Starting from the left | - | 20 |
| 1 | Four fireballs to the right | 3 | 17 |
| 2 | One Diagonal DOWN + RIGHT charge | 1 | 16 |
| 3 | One Diagonal DOWN + LEFT charge | 1 | 15 |
| 4 | Four DOWN charge | 4 | 11 |
| 5 | One RIGHT charge | 1 | 10 |
| 6 | One Diagonal DOWN + RIGHT charge | 2 | 8 |
| 7 | One Diagonal DOWN + RIGHT charge | 1 | 7 |
| 8 | Six DOWN charge | 6 | 1 |
| 9 | One RIGHT charge | 1 | 0 |
I have no idea why action 6 dealt 2HP of damage. I could not replicate it, but I guess it is because the boss became vulnerable again while I was still in the charge animation. I will try to find out more about this, but it is unlikely that I can improve the fight as it is quite well optimized at the moment.
Still, I do a glitched charge at 0:29 to show you what it looks like, but otherwise, it is never used in the run. I am very happy with the strategy of the fight, and it also makes this entire level under 30 seconds! Insane!
16:50 - Level 4-1 Flying
Another flying level, same as the previous ones. Here are the waves:
- 0:00 Small blue turrets from the right, which can be fireballed.
- 0:08 Small blue spinners from the left. We can break them with fireballs when they join in the middle.
- 0:12 Small green turrets, but these are static, so we need to kill them as fast as possible to trigger the next stage. A supernova is the fastest here since there are four turrets and it would take too long to move from the first to the last. Also, supernova can hit the turrets before their hitbox appears, so it's not as if we could hit them with a fireball faster.
- 0:16 Small green spinners from the left. Exact same pattern as the 0:08 wave, but slower and weaker. This time, we can actually move between each of them to fireball them.
- 0:23 Small green turrets, slowly coming from the right. Very easy to defeat with fireballs.
- 0:29 Two flying skrulls, and fireballs are the best choice. Two charged fireballs thrown to hit them at the first vulnerable frame works fine.
- 0:31 Small blue spinners coming from both sides. Fireballs again, and as we alternate from the top to the bottom, we sometimes have to hit several at once before moving on.
- 0:37 Three rows of small green turrets from the right. We just move up and down, throwing fireballs at them, and at the occasional laser ball in the middle to prevent getting hit.
- 0:44 Two large drones, which can be killed by charged fireballs. We start with the bottom one first because it is faster to kill the second drone after.
- 0:48 Brown large drone, which dies at the hands of a charged fireball. Easy.
- 0:50 Small blue spinners coming from left and right in a single burst. Very hard to hit them all in RTA without getting hit because of their weird position, so you only have one try to hit them really.
- 0:55 Small green turrets appearing in the middle, in a circular pattern. The timesave is a bit weird here. I noticed that if you get hit and supernova before the last turret appears, the next wave is triggered ONE FRAME earlier. This is intentional damage in an otherwise damageless level, for the sake of speed.
- 1:00 Small blue spinners from the right,, followed by green turrets almost immediately. Fireballs are the best choice here again.
- 1:06 Two flying skrulls, coming from both sides. Take out the one on the right first with a charged fireball, then the one on the left as soon as it can be hit. A bit later than expected, but since we can't shoot fireballs to the left, we need to wait until we are at the same level as the skrull to shoot.
- 1:08 One large brown drone that can be killed with a charged fireball.
The usual charged fireball and supernova are fired at the end just to show off.
18:10 - Level 4-2 Industrial
Right at the start we dash to the right and enter the first locked screen. It is actually possible to skip this with a long series of upward dashes, but it is quite slow. It is in fact slower than fighting through the locked screen. We also get a third of an action wheel which is nice. We fight a new form of enemy, a mech. Like the skrulls, they have different colours to indicate their strength and health. In increasing order, they are Red, Blue, Green and Orange. We defeat three red mechs, one blue, one green and the last red mech.
A charge to the right leads us to the next locked screen at around 0:18. We do a land cancel then beat up the red turret, the red mech and the blue mech. On our way to the right, we land a few hits to the mechs laying around to fill up the action meter. Going to the upper part here allows us to skip a locked screen. After a couple charges and dashes to the right we arrive at another scaffolding at 0:30, which contains a locked screen. This one has three red mechs, a blue one, another three red and finally a green one.
We go quite a way to the right and arrive at the next scaffolding locked screen at 0:49. This time, we defeat three red mechs, a blue one and a red one. We dispose of the rest with two supernovas since they are too spread apart. Next we go to the right, staying somewhat close to the ceiling to skip some more locked screens.
We still get caught by one last locked screen at 1:11 which has two orange mechs, and a blue one. Kill the next three blue ones with two supernovas and then do the same for the two greens and the orange mech. The orange one needs to be damaged a tiny bit first though.
We then move on to the right until the end of the level. We can also upgrade one skill, so we choose "Supernova + Fireball" so we can deal max damage on the enemies later on.
19:45 - Level 4-3 Industrial
This level is pretty much the same as the previous one. We go straight to the right, then we take the upper path to battle the first locked screen at 0:07. This one contains two red mechs, two blue ones, one green, one orange and finally one green. Like always, we use a combination of punches, fireballs and charges to defeat them.
We then go up to the right on top of the building and battle the next locked screen at 0:21. This one has two red mechs, one blue, two green and one orange. After this, we go all the way down to the right. When we get to the nurse at 0:32, we dash to the right through the platform, but not above it. We want to be barely below the walk-able path to avoid a locked screen. The aim is to almost bang your head on the corner at 0:33 then do a charge a bit after for max speed. At the second acid showers we skip a locked screen again by jumping upwards at the right time.
For the first time in a very long time, we go up then left! Enjoy it because we won't do it much in this game. After the big fans at 0:43 we need to go up then right. This is where things get somewhat interesting. There is a way to go behind the wall there by charging through the L shaped wall, then going over the rightmost wall, while still being under the walk-able path above. I have made a small video to explain it better if you want to watch it.
This unfortunately does not save any time. It actually loses time because there is a locked screen a bit further and I haven't found a way to skip it yet. For now we just continue to the right and fight the locked screen at 0:49. It has two red mechs and a green one, which we kill with two supernovas because they are too far apart. Then we have two blue mechs and two green ones. There is one last orange mech off screen that we defeat with fireballs.
We then continue to the right all the way down, under the chackpoint to skip the locked screen above. We take some mandatory electric damage here to prevent waiting and we continue up into the next locked screen at 1:07. We battle two red mechs and two blue. The next mechs (two green and two orange) will be defeated with two supernovas because of their position and strength. We skip the last locked screen by staying up on the path, then we arrive at the end of the level.
21:22 - Level 4-4 Galactus

This boss level has three phases, all of which are VERY different from each other, so read carefully these bullet points.
- Phase 1: break 2 chains
- Phase 2: break 2 chains
- Phase 3: break 2 chains
The big cosmic entity in the background is the boss we have to battle, and its name is Galactus. To go through each phase of the boss battle we need to break two chains that are holding it. Easy enough, right? Each chain has a health bar that can withstand seven hits, so at first I tried to hit it seven times to beat it with fireballs. The first chain broke in 5 hits. I was baffled and saw that some of the fireballs dealt x2 damage, so I had to figure out why.
It turns out that a chain does not have a single hitbox, but rather a series of squared hitboxes lined up on the chain. The x2 damage I dealt were actually the fireballs interacting with two hitboxes at the same frame. I was then wondering, can a charge be used to hit three hitboxes at a time? Maybe, but I could not find a way to do it. As far as my testing went, the area of effect of the charge is not large enough to hit three hitboxes at a time. Either that, or there are only two hitboxes, but since I have no way of seeing them, I can only guess.
To make things difficult for the player, the boss can make the chains invulnerable one at a time, and each cycle lasts roughly 8-9 seconds. This implies that every chain has to be broken before its cycle ends, but as you will see, this is not an issue whatsoever.
The strategy for the boss battle is as follows.
- Defeat the very first chain with one normal fireball + three x2 damage fireballs. It is possible to replace any fireball with a charge, but depending on when you do it, it might be slower, so it is preferred to only do it for the first chain. It won't delay the cycle for the next vulnerable chain.
- We then have some time to kill doing whatever we want, but not for too long. We can get in position for the next step here.
- After the 8-9 seconds have passed, the second chain can be damaged. We use one normal fireball + three x2 damage fireballs again.
- Head as close as possible to the next part of the battle BEFORE the transition occurs. It is a scripted event, so we want to shorten it as much as possible. We head up + left for the 1st -> 2nd phase, and up + right for the 2nd -> 3rd phase.
It is not necessary to beat any enemy during the boss battle. breaking the chains are the only things that will move the level forward. You will see that we still take out a few enemies, but mostly because they might target us. Damageless boss fight is cool.
22:15 - Level 5-1 Nuke
Wow! This is the last flight level! It's a shame there aren't more of these because they are incredibly easy to TAS. Since this is the last, the devs decided to add a little twist to it. WE ARE CHASED BY A NUKE! As you can imagine, we can't touch the nuke at all or it blows up and we have to start the level again. Even throwing fireballs at it detonates it, but it is reaaaally hard to do by normal means because the nuke is quite fast.

So, what are we supposed to do here? The nuke travels very slowly from the left to the right of the screen, but follows us up and down quite quickly. It even bounces a little bit! We are forced to go to the right part of the screen as the timer goes up, until it reaches almost the middle.
Like all the other flying levels, let's go through the enemy waves we have to take down. We are so powered up that we can defeat any enemy with a fireball, even the strongest ones.
- 0:02 Small red turrets from the right, quite easy to beat but they can't be hit until quite late. It's not as if we could attack them as soon as we see them.
- 0:09 Large brown drone, one fireball and it gets barbecued.
- 0:12 Small red turrets again, appearing from the middle of the screen somewhat to the left. We have to get a bit close to the nuke here or we can't hit the turrets at the first opportunity. Scary!
- 0:18 Brown spinners from the right. We have become so powerful that we can destroy them off-screen. YAY!
- 0:24 Now we are playing with danger, brown spinners again but this time it's from the left. We have to get SUPER close to the nuke to get the spinners early.
- 0:28 Small green turrets appearing from the middle, but they give you plenty of time to prepare. You can see them for a second or two in the distance. They arrive two by two, but spawn at the same spot. A well placed fireball can hit both at once!
- 0:35 Brown spinners from the left then from the right. We let the nuke get super close because this game is called "Daredevil", ... wait, let me check my notes, ..., oh crap, it's actually called "Fantastic Four" because we are fantastic!
- 0:44 Offscreen brown spinners from the right, super easy. Don't even need to look.
- 0:49 Blue Flying skrulls! They are back! I missed those, but don't worry, we have plenty of opportunities to see them in the coming levels. These ones fly in from the right.
- 0:50 Same wave as previous one, but they came prepared this time. A large brown drone flies in to save the day, but gets wrecked by our supernova. It saves about half a second compared to fireballing everyone.
- 0:53 Brown spinners from left and right. Hopefully we have enough to have fun! Wait no, we only had three. :(
- 0:59 Red drones from the right, easy to defeat. They are quite spaced so we need to move around a bit.
- 1:08 Red drones again, but from the left! The nuke is really far into the level now. So close that we could sit on it. It almost feels like it's part of us now. We fireball each of them and use a supernova for the last set because the nuke is in the way now.
- 1:18 This is the last wave of flying levels, EVER. Enjoy it because it lasts exactly 15 frames. It is two brown drones from the right, and only a single fireball that hits both is the fastest. The drones have a rather late invincibility time, so it is slower to use one fireball each. The level ends when the drones' hp are 0, so we don't even get to see them break down!
Another upgrade point, and this time it is awarded to ... "Inferno + Punch"!
23:46 - Level 5-2 Alien Ship
We start on an alien ship and will have to go through three locked screen to complete the level. The first one is quite early in the level at 0:04. It consists of several mechs, armored skrulls, and red turrets. You will see that every locked screen in this level are the same, with very few differences. We simply use a combination of punches, charges and a supernova to beat the first wave.
We continue to the right to clear the second locked screen at 0:19, then heal up at the nurse. This was not required, but since she was in our way, it does not waste any time!
The third locked screen is at 0:29 to the right of the others. When we arrive in it we are quite high up in the air, so we throw a fireball to stop the upwards momentum. Two supernovas are needed to defeat all the enemies here. There are a few offscreen so its much faster than having to go to them. We finish off the rest of the enemies and continue to the left.
We then climb the ledge and punch the air several times to land faster. This is so we can jump again and avoid a locked screen to the right. We dash right above it and go over the stairs to the right to get to the third and final locked screen at 0:45. Amongst the many attacks we do, we will glitch one of them to save time, so let's explain how it works. In this game, Johnny can do combo attacks with his fists shown by a combo multiplier above the attack. If Johnny does three successive punches, the third one will have a special explosive animation. This does not increase damage, but blows enemies away. It is possible to prevent that animation from playing if we jump one frame before the attack actually lands. This is exactly 13 frames after throwing the third punch. Johnny will then jump and cancel the animation, but still carry out the attack.

This was never used before because in most cases jumping would put us out of reach from other enemies. This is one of the rare moments where it is the fastest method.
We continue to the right, dashing and bouncing all the way. Right before the next nurse at 1:01 we dash diagonally Up+Right to go over another locked screen, and do it again to avoid a second one. We continue to the right climbing a small slope and we get to the end of the level, easy!
This is the last upgrade of the game we can do, so we must choose it very carefully. Health upgrades are not needed, so "Inferno + Punch" it is!
25:10 - Level 5-3 Alien Ship
This is the last platformer level of the game, let's enjoy it (Who's cutting onions here?). It is meant to be the most difficult and the longest level of the game. Let's crush it! Right at the start, we go up above a locked screen trigger, and move on to the right. We continue for a while until 0:10 for the first locked screen that we have to fight. This one has a wide variety of skrulls and mechs, but no flying enemy. We are used to the attacks of Johnny by now, so going into detail won't be of use to you. The supernova we do at the start is to save time due to the spread of enemies which is too large.
Next locked screen at 0:28, with a flying skrull this time! The wave of enemy is split into three vertical levels, with a lot of distance between each of them. Here we are saving the special attacks for a later fight, which is why we don't use them now.
We then arrive at 0:55 to the next two locked screen. Similar to the previous one, except that there are many more enemies. It is meant to be an endurance fight, so it could take a while to do in RTA. We move on to the other locked screen at 1:05 and have to start it from the bottom up. Same types of enemies as before, nothing more to say here. At the end of the locked screen we do a supernova. The reason for this is that once we clear up half of the wave, a black skrull appears at the bottom level (same skrull than the snow levels boss fight). It would take way too long to go down there again, so special attacks are getting used.
Continuing to the right are several flights of stairs, that lead to the boss of this level at 1:25. It is a scientist with a flask of grape juice (source: trust me bro). It is so sour that it salivates all over the floor and rips its shirt (9/10 dentists recommend it to remove tartar). After a few hits of all kinds, the scientist gently agrees to let us move forward.

We move on to the right and ... Oh my god. This is it. This is the last locked screen of the game. We get there at 1:35. Skrulls and mechs await us. After a couple of love taps, four mechs show up, then another four. They are split into two levels, so we will use the remaining four special attacks to defeat them. FANTASTIC FOUR SUPERNOVAS. The end of the level is quite close to the right, so we head there right after.
27:17 - Level 5-4 Super Skrull
ALERT ALERT, FINAL BOSS OF THE GAME. Like all other bosses, this one suffers from the famous illness of I-have-too-many-invincibility-frames. luckily, we have the remedy in the form of fire in the face. let's deliver the medicine as quickly as possible. It has 23 HP.
This boss is quite resistant to damage, and has special waves after we reach HP milestones.
Punches:
These are pretty much useless here. They don't bring down the boss's HP bar in one hit, so we avoid dealing damage with it.
Fireballs and supernovas:
Will do 1 damage per hit. We tend not to use them unless we don't have another option.
Charges and infernos:
Main method of damage for the boss. These have a long lasting animation, so it guarantees to hit the boss several times (if done correctly). Charges can do 1-2 damage and infernos 1-4 damage depending on how long the attack stays on top of the boss.
How about we show this into a table to make it easier to see?
Phase 1:
| Attack Description | Damage | HP left |
|---|---|---|
| Fireball | 1 | 22 |
| Inferno | 3 | 19 |
| Charge | 2 | 17 |
The second hit of the charge triggers the special move of the boss. I will call it the Tesla coil. The boss flies to the middle of the screen and throws a red and a blue electric arc. The red one turns counterclockwise, and the blue one clockwise. To give us a chance to escape damage, the boss kindly alternates on/off the blue electric arc. We just move around it and we are good to go.

Phase 2:
| Attack Description | Damage | HP left |
|---|---|---|
| Inferno | 4 | 13 |
| Charge | 2 | 11 |
The boss now flies to its spaceship, and targets us with a fireball canon. Nothing we can do here except wait and dodge. Then, the boss triggers an ice attack on us. Two piles of ice spawn on each end of the screen, and the boss shoots three bolts of lightning from above.


Phase 3:
| Attack Description | Damage | HP left |
|---|---|---|
| Inferno | 3 | 8 |
| Charge | 2 | 6 |
Tesla coil attack again.
Phase 4:
| Attack Description | Damage | HP left |
|---|---|---|
| Inferno | 3 | 3 |
| Charge | 2 | 1 |
THE BOSS ONLY HAS 1 HP LEFT GODDAMNIT. AND NOW HE DECIDES TO GO BACK TO HIS SPACESHIP WASTING 10 SECONDS. Calm down, it's almost the end now.
Phase 5:
| Attack Description | Damage | HP left |
|---|---|---|
| Charge | 1 | 0 |
We finish the level in style at 1:01 with one of Johnny's static animations, the fire extinguisher to the face. This is where the speedrun RTA ends, and sets the time for leaderboards. However, for the sake of completeness of the TAS, we will go all the way to the end credits. It is up to you to decide what you prefer. Either end time on the last attack of boss, or wait until the words "THE END" appear on screen 25 seconds later. There is no more gameplay either way, just text boxes.
If you wait to the end of the credits you will see the nurse and Johnny on a beach Congratulating us. Yay!


- Frequently Asked Questions
If charging is the fastest, why don't you always use it?
- After Johnny charges, he cannot do a dash, no matter how many times he did it before in the same flight. It reduces to 0 the amount of moves we have left. When we do a charge, we have to be sure that we won't need to dash after.
How long did it take to complete the TAS?
- About a year, with a break of a couple months in the middle to leave room for university exams.
Can you play as one of the other Fantastic Four members?
- No, this game focuses on Johnny the human torch, so we cannot play as the other characters. We see them on occasion though, during cutscenes.
How do you know when you have skipped a locked screen?
- You have skipped a locked screen when you have gone further than the locked screen and haven't triggered it.
How do you know where the locked screen triggers are?
- I don't. Just trial and error. I looked for a while for a way to know if I trigger a locked screen or not in the RAM. Couldn't do it. It's all done manually. If anyone knows how to observe the locked screen trigger data, the TAS will most likely be improved by MINUTES, since we would dodge more locked screens.
How many fingers am I holding up?
- Three.
What other games have you done?
-
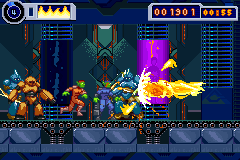
Published on 2/7/2024Fantastic 4: Flame On is a licensed action platforming game that was published by Activision in 2005. While the box art and the marketing make it look like a tie-in to the 2005 movie Fantastic Four, it has an original plot that is disconnected from the movie. The game features the Human Torch, aka Johnny Storm, single-handedly fending off a Skrull invasion that threatens the world, with a bit of help from the rest of the Fantastic Four. Along the way, he'll be doing things such as motorbike racing, globetrotting, and discovering that the Skrulls have captured Galactus.Here, Cadit displays a good amount of knowledge on the game's movement and combat mechanics and does a number of tricks to beat the game and thwart the Skrulls in record time. For more information on the gameplay and the tricks used, you can read the author's notes.Game:
Fantastic 4: Flame On
Genres:
Action
Platformer
Game Version:
Fantastic 4 - Flame On (Europe) (En,Fr,Es,It)
Tags:
Takes intentional damage
Video Downloads:
Compatibility MP4
Emulator Replay:BizHawk 2.8
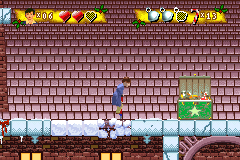
Published on 1/18/2023The Polar Express is a video game for the Game Boy Advance that is based on the movie of the same name. As with many licensed games at the time, it loosely follows the story of the movie, but with a good amount of liberties taken to make it more suitable for a platformer. Witness as a boy boards a train, gets himself into some sticky situations in the North Pole that probably never happened in the movie, and possibly meets Santa Claus?Cadit improves on their previous run by 82.06 seconds by making the zeppelin in the final level go faster by holding down the Right button, which was overlooked in the previous run.The YouTube encode has author's commentary in the form of captions.Game:
The Polar Express
Genres:
Platformer
Game Version:
Polar Express, The (USA, Europe) (En,Fr,De,Es,It).gba
Tags:
Takes intentional damage
Video Downloads:
Compatibility MP4
Emulator Replay:BizHawk 2.8
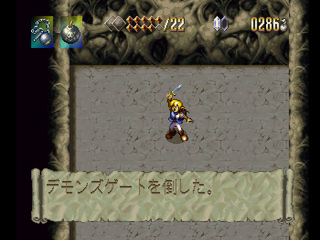
Published on 9/26/2022Alundra is the title of the game, and our protagonist who has the power to enter people's dreams.Watch as Cadit takes the dreamwalker to save the people of Inoa from their nightmares, collect all 40 Life Vessels, the 4 Magic Seeds, activate all 8 portals, collect all individual items and Gild 50 Falcons in record time.There is also an alternate YouTube stream featuring subtitled commentary by the author which also features an in-depth item tracker.Game Version:
Alundra (Japan).bin
Tags:
100% completion
Video Downloads:
Compatibility MP4
Emulator Replay:BizHawk 2.3.2
![[Has commentary]](/images/commentary.png "Has commentary")
arkiandruski: Claiming for judging.
arkiandruski: Removing branch name.
arkiandruski: Looks good. Accepting to Standard.
despoa: Processing...